
Magento Acumatica Connector Configuration Checklist
Launching a Biz-Tech Services Inc Magento Acumatica integration between your online storefront and your Enterprise Resource Planning system, or ERP, is a transformative step for your business operations. At Biz-Tech Services, we know the difference between a stressful go-live and a seamless transition lies in the preparation. A thorough pre-launch checklist makes sure every automated workflow is rooted in accurate data and secure connections. By walking through these requirements now, you eliminate technical friction, so the moment you flip the switch, your orders, inventory, and customer data flow exactly as intended.
Establishing required configuration
The first phase is establishing the technical foundation inside Acumatica. Before you can sync any data, confirm that your Acumatica system is running one of the approved licenses, such as PCSR, PERP, or SAAS. Once your licensing is verified, install the Biz-Tech Magento integrator customization package. On the Customization Projects form, you upload the deployment package, validate the project to catch any environment conflicts, and publish it to your tenant.
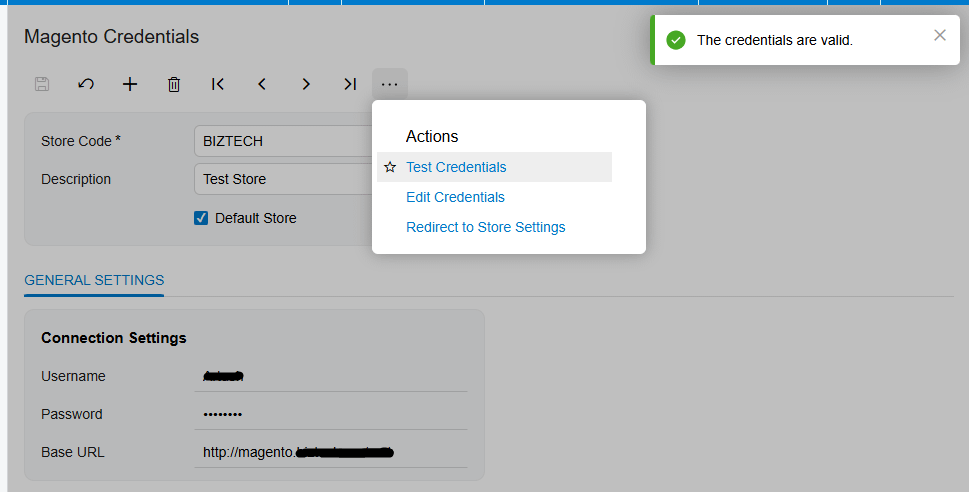
With the package published, your next priority is establishing the API connection. On the Magento Credentials screen, you enter your Magento system credentials, which include your username, your password, and the base web address for your store. The most critical step here is the Test Credentials action; a successful confirmation is your green light that the two systems are officially speaking to each other.
Data preparation and strategic mapping
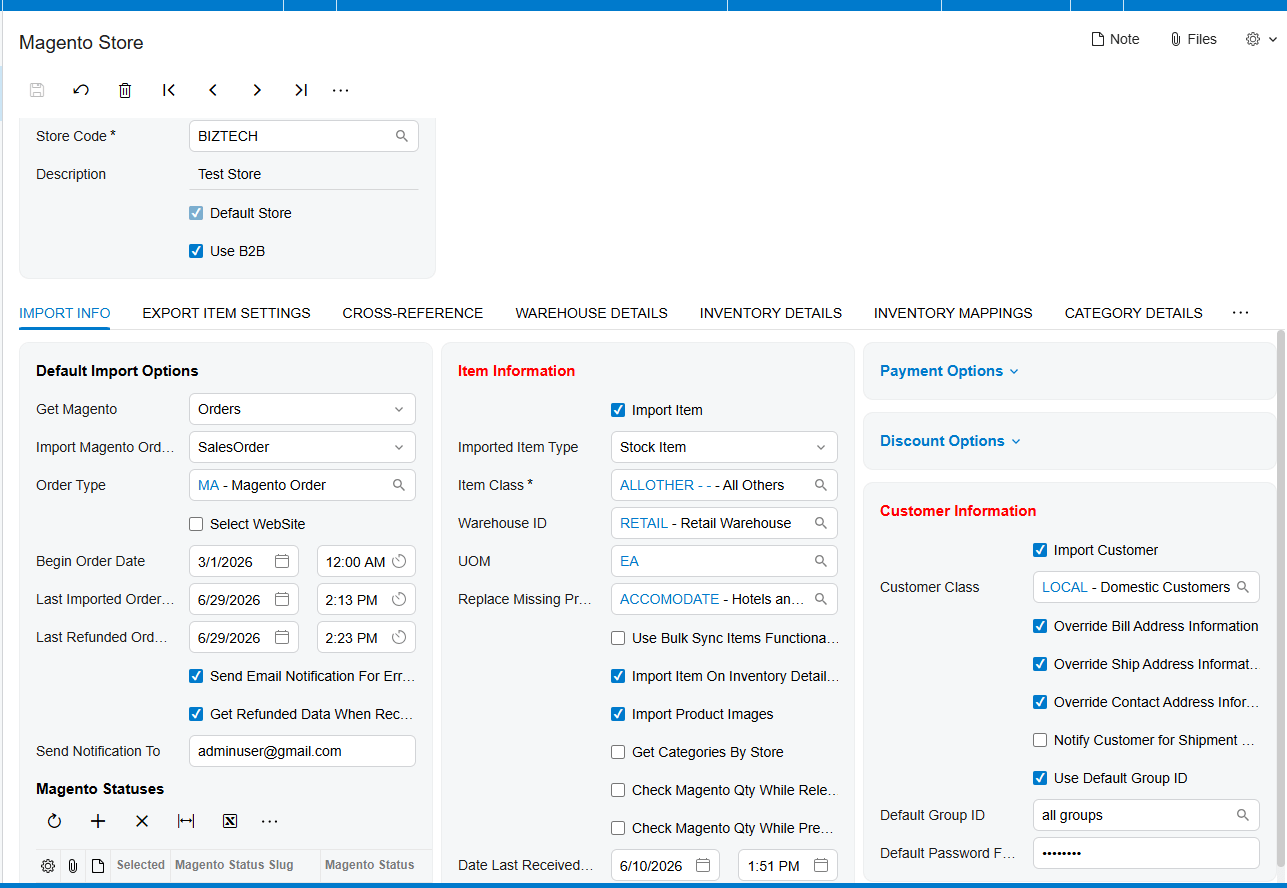
After the API connection is established in Biz-Tech Services Inc Magento Acumatica integrator, you move into the Magento Store screen to define your high-level operating rules. Your first task is to set a begin order date, which tells the system exactly when to start looking for Magento orders and prevents accidentally importing old historical data.
Next, prepare your default settings for both customers and items. If you choose to import customers as new records, define a default customer class, and decide whether the system should override the billing and shipping address information from the web store. For your inventory, confirm your default item class, the primary warehouse for fulfillment, and the default unit of measure, or UOM. And a key part of data preparation is making sure your Stock Keeping Unit values, or SKUs, in Magento match your inventory IDs in Acumatica. If the Import Item setting is turned off, the system relies entirely on that SKU match to find the right product, and if a match isn’t found, the order import will fail.
Validation points and cross-referencing
Validation is the process of making sure specific values in Magento have a designated home in Acumatica. In the Cross-Reference tab, you match your Magento shipping methods to your Acumatica ship-via codes. You do the same for financial data, mapping your Magento payment methods to the corresponding payment types and cash accounts in your ERP.
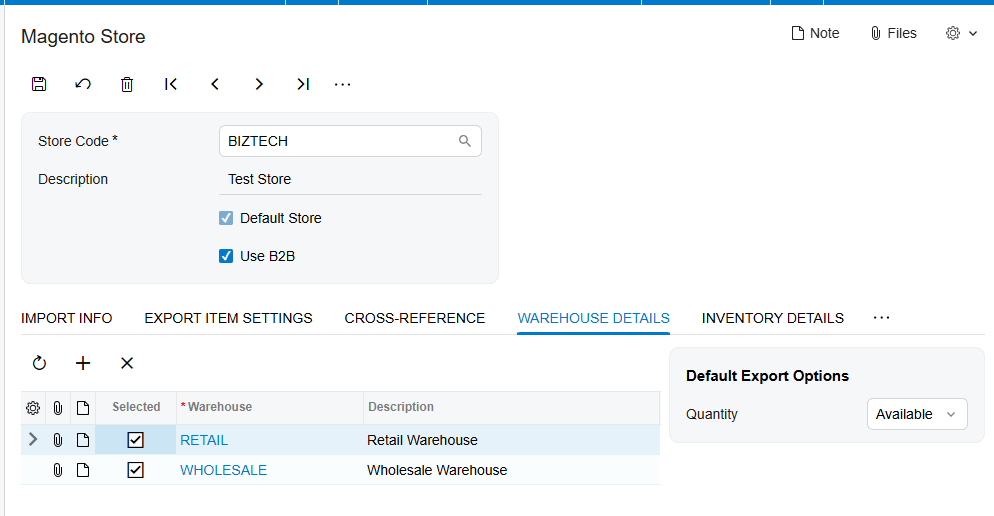
You also validate how the systems handle inventory levels and attributes. In the Warehouse Details tab, you select which physical warehouses contribute to the total quantity synced back to Magento.
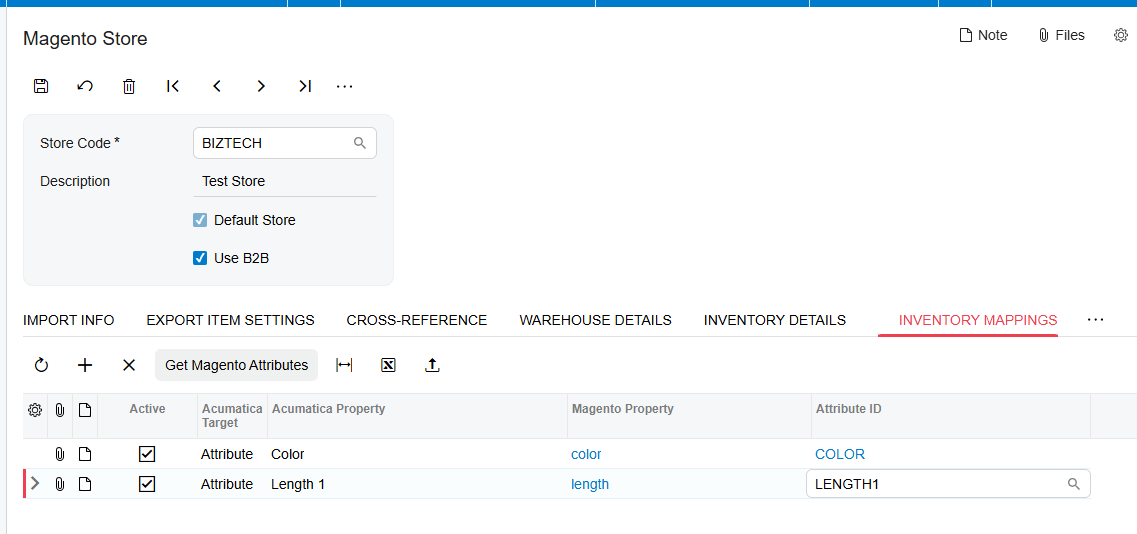
If you use complex product details, the Inventory Mappings tab is where you make sure your Acumatica attributes, like color or size, are correctly linked to their Magento properties. And in the Category Details tab, you retrieve your Magento product categories, so you can keep your storefront organized directly from your ERP.
User access and security
Security and user access are vital for a good customer experience. For your internal team, make sure they’re set up to receive email notifications for any failed order imports, so troubleshooting can happen immediately. And when it comes to your customers, the Biz-Tech Services Inc Magento Acumatica connector needs specific data for a successful sync. Every customer contact must have a first name, a last name, and an email address. And to allow a secure customer login, you establish a default Magento customer password within Acumatica, made up of a mix of letters, numbers, and special characters.
Testing the workflow
Before going live, walk through a complete testing cycle. Start with the Get Orders process on the Import Magento Orders screen to retrieve recent web transactions, and verify they appear with the correct statuses, like Pending or Processing.
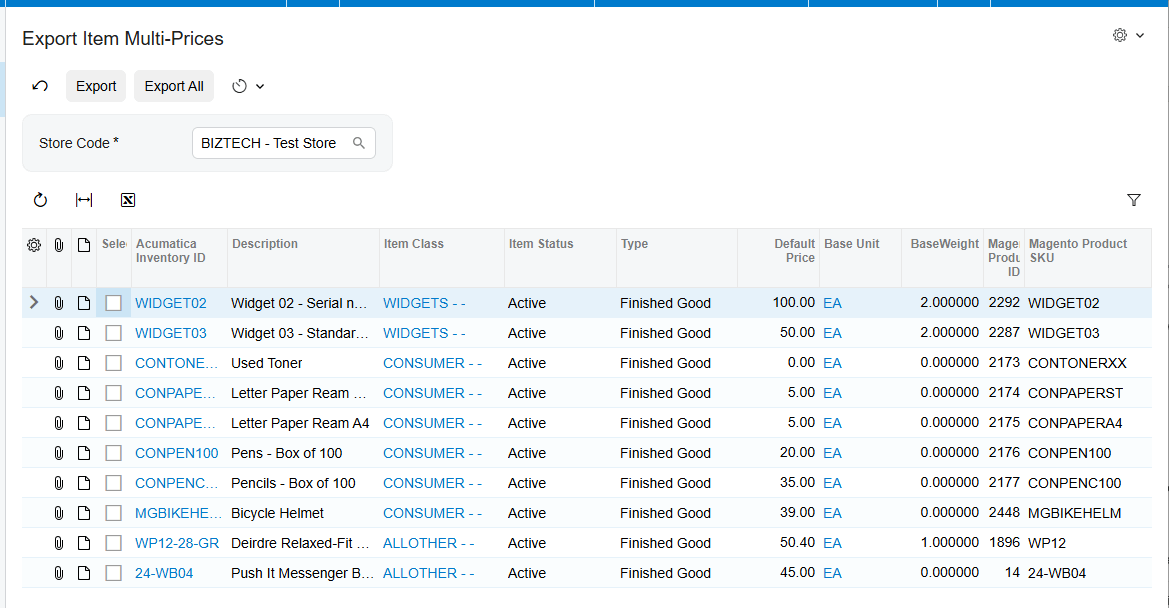
Next, test your item and price synchronization. Use the Export Item Multi-Prices screen to sync a test price and verify it updates correctly on your storefront. Finally, it’s essential to test your refund workflows. The Biz-Tech Services Inc Magento Acumatica connector manages five different refund cases, ranging from simple sales order cancellations to reversing invoices that have already been released. Verify that the system creates the right customer refund payment types or credit memos, based on the current state of the order.
Go-live readiness and automation
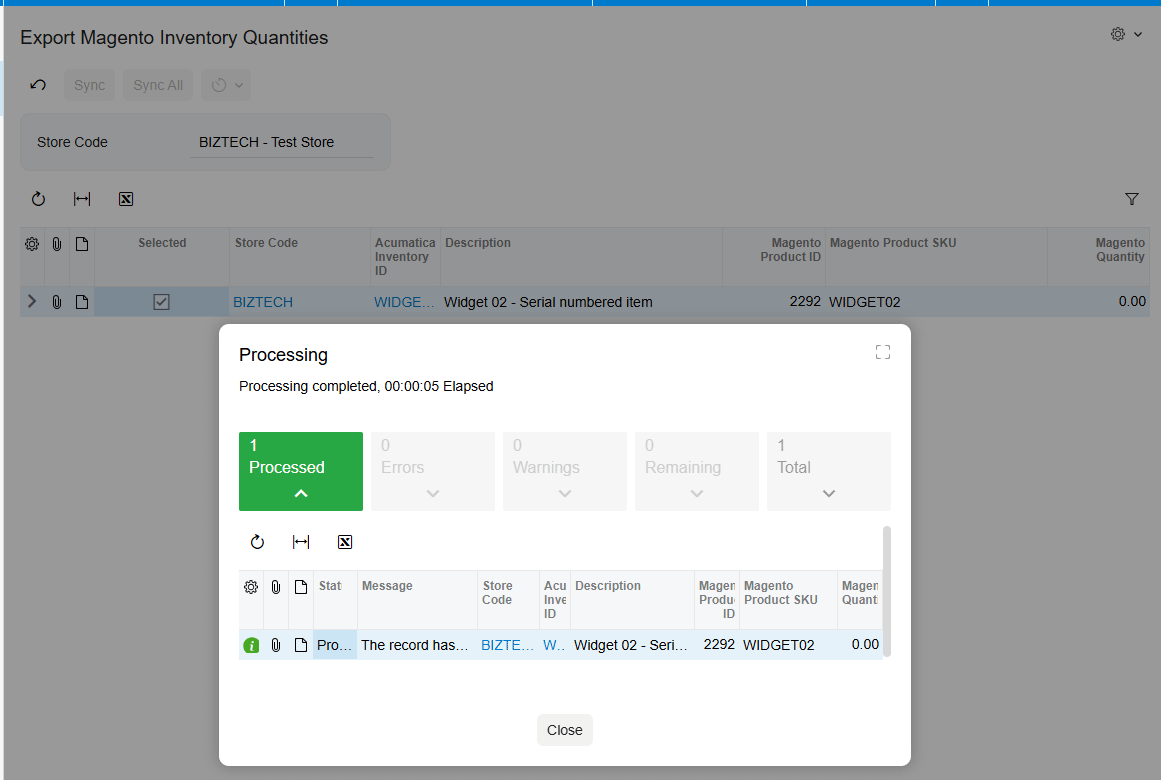
The final stage is preparing for automated efficiency in Biz-Tech Services Inc Magento Acumatica integration. Before you begin full automation, do one last check of your inventory quantities using the Export Magento Inventory Quantities screen, to make sure your available or on-hand stock levels are perfectly aligned.
The single most important takeaway for go-live readiness is to verify your last imported order date and confirm that your Get Orders timer is working correctly to handle the expected volume of your business. When those steps are complete, your Biz-Tech Services Inc Magento Acumatica integration is ready to provide a seamless, real-time connection between your ERP and your e-commerce platform.
If you’re ready to see the Biz-Tech Services Magento Acumatica Connector in action, and want to learn how it can streamline your specific workflows, visit biz-techservices.com to schedule a personalized demo today.

