
Gift Card Processing Configuration Checklist for Acumatica
Growing your business often means moving beyond traditional paper certificates to a more modern solution. At Biz-Tech Services, we know that offering serialized gift cards can help you increase revenue and reinforce your brand, since they’re a preferred choice for customers today. But before you start processing these transactions, you need to make sure your system is perfectly tuned. This pre-launch checklist is your guide to a successful go-live, making sure every configuration and every data point is validated inside your Acumatica Enterprise Resource Planning system, or ERP.
Required configuration and licensing
Your first step is to confirm your Acumatica environment is ready. The Biz-Tech Gift Card Processing solution needs to be installed on a system with one of the supported licenses, such as PCSR, PERP, or SAAS. Once your licensing is verified, you manage the installation through the Customization Projects form, where you upload the customization package and publish it for your tenant.
Next, you decide how these cards are treated financially. We recommend creating a dedicated General Ledger, or GL, account for your gift card items, to keep those assets clearly organized. On the Payment Methods screen, you create a new payment method specifically for gift cards, and make sure it’s active for both Accounts Receivable, or AR, and Sales Orders. Within that setup, add your gift card cash account under the allowed cash accounts, and select a default gift card item to streamline the payment process for your users later.
Preparing your items and accounts
With the framework in place, you prepare the specific data for the cards you’ll sell. GiftCard Integration provides you two paths here: non-stock items or stock items. If you’re selling digital or non-physical cards, you configure a non-stock item and associate it with your new gift card payment method. For physical cards that need inventory tracking, you use the Stock Items screen instead.
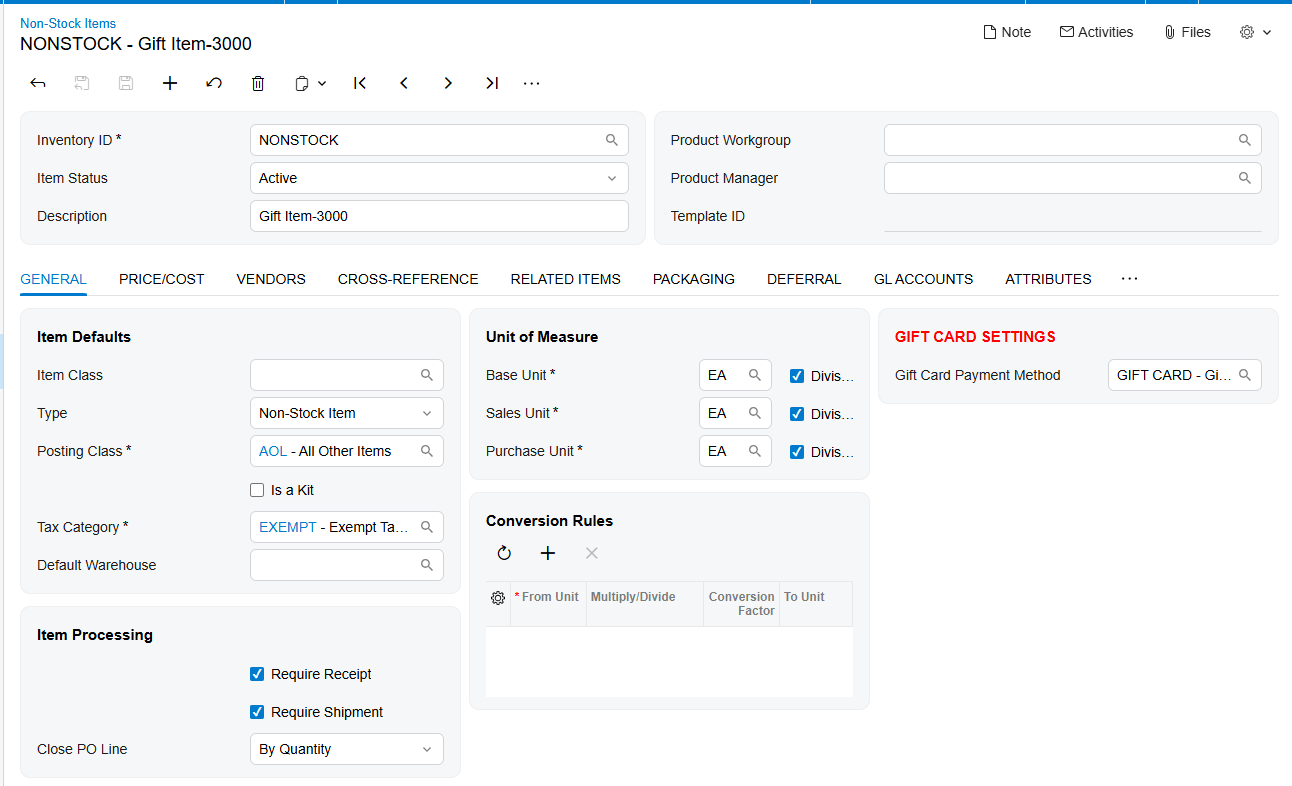
For those stock items, data preparation takes a few extra steps. You create a specific lot or serial class that tracks serial numbers as they’re received. And it’s important to enable the Track Expiration Date option within that class if you plan to have your cards expire, because that date is established during the initial gift card receipt.
Validation and preferences
Before you process your first order via GiftCard Connector, validate your settings on the Gift Card Preferences screen. This is where you map your internal Acumatica items to any external Stock Keeping Units, or SKUs, if you’re importing orders from a commerce platform. If you don’t select the option to use multiple cards in commerce, the system simply defaults to your primary non-stock gift card item during imports.
You also validate your numbering logic. You decide between a structured numbering sequence and random generation. If you choose a structured approach, confirm that you’ve configured an auto-incremental value in the numbering segments. If you prefer more security, you can enable random numbering, which prevents anyone from guessing sequences by generating a unique number only when a quantity is specified on a sales order.
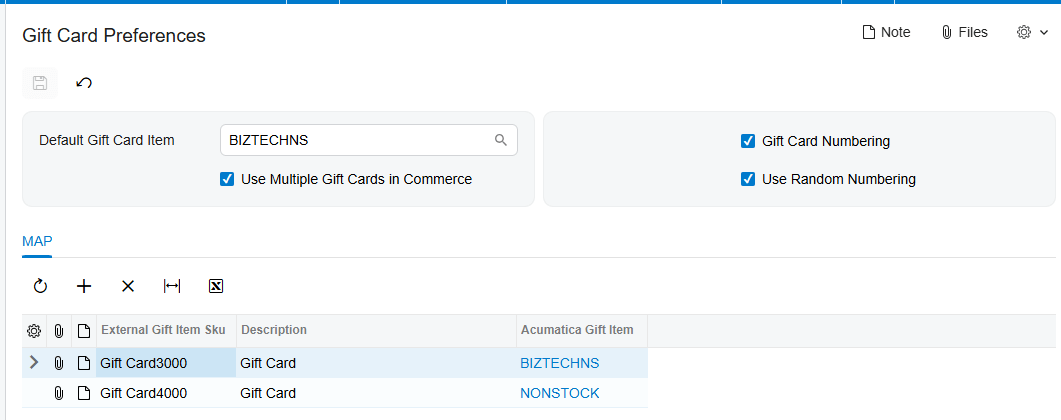
Testing the workflow
Testing is perhaps the most critical phase before go-live, and we suggest starting with the sales process. Enter a Sales Order for a gift card and confirm the system generates the serial numbers correctly, whether manually or automatically. For non-stock items, remember the shipping rule defaults to Ship Complete on the order line. For stock items, validate the receipt process by adding items to a receipt, generating serial numbers, and assigning expiration dates in the line details.
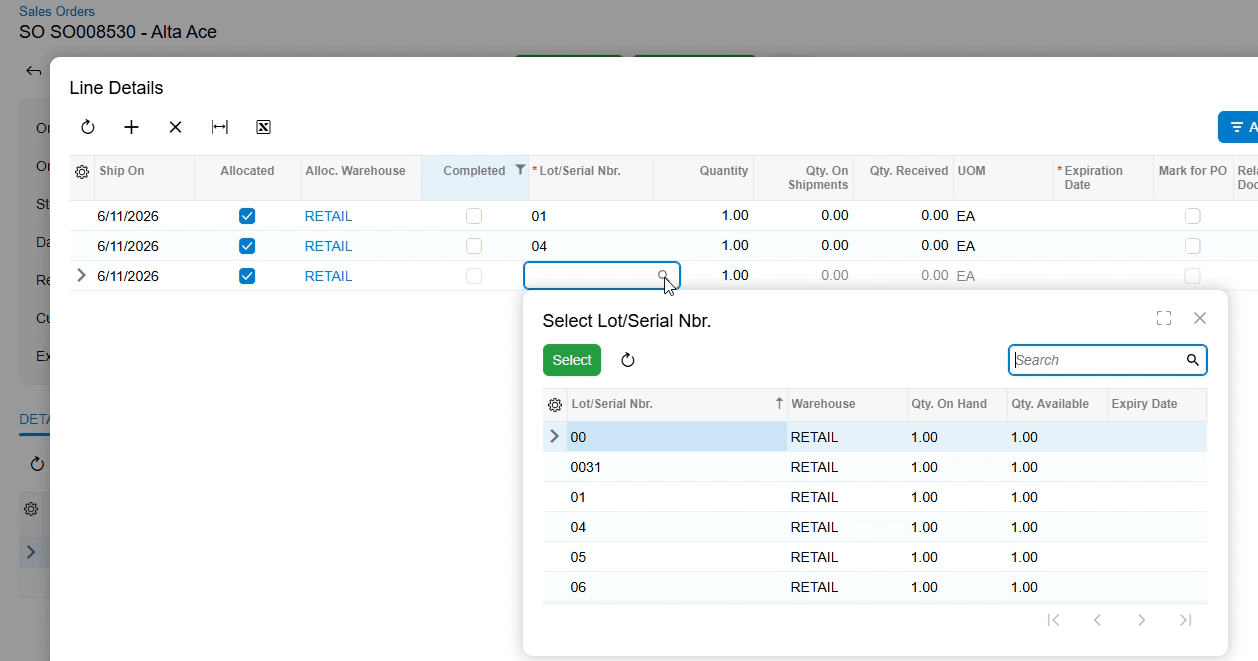
Next, test the payment side. You should be able to select Gift Card as a payment method directly from a sales order, from the Payments and Applications screen, or from an invoice. Verify that the system lets you choose a serial number and that it correctly shows the remaining balance on the card. Finally, run a test return. Use the return order type to process a credit for a gift card, and confirm the system updates the Gift Card History screen with the returned amount.
Go-live readiness and reporting
As you approach your go-live date, the final check is your reporting and visibility. The Gift Card Summary and Gift Card History screens should be your main validation points. The history screen should show a clear audit trail of every transaction, including the original invoice, any payments made, and even voided transactions. And if you use an Application Programming Interface, or API, to connect to external systems, do a final sync to make sure customer information and serial numbers are flowing in accurately.
Go-live readiness means more than just having the software installed. It means having confidence that every gift card you sell is a secure, traceable asset for your business. Once you’ve verified your GL accounts, validated your numbering, and successfully tested a full sale, payment, and return cycle, you’re ready to launch.
To see these steps in action, or to learn how we can help you grow your sales, visit us at biz-techservices.com to schedule a personalized demo.

