
Consignment Processing Configuration Checklist for Acumatica
Launching a new module inside your Enterprise Resource Planning system, or ERP, is a significant milestone for any growing business. At Biz-Tech Services, we know the key to a successful go-live isn’t just the software itself; it’s the preparation you put in before the first order is ever entered. And when you’re managing inventory held at your customers’ locations, visibility and accuracy are everything. So we’ve put together this pre-launch checklist to make sure your Acumatica environment is fully ready for Consignment Processing.
Phase one: required system configuration
Your first step is the technical foundation. You need to make sure the Consignment Processing customization project is correctly installed in your Acumatica environment. On the Customization Projects form, we recommend you first validate the project to catch any conflicts with your existing setup, and then publish it for your tenant. That uploads the package to your database and compiles the files that switch on the consignment features.
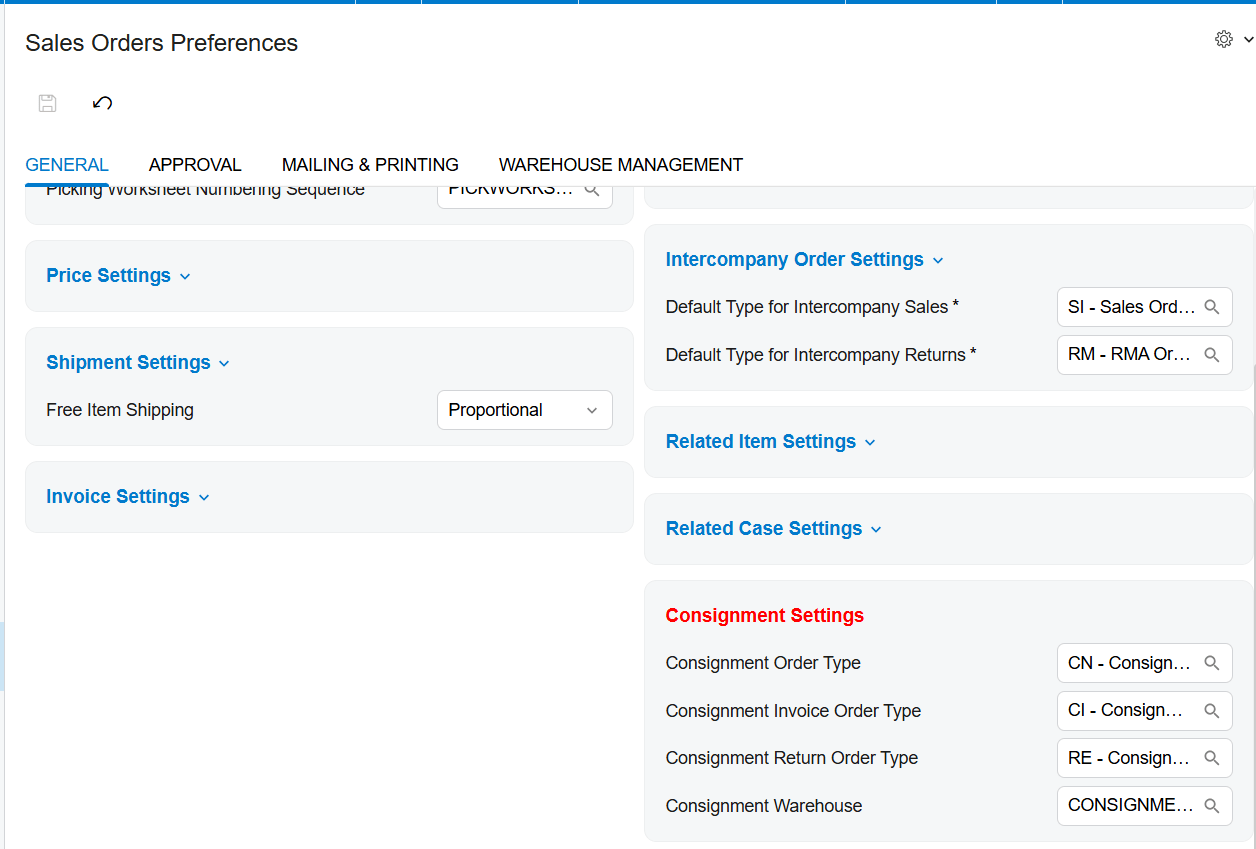
After the installation is verified, move to the Sales Order Preferences form. This is where you define the DNA of your consignment transactions, and you need to confirm that three specific order types are established. First, verify a consignment order type, typically labeled CN, created from the Transfer Order template. Next, make sure a consignment invoice order type, or IN, is set up from the Invoice Order template. And finally, confirm a consignment return order type, or CR, also built on the Transfer Order template. Within these same preferences, designate a default consignment warehouse to streamline your data entry later on.
Phase two: warehouse and customer data preparation
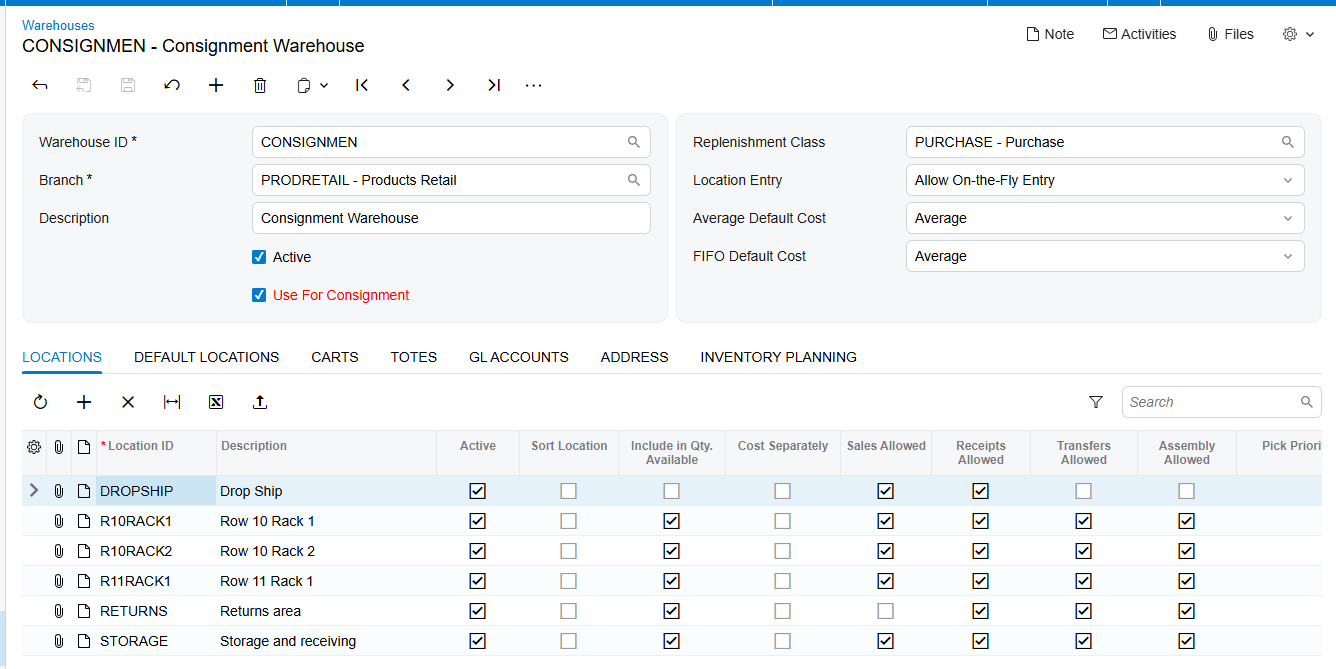
With the core preferences set, your next focus is your warehouse structure. Go to the Warehouses form to identify the locations that will hold consigned stock. For every warehouse you use for this purpose, make sure the Use for Consignment checkbox is selected. This is a critical validation point, because only warehouses with that setting can be chosen as destination warehouses on your consignment orders. Remember, in this workflow your standard warehouses serve as the source of the items, while the consignment warehouse acts as the destination.
Once your warehouses are ready, prepare your customer records. On the Customers screen, go to each client taking part in your consignment program. You can associate a specific consignment warehouse directly with a customer, and this step is vital for accuracy. A warehouse set at the customer level overrides the general default from Sales Order Preferences, so items are always tracked to the right location for that specific partner.
Phase three: process validation and user access
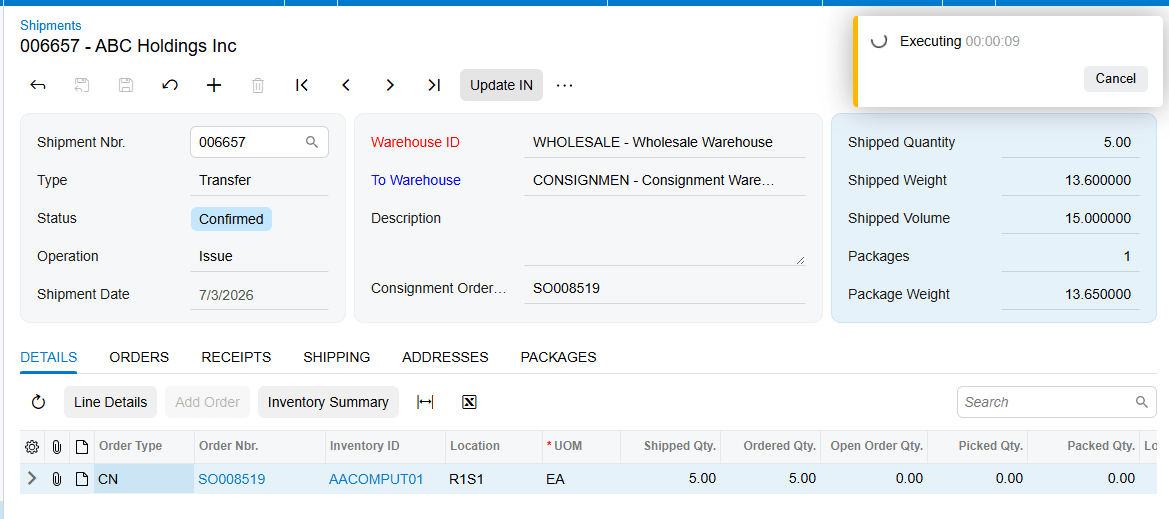
Before you let your team process live transactions, you need to validate the workflow and make sure everyone understands the specific triggers the system requires. A key training point for your staff is the shipment confirmation process. Unlike a standard sale, a consignment shipment needs a second action to move the inventory. Confirm that users know how to find and use the Update Inventory button, under the Actions menu, once a shipment is confirmed.
You should also validate that the system is automating the background tasks correctly. When that Update Inventory action runs, verify that Acumatica automatically generates and releases a transfer-type purchase receipt. That’s the mechanism that issues items out of your main warehouse and receives them into the consignment warehouse. If this step is missed, your inventory valuation and quantities won’t reflect the stock actually sitting at the customer’s site.
Phase four: testing and go-live readiness
The final stage is end-to-end testing of the two most common post-shipment scenarios: selling and returning. First, create a test consignment order and move it to a Consignment, or Partial Consignment, status. At that point, verify that the Consignment Sell Items and Consignment Return Items buttons are properly enabled in the Actions menu.
Perform a test sell to make sure the item selection window correctly shows the available open quantities, and confirm that selecting an item and adding it generates a consignment invoice order. For returns, follow the same steps to make sure a consignment return order is created, and that the Update Inventory action on that return correctly updates your balances.
As a final readiness check, we recommend configuring your physical inventory types for consignment stock. On the Physical Inventory Types form, confirm you have a type created with the Consignment Inventory Count checkbox enabled, so you can count stock held at customer locations. And verify that the system calculates the book quantity by summing the open quantities from your active consignment orders, so when you reconcile, you’re billing the customer accurately for any variances found during the count.
The bottom line
The single most important takeaway for go-live readiness is that consignment success depends on the smooth transition of statuses, from open, to consignment, and eventually to closed once every item is either sold or returned. If your configuration and data preparation follow this checklist, you’ll have the visibility you need to manage your distributed inventory with confidence.
For more on optimizing your Acumatica experience, or to see a live walkthrough of these steps, visit biz-techservices.com for a demo.

