Kit Processing Configuration Checklist for Acumatica
When your business prepares to launch a new tool inside your Enterprise Resource Planning system, or ERP, the difference between a smooth transition and a frustrated team often comes down to preparation. At Biz-Tech Services, we’ve found that a structured pre-launch phase makes sure the automation in our Kit Processing enhancement works exactly as you expect from day one. So think of this as your checklist, your roadmap through configuration, data preparation, and validation, so your team is ready for a successful go-live.
Required configuration and installation
Before you can build a single kit, you need your environment technically prepared. First, confirm that your Acumatica system is running on a supported license, such as PCSR, PERP, or SAAS. Once the platform is ready, install the necessary customization packages through the Customization Projects screen. You’ll import and publish both the Biz-Tech license package and the Kit Processing package to activate our specialized tools.
Just as important, make sure the native Acumatica Kit Assembly feature is turned on in the Enable and Disable Features form. This is the foundation our processing engine sits on. Without that native feature active, the Kit Specifications form simply won’t be available.
Data preparation and item setup
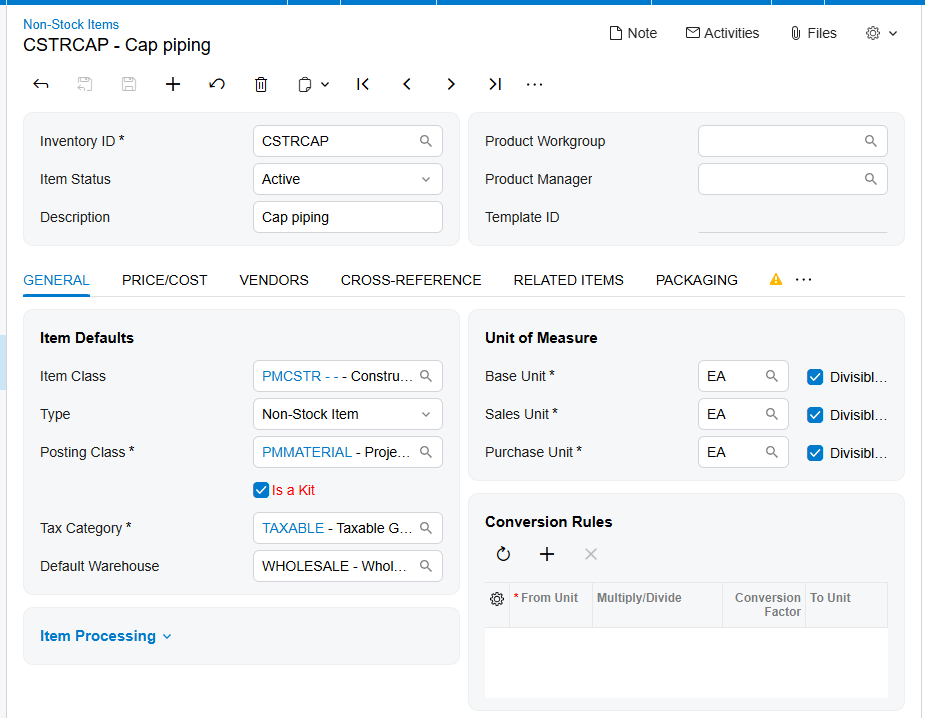
With the framework in place, turn your attention to your data. Every item you plan to sell as a kit must first be defined as one, on either the Stock Items or the Non-Stock Items form. On the General tab of those screens, confirm you’ve marked the Is a Kit checkbox for every relevant product.
Next, prepare what we call kit placeholder items. These are non-stock items that stand in for the kit parent on a sales order, after the kit explodes into its components. A vital validation point here is the unit of measure, or UOM. The unit of measure on your placeholder item must exactly match the unit of measure of the kit itself, or the system will warn you during order entry.
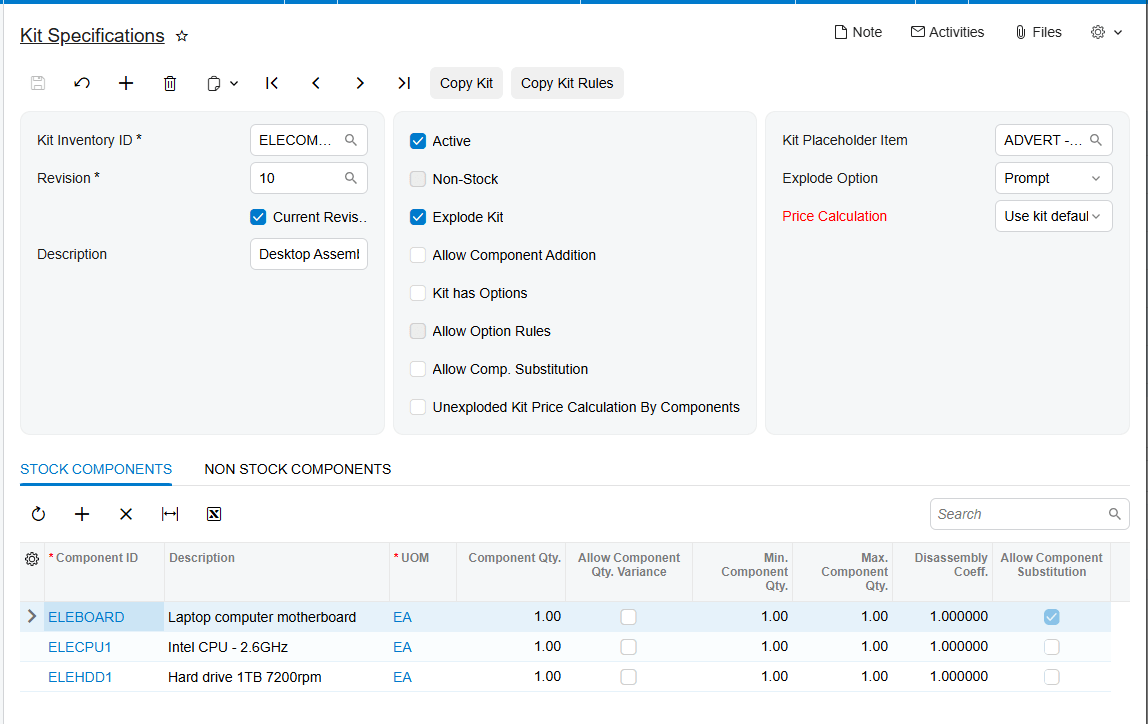
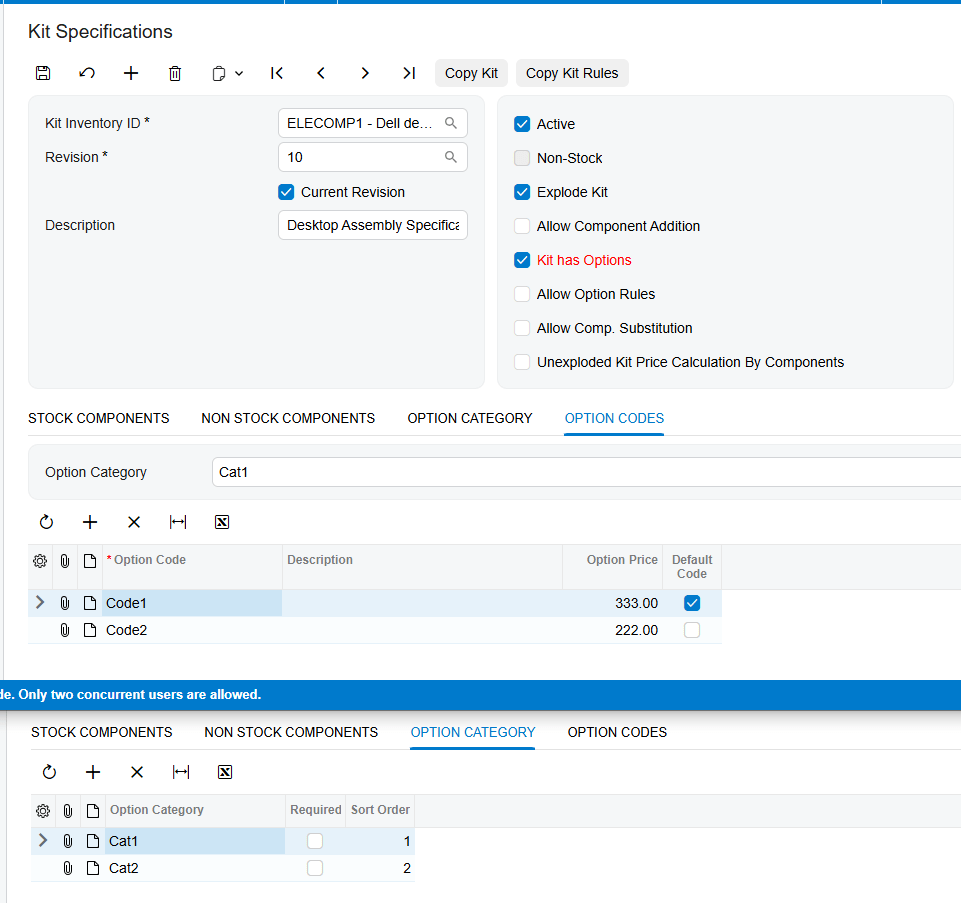
Finally, for each kit, you set up its kit specification. This is where you define the components and the revision number, and, most importantly, mark the revision as active and current. Only the current revision is used to explode components when an order is entered, so this step is easy to overlook and important to get right.
Defining your business logic
Once your items are ready, you tell the system how to handle them day to day, on the Sales Order Preferences screen. Here you choose your default explode option. You can have the system automatically break kits into their components, prompt the user to decide each time, or not explode at all. But if the specific item has configyration in Kit Specifications screen, then the setup of individual item would be used.
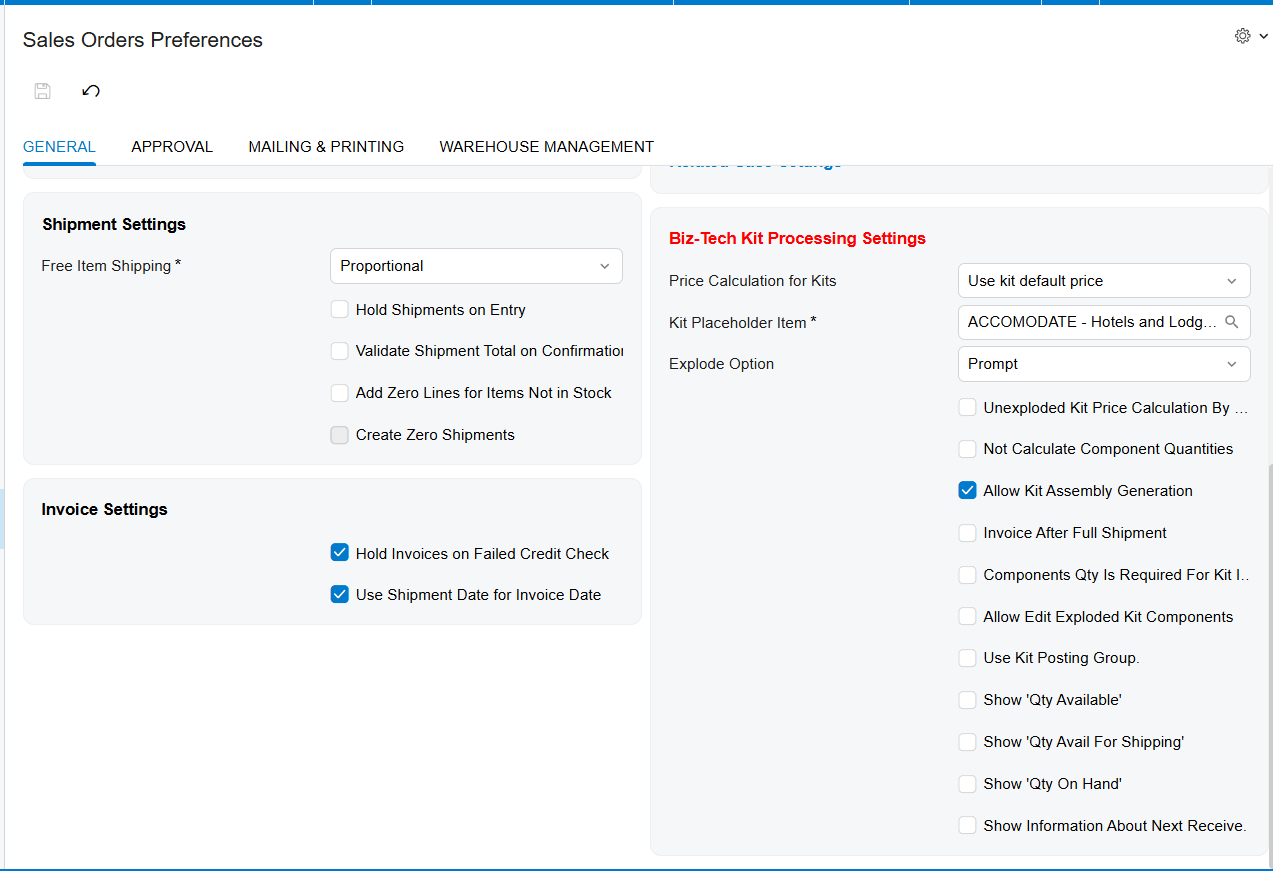
You also set your price calculation strategy. Your business might price from the kit’s default price, from the components’ default prices, or use a combined approach. And if you’d rather keep the kit intact on the order but still price it from its parts, you can turn on the unexploded kit price calculation by components.
Lastly, think through your shipping logic. Under the Biz-Tech Kit Processing settings, you decide whether to ship the available quantity or only the ordered quantity. Choosing the ordered quantity makes sure nothing leaves the warehouse until every component of the kit is allocated and ready to go.
Validating your options and rules
For configurable kits, validating your rules is a critical pre-launch step. If your kits have options, you set up option categories and option codes inside the kit specification. To keep orders accurate, you can use option rules to create exclusion logic. For example, a rule that makes certain color choices unavailable once a customer picks a particular size.
And if you allow flexibility in the warehouse, confirm that component substitution is enabled. That lets your team swap a standard component for a pre-defined substitute when the primary item is out of stock, without holding up the order.
Testing and go-live readiness
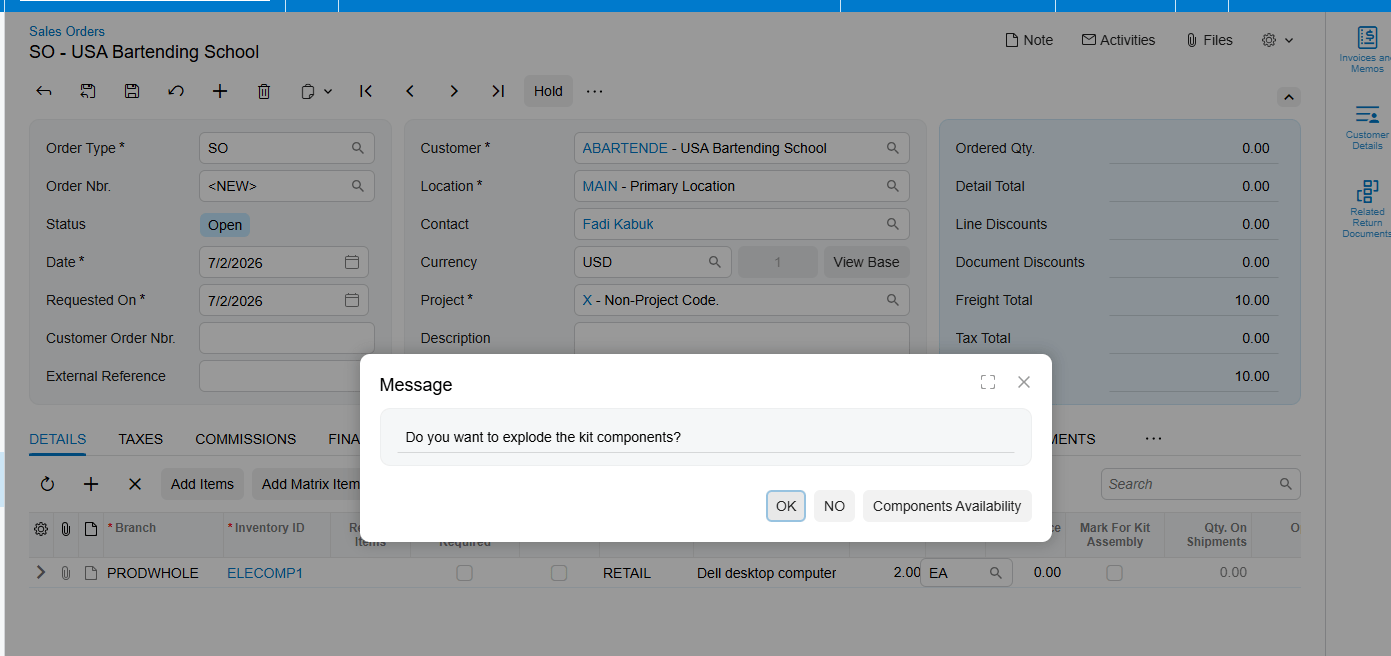
The final phase of the checklist is a thorough testing cycle. We recommend entering several sales orders to watch the kit explosion happen, and opening the component details window to confirm the quantities and warehouses populate correctly. If you’ve enabled kit assembly generation, test creating a kit assembly right from the sales order, so your production and sales workflows are properly linked.
Then confirm the financial flow by taking a test order all the way through shipment and invoicing. Pay close attention to how the system handles the kit placeholder item, and make sure the costs carry forward to the invoice as you expect. And if you run a storefront integration, verify that the setting to fulfill exploded kit items is active, so shipment status syncs back to your store correctly.
The real sign of go-live readiness is when your settings in Sales Order Preferences perfectly mirror your physical warehouse and your accounting workflows. When your testing shows components allocated correctly and prices calculating exactly as your catalog defines, you’re ready to launch with confidence.
To see these features in action, or to get a guided walkthrough of the setup, visit us at biz-techservices.com for a full demo of our Kit Processing solution.