
How to Import Shopify Orders into Acumatica
How to Import Shopify Orders into Acumatica
To import Shopify orders into Acumatica, you configure a Shopify store record, choose which order statuses and dates qualify, retrieve the orders on a processing screen, and import them as Acumatica sales documents. This article walks through that task with the Biz-Tech Services Shopify Acumatica Connector for Acumatica ERP (enterprise resource planning): the settings that decide what comes in, the documents the import creates, and what to check when an order does not arrive as expected.
The scope is the inbound task only: getting a placed Shopify order into Acumatica, turning it into a document your teams can work, and diagnosing what commonly goes wrong. Every setting below uses the exact field name the Biz-Tech Services Acumatica Shopify connector shows on screen.
Before You Import: The Settings That Decide What Comes In
The Shopify order import is not a single button. A store record plus a set of import options define a filter: which orders are eligible, what they become in Acumatica, and which defaults fill the gaps. Because these settings decide what is pulled from Shopify in the first place, getting them right saves considerable cleanup later.
The Shopify Store Record and Its Connection
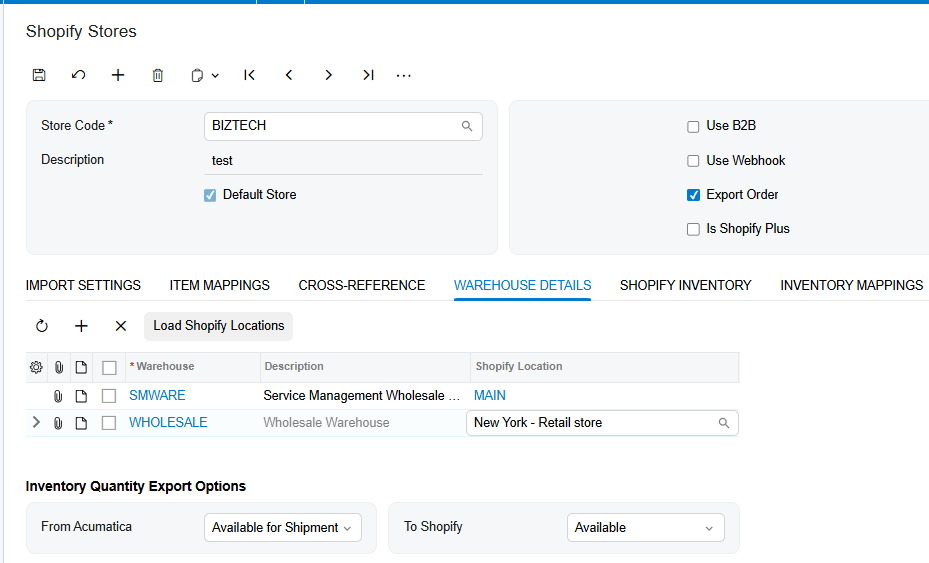
Everything begins on the Shopify Store screen in Acumatica. The Biz-Tech Services Acumatica Shopify integration requires connection settings there and connects to the corresponding Shopify system based on them. You create the record by clicking Add New Store, which redirects you to the Shopify Credentials screen. Each record carries a Store Code, a lookup field identifying the Shopify store, and a Description.
Test Credentials verifies the connection through the API (application programming interface) using the values on the Connection Settings tab. If your business runs one storefront, select Default Store so it appears automatically on the processing screens.
Document Type, Order Type, and Branch
The most consequential setting is Import Shopify Orders to, which specifies the Acumatica document type Shopify orders become. Orders can be imported as Sales Orders, Sales Order Invoices (SO Invoice), or Accounts Receivable Invoices (AR Invoice). The choice drives everything downstream: a sales order flows into picking, shipping, and invoicing, while importing straight to an invoice skips the fulfillment path entirely.
Order Type sets the default type of the orders the Biz-Tech Services Shopify Acumatica integration creates, so numbering and workflow follow from it. Branch controls the Acumatica organizational branch; the import uses the branch values already set up on the store record.
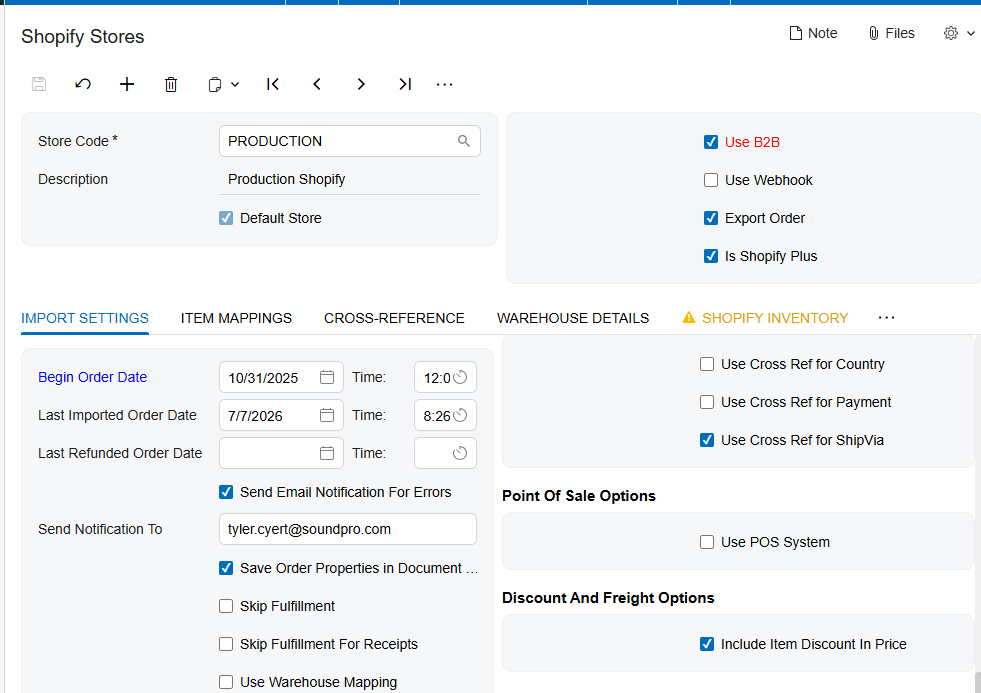
Date Filtering: Begin Order Date and Last Imported Order Date
Begin Order Date displays the date from which the first order should be imported. Last Imported Order Date displays the date the last order was imported, and for the other invoice import processes it counts the date related to the last invoice date.
The rule connecting them explains most reports of missing orders. Initial retrieval begins from Begin Order Date if the last imported order date is not later than Begin Order Date; afterward, orders are fetched based on the last imported order date. The window moves forward on its own, so back-dated orders behind that watermark are not swept up by a normal retrieval.
Order Status Selections
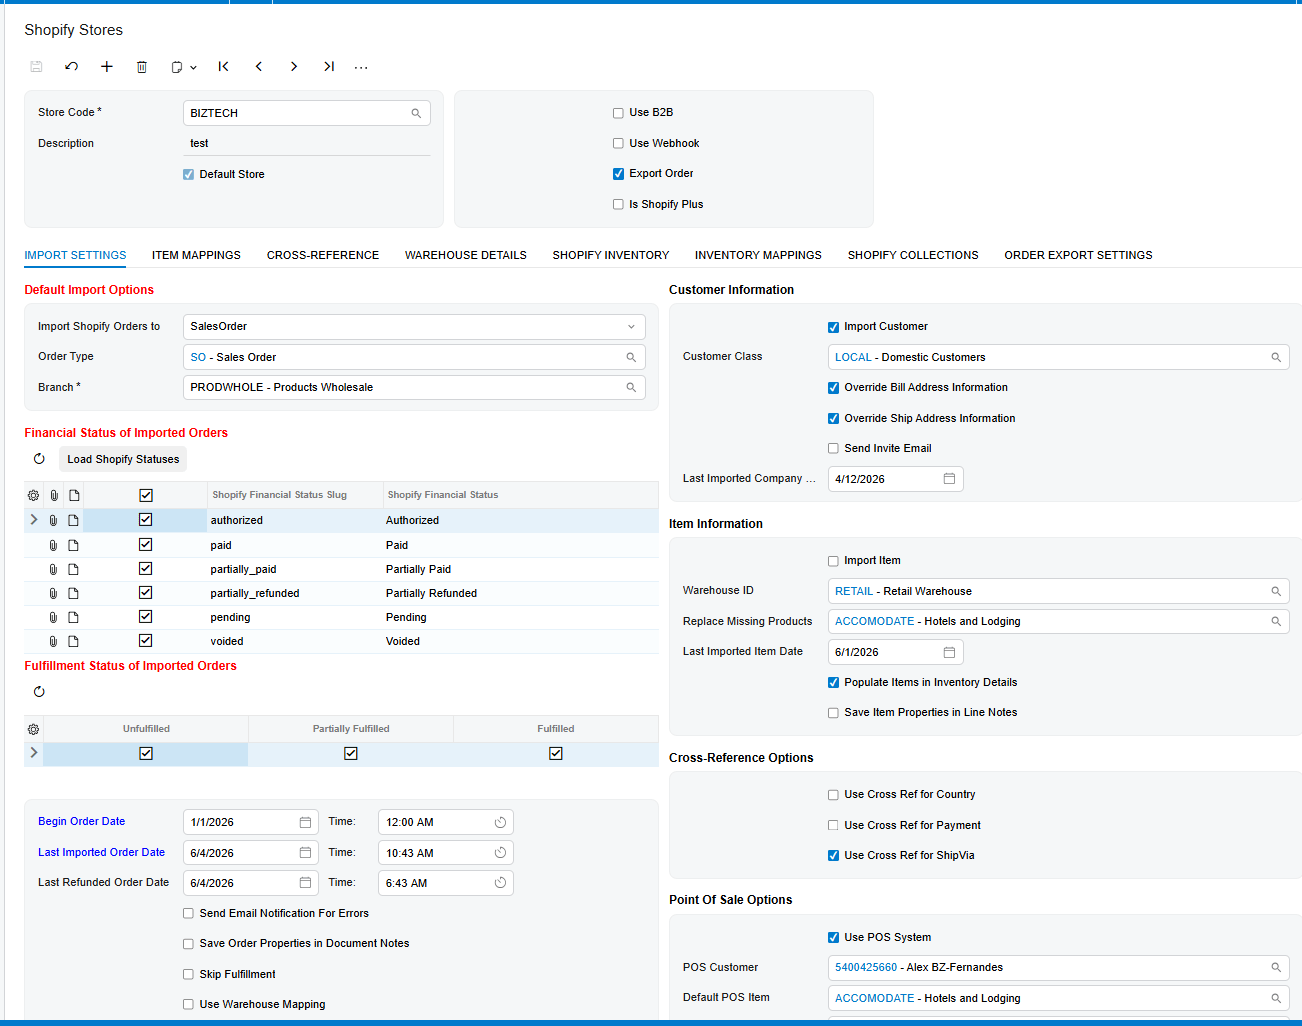
Status filtering happens on two levels. Fulfillment Status of Orders reflects the status of the corresponding Shopify order that will be imported. Under Order Status sit the Shopify order financial statuses, and the corresponding Order Status checkbox must be selected for an order to be retrieved and imported. An unchecked status does not import with a warning; it never appears at all.
A second constraint lives on the processing screen, which shows only Shopify orders with the Fulfilled, Unfulfilled, or partially fulfilled status. Account for both filters.
Notification, Notes, and Refresh Options
Send Email Notifications for Errors opens a field for an email address and makes the Biz-Tech Services Acumatica Shopify connector notify you about order IDs that hit errors during retrieval. Save Order Properties in Document Notes makes the Biz-Tech Services Shopify Acumatica connector retrieve order properties into Acumatica document notes while fetching orders.
Refresh Order When Import Orders decides how current the data is at import time: selected, the process sends a request to Shopify and updates the order data; cleared, the order is imported without updating anything.
Importing Shopify Orders, Step by Step
The Import Shopify Orders screen lets you retrieve and import all Shopify orders into Acumatica. It separates retrieval from import on purpose, so you can look before you commit.
Step 1: Retrieve the Shopify Orders
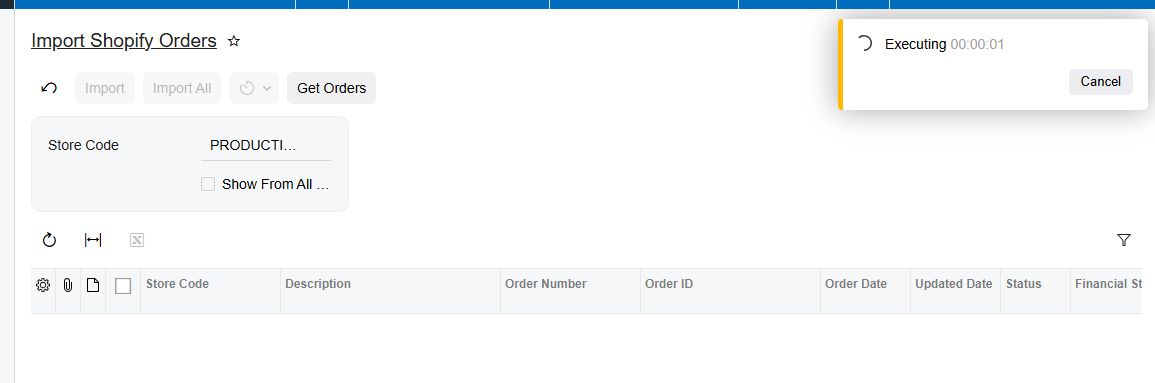
Click Get Orders on Import Shopify Orders screen in Biz-Tech Services Acumatica Shopify integrator. The button retrieves orders from Shopify, and a timer indicates the elapsed time until the process completes. The grid contains only orders with the Fulfilled, Unfulfilled, or partially fulfilled status, restricted further by the financial statuses you checked and by the date logic above. Retrieval creates nothing in Acumatica; it stages what is eligible.
Step 2: Review What Was Retrieved
Each retrieved order carries a hyperlink on its order number. Clicking it navigates to the Shopify Orders screen of Biz-Tech Services Acumatica Shopify integration, which presents the initial situation of the Shopify order. This is your inspection point. It shows the Order ID field with the Shopify order ID and order number, Status with the Shopify order status as held in Acumatica, Payment Method, and Ship Via with the shipping method used.
Its tabs include Document Details, which provides information about the items of the order, and Addresses, which offers details about the customer address. Reviewing here catches unmapped shipping and payment methods early: the payment method and Ship Via values used to build Cross-Reference mappings are taken from this screen.
Step 3: Import Selected Orders or Import All
Back on the Import Shopify Orders screen of Biz-Tech Services Shopify Acumatica integrator, IMPORT lets you select and import specific orders; IMPORT ALL imports every order in the grid. Use selective import for the first run and after any mapping change, so a mistake affects one Acumatica document rather than a day of trading. If an error appears while importing an order, the error message is displayed on the screen with information about the system error.
Step 4: Import an Individual Order by Shopify Order ID
Sometimes you need one order the normal window will not produce, such as one dated behind the last imported order date. The Shopify Orders screen provides an Import Order button that gets orders by Shopify order ID. After you use it, the order displays on the Import Shopify Orders screen and is ready to be imported. This is the documented way to manually import a preferred order instead of widening the date filter.
Step 5: Remove the Manual Step
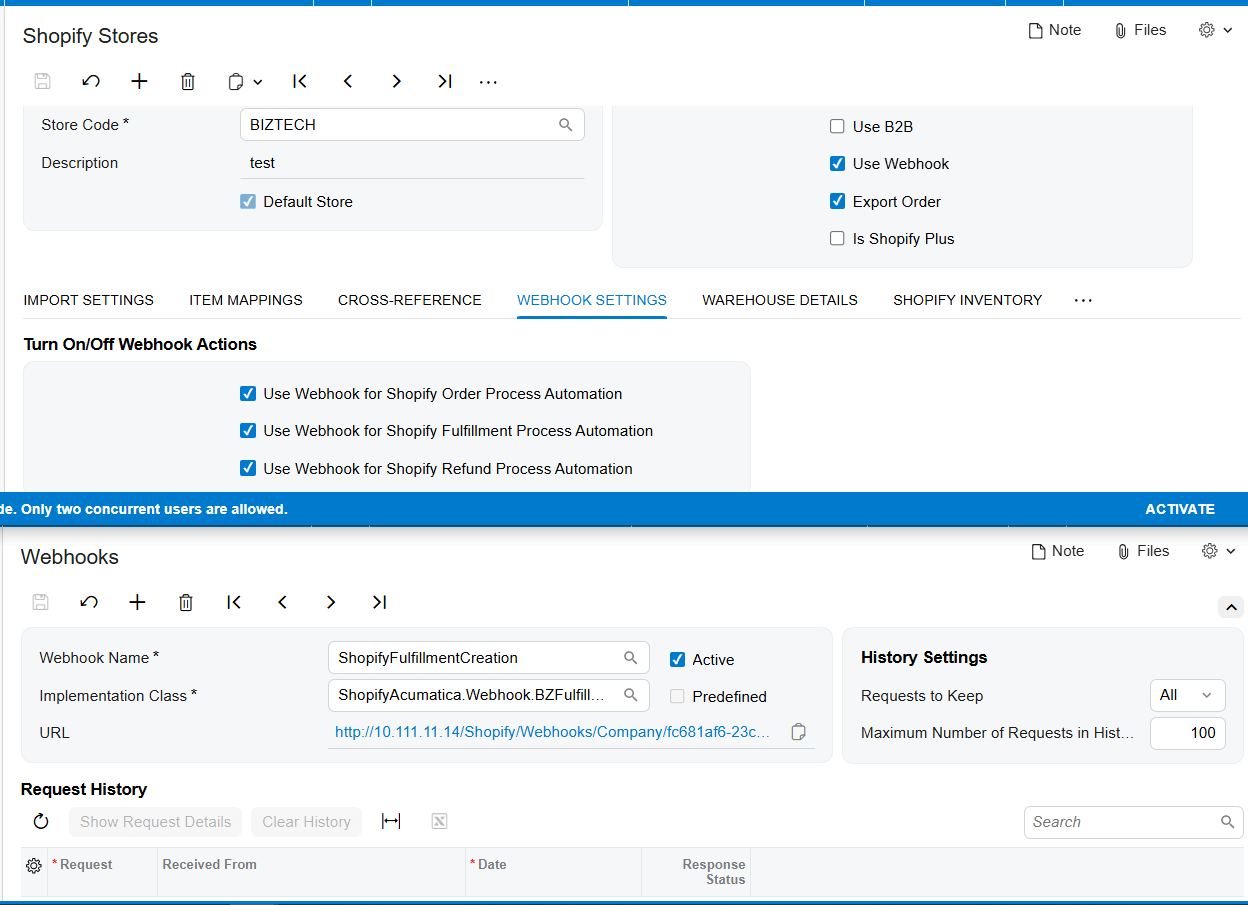
The Import Shopify Orders screen also allows you to set up a schedule for getting and importing orders. A second path runs through webhooks: with Use Webhook for Shopify Order Process Automation selected, any order created in Shopify is automatically created and imported on the Acumatica Sales Orders screen, and afterward the Webhook Order checkbox is automatically selected on the Shopify Orders screen of Biz-Tech Services Shopify Acumatica integrator. This requires the Use Webhook checkbox on the store record, which enables the webhook logic. To create the mapping, go to the Webhooks screen in Acumatica, fill in the webhook name and implementation class, and click Save; that generates a webhook URL (uniform resource locator) which you add to the URL field of the newly created webhook in Shopify.
Document Triggers: What the Shopify Order Import Creates
The Acumatica document an import creates is chosen by Import Shopify Orders to on the store record. That field is the trigger, and the three outcomes are a sales order, a sales order invoice, or an accounts receivable invoice.
The Sales Order Path
Imported as sales orders Biz-Tech Services Shopify Acumatica integration, the results are ordinary Acumatica sales orders created with the Order Type and branch set on the store record. Shipments are created and confirmed against them, and Prepare Invoice moves them toward billing. The documentation describes this handoff: the Biz-Tech Services Acumatica Shopify integrator retrieves orders from Shopify, imports the selected orders, and when a user confirms the shipments created from them, fulfillment events are generated for each corresponding order.
The Payment Document
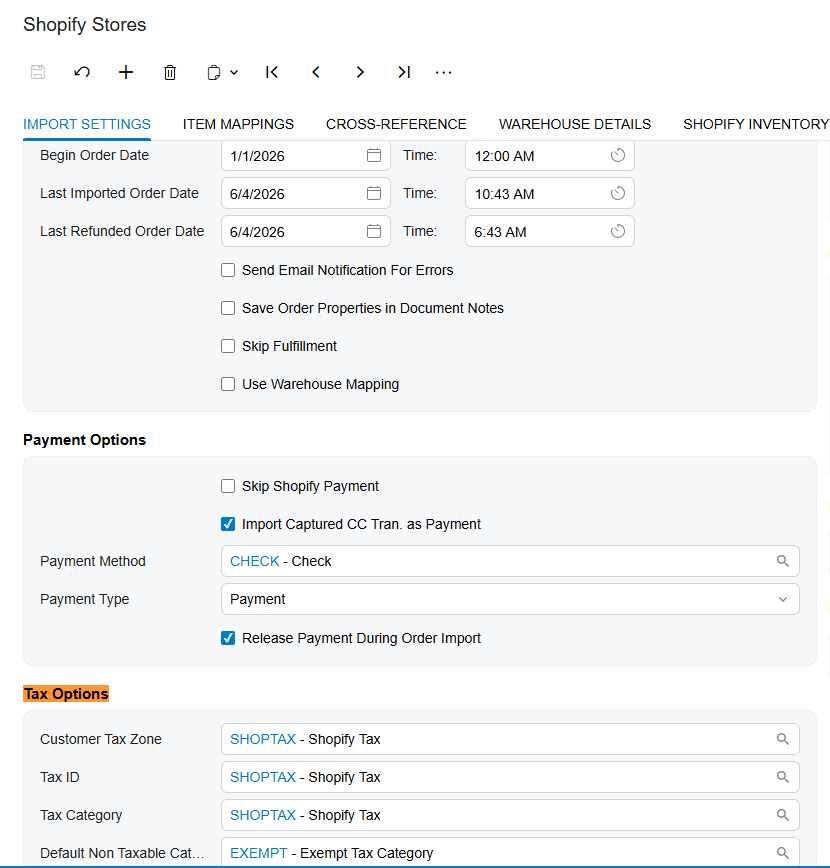
A payment can be created alongside the order. If a Shopify order has a payment and should be imported with it, the Import Captured CC Tran. as Payment checkbox must be selected; otherwise, the order is imported without any payment. Payment Method sets the method applied during the import, Payment Type offers Payment and Prepayment, and Release Payment During Order Import determines whether the payment arrives already released in Acumatica.
Fields That Link Shopify Orders to Acumatica Documents
The Shopify Orders screen is the join between the systems. Order ID displays the Shopify order ID and order number. Sales Order Number displays the sales order number once the order is imported. Invoice Number displays the invoice number once the order is invoiced. Together these let you move from a customer service question about a Shopify order number to the exact Acumatica document in one hop, in either direction.
One further linkage is easy to miss: the documentation states that after the import process, the Ship Via value should be displayed in the Delivery Settings field on the Shipping tab of the Acumatica Sales Orders screen. That is where you confirm a shipping method mapping actually took effect.
Mapping Rules That Decide What Lands on the Order
Mapping turns a technically successful import into a usable document. The Biz-Tech Services Acumatica Shopify connector handles it through three mechanisms: item resolution by SKU, cross-references for value translation, and item creation defaults for when nothing matches.
Item Resolution by SKU
Line items resolve through the SKU (stock keeping unit). During the sync action the Biz-Tech Services Shopify Acumatica connector takes the Shopify item SKU and creates an Acumatica inventory ID from it, which is what makes SKU the reliable join key on an imported order line. In the import direction you also have the capability to create a map between Shopify and Acumatica items.
Cross-References for Shipping Method, Payment, and Customer
Cross-Reference options on the Import Settings tab let you select which entities should be set up and matched in Shopify and Acumatica during the transition. Selecting them makes the Ship Via field appear, which maps a Shopify value to the Acumatica Ship Via value. Only the checked entities from Cross-Reference Options show up in that drop-down, so a missing entity is fixed on the Import Settings tab, not on the Cross-Reference tab.
Cross-references also drive customer selection by tag. If Use Tags to Import Customer is selected and the type Code is chosen, you set up the Shopify tags and the Acumatica customer account codes (AcctCD) in the Shopify Value and Acumatica Value fields on the Cross-Reference tab. Shopify orders carrying a mapped tag then get that customer. If the Use def. class if tag is not found checkbox is not selected, a new customer is created taking its class from that tab. The same logic works for items.
Defaults When Nothing Matches
The Import Item checkbox governs unmatched lines. Selected, the system may create a new item if it does not exist in Acumatica during the sync and order import process, and it reveals the defaults that item will use: imported item type, item class, UOM (unit of measure), and warehouse ID. That is why warehouse belongs on your pre-import checklist.
When Import Item is not selected, the behavior is more conservative: for a new item arriving on an order, the system sets Replace Missing Products as the item name and takes the warehouse from the Warehouse ID field. One option grows your item master automatically; the other funnels unknown products into a placeholder somebody must reconcile.
Three further options appear with Import Item selected. Use Numbering Sequence for SKU Generation generates a new SKU per the numbering sequence setup when none is found during item creation. Populate Items in Inventory Details adds the item into inventory details while importing. Save Item Properties in Line Notes lets the order sync with line and header notes in Acumatica. Separately, Include Item Discount in Price includes the item discount amount in the order price, changing how imported line totals reconcile against Shopify.
Customer, Payment, and Tax Behavior on Import
Three groups of settings determine who the order is billed to, whether money comes with it, and how tax is applied.
Customer Creation Versus a Default Customer
Import Customer is the switch. Selected, the Biz-Tech Services Acumatica Shopify integration imports the customer information from Shopify into a new Acumatica customer record. Not selected, orders are imported with the default customer. Creating records gives you per-buyer history; a default customer keeps the customer master small for high-volume retail traffic. A related field, Last Imported Company Date, displays when the last company was imported.
Address handling is controlled independently. Override Ship Address Information from Shopify Order imports the address of the location the order will ship to, and Override Bill Address Information from Shopify Order imports the address of whoever pays the order bill. These matter most with a default customer, since without them every order inherits the default customer addresses rather than what the buyer entered at checkout.
Point of Sale Orders
Counter transactions are a separate case. Use POS system enables the importation of POS (point of sale) orders. POS Customer sets a default customer for those orders, and Default POS Item sets the default item for the POS order import process. Configure this group deliberately so counter sales do not land on your web default customer.
Payment on Import
Read the payment options together. Skip Shopify Payment imports the order without payment. Import Captured CC Tran. as Payment is the affirmative switch for bringing a captured credit card transaction across into Acumatica. Payment Method and Payment Type set what that payment looks like, with Payment and Prepayment available. Release Payment During Order Import brings it in already released. Decide these once, with your controller present; changing them later leaves a mixed population of payments to reconcile.
Tax Options
Four settings make up the Tax Options of Biz-Tech Services Shopify Acumatica integration. Customer Tax Zone is the combined set of effective taxes for a zone, defined according to the locations of the vendors or customers. Tax ID holds the customer tax ID. Taxable Category creates or edits the tax categories applied to products. Default Non-Taxable Category sets an exempt tax category for non-taxable items so they display on sales order lines. These are the tax controls the Biz-Tech Services Shopify Acumatica connector documentation defines for the import path; if your business uses a different tax determination arrangement in Acumatica, confirm the behavior before go-live.
Validation and Common Exceptions
Most Shopify order import problems are not connector failures. They are a filter or a default doing exactly what it was configured to do.
The Order Never Appears in the Grid
Almost always a filter. Check in sequence: whether the order has the Fulfilled, Unfulfilled, or partially fulfilled status, since the processing page shows only those; whether the checkbox for that order financial status is selected, because it must be for the order to be retrieved and imported at all; and whether the order date falls inside the active window, given that after the first run orders are fetched based on the last imported order date. If the order is behind that watermark, use Import Order on the Shopify Orders screen to pull it by ID.
The Item on the Line Is Not the Item You Expected
A line arriving as Replace Missing Products means the item did not resolve and Import Item is cleared, so the Biz-Tech Services Acumatica Shopify connector used the documented fallback and took the warehouse from the Warehouse ID field. A newly created Acumatica item you did not want means the opposite: Import Item is selected and the item was built from the configured item type, item class, UOM, and warehouse defaults. Either way the root cause is a SKU that did not match, so fix SKU alignment first.
The Customer Is Wrong or Was Not Created
If every order lands on the same customer, Import Customer is cleared and the default customer is in use as documented. If addresses look wrong, the two override checkboxes are likely cleared too. If you use tag-based selection and get the wrong customer, verify the tag and account code pair exists in the Shopify Value and Acumatica Value fields on the Cross-Reference tab, and check Use def. class if tag is not found.
The Numbering Sequence Is Missing
The documentation records this explicitly: if the corresponding numbering sequence is absent, an error message will be displayed. Verify the Acumatica numbering sequences behind the document type you import to and behind item creation before your first production run.
The Shipping Method Did Not Carry Over
If Delivery Settings on the Shipping tab of the created sales order is empty or wrong, look at the Ship Via cross-reference. Confirm the entity is checked in Cross-Reference Options, since only checked entities appear in the drop-down, and confirm the Shopify value matches the Ship Via value shown on the Shopify Orders screen for that order.
How the Connector Reports Errors
Errors surface in two places. If an error appears while importing an order, the message is displayed on the processing screen with information about the system error. Separately, with Send Email Notifications for Errors selected, the Biz-Tech Services Acumatica Shopify connector emails notifications for the order IDs that encounter errors during retrieval. Turn that second channel on for scheduled imports, where nobody is watching the screen.
Where to Check Your Work
Do not simply confirm documents were created. Open an imported order in Acumatica, verify each field below, then repeat for one order from every pattern you expect: taxable, exempt, paid, and new customer.
1. Import Shopify Orders to on the store record, confirming the created document is the sales order, SO invoice, or AR invoice you intended.
2. Order Type and Branch on the created document, matching the store record defaults.
3. Sales Order Number on the Shopify Orders screen, populated once the order is imported.
4. Invoice Number on the Shopify Orders screen, populated once the order is invoiced.
5. Delivery Settings on the Shipping tab of the sales order, where the Ship Via value should appear after import.
6. The line item Acumatica inventory IDs, checking that none silently defaulted to Replace Missing Products.
7. The warehouse on the order lines, against the warehouse ID configured for item creation or the Warehouse ID field.
8. The customer on the header, and whether a new record was created or the default customer was used.
9. The ship-to and bill-to addresses, confirming the override options produced buyer addresses.
10. The Payments tab, verifying payment method, payment type, and whether the payment was released during import.
11. Customer Tax Zone and the tax category on the lines, including the non-taxable category on exempt lines.
12. Last Imported Order Date on the store record, which should have advanced after a successful run.
Importing Shopify Orders: Frequently Asked Questions
Why are some of my orders missing from the Import Shopify Orders screen?
Three filters can hide an order. The processing page shows only orders with the Fulfilled, Unfulfilled, or partially fulfilled status. The order financial status checkbox must be selected for that order to be retrieved and imported. And the retrieval window starts from Begin Order Date only on the first run, after which orders are fetched based on the last imported order date.
How do I import one specific order without changing my date settings?
Use the Import Order button on the Shopify Orders screen, which gets an order by its Shopify order ID. Once retrieved that way, the order displays on the Import Shopify Orders screen and is ready to be imported like any other. This avoids moving your date window backward.
What is the difference between IMPORT and IMPORT ALL?
IMPORT lets you select specific orders in the grid and import only those; IMPORT ALL imports every order shown. Use the selective button whenever you have just changed a mapping or a default, so any surprise is contained to one Acumatica document.
Why is every imported order landing on the same customer?
That is the documented behavior when Import Customer is not selected: orders are imported with the default customer instead of creating an Acumatica customer record from Shopify data. Select Import Customer if you want per-buyer records. If you prefer the default customer, also select the ship and bill address overrides so each order still carries the buyer addresses.
Why does a line show Replace Missing Products instead of a real item?
That value is the documented fallback when Import Item is not selected and the item does not exist in Acumatica. The system sets Replace Missing Products as the item name and takes the warehouse from the Warehouse ID field. The real fix is usually SKU alignment, since item resolution runs on the SKU. Import Item is the secondary decision, about whether missing items should be created automatically.
Can the order come in with its payment already applied and released?
Yes. Select Import Captured CC Tran. as Payment so an order that has a payment in Shopify is imported with it, then set Payment Method and Payment Type, choosing between Payment and Prepayment. Selecting Release Payment During Order Import brings the payment into Acumatica already released. Skip Shopify Payment does the opposite.
Do I have to run the Shopify order import manually every day?
No. The Import Shopify Orders screen allows you to set up a schedule for getting and importing orders. Alternatively, selecting Use Webhook for Shopify Order Process Automation means any order created in Shopify is automatically created and imported on the Acumatica Sales Orders screen. If you automate, turn on error email notifications.
The order status in Acumatica does not match my Shopify store. What should I do?
The stored status reflects the initial state of the Shopify order at import, so a later change in the store does not appear on its own. Open Actions on the Shopify Orders screen and click Refresh Order, which updates the status to match the store. To reduce how often this happens, select Refresh Order When Import Orders so the import requests fresh data before creating the document.
Work With the Biz-Tech Services Shopify Connector
Importing Shopify orders into Acumatica is a configuration task before it is an operational one. The store record decides which orders qualify and what document they become, the cross-references and item settings decide what lands on each line, and the customer, payment, and tax options decide who is billed and how. Retrieve first, review, import selectively until the configuration proves itself, then schedule it or hand it to a webhook. When something looks wrong, the Order ID, Sales Order Number, and Invoice Number fields on the Shopify Orders screen tell you where an order stands.
If your business is planning an e-commerce integration or trying to eliminate manual order entry from a growing sales channel, the Biz-Tech Services team can help you configure the Shopify order import to match how you actually sell. Visit https://biz-techservices.com to learn more about our Acumatica expertise or to schedule a personalized demonstration.
Check also this https://www.youtube.com/watch?v=wkjPKdLzv2M
How to Import WooCommerce Orders into Acumatica
How to Import WooCommerce Orders into Acumatica
To import WooCommerce orders into Acumatica, you retrieve them from your store with the Get Orders action and then import the ones you want as Acumatica ERP (enterprise resource planning) sales orders. By the end of this guide you will know which settings decide what gets pulled in, which screen a retrieved order lands on, what documents the import creates, how mapping rules decide which values reach the order, and what to check when an order you expected does not appear.
The steps below describe the Biz-Tech Services Acumatica WooCommerce Connector. Two screens do most of the work: Import WooCommerce Orders, where retrieved orders are staged and imported, and WooCommerce Orders, which holds the imported record and links back to the documents it created. Both are governed by the WooCommerce Store screen, so that is where the task really starts.
Before You Import: The Settings That Decide What Comes In
The Order Settings tab of the WooCommerce Store screen configures order synchronization to Acumatica, and nothing on the processing screens overrides it. If an order never shows up for import, the cause is almost always a value on this tab.
Import WooCommerce Orders To specifies the type of Acumatica document into which orders will be imported; the documented selection is Sales Orders. It matters more than anything else here, because the lines, discounts, freight, tax, and payment all attach to that document. Order Type defines the default order type for all orders created by the Biz-Tech Services Acumatica WooCommerce integration, and because it drives numbering and workflow, a wrong value has to be corrected order by order.
Warehouse ID specifies the default warehouse assigned to orders imported from WooCommerce, so inventory availability and stock management align with the selected warehouse.
Begin Order Date filters which orders are retrieved: only orders created on or after this date are imported, enabling an incremental import instead of dragging in the entire history of the store. Last Imported Order Date displays the date of the most recent order successfully imported, and the next import process begins from this date so no orders are skipped or duplicated.
One rule about that window is flagged as important in the documentation: orders are imported into Acumatica based on their updated date rather than their created date. An old order edited yesterday is in scope today; a recent order untouched since the last run may not be.
WooCommerce Status determines which orders are imported based on their status, for example Completed, Processing, or On Hold. Only orders matching a selected status are included, and the corresponding checkbox must be selected for an order to be retrieved and imported at all. That filter lets your business decide which parts of the store reach the ERP.
Importing WooCommerce Orders, Step by Step
The task has two stages. Retrieval brings order data into staging records; import turns a staged record into a real Acumatica document. Run them back to back, or retrieve on a schedule and import after review.
Step 1: Run Get Orders and Wait for the Retrieval Timer
Open the Import WooCommerce Orders screen, select the store code, and click Get Orders. The button retrieves orders from WooCommerce, and a timer indicates the elapsed time until the process is complete. A store marked with the Default Store checkbox is set automatically in the Store Code field on the processing screens.
Let the timer finish. All orders for the selected period are retrieved and displayed at once rather than trickling in, so an empty grid mid-run is not evidence that nothing was found. Retrieval can also be scheduled: configure the Get Orders screen with Import Orders from WooCommerce selected in the Screen ID field.
Step 2: Review What Was Retrieved
Each retrieved order in the grid carries a hyperlink; clicking the order number navigates to the corresponding WooCommerce order screen in Biz-Tech Services WooCommerce Acumatica integration, where you can inspect the lines, addresses, and mapped values. Retrieval is when the Biz-Tech Services Acumatica WooCommerce connector captures order values into the staging record, so this is your last chance to adjust what the import will write.
Step 3: Import Selected Orders, or Use Import All
The Import button imports the orders you selected in the grid; Import All imports every order displayed there, which is the right choice once you trust the retrieval filters. This stage schedules separately: the Import All screen must be set up, with Import WooCommerce Orders selected in the Screen ID field.
Step 4: Import a Single Order by ID with the Import Order Action
Sometimes you do not want a batch. The Actions workspace of the WooCommerce Orders screen includes Import Order: by choosing the store code and setting the order ID, this action retrieves an individual order into Acumatica. Use it when the date window or status filters would make a full run too wide or too narrow to catch the order you care about.
Which Screen Your Order Lands On
Many support questions about the WooCommerce order import in Acumatica are really about routing: an order was retrieved, the user cannot find it, and concludes retrieval failed. Usually it landed on the other screen.
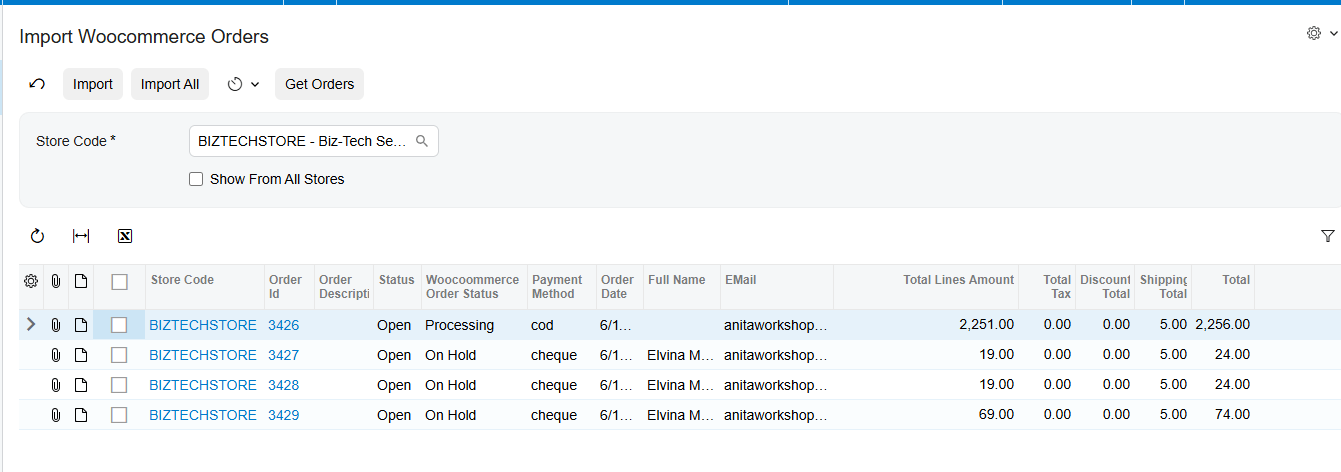
During the retrieval and import process, orders with the canceled, failed, empty, and completed statuses are displayed on the WooCommerce Orders screen of Biz-Tech Services Acumatica WooCommerce integration. Orders with the on-hold, partial-shipped, processing, and pending statuses are displayed on the Import WooCommerce Orders screen, and that processing screen only shows orders with the Partially Shipped, On hold, Pending, Pending payment, and Processing statuses in the store.
The Import WooCommerce Orders screen is a work queue holding orders that are still actionable; the WooCommerce Orders screen is the record of the order as the Biz-Tech Services Acumatica WooCommerce connector knows it, whether or not anything further should happen to it.
The same routing explains a behavior that looks like a defect. After the WooCommerce Cancel Order process, when the status becomes Cancelled in both systems, reopening the order in Acumatica does not send the request again to update the store. You can change the status manually in WooCommerce and retrieve the order again, but it appears on the WooCommerce Orders screen based on its processing status, not on the Import WooCommerce Orders screen, because it already has an associated sales order.
Document Triggers: What the Import Creates
Knowing which documents the import triggers is what lets you verify a run. The primary document is the Acumatica sales order, created with the type set in Import WooCommerce Orders To and the Order Type and Warehouse ID defaults from the Order Settings tab.
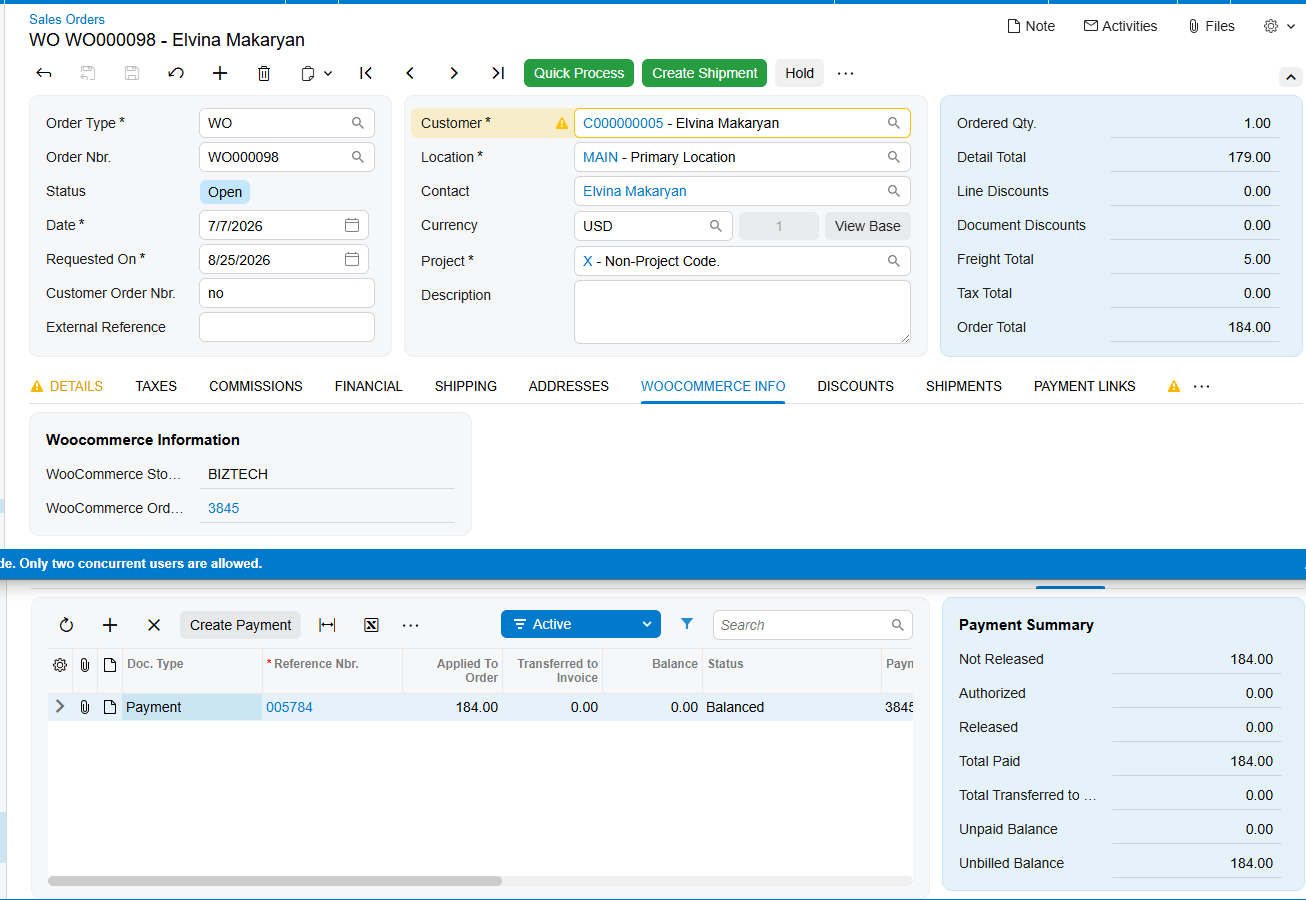
You confirm the trigger fired from the WooCommerce Orders screen, not by hunting through Sales Orders. Sales Order Number displays the order sales order number if the order is imported, and Invoice Number displays its invoice number if the order is invoiced. An empty Sales Order Number on a retrieved order means retrieval succeeded but the import did not.
The second document the import can create is a payment. If Skip WooCommerce Payment is not selected, payment information comes across using the Payment Method and Payment Type you configured, and if Release Payment during Order Import is selected the payment is released automatically at the time the order is imported. Leave it unselected and the payment waits for your finance users.
The status on the WooCommerce Orders screen reflects the initial state of the order upon import. If the order is fulfilled in WooCommerce afterwards, Actions then Refresh Order updates the status in Acumatica to match the store. That is the answer whenever a status looks stale, and it is lighter than re-importing.
Further documents follow through the normal Acumatica flow rather than from the import itself: users click Create Shipment, confirm the shipment once box ID and tracking number are set, click Prepare Invoice, and then Release. The order status in both systems then changes to Completed and Invoice Number links back to the invoice.
Mapping Rules That Decide What Lands on the Order
Two settings decide which fields get pulled in, and one rule about timing decides whether changing those settings affects the orders in front of you.
The Order Mappings Tab
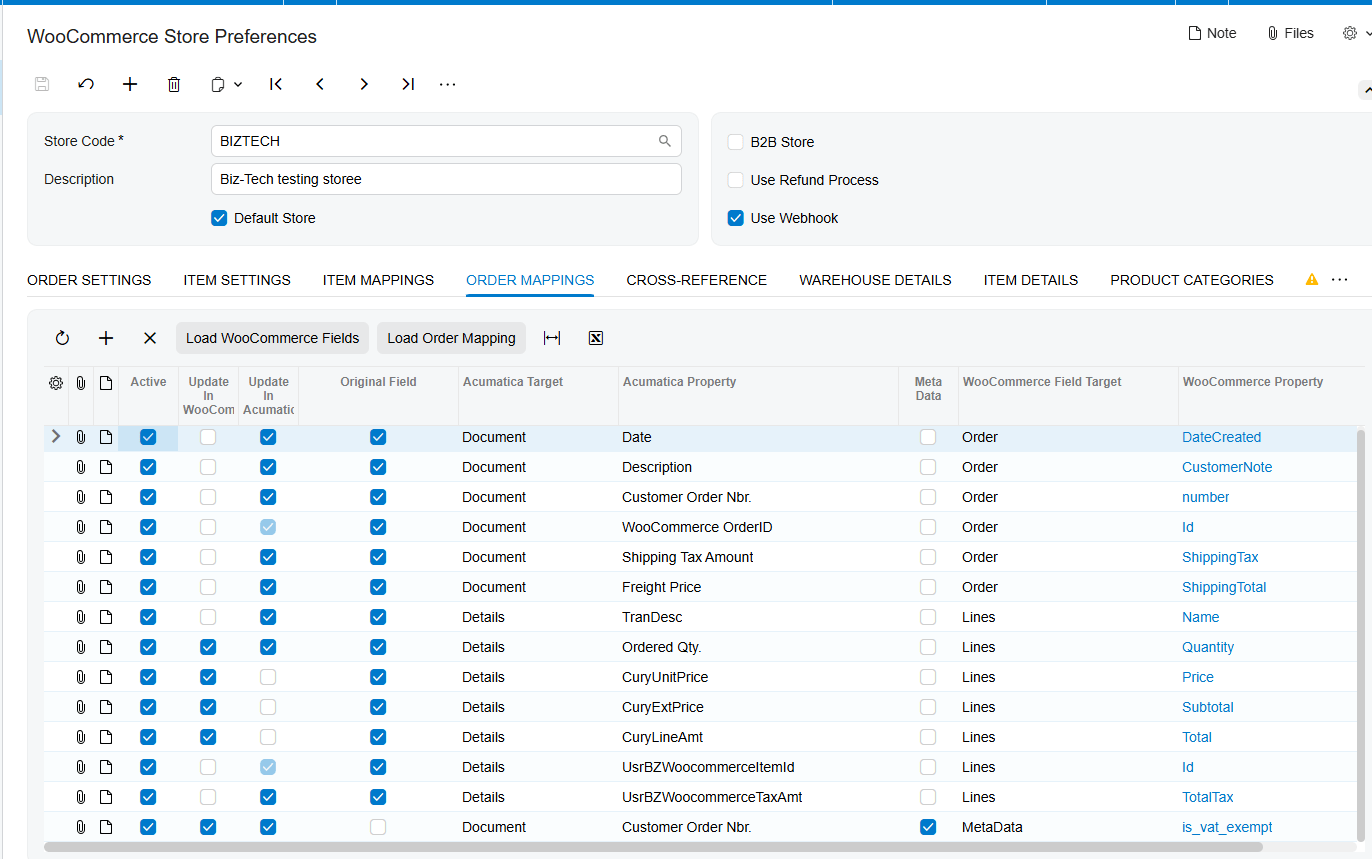
This tab on the WooCommerce Store screen holds the order mapping configuration. By default it is automatically loaded and mapped during the save action on the WooCommerce Store Preferences screen, so a correctly configured store already has a working default. Users can also configure it manually, and Load WooCommerce Fields loads or updates all related order fields under the WooCommerce properties.
Acumatica Target specifies the type of sales order field: Document for header fields or Details for line fields. That is the first decision on every row, because it decides whether a value lands once on the order or once per line. Acumatica Property is the field itself, and it can be an original or a custom field.
On the other side, WooCommerce Field Target specifies the type of order field, such as Order, Line, or Metadata, and WooCommerce Property is the field loaded during Load WooCommerce Fields. Original Field indicates a field is an original field, and original fields must be mapped for order synchronization; Meta Data should be checked when the field target is meta data. When a store value never reaches Acumatica, an unchecked box on that row is the first thing to inspect.
Direction is controlled by two checkboxes. Update in Acumatica applies updates to that field during order synchronization; Update in WooCommerce applies them in the store instead. For an import task you want Update in Acumatica, because a row with only the other direction selected changes nothing on your sales order.
The Import Fields Tab
The Import Fields tab on the WooCommerce Orders screen shows information related to the Order Mappings configured on the store. It is populated based on the order mapping during the Get Order process, then imported into Acumatica during the Order Import process. What you see there is what the import will write.
The Rule That Catches Everyone: Mapping Changes Do Not Reach Retrieved Orders
The documentation states it plainly: any changes to the Order Mapping configuration do not affect orders that have already been retrieved. Users can manually make changes only from the Import Fields tab of the WooCommerce order before importing it into Acumatica.
So if you find a mapping mistake after a batch retrieval, fixing the Order Mappings tab corrects future retrievals only. The staged orders keep the values they captured, and your only in-place remedy is editing Import Fields on each one. Validate the mapping against a few test orders first.
Ship Via Cross-References
A WooCommerce shipping method name is not an Acumatica Ship Via code, so it needs a translation layer. The Cross-Reference options specify which entities are matched between the two systems, for example how payments, countries, or ship vias correspond. After you select the checkbox, the field appears on the Cross-Reference tab, and only checked entities appear in that drop-down.
On that tab, Get Shipping Methods loads the WooCommerce shipping methods under the WooCommerce Value field mapped with the Acumatica Ship Via. The verification point is documented: after the order import process, the Ship Via value should be visible in the Delivery Settings field on the Shipping tab of the Sales Orders screen.
Customer, Payment, Discount, and Tax Behavior on Import
Four groups of options decide how much of the WooCommerce order context reaches Acumatica, and each has a documented fallback worth knowing.
Customer Information Options
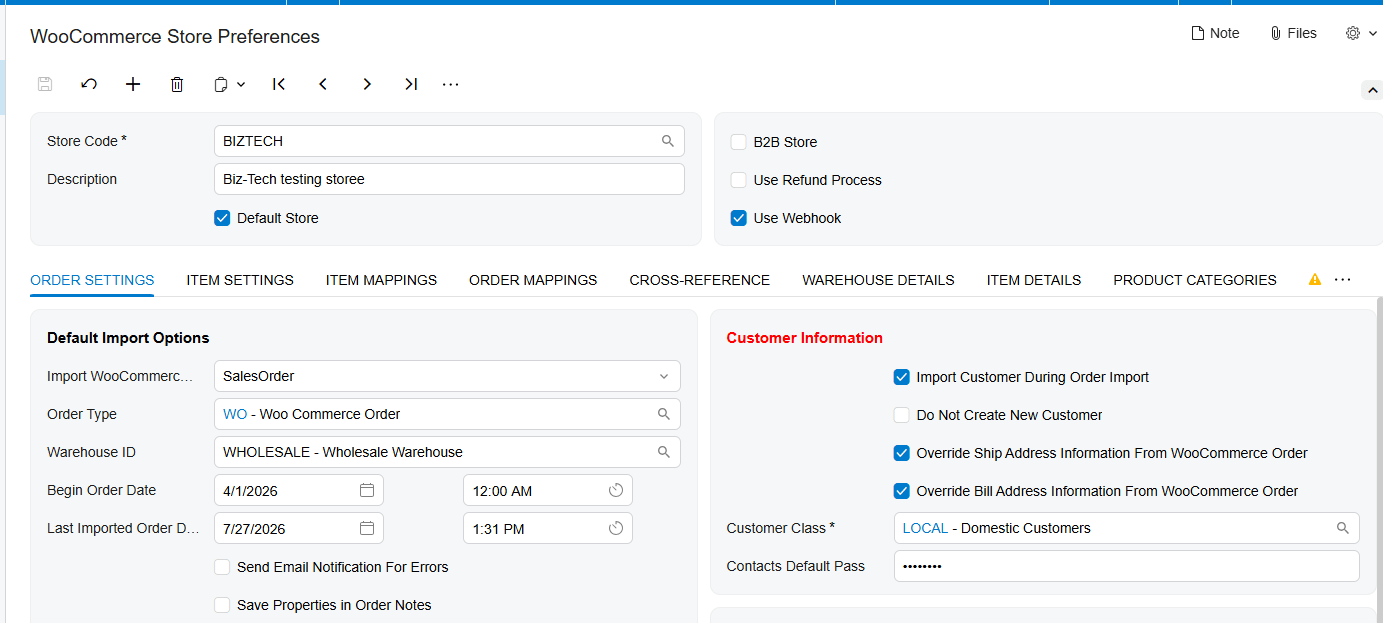
Import Customer means the Biz-Tech Services Acumatica WooCommerce integration imports the customer information from WooCommerce into a new customer record in Acumatica. Override Ship Address Information from WooCommerce Order imports the address the order will ship to, and Override Bill Address Information from WooCommerce Order imports the address of the party who will pay the bill. Customer Class sets the default class on new customers created by the Biz-Tech Services Acumatica WooCommerce integrator.
The fallback is the part to remember: if the Import Customer checkbox and the ship and bill address options are unselected, customer data is not imported, and the order is created using the default customer information in Acumatica. That is legitimate for a business that does not want a record per online shopper, and it also explains reports that every imported order landed on the same customer.
Individual customers are not imported directly from WooCommerce; they arrive through the orders. The connector searches by WooCommerce customer ID, then billing email, then account name, and creates a new customer and contact if none is found.
Shipping and Payment Options
The shipping option determines which shipping information is imported. Based on the configured setup, the shipping total can be imported as either the Freight Price or the Premium Freight Price, so web shipping revenue lands in whichever field your reporting already uses.
If Skip WooCommerce Payment is selected, imported orders will not include payment information and are created without recording any payment. If it is unselected, more options appear: Payment Method specifies the method to assign during import, for example Credit Card, PayPal, or Bank Transfer; Payment Type determines the payment type in Acumatica, for example Prepayment, Cash, or Credit; and Release Payment during Order Import releases the payment automatically.
Credit card orders divide the work between the systems. In WooCommerce, payments can be authorized at checkout, meaning card details are verified and funds reserved by the gateway but not collected. Once the order is synchronized into Acumatica the system does not authorize again; it performs a post-authorization that records the existing authorization in Accounts Receivable, and the payment can then be captured when the order is ready to fulfill. The connector supports Ebizcharge, Fortis, and other credit card payment methods, each of which must also be set up in the ERP.
Discounts
With line-level discounts, discounts are calculated for each individual item and the Discount Amount and Discount Code fields in the sales order Document Details table are populated accordingly. With order-level discounts, the discount applies to the whole order and the details appear in the Discount section. When a total looks wrong, check which of the two places the discount landed.
Tax Options
These options ensure taxes for WooCommerce orders are calculated and applied correctly in Acumatica, with flexibility for businesses using external tax services. Customer Tax Zone is the combined tax of the effective taxes for a zone, defined by the locations of vendors or customers. Tax ID is the customer tax ID, and Taxable Category creates or edits the tax categories applied to products. Is Freight Taxable in WooCommerce indicates freight is taxed in the store, and Use External allows another tax service, for example Avalara.
Do Not Import WooCommerce Price
If this checkbox is selected, the system ignores the WooCommerce prices during the order import process and uses the corresponding Acumatica item prices instead. Businesses that treat the ERP as the pricing authority want this; businesses running store promotions do not. When it is selected, the Send Invoice Info during Release, Invoice checkbox becomes disabled.
Validation and Common Exceptions
Most failures in a WooCommerce order import into Acumatica fall into a few patterns. Working through them in this order resolves most cases without guesswork.
The Order Was Never Retrieved Because Its Status Is Not Selected
Only orders matching the selected WooCommerce Status are included, and the corresponding checkbox must be selected for an order to be retrieved and imported. A store that adds a new order status, or routes orders through a status nobody enabled, produces this symptom.
The Date Window Excluded It, or the Updated-Date Rule Surprised You
An order predating Begin Order Date will never arrive, no matter how often you re-run Get Orders. And because orders are imported on their updated date rather than their created date, an order can fall outside the window you expected in either direction. When the dates fight you, use Import Order with the order ID.
The Item Does Not Exist in Acumatica
The Biz-Tech Services Acumatica WooCommerce connector searches for the Inventory CD using the WooCommerce product SKU. If found it retrieves that item; if not, the error message The item {0} does not exist in the system is displayed. If the Import Item checkbox is not selected, the program prohibits the import and creation of items unless they already exist in Acumatica, so an unselected checkbox plus a new web-only SKU reliably produces this error.
A Customer Was Not Created and Every Order Went to the Same Account
This is the documented fallback, not a fault. When Import Customer and the address override options are unselected, customer data is not imported and the order uses the default customer information in Acumatica. Select the options you want, and set Customer Class.
Your Mapping Edits Did Not Apply
Changes to the Order Mapping configuration do not affect orders already retrieved. Either edit Import Fields on each affected order before importing it, or work with freshly retrieved orders so the new mapping is applied during the Get Order process.
Ship Via Is Blank on the Sales Order
A blank Delivery Settings value on the Shipping tab of the Sales Orders screen points at the Cross-Reference tab: either the ship via entity was never checked in the Cross-Reference options, or the WooCommerce shipping method has no matching row. Run Get Shipping Methods and map each method to an Acumatica Ship Via.
Where the Error Messages Live
Send Email Notification for Errors alerts users about failed orders at the address configured on the Order Settings tab, during batch imports and during process updates for the same order. For the full picture, the Get Order Process Error Messages screen includes all error messages generated during the order retrieval process.
Where to Check Your Work
After a WooCommerce order import run in Biz-Tech Services WooCommerce Acumatica integration, verify the result rather than assuming it. These fields tell you within minutes whether the import did what you intended and, if not, where it stopped.
1. Store Code on the Import WooCommerce Orders screen: confirm you retrieved from the store you meant.
2. Last Imported Order Date on the Order Settings tab: it shows where the next import process will begin.
3. The WooCommerce Status checkboxes: the status of the order you are looking for must be selected.
4. Sales Order Number on the WooCommerce Orders screen: populated means the order was imported and a sales order exists.
5. Invoice Number on the WooCommerce Orders screen: populated means the order has been invoiced.
6. Status on the WooCommerce Orders screen: run Refresh Order if it looks stale against the store.
7. Import Fields tab: populated from the order mapping, and the last place to correct values before importing.
8. Document Details, Total Lines Amount, Discount Total, Shipping Total, Total Tax, and Total on the WooCommerce Orders screen: compare against the order in the store.
9. Discount Amount and Discount Code in the sales order Document Details table, or the Discount section for order-level discounts.
10. Delivery Settings on the Shipping tab of the Sales Orders screen: the mapped Ship Via should be visible after the import.
11. Warehouse on the imported sales order: it should match the Warehouse ID default.
14. The Payments tab of the sales order, with Payment Method and Payment Type: confirm the payment was created, and released if that option is selected.
15. The Get Order Process Error Messages screen: review it after every scheduled run.
Importing WooCommerce Orders: Frequently Asked Questions
Why is my WooCommerce order not showing on the Import WooCommerce Orders screen?
Usually this is routing rather than failure in Biz-Tech Services Acumatica WooCommerce integrator. That screen only shows orders with the Partially Shipped, On hold, Pending, Pending payment, and Processing statuses; canceled, failed, empty, and completed orders appear on the WooCommerce Orders screen. If it is on neither, check that its status is selected and its updated date falls in your window.
I changed the order mapping. Why did nothing change on my imported orders?
Because changes to the Order Mapping configuration do not affect orders already retrieved. The Import Fields tab was populated from the mapping during the Get Order process, and that captured set is what the import writes. Edit Import Fields manually before importing, or retrieve fresh orders.
What does the error The item does not exist in the system mean?
It means the Biz-Tech Services WooCommerce Acumatica connector searched for an Inventory CD using the WooCommerce product SKU and found no match. Either create the item with an Inventory CD matching the store SKU, or correct the SKU in WooCommerce. If the Import Item checkbox is not selected, the Biz-Tech Services WooCommerce Acumatica integrator will not create the missing item.
Can I import just one WooCommerce order without running a whole batch?
Yes. Use the Import Order action in the Actions workspace of the WooCommerce Orders screen: choose the store code, set the order ID, and it retrieves that individual order into Acumatica. It is the quickest way to retry one order that failed in a batch.
Every imported order is on the same customer. What did I configure wrong?
Probably nothing broke; this is the documented fallback. If the Import Customer checkbox and the address override options are unselected, the order uses the default customer information in Acumatica. Select Import Customer and the overrides you need, and set Customer Class.
The order status in Acumatica does not match WooCommerce. Do I need to re-import?
No. The status on the WooCommerce Orders screen reflects the initial state of the order at import, so it does not track later changes on its own. If the order is fulfilled or updated in the store afterwards, go to Actions and click Refresh Order.
Why was an old order imported again?
Because orders are imported on their updated date rather than their created date. If someone edited an old order in WooCommerce, its updated date moved into your retrieval window and the Biz-Tech Services Acumatica WooCommerce picked it up. That is also what lets later store edits reach Acumatica.
Can I automate the WooCommerce order import instead of clicking through it?
Yes, and the two stages schedule separately. For retrieval, configure the Get Orders screen and select Import Orders from WooCommerce in the Screen ID field. For import, set up the Import All screen and select Import WooCommerce Orders. Scheduling retrieval only is a good middle ground while you validate the configuration.
Work With the Biz-Tech Services WooCommerce Connector
Importing WooCommerce orders into Acumatica rests on decisions made in advance. The Order Settings tab decides which orders are eligible, through the document type, the Order Type and Warehouse ID defaults, the date window, and the status selections. Get Orders stages what matched, each status decides which screen the order lands on, and Import or Import All turns a staged order into a sales order with its payment, discounts, freight, and tax. When something goes wrong, the Sales Order Number field, the Import Fields tab, and the Get Order Process Error Messages screen tell you where the run stopped.
If your business runs WooCommerce alongside Acumatica ERP and wants order import that is predictable, auditable, and configured to match how you already work, the Biz-Tech Services WooCommerce Acumatica Connector is built for exactly that. Visit https://biz-techservices.com to learn more about our Acumatica expertise or to schedule a personalized demonstration.
Check also the video - https://www.youtube.com/watch?v=N8bnQS5EKTw
How to Create Acumatica Sales Orders from PDF Purchase Orders
How to Create Acumatica Sales Orders from PDF Purchase Orders
This guide shows you how to turn a customer PDF purchase order into an Acumatica sales order without retyping a line, using Biz-Tech Services DocVision and a template that already exists for that customer. PDF stands for Portable Document Format, and a purchase order (PO) is the document your customer sends when they want to buy. By the end you will know how to read the color coding that says whether a document is ready, what Generate Sales Order creates, and what to do when a line refuses to map.
DocVision, from Biz-Tech Services, Inc., automates the creation of sales orders in Acumatica from uploaded PDF files such as purchase orders or shipping requests. It is built natively for Acumatica, so it runs inside the same secure environment and respects the same user permissions and audit trails as the rest of your ERP (Enterprise Resource Planning) system. This article skips the one-time configuration work and concentrates on the recurring task your order desk performs daily: a customer PDF arrives, and somebody has to make an Acumatica sales order out of it.
Before You Start: What Must Already Exist
Creating a sales order from a PDF is fast only when the setup behind it is done. DocVision does not guess at document layouts. It reads each PDF through a template built for that specific customer format, so the first question is whether that template exists. Three things must be in place:
1. A template for that customer PDF layout. Templates are created on the PDF Import Settings screen, where a PDF is imported and the mapping between PDF values and Acumatica values is defined. DocVision supports per-customer PDF mapping, so each format gets its own template, which lets your business handle several layouts at once.
2. Inventory and customer cross-references. When CrossRef is enabled for the Inventory ID field, an Inventory Cross-Reference tab appears where PDF items are mapped to Acumatica Inventory IDs, manually or by importing all items via Excel. When Cross Reference is selected, a Customer Cross-Reference tab appears for mapping PDF customer values and locations to Acumatica customers and locations. These tables turn a part number printed on paper into an Acumatica record.
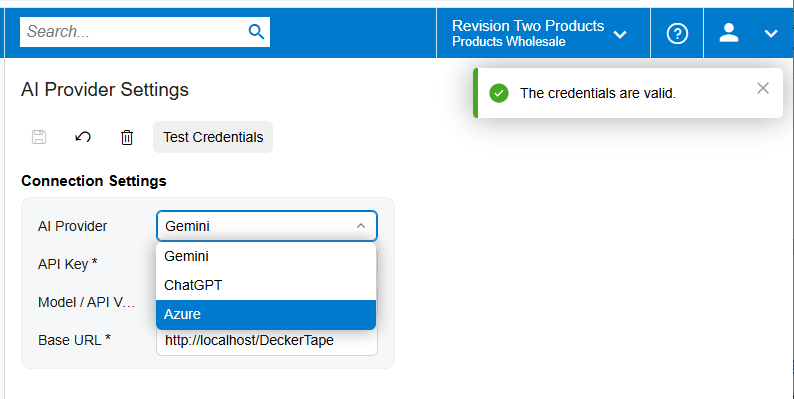
3. Tested Azure credentials. The Azure setup lets the ERP run on the Microsoft cloud platform and, for DocVision, supports importing customer purchase order PDF files so they can be processed and converted into sales orders in Acumatica. The setup screen has a Test Credentials button that confirms they are configured correctly. Press it before troubleshooting anything else, because an import that never starts is usually a credentials problem, not a mapping problem.
Treat all three as background. Once they exist for a customer, the daily work happens entirely on the Import Documents screen and the batch screen.
Turning a PDF Purchase Order into a Sales Order, Step by Step
The recurring task has four moves: get the document in, confirm which template read it, review what the template produced, and generate. Skipping the review step is the most common reason a generated order comes out wrong.
Step 1: Import the Document
There are two ways in. The first is the PDF Import Settings screen, where the Plus button opens a new workspace, a PDF is imported, and a template is created. The second, and the one your order desk will use most, is the Import Documents screen itself, which enables documents to be imported directly from that screen. Importing there keeps users in the operational screen rather than the configuration screen, and it is also the case in which the Validate Items button gets the most use.
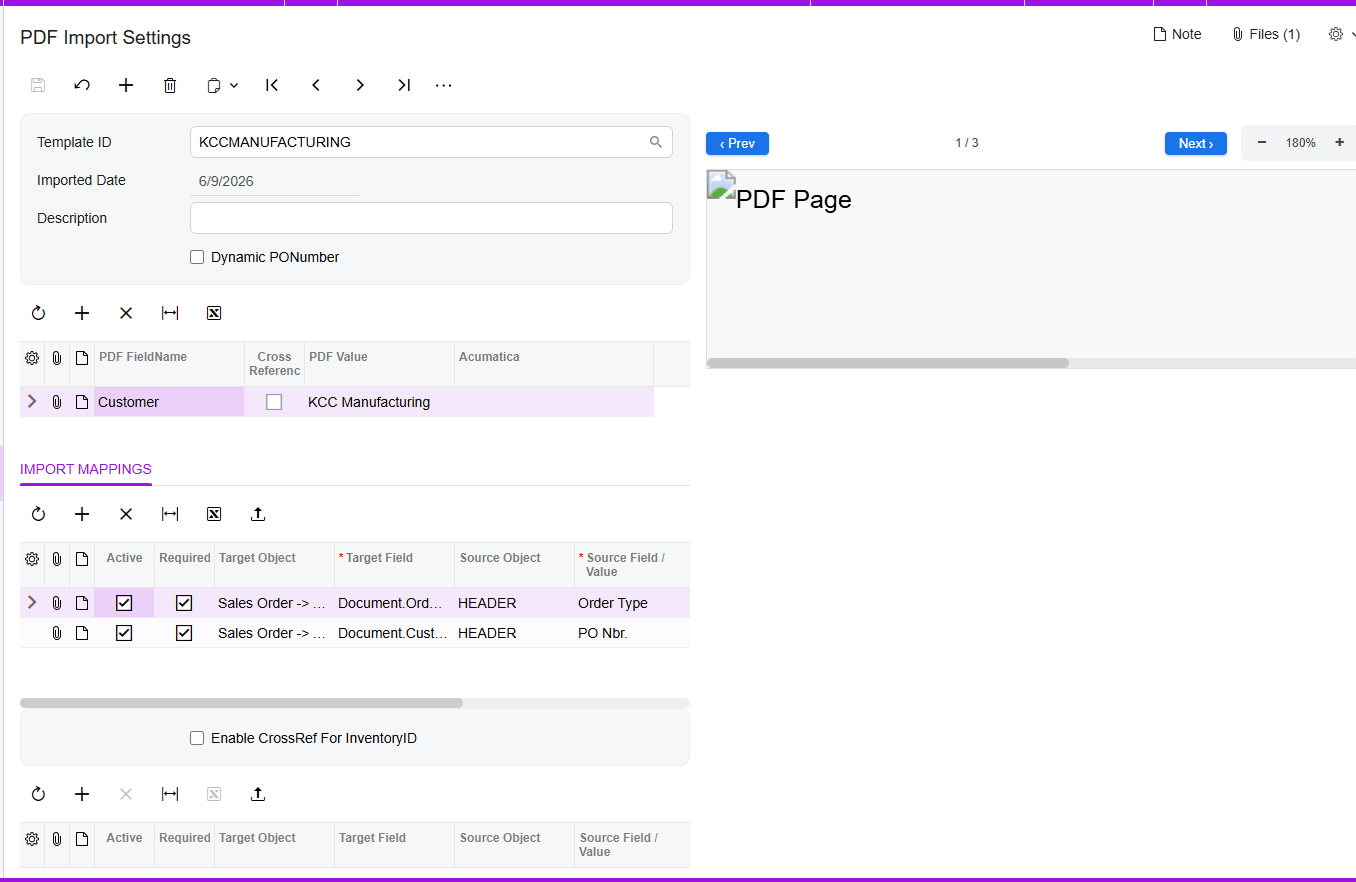
Once the file is in, the system automatically sets PDF FieldName and PDF Value, and on the Import Mappings tab it automatically sets the mappings between Target Object and Source Field. The right side of the screen displays the file, and you can move to the next or previous page and zoom in or out. That side-by-side view matters: when a value looks wrong in the grid, you can read the original page beside it.
Step 2: Read the Retained Template ID
Selecting a document number on the Import Documents screen displays the already imported PDF from PDF Import Settings along with all mappings for that document, and it retains the Template ID. Read that Template ID first. It tells you which rules interpreted this PDF, which means it tells you whose mapping table to open when a value is missing or misread.
The Template ID also appears on the Documents tab beside the document number, the Order Type, and the Customer. If it is not the template you expected for that customer, stop. A document read through the wrong template still produces mapped values, and they look plausible until they land on an Acumatica sales order with the wrong quantities or ship-to location.
Step 3: Review the Mapped Values
This is why the Import Documents screen exists: it allows you to make changes to existing or previously imported documents, so anything the template got wrong is corrected here rather than on the sales order afterward. Work down the lines against the PDF preview on the right. Check the header values first, because a wrong customer or purchase order number affects every line beneath it, then check the item lines.
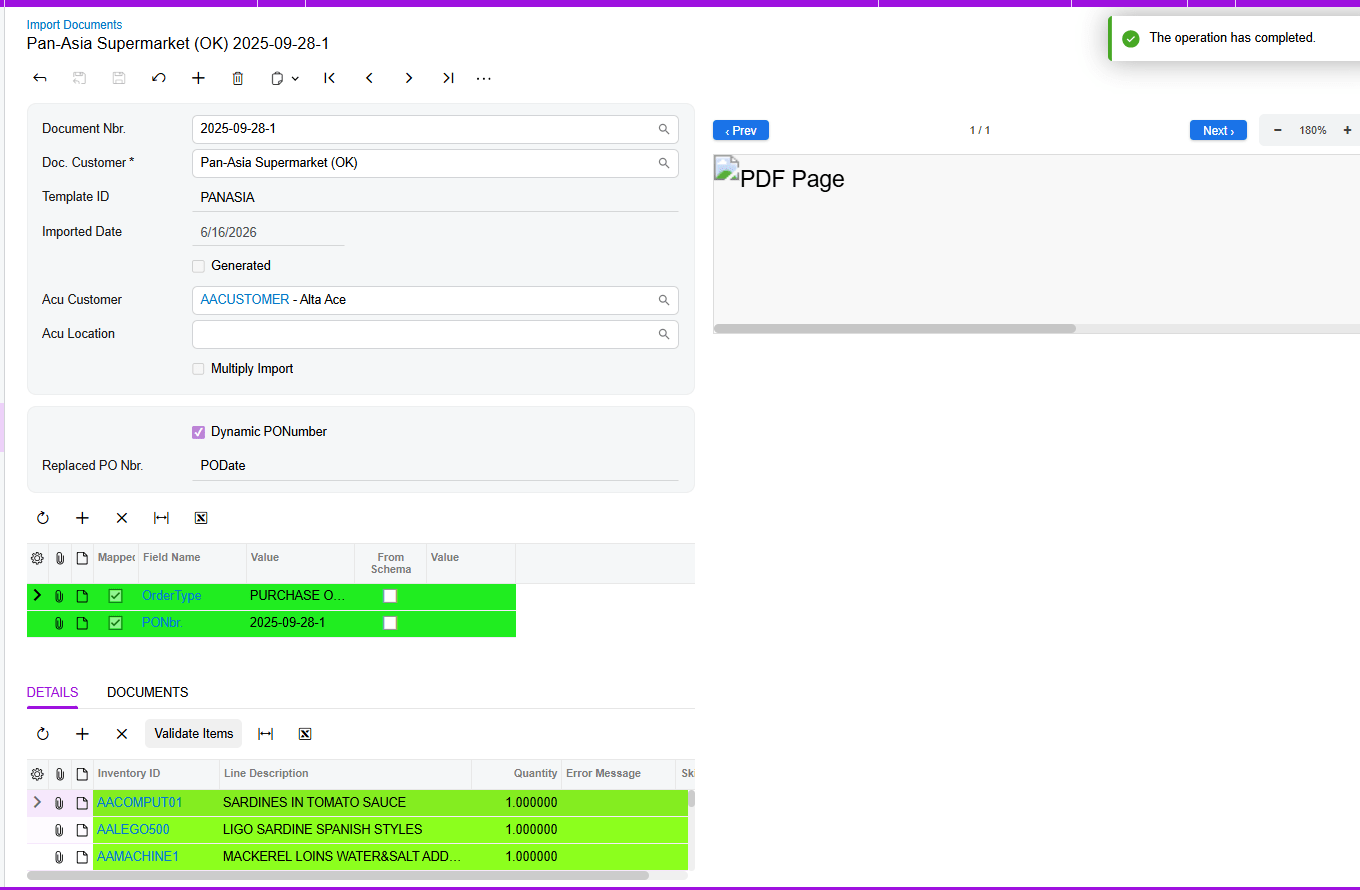
Use the color coding as your triage tool while you review. Green lines need nothing. Yellow and red need different kinds of attention, and knowing which you are looking at determines whether you press a button or open a cross-reference table.
Step 4: Generate the Order from the Three Dots Menu
Once the setup is complete and the document reviews clean, open the three dots and select Generate Sales Order. That command creates a sales order for all the mapped data on the document. There is no separate confirmation stage afterward, which is why the review that precedes it carries so much weight.
Generation is also the point at which the Active checkbox becomes final. Only fields whose Active checkbox is selected are uploaded during sales order generation, so a field sitting in the mapping grid is not necessarily a field that will reach the order.
Reading the Color Codes on the Import Documents Screen
DocVision uses three colors in the user interface, and each carries a different instruction.
1. Green indicates that everything is mapped correctly and the file is ready for generating a sales order. Green is a go signal, not merely an absence of errors.
2. Red means that during the import process there was an issue with an item line. The line turns red and an error message is displayed in the Error Message field on that line.
3. Yellow indicates a mapping problem, for example items that are not mapped correctly.
The practical difference between red and yellow is where the fix lives. Red is line specific and self describing: the system already knows what went wrong and has written the reason into the Error Message field, so your first move is to read that field rather than guess. Red usually means the line as imported must be corrected on the document.
Yellow is a mapping gap, not a broken line. The value came off the PDF fine, but DocVision could not connect it to an Acumatica record, most often because a PDF item has no counterpart in the Inventory Cross-Reference. Yellow is therefore often fixable in bulk, because the missing piece is usually a cross-reference entry that resolves many documents at once. In short: red sends you to the Error Message field on the line, yellow sends you to the cross-reference tables on the PDF Import Settings screen.
Document Triggers: What Generate Sales Order
Choosing Generate Sales Order sets off a short chain of results. Knowing all four tells you whether generation actually succeeded rather than merely appeared to.
1. The sales order itself is created in Acumatica from all the mapped data on the document. Everything with Active selected is carried across; everything without it is not.
2. The order number and the Order Type are displayed against the document. That is your immediate confirmation and the value you use to find the order in Acumatica.
3. The Generated checkbox is set automatically on the Documents tab. You do not tick it yourself, which is what makes it a reliable way to separate documents that have already produced an order from documents still awaiting review.
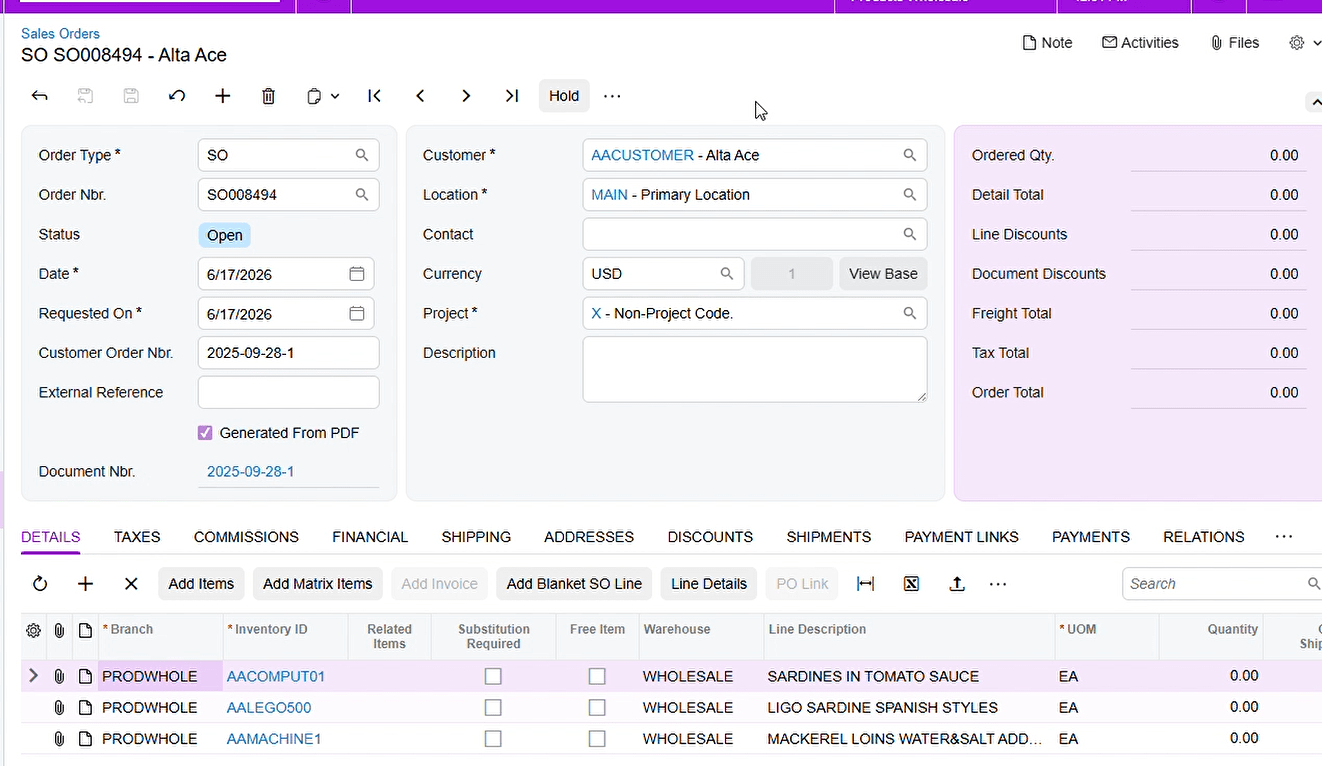
4. The document number becomes visible on the Sales Order screen. That is the traceability link in the other direction, from an Acumatica order back to the PDF it came from, which makes an audit or a customer dispute answerable.
Read those four together as one completion test. If the order number appears but the Generated checkbox is not set, or the document number is missing from the Acumatica sales order, something did not finish.
Mapping Rules That Decide What Lands on the Order
Even when you are not building templates, four rules determine what a template puts on an order. These are the rules you reason with when a generated Acumatica sales order does not match the PDF.
The Active Checkbox Controls Whether a Field Is Uploaded at All
During sales order generation, only the fields whose Active checkbox is selected will be uploaded. This is the most consequential setting in the mapping grid and the easiest to overlook, because an inactive mapping still shows a PDF FieldName, a PDF Value, and a target. It simply does nothing at generation time. If a value is correct on the document but absent from the finished order, check Active before anything else.
The Target Object Path Decides Header Versus Line
The Target Object is where a mapped PDF value is told to land in Acumatica, and the path decides whether it becomes a header field or a line field. To map header fields of a sales order, select Sales Order then Advanced in the Target Object. To map details on the Sales Order screen, select Sales Order then Details then Advanced. Getting this backwards is a quiet failure: a value routed to the header when it belongs on a line will not repeat per item.
Cross-References Translate Customer Language into Acumatica Records
Customers write their own part numbers and address formats on their purchase orders, and neither matches your Acumatica master data by default. Enabling CrossRef for the Inventory ID field makes the Inventory Cross-Reference tab appear, where PDF items are mapped to Acumatica Inventory IDs manually or imported in bulk via Excel. Selecting Cross Reference makes the Customer Cross-Reference tab appear, for mapping PDF customer values and locations to Acumatica customers and locations. This supports smart customer recognition, where Customer and Ship-To information is identified from each PDF through the pre-configured template.
Dynamic PO Number Handles PDFs With No Purchase Order Number
Not every incoming document carries a purchase order number. Under the Description section of the template there is a Dynamic PO Number field. If there is no PO number in the PDF, that checkbox is automatically selected during the file import process and a warning is displayed: "The document for the mapping does not have any number. Please select an alternative PO Number." After that warning, a Release PO Number field appears, which allows you to map the values of the header with existing values of the field. The document is not rejected for lacking a number; you nominate an alternative header value to stand in, so the order still has a meaningful reference.
Validation and Common Exceptions
Most days this is uneventful. The exceptions below are the ones that consume time, and each has a specific place to look.
Yellow Warnings and the Real Limitation of Validate Items
To resolve yellow warnings, use the Validate Items button. It maps all PDF items to Acumatica values and displays them in the Details tab, provided the items are already mapped in the Inventory Cross Reference on the PDF Import Settings screen. That proviso is the limitation, and it is worth stating plainly: Validate Items applies cross-references that already exist. It does not create them. Pressing the button repeatedly on an item that was never cross-referenced will not eventually produce a match.
When yellow persists, add the missing entry to the Inventory Cross-Reference on the PDF Import Settings screen, return, and press Validate Items again. The button is meant to be used frequently, particularly when the PDF was imported from the Import Documents screen itself.
Red Lines and the Error Message Field
A red item line means the import process hit an issue with that specific line, and the reason is written into the Error Message field on the line. Read it first. Because the message is per line, two red lines on one document can have entirely different causes. Correct the line on the Import Documents screen, then generate.
A Mapped Field Is Missing from the Generated Order
This is the classic Active checkbox symptom. The field is visible in the mapping and the PDF Value looks right, yet the generated Acumatica sales order does not show it. Because only fields with Active selected are uploaded, an unselected Active checkbox produces exactly this result with no error and no color warning to hint at it. Select Active on the mapping and generate again.
A Document With No Purchase Order Number
When the incoming PDF has no PO number, expect the Dynamic PO Number checkbox to be selected automatically and the warning about the missing number to appear. This is not a failure; it is a prompt to choose an alternative through the Release PO Number field by mapping header values to existing values of the field. Decide as a business which header value stands in, and apply it consistently, so everyone searching for the order later knows what to search on.
Generating Sales Orders in Batches
One document at a time is fine for exceptions, but it is not how a high-volume order desk works. The Generating Sales Orders screen has been modified to allow importing orders in batches and generating sales orders, which is the mode to use when a stack of customer PDFs arrives together.
On that screen, the Document Number field lets you filter by document number and generate the corresponding sales order. In a batch context this narrows a large working set to the documents you intend to process, so a run does not sweep in a document nobody has reviewed. Triage on the Import Documents screen first, then filter and generate.
To find the documents in the first place, DocVision includes a generic inquiry listing all document numbers, Template IDs, customer information, and document generation dates. A generic inquiry (GI) is standard Acumatica functionality for building a queryable list. Hyperlinks have been added to these fields and they direct back to the Import Document screen. That answers two questions at once: which documents were generated and when, and how to jump from a listed document number into the screen where you can correct it.
Where to Check Your Work
After generating one order or a batch, walk this list. Each item names something DocVision populates or displays, so every check is a comparison rather than a judgment call.
1. Template ID on the document, confirming the right template interpreted this customer PDF.
2. Document number, which is your handle for the imported PDF everywhere else in the system.
3. Customer on the Documents tab, checked against the Customer Cross-Reference expectation for that PDF.
4. Order Type displayed against the document after generation.
5. Order number displayed against the document, confirming an Acumatica sales order actually exists.
6. Generated checkbox, which the system sets automatically once generation succeeds.
7. Error Message field on any red line, read in full rather than skimmed.
8. Line colors across the document, with green on every line you intended to include.
9. Details tab contents after pressing Validate Items, confirming the PDF items resolved to Acumatica values.
10. Active checkbox on every mapping whose value you expect to see on the finished order.
11. Dynamic PO Number and, where it applies, the Release PO Number mapping you selected.
12. Document number on the Sales Order screen in Acumatica, closing the loop from order back to source PDF.
Creating Sales Orders from PDFs: Frequently Asked Questions
Can I import a PDF without leaving the Import Documents screen?
Yes. The Import Documents screen enables documents to be imported directly from it, as well as letting you change existing or previously imported documents. For daily order processing this is the better route, because it keeps users in the operational screen, and it is the case in which Validate Items is expected to be used frequently.
Why is my item line yellow after I pressed Validate Items?
Validate Items maps PDF items to Acumatica values only if those items are already mapped in the Inventory Cross Reference on the PDF Import Settings screen. If the entry does not exist, the button has nothing to apply and the line stays yellow. Add it, then press Validate Items again.
A field is mapped, so why is it missing from the sales order?
During sales order generation only fields whose Active checkbox is selected are uploaded. A mapping present but not marked Active is skipped, and nothing flags it as a problem. Select Active on that mapping and generate the Acumatica order again.
What does it mean when a line turns red?
Red means the import process found an issue with that item line, and the system writes the reason into the Error Message field on the line. Read that field first. Because each red line carries its own message, treat every red line as a separate problem.
What happens if the customer PDF has no purchase order number?
During import, DocVision automatically selects the Dynamic PO Number checkbox and displays a warning that the document has no number, asking you to select an alternative PO Number. A Release PO Number field then appears, letting you map header values to existing values of the field. The document is not rejected; it needs a substitute reference.
How do I tell whether a document has already produced a sales order?
Check the Generated checkbox on the Documents tab, which the system sets automatically after a sales order is generated. The order number and Order Type displayed against the document confirm the same. For a broader view, use the generic inquiry, which lists document numbers, Template IDs, customer information, and generation dates.
How do I trace an Acumatica sales order back to the PDF it came from?
After generation the document number is visible on the Sales Order screen, linking the order back to the imported document. From the other direction, the generic inquiry carries hyperlinks that navigate to the Import Document screen. Between the two, every generated Acumatica sales order ties back to its source PDF.
Can I process a stack of PDFs at once instead of one at a time?
Yes. The Generating Sales Orders screen has been modified to allow importing orders in batches and generating sales orders, and the Document Number field filters the set to the documents you want. Triage on the Import Documents screen first, so every document in the batch is already green, then run it.
Work With the Biz-Tech Services DocVision Product
The recurring task is short once the groundwork exists: import the customer PDF, confirm the retained Template ID, review the mapped values and clear anything red or yellow, then choose Generate Sales Order from the three dots and verify the order number, the Order Type, the Generated checkbox, and the document number on the Acumatica sales order. The color coding tells you where to look, the Error Message field tells you why, the Active checkbox governs what reaches the order, and the batch screen and generic inquiry scale the same routine to a full day of documents. That is Acumatica PDF automation with DocVision.
If your business receives customer purchase orders as PDF files and wants to create sales orders from them without manual data entry, Biz-Tech Services, Inc. can help you configure DocVision for your document formats and your Acumatica environment. Visit https://biz-techservices.com to learn more about our Acumatica expertise or to schedule a personalized demonstration.
How to Add CRV Fees to Sales Orders in Acumatica
How to Add CRV Fees to Sales Orders in Acumatica
Adding California Redemption Value, or CRV, fees to a sales order in Acumatica should take no extra clicks from the order entry user: you select the customer, add the beverage item, and the CRV line appears on its own. This article walks through exactly what has to be configured for that to happen, what the system does the moment a parent item is entered, and the short sequence of checks to run when the CRV line does not show up.
CRV is a refundable deposit collected on eligible beverage containers under California's recycling program. Which containers qualify and at what rate is settled outside your ERP, but charging the fee, passing it through shipments and invoices, and keeping it traceable to the product that generated it are squarely ERP problems. The Biz-Tech Services CRV solution for Acumatica ERP, from Biz-Tech Services, Inc., handles that side: it links each sellable product to a CRV item, prices that item by unit of measure, and decides per customer location whether the fee is charged at all.
What Has to Be in Place Before CRV Appears on an Order
A CRV sales order line is the end result of four pieces of setup. If any one of them is missing, order entry looks normal but the fee line never gets created. Confirm all four before you start testing orders.
1. The CRV item exists as a non-stock item. In Acumatica, CRV items are only ever non-stock items. They represent an environmental fee, not something you hold in inventory, so a CRV item created as a stock item will not behave correctly.
2. The parent product points at that CRV item. On the Stock Items screen in Acumatica, open the beverage product, go to the Price/Cost tab, and select the appropriate CRV item in the CRV Item field. This is the link that tells Acumatica which fee belongs to which product.
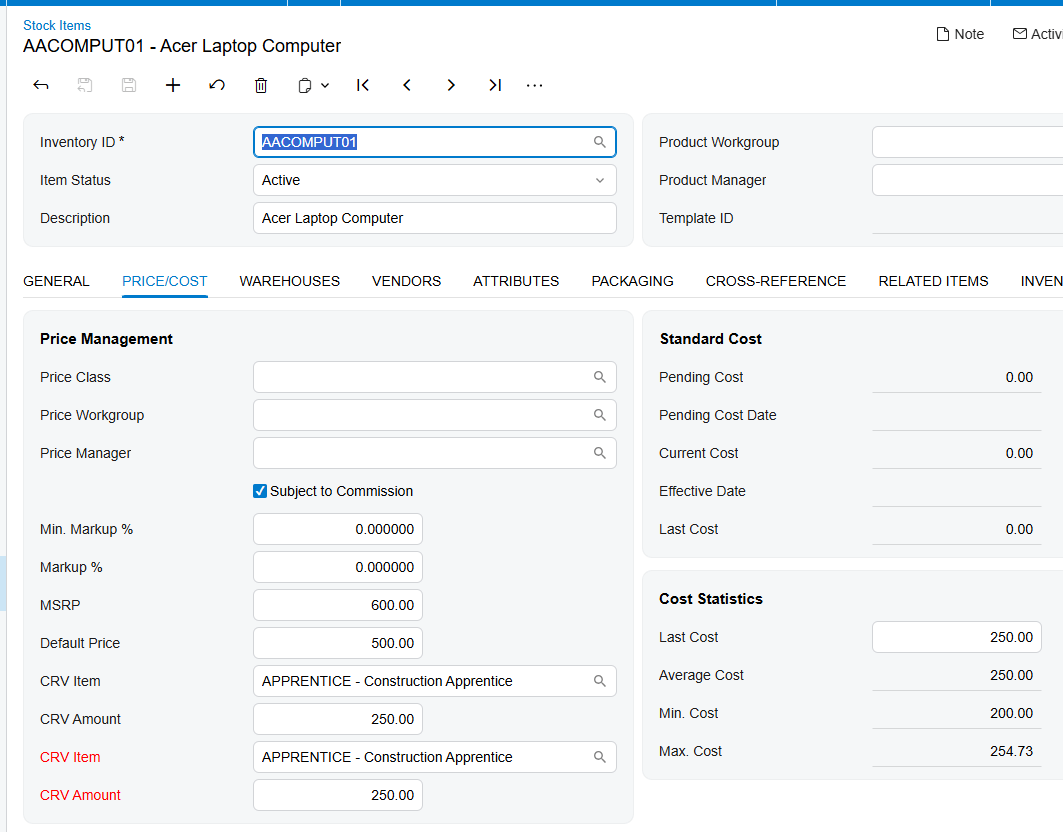
3. The CRV Amount field is populated. This field, on the General tab of the Stock Items screen, determines the amount charged for the associated CRV item based on the selected unit of measure, or UOM. It lets you define a separate price for the CRV item rather than folding the fee into the product price.
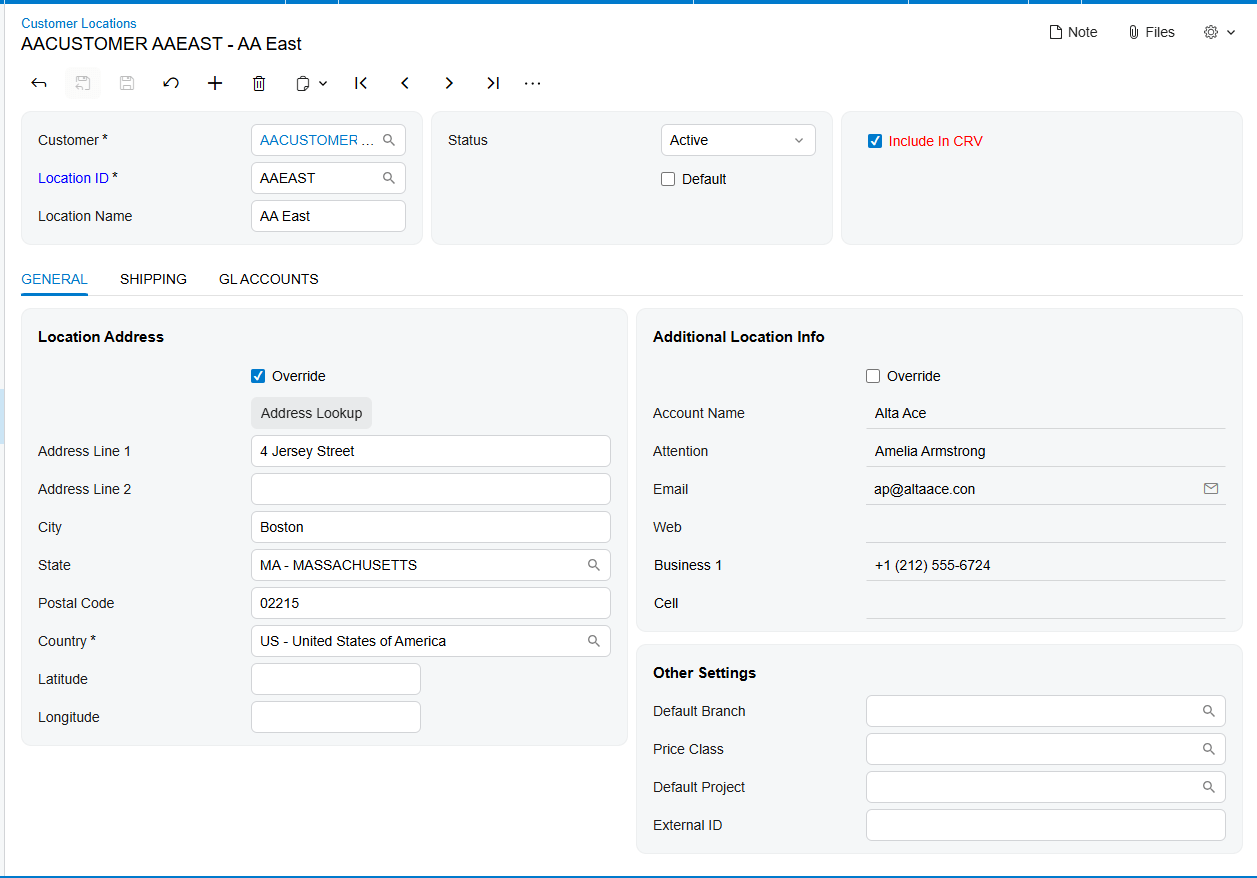
4. The customer default location has Include in CRV selected. The Include in CRV checkbox was added to the customer default location, and its state determines whether the CRV item is displayed on the sales order.
Sequence matters less than completeness, but most Acumatica implementations create the CRV non-stock items first, assign them across the catalog and set amounts by UOM next, and switch on customer locations last, so no order picks up a fee before the amounts are correct.
Adding a CRV Item to a Sales Order, Step by Step
With the setup above in place, entering a CRV-bearing order in Acumatica is ordinary order entry. The steps below separate what the user does from what Acumatica contributes.
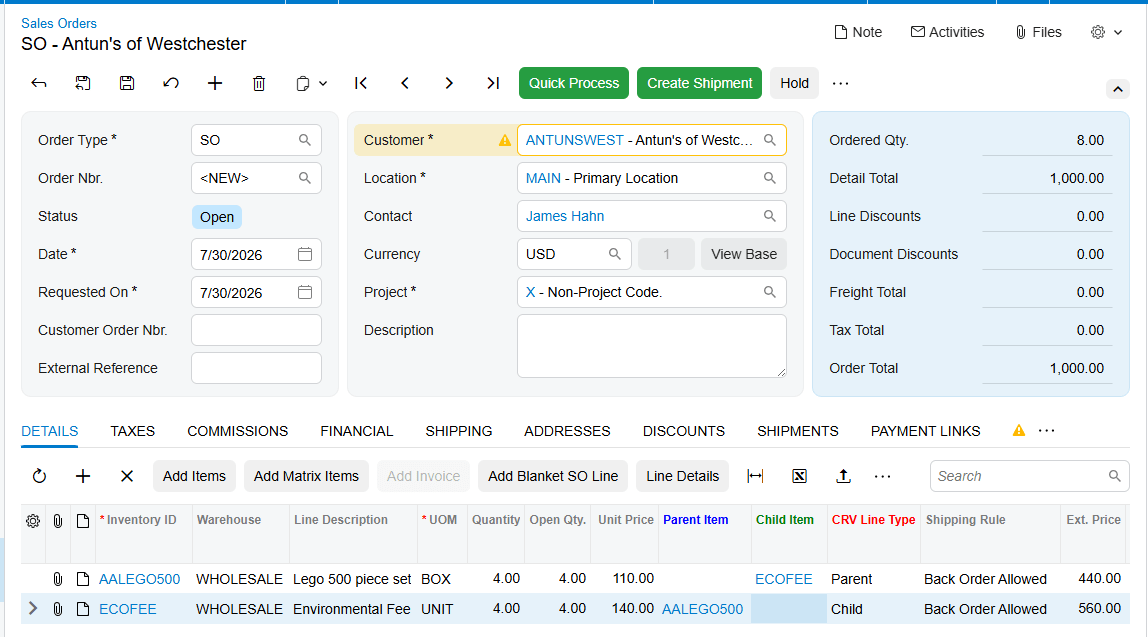
Step 1: Select a customer whose location is flagged for CRV
Open the Sales Orders screen in Acumatica and select the customer. The deciding factor is not the customer record on its own but the location: the location must have the Include in CRV checkbox selected. For a customer with several locations, confirm you are on the location you intend to charge, because the checkbox is set at that level.
Step 2: Add the parent beverage item
Add the main item to the order lines as usual, with the quantity, warehouse, and unit of measure the customer is buying. This is the parent item. You do not add the CRV item yourself and should not need to look it up; the fee follows the product automatically.
Step 3: Let Acumatica add the CRV line
When the parent item is added, Acumatica automatically adds the associated CRV item as a new line on the order. The child line is created with the same quantity and the same warehouse as the parent line, so the fee scales with what is being sold and stays consistent with where it ships from. The amount comes from the CRV Amount configured for the selected unit of measure.
Document Triggers: What Adding the Parent Item Creates
The trigger here is narrow and easy to reason about. Adding a parent item to a sales order for a CRV-enabled customer location is what creates the CRV line. There is no separate action to run, no button to press, and no batch process to schedule; the child line is produced as part of entering the parent line.
That child line is a real order line, so it flows forward like any other. To keep the relationship visible, the Parent Item and Child Item fields have been added to the Sales Orders, Shipments, and Invoices screens in Acumatica. On each document you can see which line is the main item and which is its associated CRV item, so the pairing survives the handoff from order to shipment to invoice.
That is what makes CRV auditable in Acumatica. When a customer questions a fee on an invoice, the Parent Item and Child Item fields let you walk from the fee line back to the product that generated it without reconstructing the logic by hand.
Mapping Rules That Decide the Fee and Who Pays It
Three independent mapping rules decide whether Acumatica creates a CRV sales order line and what it costs. Keeping them separate makes troubleshooting faster, because each fails in a different, recognizable way.
Product to fee item. The CRV Item field on the Price/Cost tab of the Stock Items screen maps one product to one CRV item. This is a per-product decision: a product with no CRV item selected will never generate a fee line, no matter how the customer is configured.
Unit of measure to amount. The CRV Amount field on the General tab determines the amount for the associated CRV item based on the selected unit of measure. That matters because the same product is often sold in more than one UOM. The amount on the order line follows the UOM chosen on the parent line.
Customer location to eligibility. The Include in CRV checkbox on the customer default location controls whether Acumatica displays the CRV item on the sales order at all. Because this control sits on the location rather than on the customer, one customer can be charged CRV at some locations and not at others. That is the right behavior for chains and distributors whose sites are not all treated alike, and the most common reason a fee appears on one order and not the next for the same account.
Validation and Common Exceptions
Almost every CRV question that reaches a support queue is a version of the same one: the CRV line did not appear. Because three separate settings feed the result, guessing is slow. Run these checks in order and each one rules out a mapping rule above.
Check 1: the customer location. Open the customer's default location in Acumatica and confirm the Include in CRV checkbox is selected. If it is not, no CRV line will be added regardless of how the products are configured, which makes this the fastest thing to rule out.
Check 2: the parent product. Open the item on the Stock Items screen, go to the Price/Cost tab, and confirm the CRV Item field has the correct CRV item selected. An empty CRV Item field is the usual explanation when the fee appears for most beverages on an order but is missing for one line, and it usually points at a recently added product that missed the setup pass.
Check 3: the CRV item itself. Confirm the item selected in the CRV Item field is configured as a non-stock item. CRV items in Acumatica are only non-stock items, so a fee item created as a stock item, or a CRV Item field pointed at an ordinary inventory item, is not a valid configuration even though the field looks populated.
The multi-UOM exception. A related case is a CRV line that appears but carries an unexpected amount. Because the CRV Amount on the General tab is tied to the selected unit of measure, a product sold in more than one UOM needs the amount defined for the UOM actually used on the order line. Review the CRV Amount configuration for that unit of measure before assuming the calculation is wrong.
Where to Check Your Work
After entering a test order in Acumatica, verify the result across all three documents rather than stopping at the sales order. These are the exact fields to look at.
1. On the customer default location: the Include in CRV checkbox is selected for the location used on the order.
2. On the Stock Items screen, Price/Cost tab: the CRV Item field on the parent product names the intended CRV item.
3. On the Stock Items screen, General tab: the CRV Amount field is populated for the unit of measure the order uses.
4. On the CRV item record: the item is a non-stock item.
5. On the sales order: a separate CRV line exists beneath the parent beverage line.
6. On the sales order: the CRV line carries the same quantity as the parent line.
7. On the sales order: the CRV line carries the same warehouse as the parent line.
8. On the sales order, shipment, and invoice: the Parent Item and Child Item fields correctly identify the main item and its associated CRV item.
9. On the invoice: the CRV amount billed matches the CRV Amount configured for the unit of measure on the order line.
Adding CRV to Sales Orders: Frequently Asked Questions
Why is the CRV line not appearing on my sales order?
Work through three checks in order. First, confirm the Include in CRV checkbox is selected on the customer location used for the order. Second, confirm the CRV Item field on the Price/Cost tab of the parent product is populated. Third, confirm the item selected there is a non-stock item, since CRV items in Acumatica are only non-stock items.
Do I have to add the CRV item to the order manually?
No. When you add the parent item to a sales order for a customer location flagged with Include in CRV, Acumatica adds the associated CRV item as a new line automatically. The child line inherits the parent line's quantity and warehouse, so manual entry is neither required nor expected.
Can one customer be charged CRV at some locations but not others?
Yes. The Include in CRV checkbox sits on the customer default location, not on the customer record as a whole, so eligibility is decided per location. That is why the same account can show a CRV line on one order and not another. Always verify the location on the order itself.
Why is the CRV amount different from what I expected?
The CRV Amount field on the General tab of the Stock Items screen determines the amount for the associated CRV item based on the selected unit of measure. If the order line uses a different UOM than the one you configured, the amount follows that UOM instead. Review the CRV Amount setup for every unit of measure in which the product is sold.
Can a CRV item be a stock item?
No. CRV items in Acumatica are only non-stock items. They carry an environmental fee rather than representing physical inventory you receive, count, and ship, so creating one as a stock item keeps the configuration from working even if every other field is set correctly.
How do I tell which fee line belongs to which product?
Use the Parent Item and Child Item fields, added to the Sales Orders, Shipments, and Invoices screens in Acumatica. They identify the main item and its associated CRV item on each document, so you can match a fee line to the product that generated it at any stage without guessing from line sequence.
Does the CRV line carry through to shipments and invoices?
Yes. The CRV item is added as an order line, and Acumatica carries the Parent Item and Child Item fields onto the Shipments and Invoices screens so the parent and child pairing stays identifiable, giving your billing and audit teams a consistent view from order entry through invoicing.
Work With the Biz-Tech Services CRV Solution
Getting CRV onto sales orders in Acumatica comes down to four pieces of setup and one trigger. The CRV item must be a non-stock item, the parent product must point at it through the CRV Item field, the CRV Amount must be defined for the unit of measure being sold, and the customer location must have Include in CRV selected. With those in place, adding the parent item creates the CRV line automatically at the same quantity and warehouse, and the Parent Item and Child Item fields keep the pair traceable through shipments and invoices.
If your business sells beverage products into California and wants CRV handled inside order entry rather than in a spreadsheet beside it, the Biz-Tech Services CRV solution is built for that. Visit https://biz-techservices.com to learn more about our Acumatica expertise or to schedule a personalized demonstration.
How to Sell Gift Cards Through Sales Orders in Acumatica
How to Sell Gift Cards Through Sales Orders in Acumatica
To sell a gift card on a sales order in Acumatica, you add a gift card item to the order line, let the system produce a number for it, and confirm that number before the order moves to fulfillment. This article walks that task end to end for both kinds of gift card item the Biz-Tech Services Gift Card Processing product supports: a non-stock card, numbered on the order itself, and a stock card, whose number already exists as a serial number and has to be allocated. You will learn which record the sale creates, which setting decides the card number, and what stops a sale.
Gift Card Processing is an Acumatica ERP customization published by Biz-Tech Services, Inc. It extends the Sales Orders screen (SO301000), the Payment Methods screen (CA204000), and the Stock Items screen (IN202500) so a gift card can be sold like any other item and later spent like a tender. This article covers only the selling half; redemption and returns are covered separately. The finish line is a numbered, valid gift card record your business can hand to a customer.
Before You Start: What Must Be Configured
Three pieces of setup must exist before the first gift card sales order behaves correctly. All are one-time tasks, but a gap in any of them surfaces later as a line that cannot produce a card number.
A Gift Card Payment Method and Its Cash Account
Create a gift card payment method on the Payment Methods screen (CA204000), then add the gift card cash account under its Allowed Cash Accounts tab. Because payment methods in Acumatica are linked to cash accounts, Biz-Tech Services strongly recommends a dedicated general ledger (GL) account for the gift card item; the balance on unspent cards is a liability and belongs apart from ordinary cash. The screen also carries a Default Gift Card field, which sets the card shown by default in the Create Payment popup.
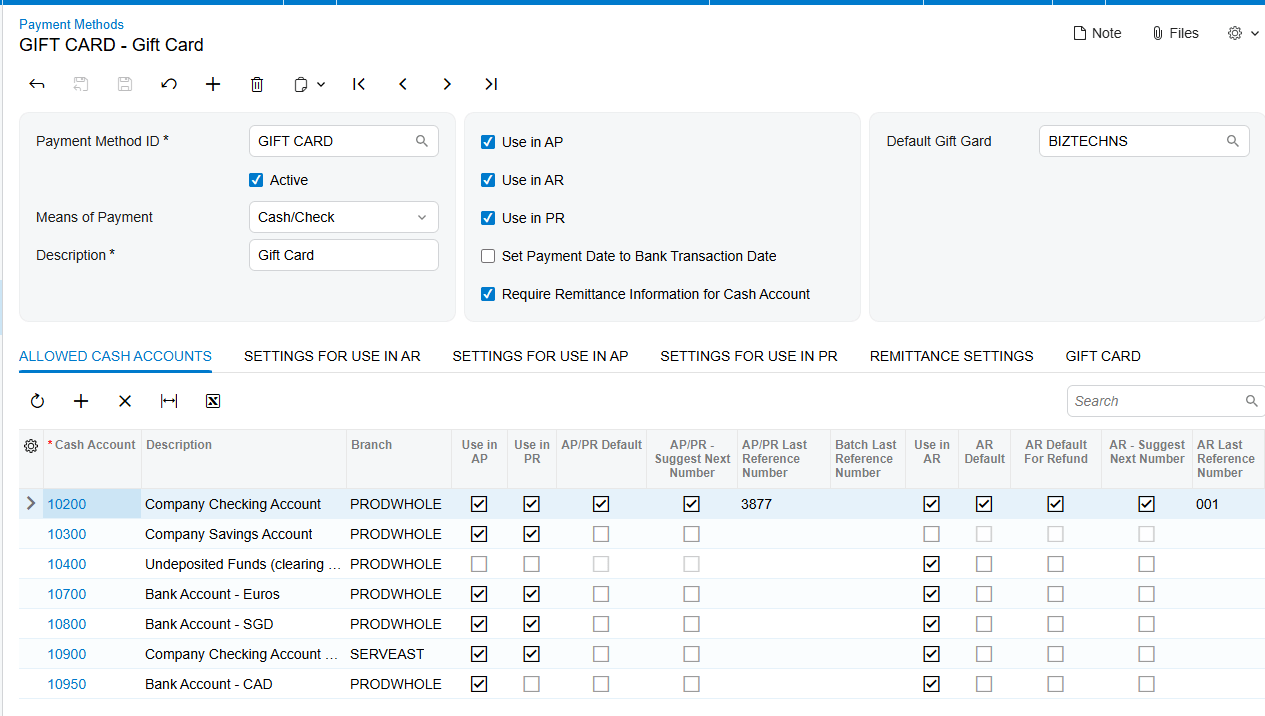
A Gift Card Item
A gift card item is an Acumatica item with the gift card payment method attached to it. It can be non-stock or stock, and the choice changes the whole order entry procedure. Non-stock suits cards issued electronically or numbered at the moment of sale; stock suits physical, pre-printed cards received into inventory with serial numbers already on them.
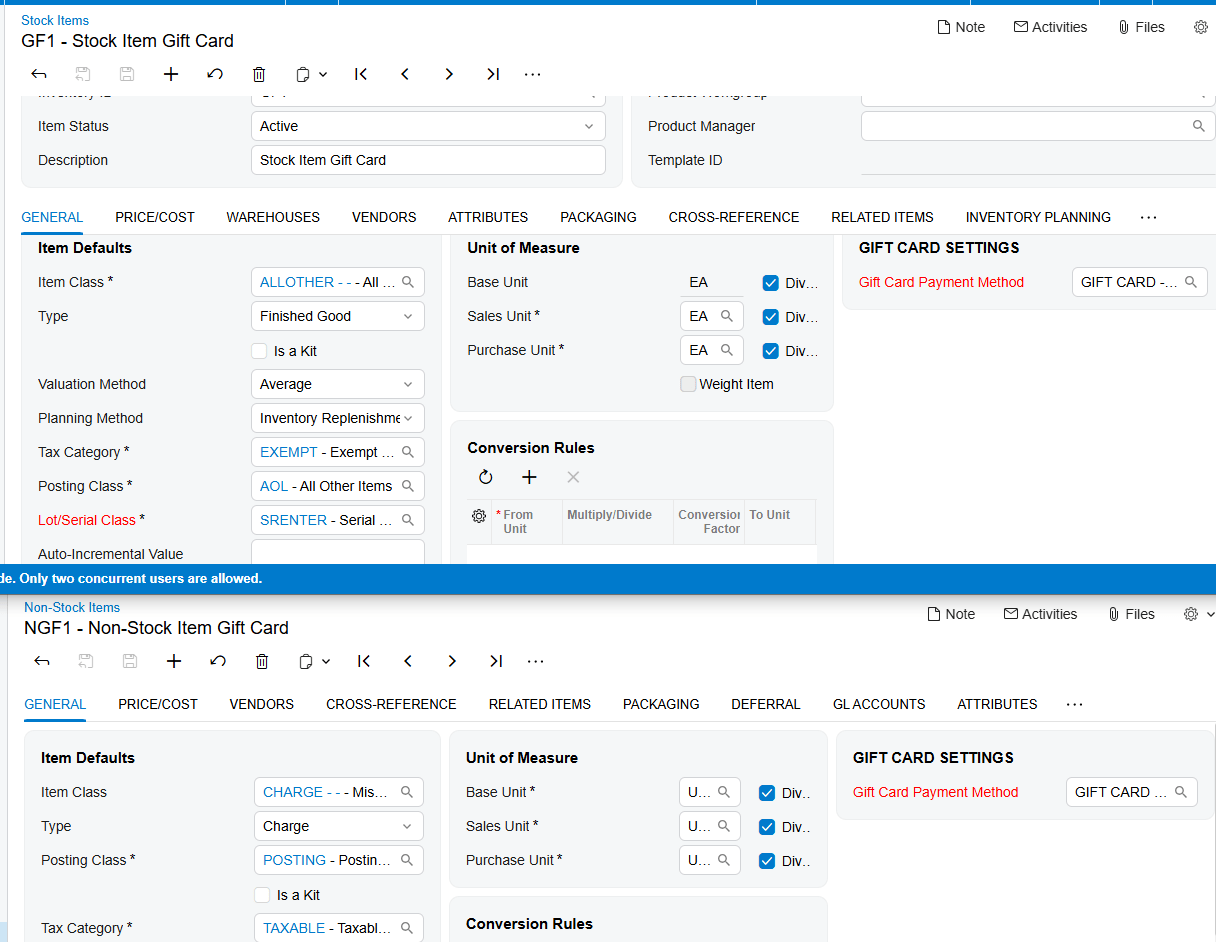
A Numbering Choice in Gift Card Preferences
The Gift Card Preferences screen (BZ102000) decides how non-stock gift card numbers are produced. Two checkboxes drive it: Gift Card Numbering, which exposes a Numbering Segments tab for a structured number, and Use Random Numbering, which hides that tab and has Acumatica generate random numbers instead. The same screen holds the Default Gift Card Item field and the Use Multiple Gift Cards in Commerce checkbox, which govern imported orders.
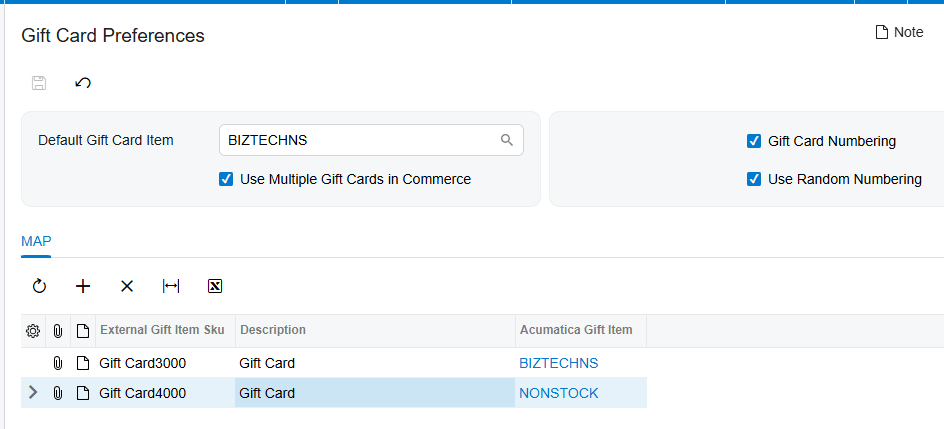
Selling a Non-Stock Gift Card on a Sales Order
Non-stock gift cards are sold on the standard Acumatica Sales Order screen. There is no special order type and no separate screen; the gift card behavior attaches to the line.
Step 1: Add the Gift Card Item to the Order
Create the order and add the non-stock gift card item on the Details tab as you would any other item, with quantity and amount. The sale records a Gift Card Amount for the card, so enter the value the customer is buying. Once Acumatica recognizes the line as a gift card item, the Details tab exposes a Gift Card Numbers field where the produced number is shown.
Step 2: Let the Number Be Produced, or Type It
For orders created inside Acumatica, the gift card number can be entered manually or generated according to the Gift Card Numbering setup on Gift Card Preferences. That gives three modes: manual entry, where a user types the number printed on the card stock; a numbering sequence, where Acumatica builds the number from the segments you defined; and random numbering, generated as soon as the item and a quantity are entered.
Choose deliberately. A sequence is easy to reconcile but also easy to guess: if card 100045 is valid, card 100046 probably is too. Use Random Numbering exists to prevent users from using gift cards based on a predefined numbering sequence.
Step 3: Check the Gift Card Numbers Popup
The generated number appears in the Gift Card Numbers field on the Details tab and in the Gift Card Numbers popup available during order creation. The popup confirms what Acumatica produced, and it is line-scoped: it displays the number based on the selected line of the item. On an order with three gift card lines you see one at a time, so click through each.
Step 4: Handle a Quantity Greater Than One
A single line can sell more than one card. When the gift card quantity is more than 1, the individual numbers appear in the Gift Card Numbers popup rather than on the line, and under random numbering they are generated based on the entered quantity. The popup is then the only place the full set is visible.
Step 5: Expect the Ship Complete Rule
The shipping rule for the corresponding non-stock gift card becomes Ship Complete on the sales order line. Acumatica sets this rather than keeping the customer or order type default, because a line for five cards has five numbers bound to it and partial shipment would split an issued set across documents. If a user cannot partially ship a gift card line, this rule is the reason.
Selling a Stock Gift Card: Receipt First, Then Allocation
A stock gift card is a physical card that exists in inventory before anyone sells it. Order entry is shorter than on the non-stock path, but two steps must precede it or the card cannot be sold.
Step 1: Create the Item as a Serialized Stock Item
A gift card item can be created from the Stock Items screen (IN202500). You must select a payment method to associate with the item for gift card payments, and that field is enabled only for serialized items. A serial class specifically for the gift card item therefore has to be created on the Lot/Serial Classes screen and assigned first; a disabled payment method field means the item is not serialized yet. On that serial class, select Track Expiration Date if your cards expire.
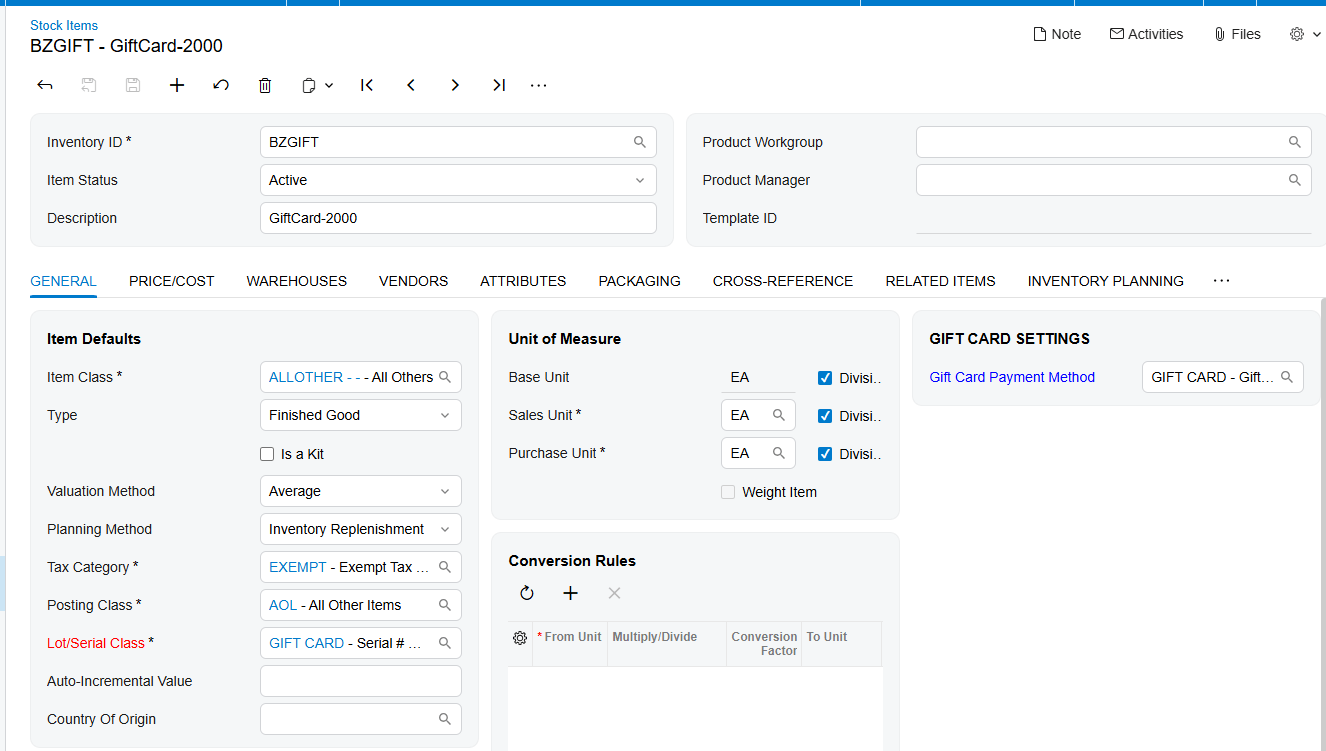
Step 2: Run the Gift Card Receipt Process
Receiving stock gift cards into Acumatica takes three actions. Add the gift card item to the Receipts screen, enter the quantity, then generate the serial numbers with their respective expiration dates from the Line Details popup window. Those date fields appear when Track Expiration Date is selected on the serial class. The documentation is explicit that the expiration date should be established during the receipt process, so treat receipt as the last chance.
Step 3: Allocate the Serial Number on the Sales Order
Stock gift cards are also sold on the Acumatica Sales Order screen (SO301000). Add the item to the line, open Line Details, and pick the serial number in the Lot/Serial Nbr field. Allocation is required for all stock gift card items, so the line is not complete until a serial number is bound to it. The lookup shows all available gift card-related serial numbers with their expiration dates, which lets users issue the oldest card first.
Notice what is absent: no number generation and no Gift Card Numbers popup, because the number was created at receipt. The Gift Card Preferences numbering settings govern non-stock cards only.
Document Triggers: What the Gift Card Sales Order Creates
Once a gift card item is sold, Acumatica writes the customer information, order information, and gift card amount into the Gift Cards tab of the Payment Methods screen. This happens for both non-stock and stock items, and it turns an order line into a spendable card.
The Gift Card Record on the Payment Methods Screen
The Gift Cards tab added to the Payment Methods screen displays all related information for the card. The documented fields are Customer ID, Inventory ID, Gift Card Serial Number, Order Number, Gift Card Amount, Used Amount, and Remaining Amount. Read as a set, they answer what a support agent asks: who owns this card, which item was sold, which card is it, which order created it, and what is left. Used Amount and Remaining Amount are written at the moment of sale and maintained as the card is spent, so on a freshly sold card Remaining Amount should equal Gift Card Amount.
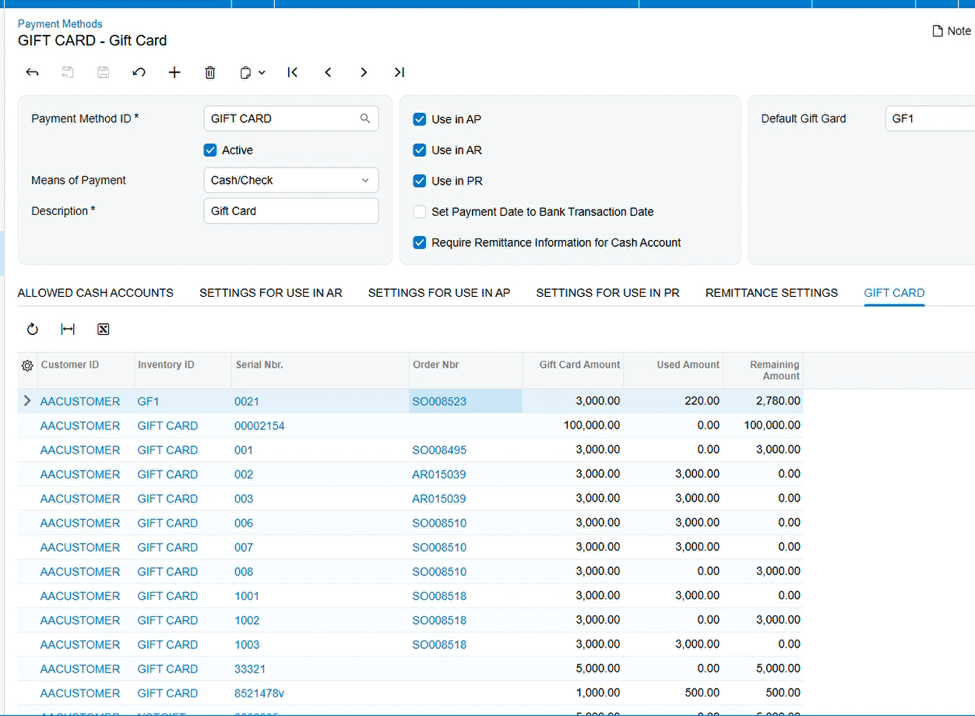
The Gift Card History Entry
Clicking the serial number in the Gift Cards tab opens the Gift Card History screen (BZ407099), which displays all related information for the card. Two flags there identify its origin: External Gift Card indicates the card was imported from an external system, and Is Stock Gift Card indicates whether the card is a stock or non-stock item. Both help during triage, because they tell you which creation path produced the record.
That screen also carries a Create Gift Card button, a separate creation path and the same action exposed as Create Gift Card in the Gift Card History endpoint of the Biztech application programming interface (API) for imports from an external system. Those cards appear under the Gift Card tab of Payment Methods exactly like cards created by a sale. A sold card is now redeemable as a payment method in Acumatica; spending it is outside this article.
Mapping Rules That Decide the Card Number and Item
Four settings determine what number a card gets and, on imported orders, which Acumatica item the card is booked against.
Numbering Segments and the Auto-Incremental Value
When Gift Card Numbering is selected and Use Random Numbering is unselected on the Gift Card Preferences screen, the Numbering Segments tab becomes available. You use it to define the numbering structure for non-stock gift cards, and Acumatica generates the numbers from that configuration. One requirement is easy to miss: it is essential to configure the Auto-Incremental Value for automatic generation of the gift card number. A structure with no incrementing segment has nothing to advance.
Random Numbering as the Alternative
Selecting Use Random Numbering hides the Numbering Segments tab. Acumatica then generates random numbers when a gift card item is entered on the sales order and a quantity is specified. The two modes are alternatives, not layers. If the Numbering Segments tab has disappeared, someone turned on random numbering, and the segments you configured earlier are no longer in force.
The Default Gift Card Item
The Default Gift Card Item field names the non-stock item that should be considered the default gift card item for an external gift card during the order import process. It is the fallback for a card arriving from outside Acumatica without a specific item attached, and plays no part in an order a user keys by hand.
External SKU Mapping for Imported Orders
The Use Multiple Gift Cards in Commerce checkbox lets you map an external gift card stock keeping unit (SKU) to the corresponding Acumatica gift card item. That mapping is used when processing orders that involve multiple gift cards, which is what a storefront selling several denominations produces. If the checkbox is not selected, the system defaults to the non-stock item specified in Default Gift Card Item during the external order import process. Unchecked means every imported card lands on one item; checked means each SKU can land on its own.
Validation and Common Exceptions
Biz-Tech Services documents these as requirements rather than error messages, so the symptom is usually a field that stays empty or disabled. Each condition below must be satisfied for a gift card sale to complete.
No Numbering Configuration Means No Automatic Number
1. Automatic generation depends on the Auto-Incremental Value in the Numbering Segments tab. Without it, structured numbering cannot produce a number.
2. If neither Gift Card Numbering nor Use Random Numbering is in force, the only documented option left on an Acumatica order is manual entry on the line.
3. On an imported order, without external SKU mapping enabled the import falls back to the Default Gift Card Item, so that field needs a value.
Stock Gift Cards Require Serialization
1. The payment method field on the Stock Items screen is enabled only for serialized items, so a non-serialized item cannot become a gift card item.
2. A serial class specifically for the gift card item must be created on the Lot/Serial Classes screen and assigned to the item.
3. Allocation is required for all stock gift card items: the line needs a serial number in Lot/Serial Nbr under Line Details.
Expiration Dates Are Set at Receipt Only
1. Track Expiration Date must be selected on the serial class before receipt, or no expiration date fields are offered.
2. The date is established during the gift card receipt process. No step is documented for adding one at the point of sale, so a card received without a date is sold without one.
Order Line Behavior You Cannot Override
1. The shipping rule for a non-stock gift card line becomes Ship Complete, so plan fulfillment around it rather than splitting the line.
2. The Gift Card Numbers popup shows numbers for the selected line only, so check a multi-line order line by line.
3. When quantity is greater than one, the individual numbers live in the popup. Confirm the count before shipping.
Configuration Gaps That Surface Later
1. The gift card cash account must be added under the Allowed Cash Accounts tab of the payment method, because payment methods in Acumatica are linked to cash accounts.
2. A gift card item is defined by having the gift card payment method selected on it. Without that, it is an ordinary item and produces no gift card record.
Where to Check Your Work
After you save a gift card sales order, walk this checklist before it goes to shipping. Each item names an Acumatica field you can look at directly, and together they confirm the sale produced a card your customer can spend.
1. Sales Orders (SO301000), Details tab: the gift card item is on the line with the right quantity and amount.
2. Details tab: the Gift Card Numbers field on the line is populated, not blank.
3. Gift Card Numbers popup, with that line selected: the number matches the card being issued.
4. Gift Card Numbers popup: the count of numbers equals the line quantity when quantity exceeds one.
5. Sales order line: the shipping rule reads Ship Complete for a non-stock gift card line.
6. Line Details, Lot/Serial Nbr: a serial number is allocated on every stock gift card line, with the expiration date you expect for that batch.
7. Payment Methods (CA204000), Gift Cards tab: a row exists for the card you just sold.
8. Gift Cards tab, Customer ID: it matches the customer on the sales order.
9. Gift Cards tab, Inventory ID: it is the gift card item you intended, which matters most on imported orders.
10. Gift Cards tab, Order Number: it points back to the sales order you entered.
11. Gift Cards tab: Gift Card Amount equals Remaining Amount, with Used Amount at zero.
12. Gift Card History (BZ407099), reached by clicking the serial number: the entry exists and the Is Stock Gift Card and External Gift Card flags read as expected.
Selling Gift Cards on Sales Orders: Frequently Asked Questions
Why is the Gift Card Numbers field empty on my sales order line?
Automatic numbering has nothing to work with. Structured numbering requires the Auto-Incremental Value in the Numbering Segments tab, and random numbering fires only once a quantity is specified on the line. Check the quantity, then check which numbering checkbox is selected on Gift Card Preferences. If neither mode is in force, type the number manually.
The Numbering Segments tab disappeared from Gift Card Preferences. What happened?
Someone selected Use Random Numbering, which hides that tab and has Acumatica generate random numbers as the item and quantity are entered on the order. Clearing the checkbox and selecting Gift Card Numbering brings the tab back. The two modes are mutually exclusive.
Why can I not select a payment method on my stock gift card item?
The payment method field on the Stock Items screen (IN202500) is enabled only for serialized items, so a disabled field means the item has no serial class. Create a serial class specifically for the gift card item on the Lot/Serial Classes screen and assign it, and the field becomes available. This is a hard prerequisite in Acumatica, not a preference.
Can I sell more than one gift card on a single order line?
Yes. Enter the quantity and Acumatica produces a number for each card. When the quantity is more than one, the individual numbers live in the Gift Card Numbers popup rather than on the line. Open the popup with that line selected and confirm the count before the order ships.
Why did my gift card line switch to Ship Complete?
That is intended. In Acumatica the shipping rule for a non-stock gift card becomes Ship Complete on the sales order line, which keeps a set of issued numbers from being split across partial shipments. If a customer needs cards delivered in batches, use separate lines or separate orders.
I forgot to set an expiration date. Can I add it on the sales order?
No. The expiration date should be established during the gift card receipt process, and the date fields only appear when Track Expiration Date is selected on the serial class. Acumatica offers no documented way to set the date later from the sales order, so contact Biz-Tech Services about cards already received without one.
An imported order created the card on the wrong inventory item. Where do I fix it?
On the Gift Card Preferences screen. If Use Multiple Gift Cards in Commerce is not selected, the system defaults to the item named in Default Gift Card Item for every imported gift card, whichever card the storefront sold. Select the checkbox and map each external SKU to its Acumatica gift card item so future imports land correctly.
How do I confirm that a sale actually produced a usable gift card?
Open the Payment Methods screen (CA204000) and go to the Gift Cards tab. A row should show the Customer ID, Inventory ID, serial number, Order Number, Gift Card Amount, Used Amount, and Remaining Amount. If Remaining Amount equals Gift Card Amount and Order Number points at your order, the card was created correctly.
Work With the Biz-Tech Services Gift Card Processing Product
To sell gift cards in Acumatica reliably, configure the gift card payment method with its own cash account, build the item as non-stock or as a serialized stock item, and choose a numbering mode on the Gift Card Preferences screen. Then, on the gift card sales order, add the item and either confirm the generated number in the Gift Card Numbers popup or allocate a serial number in Lot/Serial Nbr. The sale writes a record onto the Gift Cards tab of the Payment Methods screen plus a matching Gift Card History entry, and the card is then redeemable as a payment method. Most problems trace back to four things: a missing Auto-Incremental Value, an unserialized stock item, an expiration date never set at receipt, or an external SKU never mapped.
If your business is planning to sell gift cards through Acumatica sales orders, or is already selling them and wants the numbering, mapping, and validation rules configured correctly the first time, the Biz-Tech Services Gift Card Processing product and the team behind it can help. Visit https://biz-techservices.com to learn more about our Acumatica expertise or to schedule a personalized demonstration.
Check also https://www.youtube.com/watch?v=FyVcs9bR5NY video training.
Sage 100 to Acumatica Migration Guide 2026: Complete ERP Modernization Guide
Sage 100 to Acumatica Migration Guide 2026: How to Modernize Your ERP Without Losing Your Business Data
Moving from Sage 100 to Acumatica is not simply a software replacement. It is an opportunity to redesign how finance, inventory, sales, purchasing, manufacturing, projects, warehouses, reporting, integrations, and employees work together.
For many companies, Sage 100 has been a dependable business system for years or even decades. It may contain financial history, customer and vendor records, inventory, sales orders, purchase orders, manufacturing data, custom reports, Crystal Reports, Visual Integrator jobs, ODBC connections, third-party add-ons, SQL databases, and business processes that have gradually become part of the organization’s daily routine.
That history is exactly why a Sage 100 to Acumatica migration should never be approached as a simple export-and-import project.
The business is not only moving accounting data.
It is moving institutional knowledge.
A successful Sage 100 migration to Acumatica must determine:
- which Sage 100 data should move;
- which historical information should remain archived;
- how the chart of accounts should evolve;
- how companies and locations should map into Acumatica;
- how inventory quantities and valuation will be reconciled;
- how open AR and AP documents will be migrated;
- how sales and purchasing transactions will continue after cutover;
- how Sage 100 manufacturing structures should map into Acumatica Manufacturing Edition;
- what happens to Crystal Reports and custom reports;
- how Sage customizations and integrations should be replaced;
- how users will learn the new workflows;
- how the business will continue operating during cutover.
Companies searching for Sage 100 alternative, Sage 100 replacement, Sage 100 cloud ERP migration, Acumatica vs Sage 100, or how to migrate Sage 100 to Acumatica are usually facing the same underlying question:
Has our business become more complex than the ERP architecture we originally implemented?
That is a better question than asking whether Sage 100 is “good” or “bad.”
Sage 100 continues to be an actively supported ERP product. In 2026, Sage released Sage 100 2026 and subsequent product updates with new capabilities and enhancements.
The case for moving to Acumatica is therefore not that Sage 100 has disappeared.
The case is that some growing companies need a different operating model: cloud-native access, broader employee participation, real-time data across locations, open integration architecture, industry-specific ERP functionality, modern dashboards, flexible automation, and a platform designed to connect more of the business in one environment.
Acumatica has also created a dedicated See the Difference Migration Plan for Sage 100 customers, allowing organizations to experience Acumatica using their actual data before committing to a full production conversion.
For BizTech, this migration scenario is particularly relevant.
BizTech Services is both a Sage Certified Gold Development Partner and an Acumatica Gold Partner.
That means our team understands both sides of the transition: the Sage ecosystem a company is leaving and the Acumatica platform it is adopting.
BizTech also develops proprietary Acumatica integrations and enhancements for Amazon, Shopify, WooCommerce, Magento, PayPal, ShipHero, ShipStation, DSCO, CommerceHub, Salesforce, ServiceTitan, EDI, inventory workflows, gift cards, kits, consignment, and custom business systems.
This guide explains the complete migration journey—from the first modernization decision to final data reconciliation and post-go-live support.
Important: Sage 100 Is Still Supported in 2026
One of the easiest ways to damage the credibility of an ERP migration article is to claim that Sage 100 is dead, discontinued, or unsupported.
That is not accurate.
Sage continues to develop and support Sage 100.
Sage 100 2026 introduced enhancements including an AI-powered Help Agent, Global Search, expanded lot and serial number fields, and workflow improvements. Sage subsequently released Sage 100 2026.1 with additional enhancements and fixes.
Sage also continues to position Sage 100 as an ERP solution with accounting automation, payroll, inventory optimization, reporting, workflow capabilities, and integrations.
This matters because a Sage 100 to Acumatica migration should be a strategic choice rather than a fear-based decision.
Sage 100 migration in 2026 is generally a modernization decision, not a forced end-of-life migration.
A business should consider moving because the economics, architecture, integrations, user experience, scalability, remote access, reporting, or operating model no longer fit its needs—not because someone incorrectly claimed the software has disappeared.
This distinction also helps management build a better business case.
The decision becomes:
- What does staying on Sage 100 cost us over the next five years?
- What operational constraints are we accepting?
- How much manual work exists around the ERP?
- How many third-party applications are required?
- How much infrastructure and IT support do we maintain?
- How difficult is it to provide access across locations?
- How quickly can we introduce new channels, warehouses, entities, or business models?
- Would Acumatica create enough measurable value to justify migration?
Those are legitimate ERP questions.
Why Businesses Move Beyond Sage 100
Sage 100 can remain operational long after a company begins experiencing ERP friction.
Financials may still post correctly. Invoices may still be created. Purchase orders may still be entered. Reports may still run.
The first problems often appear around the ERP rather than inside the general ledger.
Examples include:
- employees exporting information to Excel for analysis;
- inventory being tracked in another application;
- different locations operating separate processes;
- warehouse teams depending on paper;
- remote employees relying on additional infrastructure;
- eCommerce orders being synchronized through fragile integrations;
- management waiting for manually assembled reports;
- separate CRM, service, manufacturing, or project applications;
- duplicate entry between Sage 100 and external systems;
- increasing dependence on custom code and specialized knowledge.
Over time, the ERP becomes one component in a larger collection of disconnected tools.
That is when the company should evaluate whether continuing to extend the old architecture remains economically rational.
Growth Across Locations
A company that operated from one office may now have:
- multiple warehouses;
- distribution centers;
- manufacturing facilities;
- field teams;
- remote workers;
- international locations;
- several legal entities.
The ERP architecture must evolve with that structure.
Growing Integration Requirements
Modern businesses increasingly need ERP connected to:
- Amazon;
- Shopify;
- WooCommerce;
- Magento;
- Salesforce;
- payment gateways;
- shipping systems;
- warehouse platforms;
- EDI networks;
- tax services;
- BI tools;
- custom applications.
Integration architecture becomes a strategic ERP capability rather than a secondary technical concern.
More Users Need Direct Information
ERP value increases when decision-makers can access current information directly.
Finance, sales, operations, purchasing, customer service, warehouse teams, production managers, project managers, executives, and field employees may all need different views of the same business data.
Acumatica vs Sage 100 in 2026
The most useful comparison is not a list of checkboxes.
Both products can manage important ERP processes.
The more meaningful question is how each platform supports the future operating model.
| Area | Sage 100 | Acumatica Cloud ERP |
|---|---|---|
| Product status | Actively supported and updated, including Sage 100 2026 | Actively developed cloud ERP platform |
| Core architecture | Long-established ERP architecture with Standard, Advanced, and Premium deployment considerations | Modern browser-based cloud ERP architecture |
| Deployment | Deployment model varies by Sage 100 edition and hosting arrangement | SaaS and Private Cloud Subscription options |
| User access | Licensing and access depend on Sage configuration and agreement | Acumatica markets consumption-based plans around broad/unlimited user access; exact entitlements depend on product and licensing method |
| Financial management | Established accounting and financial functionality | Financial management directly connected with modern operational and industry applications |
| Inventory | Inventory and distribution functionality available | Integrated inventory, warehouses, availability, purchasing, sales, WMS, commerce, and reporting |
| Manufacturing | Manufacturing capabilities and third-party ecosystem available | Integrated Manufacturing Edition with BOM, routing, production, MRP, planning, scheduling, engineering changes, and related functions |
| Construction | May rely on industry modules and connected applications depending on environment | Dedicated Construction Edition |
| CRM | Often supplemented with external CRM depending on implementation | Embedded CRM functionality with optional external CRM integration |
| Integration | Visual Integrator, ODBC, Business Objects, third-party integrations and partner development | REST APIs, webhooks, business events, import/export scenarios and customization framework |
| Reporting | Standard reports, Crystal Reports, ODBC, exports and partner tools | Reports, Generic Inquiries, dashboards, business events, analytics and BI integrations |
| Remote access | Depends on deployment and hosting architecture | Designed around browser and cloud access |
| Industry expansion | Capabilities depend on edition, modules and ecosystem | Distribution, Manufacturing, Construction, Retail, Professional Services and General Business editions |
The correct decision depends on business requirements.
For companies that are comfortable with Sage 100, have a stable operating model, and do not need major architectural change, remaining on Sage may be perfectly reasonable.
For companies that need a more connected cloud operating environment, Acumatica can offer a stronger long-term platform.
Acumatica’s Official Sage 100 Migration Program
Acumatica has developed a dedicated migration initiative for Sage 100 customers called the See the Difference Migration Plan.
The program is particularly interesting because it reduces one of the biggest barriers in ERP evaluation:
Businesses usually have to imagine what the new ERP will look like using generic demonstration data.
Under this program, Acumatica can instead create an environment using the company’s actual Sage 100 information.
Core Data Migration in Two to Three Days
Acumatica states that its automated process can move core financial information, customer data, vendor data, and open transactions into the evaluation environment in approximately two to three days.
The purpose is to allow the business to see its own data inside Acumatica quickly.
Six-Month Trial Environment
The program includes six months of software access using the company’s migrated information.
This enables users to evaluate:
- navigation;
- financial reporting;
- customer and vendor information;
- open transactions;
- workflows;
- role-based access;
- fit with future requirements.
Guided Migration Support
Acumatica also positions the program around:
- scoping;
- mapping;
- cutover planning;
- scheduled guidance;
- role-based learning.
A Two-to-Three-Day Trial Migration Is Not the Same as a Complete ERP Implementation
This distinction is critical.
The official migration program can create an evaluation environment with core Sage 100 data quickly.
That does not mean every Sage 100 company can completely replace its production ERP in two or three days.
Core data conversion for evaluation and full production ERP implementation are different projects.
A production implementation may also require:
- business process discovery;
- company and branch design;
- chart of accounts redesign;
- inventory structure;
- warehouse configuration;
- manufacturing setup;
- project or construction configuration;
- historical data strategy;
- custom reports;
- Crystal Reports replacement;
- customization redevelopment;
- eCommerce integrations;
- EDI;
- shipping;
- payment integrations;
- user acceptance testing;
- training;
- final cutover;
- post-go-live support.
The Acumatica migration program is valuable because it lets companies validate the platform using real information before committing to the entire transformation.
That can improve implementation planning because the final scope is based on experience rather than assumptions.
Twelve Signs Your Business May Have Outgrown Sage 100
1. You Depend on Too Many Spreadsheets
If Excel has become the place where inventory, consolidations, project status, forecasts, pricing, or management reports are actually controlled, the ERP is no longer the complete operational system.
2. Employees Enter the Same Data More Than Once
Orders, customers, payments, inventory changes, or shipping information may be copied manually between Sage 100 and external platforms.
3. Several Locations Operate Differently
Different branches may have developed separate spreadsheets, applications, workflows, or reporting routines.
4. Remote Access Requires Additional Complexity
Users need a simpler way to access ERP information from different locations, devices, or working environments.
5. Management Reporting Takes Too Long
If managers wait hours or days while information is exported, consolidated, and reformatted, decision-making is delayed.
6. Inventory Is Not Trusted
Warehouse employees may need to physically verify stock because system quantities do not match operations.
7. Your Business Uses Many Add-On Systems
An expanding stack of inventory, CRM, manufacturing, reporting, EDI, eCommerce, warehouse, and service applications can create integration debt.
8. Adding a New Business Entity Is Difficult
Acquisitions, new divisions, or legal entities may create significant accounting and reporting complexity.
9. Manufacturing Has Outgrown the Current Structure
The company needs stronger planning, scheduling, production management, BOM control, traceability, or shop-floor information.
10. eCommerce and Marketplaces Are Becoming Core Revenue Channels
Amazon, Shopify, WooCommerce, Magento, and retail networks require reliable inventory, order, payment, tax, fulfillment, and refund synchronization.
11. IT Spends Too Much Time Maintaining ERP Infrastructure
The business wants IT resources focused on process improvement and integration rather than servers and legacy dependencies.
12. Technology Is Limiting Business Strategy
The strongest migration signal is when management avoids operational changes because the existing ERP environment makes them too difficult.
What Data Can Be Migrated from Sage 100 to Acumatica?
Most core Sage 100 business data can be migrated.
The exact scope depends on:
- Sage 100 edition;
- version;
- modules;
- data quality;
- custom fields;
- third-party enhancements;
- historical requirements;
- Acumatica target design.
Financial Data
- chart of accounts;
- general ledger balances;
- account history;
- departments or divisions;
- bank accounts;
- currencies;
- financial periods;
- budgets;
- open receivables;
- open payables.
Customers
- customer numbers;
- names;
- addresses;
- contacts;
- terms;
- credit limits;
- salespersons;
- tax information;
- price levels;
- custom fields;
- open balances.
Vendors
- vendor numbers;
- names;
- addresses;
- contacts;
- terms;
- tax identifiers;
- payment information;
- custom fields;
- open balances.
Inventory
- item numbers;
- descriptions;
- product lines;
- units of measure;
- warehouses;
- quantities;
- costs;
- prices;
- lot numbers;
- serial numbers;
- vendor relationships;
- reorder information;
- custom fields.
Sales and Purchasing
- open sales orders;
- open purchase orders;
- quotes where required;
- customer invoices;
- vendor invoices;
- credits;
- payments;
- open commitments.
Manufacturing
Depending on the installed Sage modules and target Acumatica Manufacturing design:
- assemblies;
- bills of material;
- components;
- routing information;
- work centers;
- production-related data;
- inventory relationships;
- manufacturing costs;
- planning data.
Historical Information
Historical migration may include:
- GL transactions;
- invoice history;
- payment history;
- purchasing history;
- sales history;
- inventory history;
- manufacturing history;
- project history.
Assessing the Existing Sage 100 Environment
Before exporting anything, BizTech recommends building a complete inventory of the Sage environment.
Document:
- Sage 100 version;
- Standard, Advanced, or Premium edition;
- installed modules;
- companies;
- divisions;
- warehouses;
- users;
- roles;
- custom fields;
- Visual Integrator jobs;
- Crystal Reports;
- ODBC connections;
- Business Objects customizations;
- third-party modules;
- scheduled tasks;
- imports and exports;
- eCommerce integrations;
- EDI;
- warehouse integrations;
- payment systems;
- reporting tools.
This environment inventory is one reason a migration partner with Sage expertise is valuable.
Source-system knowledge reduces the risk of discovering a critical dependency immediately before cutover.
How Sage 100 Data Is Extracted for Migration
Sage 100 provides several ways to access and export information.
The correct method depends on the edition, module, record type, amount of data, and whether extraction needs to be repeated during test migrations.
Visual Integrator
Sage 100 Visual Integrator can import and export data.
It can be useful for controlled migration extracts because export jobs can define:
- source tables;
- selected fields;
- output file types;
- filters;
- data transformations.
For a migration project, reusable export jobs can be valuable because the same extraction logic can be used during test conversion and final cutover.
ODBC
Sage supports ODBC-based data access.
ODBC can be used with tools such as:
- Microsoft Excel;
- Microsoft Access;
- Crystal Reports;
- SQL tools;
- other ODBC-compatible applications.
ODBC is particularly useful when migration data requires table joins, custom selections, or structured queries.
Report Export
Reports can be exported for migration or, more importantly, reconciliation.
Examples include:
- trial balance;
- AR aging;
- AP aging;
- inventory valuation;
- customer listing;
- vendor listing;
- open sales orders;
- open purchase orders.
Lookup Export
Sage 100 lookups can also be configured and exported to Excel or CSV for selected datasets.
Direct SQL Access Where Applicable
Some Sage 100 environments—particularly Sage 100 Premium and SQL-based deployments—use Microsoft SQL Server databases.
In those environments, migration teams may use SQL-based extraction and database backups as part of the source-data process.
The exact method should be determined according to edition, infrastructure, security, and data ownership.
Sage 100 SQL Data Migration to Acumatica
The phrase Sage 100 SQL migration requires clarification.
Not every Sage 100 environment has the same database architecture.
Sage 100 Premium and certain SQL-based environments can involve Microsoft SQL Server, while other Sage 100 installations use Sage data files with ODBC access.
Therefore, the project should first identify the source architecture.
For SQL-Based Sage 100 Environments
The migration process may include:
- database inventory;
- SQL Server version;
- company databases;
- custom tables;
- third-party schemas;
- database backups;
- ODBC configuration;
- query-based extraction;
- record-count validation;
- data transformation pipelines.
Do Not Treat the SQL Database as the Business Model
Direct access to tables does not automatically explain the business meaning of the data.
The migration team still needs Sage functional knowledge to understand:
- document status;
- relationships;
- control totals;
- open versus historical records;
- posting behavior;
- third-party enhancements.
A technically correct SQL export can still produce a bad ERP migration if the business relationships are misunderstood.
Sage 100 Chart of Accounts Migration
The chart of accounts is one of the areas where companies often copy too much from the old system.
A Sage 100 chart may have evolved over many years.
Accounts may contain embedded information representing:
- departments;
- locations;
- business units;
- product lines;
- entities;
- management reporting conventions.
Acumatica offers account, subaccount, branch, and other reporting structures that may allow the company to simplify the chart.
Migration Tasks
- identify active accounts;
- identify obsolete accounts;
- identify control accounts;
- map retained earnings;
- map cash accounts;
- define branches;
- design subaccount segments;
- map departments or divisions;
- prepare opening balances;
- validate the trial balance.
The objective is not to preserve every account number.
The objective is to preserve financial meaning while improving future reporting.
Migrating Sage 100 Companies, Divisions, and Locations
A growing Sage 100 environment may include:
- multiple company codes;
- separate databases;
- divisions;
- warehouses;
- locations;
- different accounting structures.
Acumatica provides companies, branches, warehouses, and related organizational structures.
The migration should determine which Sage structures represent:
- legal entities;
- financial branches;
- physical locations;
- warehouses;
- reporting dimensions.
These concepts should not be mixed automatically.
Multi-Company Consolidation
For companies running several Sage databases, moving to Acumatica may create an opportunity to centralize:
- financial reporting;
- customer data;
- vendor data;
- inventory visibility;
- intercompany processes;
- security;
- management dashboards.
Sage 100 Customer and Vendor Migration
Customer and vendor master data influences nearly every downstream process.
The migration should address data quality before import.
Customer Information
- customer ID;
- name;
- billing addresses;
- shipping addresses;
- contacts;
- terms;
- credit limits;
- salespersons;
- tax information;
- price level;
- email;
- phone;
- custom fields;
- external integration IDs.
Vendor Information
- vendor ID;
- vendor name;
- addresses;
- contacts;
- payment terms;
- tax information;
- payment details;
- currency;
- custom fields;
- item relationships.
Data Cleansing
Review:
- duplicate accounts;
- inactive customers;
- inactive vendors;
- invalid addresses;
- old contacts;
- duplicate tax IDs;
- inconsistent naming conventions.
Migrating dirty master data simply creates a cleaner-looking interface with the same underlying problems.
Sage 100 Inventory Migration to Acumatica
Inventory conversion is frequently one of the most challenging components of the project.
The business must align:
- item master data;
- warehouse quantities;
- inventory valuation;
- costing methods;
- open purchase orders;
- open sales demand;
- lot and serial information;
- physical inventory.
Item Master
Potentially migrated fields include:
- item number;
- description;
- product line;
- item type;
- units of measure;
- costing information;
- sales prices;
- vendors;
- reorder settings;
- lead times;
- custom fields.
Warehouses
For each warehouse, validate:
- on-hand quantity;
- allocated quantity;
- available quantity;
- inventory value;
- lot balances;
- serial numbers;
- in-transit inventory;
- open supply;
- open demand.
Physical Inventory Reconciliation
The ideal cutover should reconcile:
- Sage 100;
- physical inventory;
- warehouse system;
- eCommerce inventory;
- general ledger inventory accounts.
If those values disagree, the company must determine the authoritative opening balance before Acumatica goes live.
Migrating Open Accounts Receivable and Accounts Payable
Open AR and AP require detailed reconciliation because they directly affect cash and working capital.
Accounts Receivable
Potentially migrated documents include:
- open invoices;
- credit memos;
- unapplied cash;
- customer deposits;
- due dates;
- remaining balances;
- document references.
Accounts Payable
Potential data includes:
- open vendor invoices;
- vendor credits;
- prepayments;
- unapplied payments;
- due dates;
- remaining balances;
- document references.
Required Reconciliation
After migration:
- customer aging should equal approved Sage totals;
- vendor aging should equal approved Sage totals;
- AR should reconcile with the general ledger;
- AP should reconcile with the general ledger;
- unapplied documents should remain traceable.
Sage 100 Sales Order and Purchase Order Migration
Open orders need special attention because they continue through operational workflows after go-live.
Sales Orders
The migration may require:
- customer;
- order number;
- order date;
- customer PO;
- items;
- quantity ordered;
- quantity shipped;
- warehouse;
- price;
- discount;
- tax;
- freight;
- salesperson;
- status;
- channel references.
Purchase Orders
The migration may include:
- vendor;
- PO number;
- items;
- ordered quantity;
- received quantity;
- cost;
- warehouse;
- expected delivery;
- status;
- related receipts.
Partially Completed Documents
Partially shipped or partially received documents should be reviewed individually because source and target systems may represent remaining quantities differently.
Sage 100 Manufacturing and BOM Migration
Manufacturing migrations usually require design rather than simple data conversion.
The source environment may contain:
- assemblies;
- BOMs;
- component relationships;
- routing;
- work centers;
- labor;
- overhead;
- production history;
- inventory requirements;
- planning information.
Acumatica Manufacturing Edition may support:
- bill of material and routing;
- production management;
- material requirements planning;
- planning and scheduling;
- engineering change control;
- product configurator;
- shop-floor workflows;
- manufacturing costing.
Do Not Assume One-to-One BOM Conversion
A source BOM may require changes because:
- units differ;
- routing was handled externally;
- phantom assemblies exist;
- labor was tracked differently;
- overhead rules differ;
- revision control needs improvement;
- planning parameters were stored elsewhere.
The target BOM structure should support future production rather than merely preserve historical Sage behavior.
How Much Sage 100 History Should Be Migrated?
There are several valid strategies.
Full Detailed History
Advantages:
- users remain in one ERP;
- historical research is easier;
- comparative analysis can use one source;
- legacy infrastructure may be retired sooner.
Disadvantages:
- higher migration cost;
- longer reconciliation;
- more transformation;
- increased risk of transferring obsolete data.
Limited History
A company may migrate the current year plus one or more comparative periods.
Summary History
Monthly or annual financial summaries can support comparative reporting without recreating every transaction.
Opening Balances and Open Transactions Only
The cleanest production approach is sometimes to begin with approved opening positions and preserve Sage 100 as a controlled historical archive.
How to Decide
Consider:
- audits;
- tax retention;
- warranty requirements;
- customer service;
- vendor history;
- manufacturing traceability;
- project history;
- comparative reporting;
- cost of maintaining Sage access.
Sage 100 Crystal Reports Migration to Acumatica
Crystal Reports is an important part of many Sage 100 environments.
Companies may have accumulated dozens or hundreds of reports over time.
Common report types include:
- financial reports;
- sales reports;
- inventory reports;
- purchase reports;
- customer statements;
- labels;
- operational forms;
- custom management reports.
These should not automatically be recreated one-for-one.
Inventory Every Report
For each Crystal Report, identify:
- business owner;
- frequency of use;
- data source;
- parameters;
- formulas;
- distribution method;
- whether it is still required.
Possible Acumatica Replacements
A Crystal Report may become:
- an Acumatica report;
- a Generic Inquiry;
- a dashboard;
- a financial report;
- a business event;
- a Power BI or Tableau report;
- an automated notification;
- a report that should simply be retired.
Reporting Migration Is a Redesign Opportunity
A report created fifteen years ago may exist because management could not easily access live data.
If Acumatica can surface that information directly on a role-based dashboard, recreating the old PDF may provide little value.
Migrating Sage 100 Customizations and Business Logic
Many long-term Sage 100 customers use customizations created by Sage partners or internal developers.
They may include:
- Business Objects logic;
- Visual Integrator jobs;
- custom fields;
- scripts;
- modified screens;
- custom reports;
- third-party modules;
- scheduled integrations.
The migration team should not begin by asking:
How do we rewrite this in Acumatica?
The correct first question is:
What business problem does this customization solve?
Possible Target Approaches
The requirement may become:
- standard Acumatica functionality;
- a configuration setting;
- an approval workflow;
- a business event;
- a Generic Inquiry;
- an import/export scenario;
- an API integration;
- a BizTech connector;
- a custom Acumatica customization project.
Migrating Sage 100 Integrations to Acumatica
Many Sage 100 customers do not actually run one ERP.
They run an ecosystem.
That ecosystem may include:
- Amazon;
- Shopify;
- WooCommerce;
- Magento;
- CRM;
- EDI;
- shipping software;
- warehouse systems;
- payment processors;
- tax software;
- manufacturing applications;
- reporting databases;
- custom software.
Every integration must be inventoried before the Sage environment is retired.
Integration Inventory
Document:
- system name;
- business owner;
- technical owner;
- data entities;
- direction;
- frequency;
- authentication;
- record matching;
- error handling;
- monitoring;
- transaction volume.
BizTech Acumatica Connectors
BizTech already develops Acumatica solutions for many common integration scenarios.
- Amazon FBA/FBM Connector;
- Shopify Connector;
- WooCommerce Connector;
- Magento Connector;
- PayPal Integration;
- ShipHero Connector;
- ShipStation Connector;
- DSCO Connector;
- CommerceHub Connector;
- Salesforce Integration;
- ServiceTitan Connector;
- EDI workflows;
- custom API integrations.
Using an existing connector can reduce the amount of custom redevelopment required during migration.
Do Not Rebuild Sage 100 Inside Acumatica
This is one of the most important principles of the entire migration.
Users often request familiar screens, fields, reports, and workflows simply because they know them.
But familiarity does not necessarily mean efficiency.
A stronger migration sequence is:
- Use standard Acumatica functionality when it fits.
- Use configuration and low-code tools where possible.
- Use an existing BizTech or ecosystem solution when one already solves the problem.
- Keep specialized external software when it genuinely adds value.
- Develop custom Acumatica functionality only when necessary.
The goal is not to reproduce Sage 100. The goal is to preserve the business while improving the system.
This approach can reduce:
- technical debt;
- custom development cost;
- upgrade risk;
- support requirements;
- implementation time;
- training complexity.
Complete Sage 100 to Acumatica Migration Process
Phase 1: Business Discovery
Define why the company is considering migration and what measurable business problems the project must solve.
Phase 2: Sage Environment Audit
Inventory versions, modules, companies, data, reports, customizations, integrations, users, and infrastructure.
Phase 3: Acumatica Fit-Gap Analysis
Classify requirements into:
- standard Acumatica;
- configuration;
- existing BizTech solution;
- external integration;
- custom development;
- retirement.
Phase 4: Target ERP Architecture
Design:
- companies;
- branches;
- chart of accounts;
- subaccounts;
- customers;
- vendors;
- inventory;
- warehouses;
- manufacturing;
- projects;
- security;
- reporting;
- integrations.
Phase 5: Data Extraction Design
Determine whether each dataset comes from:
- Visual Integrator;
- ODBC;
- reports;
- lookup exports;
- SQL;
- third-party applications.
Phase 6: Data Cleansing and Mapping
Deduplicate, standardize, reconcile, and map source data.
Phase 7: Acumatica Configuration
Configure the approved applications and processes.
Phase 8: Integration and Custom Development
Build only what is required after fit-gap analysis.
Phase 9: Test Migration
Perform at least one realistic conversion rehearsal.
Phase 10: Reconciliation
Validate:
- trial balance;
- AR;
- AP;
- cash;
- inventory;
- sales orders;
- purchase orders;
- manufacturing balances;
- project balances.
Phase 11: User Acceptance Testing
Users test real end-to-end processes.
Phase 12: Training
Training should be role-based and based on the configured client environment.
Phase 13: Final Cutover
Freeze source transactions, complete the final export, migrate production data, reconcile, activate integrations, and approve go-live.
Phase 14: Stabilization and Optimization
Monitor users, integrations, reports, performance, and exceptions after launch.
How Much Does Sage 100 to Acumatica Migration Cost?
There is no universal migration price.
The major cost drivers include:
- Sage 100 edition;
- number of companies;
- modules;
- transaction history;
- data quality;
- inventory complexity;
- manufacturing;
- custom reports;
- Visual Integrator jobs;
- customizations;
- third-party modules;
- integrations;
- Acumatica applications;
- training;
- testing;
- cutover complexity.
| Cost Area | Typical Scope |
|---|---|
| Acumatica Software | Applications, product level, resources, storage, deployment |
| Discovery | Sage audit, process review, fit-gap, target architecture |
| Data Migration | Extraction, cleansing, mapping, imports, reconciliation |
| Reporting Migration | Crystal Reports, financial reports, dashboards, BI |
| Customization | Visual Integrator logic, custom fields, Business Objects, custom workflows |
| Integration Migration | Commerce, WMS, shipping, payments, CRM, EDI, tax, custom APIs |
| Training | Role-based training and documentation |
| Go-Live | Final cutover, reconciliation, stabilization |
| Support | Monitoring, issue resolution, optimization, enhancements |
What Reduces Migration Cost?
- clean source data;
- reconciled financials;
- limited historical migration;
- clear process ownership;
- standard Acumatica functionality;
- existing BizTech connectors;
- retiring unused reports;
- retiring obsolete customizations;
- phased deployment where appropriate.
What Increases Migration Cost?
- many companies;
- many years of detailed history;
- inaccurate inventory;
- large Crystal Reports catalog;
- many third-party modules;
- extensive customization;
- complex manufacturing;
- many integrations;
- compressed implementation schedule;
- poor internal availability.
How Long Does Sage 100 to Acumatica Migration Take?
There is no universal duration.
A Sage 100 migration can range from a focused financial conversion to a full operational transformation involving manufacturing, distribution, construction, inventory, multiple entities, historical data, and integrations.
Published Acumatica customer stories illustrate this variation.
Erickson International’s Sage 100 replacement was implemented in three months for its specific scope.
Other migrations have different timelines based on data, customizations, integrations, user availability, and industry requirements.
Timeline Drivers
- number of companies;
- number of modules;
- data history;
- quality of data;
- manufacturing complexity;
- customization;
- reporting;
- integrations;
- training;
- testing;
- internal decision speed.
Real Sage 100 to Acumatica Migration Results
Actual customer examples provide useful evidence of what organizations have achieved after moving from Sage 100 to Acumatica.
These are specific company results, not universal guarantees.
Erickson International
reduction in IT total cost of ownership reported in the customer case study
connected in one ERP environment
implementation period reported for this specific project
Erickson International replaced Sage 100 and disconnected financial systems with Acumatica.
The company gained real-time inventory visibility across locations and reduced infrastructure complexity.
Eastman Music Company
consolidated into one ERP platform
to run a transaction report that previously required 1–2 days
cut from shipping times according to the published case study
Eastman Music had operated Sage 100 for decades and needed a platform capable of supporting acquisitions and international growth.
Kelly Products
reduction in month-end close time
united on one ERP platform
inventory systems consolidated
Kelly Products moved from disconnected Sage environments to Acumatica Manufacturing Edition.
Dakota Red Corporation
Dakota Red operated Sage 100, Microsoft Access, and spreadsheets across 12 locations and 15 entities.
Its Acumatica case study reports:
- 15 entities consolidated;
- inventory visibility across 12 locations;
- approximately $1.5–$2 million reduction in inventory;
- expansion of ERP access from approximately 10 to 70 users.
Spohn Associates
Specialty contractor Spohn Associates replaced Sage 100 and multiple other applications with Acumatica Construction Edition.
The published case study reports:
- one platform replacing approximately 10 applications;
- hours saved through automation;
- efficient management of more than 350 projects annually.
Quality Material Handling
Quality Material Handling replaced Sage 100 and paper/spreadsheet processes with Acumatica.
The published case study reports:
- report preparation reduced from hours to minutes;
- five sales-tax reports consolidated into one;
- 82% reduction in month-end close time.
AFF Group
AFF Group moved from an outdated Sage environment to Acumatica Manufacturing Edition.
The published case study reports:
- millions saved in labor costs;
- production doubled with the same staff;
- major reductions in paper-based processes.
Sage 100 to Acumatica Migration for Manufacturing
Manufacturers are one of the strongest migration audiences.
A manufacturing company may need:
- financial management;
- inventory;
- BOMs;
- routing;
- production orders;
- MRP;
- planning and scheduling;
- lot and serial traceability;
- quality workflows;
- shop-floor data;
- warehouse management;
- eCommerce;
- EDI;
- CRM;
- financial reporting.
The migration should connect manufacturing and financial data rather than preserve separate operational silos.
Sage 100 to Acumatica Migration for Distribution
Distribution companies often need stronger connectivity across:
- purchasing;
- inventory;
- warehouses;
- sales orders;
- pricing;
- replenishment;
- shipping;
- returns;
- eCommerce;
- EDI;
- customer service;
- margin reporting.
A modern ERP should allow warehouse, sales, purchasing, finance, and management teams to work from the same data.
Sage 100 to Acumatica Migration for Construction
Construction businesses may require:
- project accounting;
- job costing;
- budgets;
- commitments;
- change orders;
- subcontracts;
- billing;
- retainage;
- field access;
- document management;
- project dashboards.
The migration may therefore involve more than financial balances.
Active project structures and open commitments may need detailed design.
Sage 100 to Acumatica Migration for eCommerce
An eCommerce company may have built a large integration ecosystem around Sage 100.
The target Acumatica architecture may include:
- Shopify;
- WooCommerce;
- Amazon;
- Magento;
- payment systems;
- shipping platforms;
- warehouses;
- 3PLs;
- returns;
- refunds;
- channel profitability.
BizTech’s existing connector portfolio can reduce the amount of integration redevelopment required.
Sage 100 to Acumatica Migration for Multi-Company Businesses
Multi-company organizations need to evaluate:
- company structure;
- branches;
- shared master data;
- intercompany accounting;
- consolidated reporting;
- currencies;
- security;
- warehouses;
- entity-specific integrations.
Eastman Music’s consolidation of 14 companies and Dakota Red’s 15-entity environment demonstrate the scale Acumatica can support in this scenario.
Common Sage 100 to Acumatica Migration Risks
Risk 1: Assuming Sage 100 Is the Same for Every Customer
Standard, Advanced, Premium, custom modules, hosting, SQL environments, and third-party enhancements create different migration requirements.
Risk 2: Exporting Data Before Designing Acumatica
Source data cannot be mapped correctly until the target structure exists.
Risk 3: Ignoring Custom Reports
A business may rely on Crystal Reports that nobody remembered to include in the migration scope.
Risk 4: Missing Visual Integrator Jobs
Automated imports and exports may support critical operations.
Risk 5: Migrating Inaccurate Inventory
Incorrect opening inventory immediately damages trust in the new ERP.
Risk 6: Rebuilding Every Customization
Some old customizations should be replaced with standard Acumatica functionality.
Risk 7: Migrating Too Much History
Full transaction history can significantly increase cost without producing proportional value.
Risk 8: Forgetting Third-Party Integrations
Payments, EDI, eCommerce, warehouses, and reporting systems must be included from the beginning.
Risk 9: Insufficient Testing
Individual screens can work while complete business processes fail.
Risk 10: No Post-Go-Live Support
Production transactions reveal edge cases that test data may not expose.
Why BizTech Is Uniquely Positioned for Sage 100 to Acumatica Migration
This migration is one of the scenarios where BizTech’s partner background matters most.
BizTech Services is both a Sage Certified Gold Development Partner and an Acumatica Gold Partner.
This matters because a migration partner should understand both the system being left and the platform being adopted.
Source-System Understanding
BizTech’s Sage development experience can help identify:
- Sage 100 modules;
- data structures;
- ODBC dependencies;
- Visual Integrator jobs;
- Crystal Reports;
- custom development;
- third-party applications;
- integration workflows.
Target-System Expertise
As an Acumatica Gold Partner, BizTech works with:
- Acumatica implementation;
- configuration;
- data migration;
- custom development;
- API integrations;
- automation;
- reporting;
- testing;
- training;
- support.
Proprietary Acumatica Solutions
BizTech also develops solutions for:
- Amazon FBA and FBM;
- Shopify;
- WooCommerce;
- Magento;
- PayPal;
- ShipHero;
- ShipStation;
- DSCO;
- CommerceHub;
- ServiceTitan;
- Salesforce;
- EDI;
- Gift Card Processing;
- Kit Processing;
- Consignment Processing;
- custom warehouse and commerce workflows.
One Migration Partner Instead of Several Disconnected Vendors
A complex Sage 100 replacement might otherwise require:
- one Sage consultant;
- one Acumatica consultant;
- a data migration company;
- an integration developer;
- a reporting consultant;
- a support provider.
BizTech can coordinate these disciplines as one migration program.
Final Sage 100 to Acumatica Migration Checklist
Business Case
- Reasons for migration are documented.
- Success metrics are defined.
- Executive sponsor is assigned.
- Budget is approved.
- Process owners are identified.
Sage 100 Environment
- Version is documented.
- Edition is documented.
- Modules are documented.
- Companies are documented.
- Users and roles are documented.
- Visual Integrator jobs are inventoried.
- Crystal Reports are inventoried.
- ODBC connections are inventoried.
- Customizations are inventoried.
- Third-party modules are inventoried.
- Integrations are inventoried.
Acumatica Design
- Companies are approved.
- Branches are approved.
- Chart of accounts is approved.
- Subaccount structure is approved.
- Customer classes are approved.
- Vendor classes are approved.
- Item classes are approved.
- Warehouses are approved.
- Security roles are approved.
- Workflows are approved.
Data
- Customers are cleaned.
- Vendors are cleaned.
- Items are cleaned.
- Chart of accounts is mapped.
- Trial balance is reconciled.
- AR aging is reconciled.
- AP aging is reconciled.
- Inventory is reconciled.
- Open orders are validated.
- Historical strategy is approved.
- Test migration is completed.
Reports
- Critical Crystal Reports are classified.
- New Acumatica reports are tested.
- Generic Inquiries are tested.
- Executive dashboards are approved.
- Legacy reports to be retired are documented.
Integrations
- Every integration has an owner.
- Credentials are configured.
- Cross-references are defined.
- Error handling is tested.
- Retry logic is tested.
- Monitoring is enabled.
- Orders are tested.
- Inventory synchronization is tested.
- Payments are tested.
- Fulfillment is tested.
- Returns and refunds are tested.
Cutover
- Transaction freeze is scheduled.
- Sage backup is complete.
- Final extraction is scheduled.
- Production migration is rehearsed.
- Reconciliation responsibility is assigned.
- Go-live criteria are defined.
- Contingency plan is documented.
- Support coverage is scheduled.
Final Conclusion: Moving from Sage 100 to Acumatica
Sage 100 remains an actively supported ERP product in 2026.
That makes the migration decision more meaningful—not less.
A company should move because its business has reached a point where a different ERP architecture creates more value.
For some organizations, that point arrives when they need:
- cloud-native access;
- real-time visibility across locations;
- more employees working directly in ERP;
- modern manufacturing functionality;
- construction or project workflows;
- eCommerce and marketplace automation;
- open APIs;
- modern dashboards;
- less dependence on spreadsheets;
- simpler integration architecture;
- better support for acquisitions and multiple companies.
Acumatica provides a modern ERP platform for that next stage.
But successful migration requires more than choosing software.
It requires understanding the existing Sage environment, designing the future Acumatica architecture, cleansing and reconciling data, rebuilding only the customizations that matter, connecting external systems, testing real workflows, training users, and managing cutover carefully.
BizTech is particularly well positioned for this transition because it understands both ecosystems.
BizTech is a Sage Certified Gold Development Partner and an Acumatica Gold Partner.
That combination allows the migration to be managed as one connected business transformation instead of a handoff between unrelated source-system and target-system vendors.
For organizations searching for:
- Sage 100 to Acumatica Migration;
- Sage 100 Replacement;
- Sage 100 Alternative;
- Acumatica vs Sage 100;
- Sage 100 Cloud ERP Migration;
- Sage 100 Data Migration;
- Sage 100 SQL Migration;
- Sage 100 Crystal Reports Migration;
- Sage 100 Manufacturing Migration;
- Acumatica Gold Partner;
- BizTech Sage 100 Migration;
the correct first step is a structured migration assessment.
Sage 100 contains the history of the business.
Acumatica provides the next ERP platform.
BizTech helps build the path between them.
FAQ: Sage 100 to Acumatica Migration
Is Sage 100 discontinued in 2026?
No. Sage 100 remains an actively supported product. Sage released Sage 100 2026 and product update 2026.1. Companies moving to Acumatica are generally making an ERP modernization decision rather than responding to a Sage 100 end-of-life event.
Can Sage 100 data be migrated to Acumatica?
Yes. Financial data, customers, vendors, inventory, open AR and AP, sales orders, purchase orders, warehouses, manufacturing data, and selected historical transactions can be migrated depending on the Sage configuration and Acumatica target design.
How does Acumatica’s Sage 100 migration program work?
Acumatica’s See the Difference Migration Plan can move core financial, customer, vendor, and open transaction data into an Acumatica evaluation environment in approximately two to three days and provides a six-month trial using actual company data.
Does the two-to-three-day migration program mean full Acumatica implementation takes three days?
No. The rapid conversion is designed to create an evaluation environment with core data. A complete production implementation may also require configuration, inventory design, manufacturing, integrations, customizations, reports, historical data, testing, training, and cutover.
Can Sage 100 SQL data be migrated to Acumatica?
Yes. SQL-based Sage 100 environments can be extracted using appropriate database, reporting, ODBC, or export methods. The migration must still preserve the business meaning and relationships of the data rather than simply copying database tables.
Can Visual Integrator jobs be migrated?
Visual Integrator jobs are not normally copied directly into Acumatica. Their business purpose should be documented and replaced using Acumatica import/export scenarios, APIs, business events, integrations, workflows, or custom development as appropriate.
Can Sage 100 Crystal Reports be migrated to Acumatica?
The reporting requirements can be migrated, but old Crystal Reports should be reviewed individually. A report may be recreated as an Acumatica report, Generic Inquiry, dashboard, financial report, BI report, automated notification, or retired if the information is already available natively.
Can Sage 100 manufacturing data be migrated to Acumatica?
Yes, but manufacturing conversion usually requires design work. Bills of material, routing, production, work centers, costing, planning, and inventory relationships must be mapped to the target Acumatica Manufacturing configuration.
Can open AR and AP be migrated?
Yes. Open invoices, credits, vendor invoices, payments, deposits, due dates, and remaining balances can be migrated and reconciled with the Acumatica general ledger.
Can Sage 100 inventory be migrated?
Yes. Items, warehouses, quantities, costs, prices, lot numbers, serial numbers, units of measure, vendors, and other inventory data can be migrated when the source information is accurate and reconciled.
How much Sage 100 history should we migrate?
The company can migrate full detail, limited detailed history, summarized historical data, or only opening balances and open documents. The right option depends on audit requirements, reporting needs, data quality, budget, and legacy-access requirements.
How much does Sage 100 to Acumatica migration cost?
Cost depends on Sage edition, companies, modules, data volume, historical requirements, inventory, manufacturing, Crystal Reports, customizations, integrations, Acumatica applications, testing, training, and support. A detailed assessment is required for a reliable estimate.
How long does Sage 100 to Acumatica migration take?
There is no universal duration. Published Acumatica customer examples include projects completed in approximately three months, while more complex multi-company or highly customized environments may require longer implementations.
Can BizTech migrate our Sage 100 integrations to Acumatica?
Yes. BizTech develops Acumatica integrations and proprietary connectors for Amazon, Shopify, WooCommerce, Magento, PayPal, ShipHero, ShipStation, DSCO, CommerceHub, Salesforce, ServiceTitan, EDI, and other systems.
Why is BizTech a strong partner for Sage 100 to Acumatica migration?
BizTech is both a Sage Certified Gold Development Partner and an Acumatica Gold Partner. This gives the team expertise in the Sage 100 source environment and the Acumatica target platform, including ERP implementation, migration, custom development, integrations, reporting, testing, training, and support.


```
How to Create Sales Orders with Kit Items in Acumatica
How to Create Sales Orders with Kit Items in Acumatica
Creating a sales order with kit items in Acumatica means adding one kit line, answering a short options prompt, and letting Acumatica explode that line into a placeholder item plus every component the customer will actually receive. This article walks that task as a user performs it in the Biz-Tech Services Kit Processing product for Acumatica ERP: adding the kit line, working the Options popup and the Component Details window, exploding the kit, and reading the result.
The point of the product is that kit components are visible and editable on the Acumatica sales order line itself. Users do not open a separate maintenance screen or print a pick list to see what is inside a kit. That convenience comes with rules, and most support questions trace back to a handful of settings configured long before the order was opened. Those settings appear below only where they change order entry.
Before You Start: What Must Be Configured
A kit line behaves according to its kit specification. If any of the following is missing, order entry will not go the way users expect.
1. The item is flagged as a kit. A kit specification can only be created for an item marked as a kit on the General tab of the Stock Items (IN202500) or Non-Stock Items (IN202000) form.
2. The Kit Assembly feature is enabled. The Kit Specifications form appears only if it is turned on for the tenant on the Enable/Disable Features (CS100000) form in Acumatica.
3. The specification is Active and has a current revision. A current revision must be enabled for the kit to explode on the Acumatica Sales Orders screen. If the kit already has one and you check another, Acumatica warns that saving will uncheck the previous revision.
4. Explode Kit is selected. Selecting it activates the three fields that drive order entry: Kit Placeholder Item, Explode Option, and Price Calculation.
5. The placeholder item exists and its unit of measure matches. The Kit Placeholder Item is a non-stock item that replaces the kit item after explosion, and its Unit of Measure, or UOM, must match the UOM of the kit item.
6. Preferences are set. In the Biz-Tech Services Kit Processing Settings section of Sales Orders Preferences, Price Calculation for Kits, Kit Placeholder Item, and Explode Option apply to all kits. Where the same settings are configured for a specific kit on the Kit Specifications screen, Acumatica gives priority to the per-kit setting.
That last point matters. When two users see different behavior from the same Acumatica kit, the usual cause is that the kit carries its own Explode Option or placeholder item and is ignoring the tenant-wide preference.
Creating a Sales Order with a Kit Item, Step by Step
Each sub-step below matches something the user clicks on the Acumatica Sales Orders screen.
Step 1: Add the Kit Item to the Order Line
Create the sales order as usual and add the kit inventory ID on a document detail line. The line is still a single kit line, not a set of components, and nothing is committed yet. That is exactly why this is the moment to make changes.
Step 2: Answer the Options Popup
If the specification has Kit has options selected, an Options popup opens automatically as soon as the kit item is entered. It lists each Option Category defined for the kit; the user selects an Option Code for each and presses OK. Where a category is marked Required, an option code must be chosen before the user can proceed with the kit order.
The order in which categories appear in the Acumatica drop-down is not random. The Sort Order setting on the kit specification sorts option categories ascending or descending, and that is what users see. If the sequence confuses order-entry staff, that is the setting to change.
Some option codes arrive without being chosen. A code flagged as Default Code is included automatically, which covers the cases where no human answers the popup: the API, import scenarios, processing screens, and sales quotes.
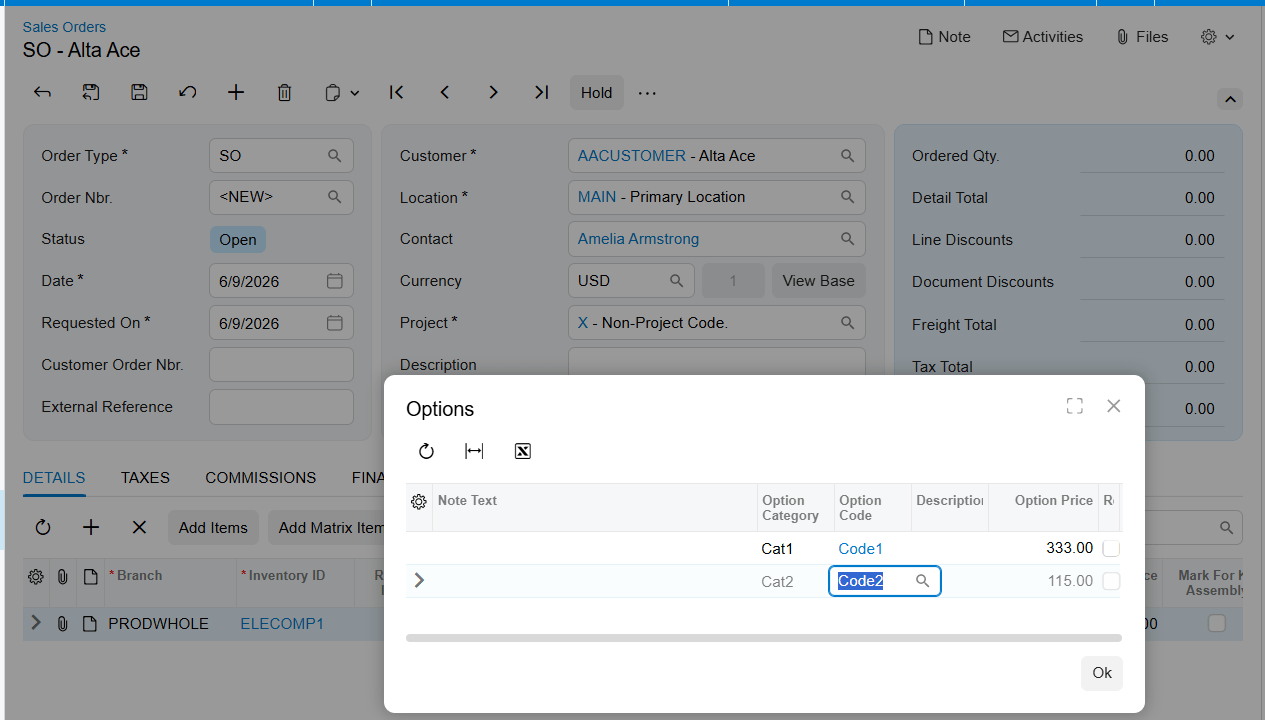
Step 3: Open the Component Details Window
With the kit line selected, open the Component Details popup. This window holds all information related to the kit. From here, and only before explosion, a user can add or delete components, exchange a component for a substitute item, and change the options selected in Step 2.
To revise options already answered, click Change Options. All previous Option Category and Option Code configurations stay intact unless manually changed, so reopening the window to adjust one category will not silently reset the others.
What the window shows about stock is configurable. The Component Availability section of Sales Orders Preferences decides whether Component Details displays Qty. Available, Qty. Avail. for Shipping, and Qty. on Hand, and whether it shows next-receive information drawn from receipts, transfers, and open purchase orders. For a user deciding whether to promise a date, that is the difference between guessing and knowing.
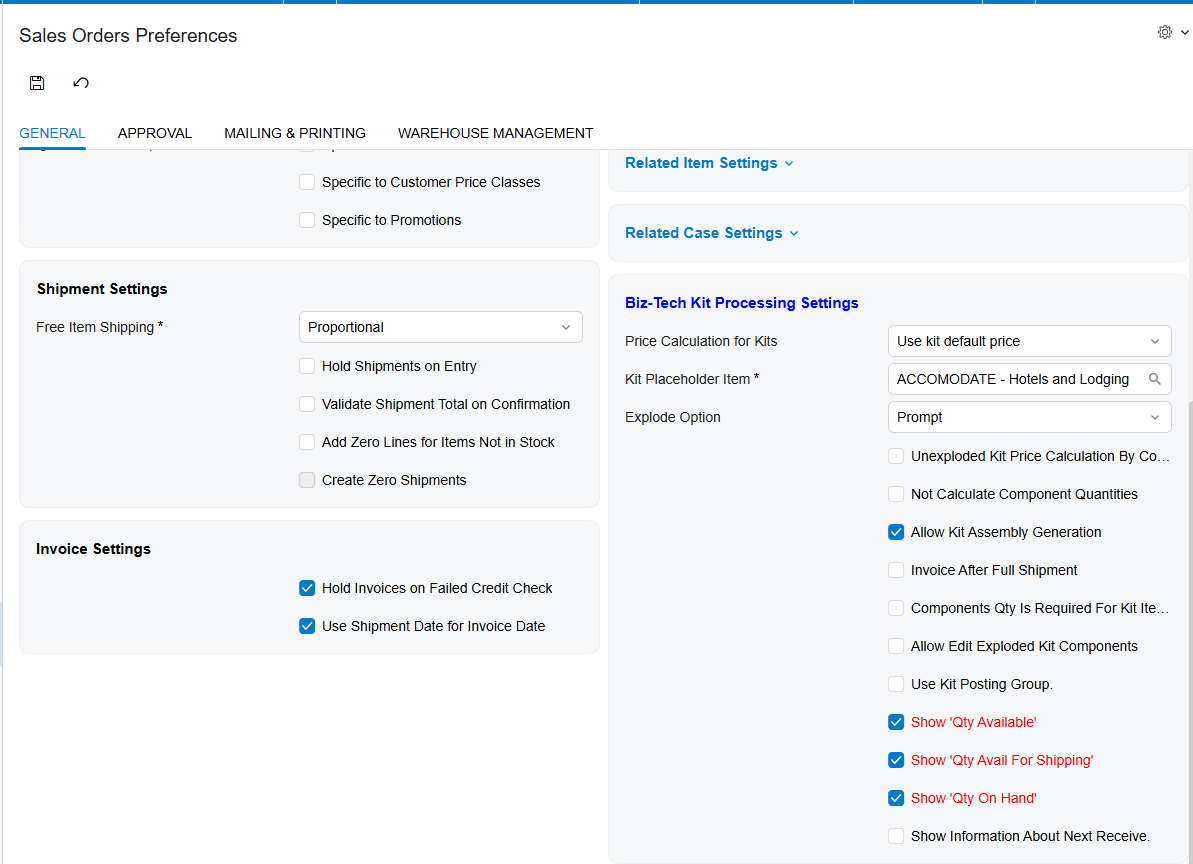
Step 4: Substitute a Component or Add One
Substitution is available when Allow Component Substitution is enabled and substitute items are defined. Double-click the component in Component Details, then use the search icon beside it to pick the substitute. This is how a kit ships with an equivalent part without redefining the kit in Acumatica.
Adding a component that was never part of the kit requires Allow Component Addition, which activates the Add Row option in Component Details. If it is off, new components cannot be added, but existing ones can still be deleted.
Step 5: Explode the Kit
There are two ways to trigger kit explosion on an Acumatica sales order: click Load Components in Component Details, or assign a quantity to the new kit line. Both produce the same result, and users tend to discover the second by accident, which is why a kit sometimes appears to explode on its own.
Whether explosion happens without being asked depends on the Explode Option. Prompt asks the user whether to explode the kit. Automatically explodes it with no user intervention. Do Not Explode prevents explosion entirely.
Step 6: Read the Order After Explosion
After explosion the kit item is replaced by the Kit Placeholder Item, and the components become their own Acumatica order lines with prices, quantities, and costs. The placeholder is a non-stock item that behaves like the kit item but contains no actual items. It keeps the financials clean: with the components on the order in their own right, carrying the kit item too would double-count costs.
One field on the placeholder row deserves attention. Total Cost of Components is the component unit cost at the time the sales order was created, which does not change afterward, multiplied by quantity. It carries forward to the invoice.
Document Triggers: What Each Action Creates
Four actions on the kit line create or change documents in Acumatica. Knowing which produces what is the fastest way to trace where a number came from.
Kit Explosion Creates the Placeholder and Component Lines
Explosion creates no separate document. It rewrites the sales order, swapping the kit line for a placeholder line and inserting one line per component. If Use Kit Posting Group is selected, Acumatica also puts the kit item Account and Subaccount values on the placeholder row, and if Apply to the Components is selected too, on the component rows as well. That is a trigger with accounting consequences, so confirm it before switching it on mid-year.
Mark for PO and Create PO Produce a Purchase Order
A purchase order can be raised for one component directly from the sales order, before the kit is exploded. Add the kit, open Component Details, select Mark for PO for the component, and click Create PO. Acumatica creates the purchase order and shows its number under the PO number column in the popup.
Three rules govern grouping and maintenance. The purchase order is created according to the Default Vendor ID of the component. If several components share a vendor, one purchase order covers them all. And if the purchase order is later deleted, or its lines removed, the number disappears from Component Details, so the sales order does not point at a missing document.
Mark for Kit Assembly and Generate Kit Assembly Produce an Assembly
A kit assembly document can be generated from the order without exploding the kit, provided Allow Kit Assembly Generation is selected on Sales Order Preferences. Enter the kit, select Mark for Kit Assembly on the Details tab, then click Generate Kit Assembly from the Actions list and Save. The same action sits behind the Mark/Unmark for Kit Assembly button in Component Details.
The generated number lands in the Kit Assembly field on the Details tab, and that link opens the Kit Assembly form, whose Orders tab shows the originating sales order number. Assemblies generated this way use the current revision on the Kit Specifications screen. Components can still be added or removed in Component Details beforehand.
Opportunities and Sales Quotes Produce the Order Upstream
Kit lines can begin before the Acumatica sales order exists. On the Details tab of Opportunities, add the kit item and press Create Quote. The kit will not explode on Opportunities itself. On the resulting Sales Quotes screen it explodes the same two ways as on an order. After Save, the exploded kit appears on the Opportunities Details tab too, and later changes are reflected on both screens.
Mapping Rules That Decide What Appears on the Order
What lands on the order is not simply the component list from the specification. Four mechanisms decide the final content and total.
Option Categories and Option Codes
When Kit has options is enabled, two tabs appear on the Kit Specifications screen: Option Category and Option Codes. Each option code belongs to a category, carries its own Option Price, and has stock or non-stock items attached, which may include other kit items. Those items are what Acumatica adds to the order when a user picks that code. This is how one inventory ID serves a family of configurations.
Option Rules That Exclude Combinations
Enabling Allow Option Rules adds an Option Rule tab. A rule pairs a Source Option Category and Source Option Code with a Target Option Category and Target Option Code, and the effect on the Sales Orders screen is exclusion: selecting the source combination removes the target code from the target category.
The documented example: with Size as source category and 8x10 as source code, and Color as target category and Black as target code, choosing 8x10 for Size removes Black from Color. Change Size to 8x12, which is not configured under Option Rules, and Black becomes available again. If staff report that a color has vanished in Acumatica, an option rule is almost always why.
Component Substitution
Substitution changes which item appears on the line without changing the kit specification. Enabling Allow Component Substitution adds a Substitution tab and a matching column on the Stock Components tab. Selecting that check box for a component publishes it to the Substitution tab, where the Sub Item section holds the items that may replace it. It applies to specified components and option code components alike.
The Three Price Calculation Methods
Price Calculation determines how the kit contributes to the order total, and the three methods give materially different numbers.
1. Use Kit Default Price. The kit default price is used, plus any manually added price for the options associated with the kit.
2. Use Component Default Price. The calculation is based on each component default price, and the kit item price is set to zero.
3. Use Combined Default Price. Both the kit default price and the default prices of each component are combined.
A separate setting skips explosion entirely for pricing. Unexploded Kit Price Calculation by Components prevents the kit from exploding and prices only the components for the order total, with a warning that it runs only for kit items whose Explode Kit check box is not enabled. One more preference changes quantities: with Not Calculate Component Quantities enabled on Sales Order Preferences screen, quantity calculation in Acumatica sales orders is based on the quantity specified for the kit itself.
Validation and Common Exceptions
These are the blocks and errors users actually hit on an Acumatica kit order, and what each is telling you.
The Placeholder Unit of Measure Does Not Match the Kit
The UOM of the Kit Placeholder Item must match the UOM of the kit item. If they do not, a warning error message appears. This is a configuration fault that only surfaces during order entry, which is why it feels like an order problem. Fix the placeholder or kit item, then re-enter the line.
The Kit Refuses to Explode
Several independent settings suppress kit explosion, each working regardless of the others. Work through them in this order.
1. The kit specification is not Active, or has no current revision enabled.
2. The Explode Kit check box is not selected on the kit specification.
3. The Explode Option is set to Do Not Explode.
4. Block Kit Items Explosion is selected on the Customers or Vendors screen for this customer.
5. Block Kit Items Explosion is selected in the Biz-Tech Kit Processing Settings on the Order Types screen for this order type.
6. Unexploded Kit Price Calculation by Components is selected, which by design prevents explosion and prices the components instead.
The last three catch people out: the kit specification looks perfectly correct while the block comes from the customer record, the order type, or a pricing preference.
Editing Is Restricted After Explosion
Once the kit has exploded, Component Details stops being an editing surface. Users can no longer delete or add components there, and only Quantity and Warehouse remain editable. Components can still be deleted or added with the [X] and [+] buttons on the Document Details tab.
Editing component quantities on an exploded kit is itself gated. Allow Edit Exploded Kit Component lets users edit individual component quantities and delete kit components on the Sales Orders screen; if it is off, expect quantities to be read-only. The same setting exists in Purchase Orders Preferences for Acumatica purchase orders.
Component Quantities Block the Shipment
Shipping is governed by Components Qty. Is Required for Kit Item Ship in Sales Orders Preferences. Selecting it reveals a drop-down with three options, and the one chosen decides whether a shipment can be created at all.
1. Ship Available Qty. sets the kit or placeholder line to back order allowed, so a shipment can be created for the minimum component quantity without all components being available based on the kit quantity.
2. Ship Ordered Qty. requires all components to be available based on the quantity specified for the kit. Nothing ships until every component is allocated and available.
3. The third option sets the line to back order allowed without requiring component quantities to be available for shipping.
If Acumatica will not create a shipment for an order that looks fully stocked, check which of the three is in force before investigating allocations. Separately, Invoice After Full Shipment allows partial shipment and holds the placeholder to be invoiced after all components have shipped.
A Component Has Zero Quantity
If any kit component has a quantity of zero and the kit item is not set to back order allowed, an error message appears when the check box is selected. A zero-quantity component and a line that cannot be back-ordered are unshippable, and Acumatica stops you at selection rather than at the shipment.
Non-Stock Kit Rules
Non-stock kits carry two constraints, both about the Explode Option. If a non-stock kit has a stock option item, its explode option should be Automatically so the stock option is allocated during shipment. If a non-stock kit is a component or option inside another kit, the Explode Option for both parent and child kit must be Automatically. Nested Acumatica kits that appear to lose stock components almost always violate one of these rules.
Kit Assembly Is Unavailable
For non-stock kit items the Mark for assembly button is disabled by design: there is nothing physical to assemble. Generating an assembly from the order also requires Allow Kit Assembly Generation, and the Kit Assembly form requires the Kit Assembly feature to be enabled in Acumatica.
A Purchase Order Will Not Be Created
Create PO needs a required quantity with a value on the component before Acumatica will create a purchase order. It also depends on the component having a Default Vendor ID, because that is what the order is created against.
Where to Check Your Work
Before releasing a kit order into the Acumatica fulfillment cycle, confirm these fields on the finished document. Most kit disputes come down to one of them being wrong when the order was saved.
1. Kit Placeholder Item. The placeholder line, not the original kit item, should be on the order after explosion.
2. Unit of Measure on the placeholder line. It must match the UOM of the kit item.
3. Component lines. Every expected component present, with its own price, quantity, and cost.
4. Total Cost of Components on the placeholder row. Unit cost at order creation multiplied by quantity, carried to the invoice.
5. Option Category and Option Code selections. Reopen Change Options and confirm they match what the customer asked for.
6. Order total against the price calculation method: Use Kit Default Price, Use Component Default Price, or Use Combined Default Price.
7. Account and Subaccount on the placeholder row, and on the component rows if Apply to the Components is in use.
8. PO number column in Component Details. Any component marked for purchase should show a live number.
9. Back order allowed on the kit or placeholder line, consistent with the shipping option selected.
10. Quantities on component lines, particularly where Not Calculate Component Quantities is enabled.
Creating Sales Orders with Kit Items: Frequently Asked Questions
Why will my kit not explode on the sales order?
Check the specification first: Active, current revision enabled, Explode Kit selected, Explode Option not Do Not Explode. If that is all correct, the block is outside the specification. Block Kit Items Explosion on the Customers or Vendors screen, the same check box on the Order Types screen, and Unexploded Kit Price Calculation by Components each prevent Acumatica kit explosion on their own.
How do I explode a kit without entering a quantity?
Open Component Details for the kit line and click Load Components, which explodes the kit directly. Assigning a quantity does the same thing and is the more common route in Acumatica, but it is easy to trigger before you meant to.
Can I change the options after I have answered the Options popup?
Yes, as long as the kit has not been exploded. Click Change Options in Component Details and adjust the option codes. Every previous Option Category and Option Code configuration stays intact unless you change it.
Why can I not add or delete components anymore?
Two rules produce that symptom. Before explosion, adding components requires Allow Component Addition, although existing ones can still be deleted without it. After explosion, Component Details allows no adding or deleting, and only Quantity and Warehouse can be edited there. Use the [X] and [+] buttons on the Document Details tab instead.
Why does an option code keep appearing even though nobody selected it?
That code is almost certainly flagged as a Default Code on the kit specification. Default codes are included automatically so kits still configure correctly when no user answers the Options popup: the API, import scenarios, processing screens, and sales quotes.
Why does my second invoice for a kit show a price of zero?
That is expected for a partial shipment when Use Kit Default Price is the price calculation option. The invoice for the first shipment carries the total kit price, and the price for the remaining items is zero. Acumatica charges the kit price once, not once per shipment.
Why is Mark for Kit Assembly greyed out on my order?
For non-stock kit items the button is disabled by design. If the kit is a stock item and it is still unavailable, confirm that Allow Kit Assembly Generation is selected in the Biz-Tech Kit Processing Settings and that the Kit Assembly feature is enabled on the Enable/Disable Features (CS100000) form.
Do kit lines work the same way on quotes and purchase orders?
Largely, yes. On the Sales Quotes screen a kit explodes by quantity or by Load Components exactly as on an order, and changes flow back to the linked opportunity, although the kit will not explode on Opportunities itself. Acumatica purchase orders use the same Component Details window and the same two explosion triggers, with their settings in Purchase Orders Preferences.
Work With the Biz-Tech Services Kit Processing Product
Creating a sales order with kit items rests on a few decisions: whether the kit explodes, which options and substitutions apply, how the price is calculated, and what must be available before the order can ship. Once your business settles those in the kit specification and in Sales Orders Preferences, order entry is a matter of adding a line, answering the Options popup, and confirming the placeholder and component rows. The Biz-Tech Services Kit Processing product keeps that loop on the Acumatica Sales Orders screen, where the order-entry user already is.
To learn more about the Biz-Tech Services Kit Processing product for Acumatica ERP, or to discuss how kit orders should be configured for your business, visit https://biz-techservices.com to learn more and get in touch with the Biz-Tech Services team.
Check also related articles
How to Set Up Kit Processing in Acumatica
Kit Processing Configuration Checklist for Acumatica
How Kit Processing Works in Acumatica from Order Entry to Fulfillment
Watch YouTube training video.
How ServiceTitan Operational Data Flows into Acumatica ERP
How ServiceTitan Operational Data Flows into Acumatica ERP
The ServiceTitan data flow into Acumatica moves field service records in one direction: ServiceTitan creates the operational documents - purchase orders, receipts, bills, invoices, payments, inventory transactions and journal entries - and the Biz-Tech Services ServiceTitan Acumatica Connector retrieves them and creates them as native documents on standard Acumatica ERP screens. Each document type has its own processing screen, its own retrieval rule, and its own place in Acumatica where the result becomes visible.
This article follows that path record by record. It is not a setup checklist. It assumes the store is already configured and answers the question that comes next: what actually happens to a ServiceTitan purchase order, receipt, bill, invoice, payment or journal entry as it lands in Acumatica? It names the screens, tabs, checkboxes and fields that carry the values, because those are the places your users will look to confirm a record arrived or work out why it did not.
What the ServiceTitan Connector for Acumatica Does
The Biz-Tech Services Acumatica ServiceTitan Connector is an ERP integration that imports records from ServiceTitan, a field service management platform, into Acumatica. It connects to a ServiceTitan store through an API, using the credentials entered on the Connection Settings tab, and then brings ServiceTitan documents into Acumatica as purchase orders, purchase receipts, bills, invoices, payments, inventory transactions and journal entries. Imports run from dedicated processing screens, either manually or automatically on a scheduler.
Everything the Biz-Tech Services Acumatica ServiceTitan integrator does is governed by the ServiceTitan Stores screen. It controls invoice import rules, import behavior, customer creation rules, inventory and item handling, warehouse and branch mapping, vendor and business unit mapping, transaction processing logic, purchase orders and receipts, and bills. The store record is the rulebook the data flow reads at every step: it decides which documents are eligible, which master records they attach to, and whether they arrive released or open. If the store is not set up correctly, no data can be imported.
The ServiceTitan Data Flow at a Glance
Before looking at each document type in detail, here is the whole path a record travels on its way into Acumatica ERP:
1. Connection: the Biz-Tech Services ServiceTitan Acumatica connector authenticates against the ServiceTitan store using the credentials on the Connection Settings tab; the Test Credentials action confirms it works before any import runs.
2. Eligibility: the ServiceTitan Store record decides what is in scope - the Import with the following statuses setting, the Begin Invoice Date and Last Invoice Date fields, and the equivalent Begin Journal Entry Date and Last Journal Entry Date fields.
3. Retrieval: every processing screen pulls ServiceTitan records based on their updated date, so a record that changes in ServiceTitan becomes eligible again.
4. ServiceTitan purchase orders first: they are imported on the Import ServiceTitan Purchase Orders screen and created in Acumatica as purchase orders. Any receipt or bill that already exists at that moment comes across in the same run.
5. Receipts and bills next: anything created after the purchase order was imported comes in separately through the Import ServiceTitan Receipts and Import ServiceTitan Bills screens, and attaches to the PO History tab of the Purchase Orders screen.
6. Invoices and payments: the Import SO Invoices screen creates sales invoices in the Invoices and Memos screen, and the Import Invoice Payments screen creates payments that are applied on the Applications tab of the invoice.
7. Inventory and items: ServiceTitan materials, equipment and services become Acumatica stock and non-stock items, and receipts, transfers, adjustments and returns become inventory transactions, released on import when the matching release checkbox is selected.
8. General Ledger: when the Journal Entry option is active, ServiceTitan journal entries are imported against the mapped General Ledger, or GL, accounts and the mapped branches.
Where the ServiceTitan Data Flow Starts: The Store Record
Every import begins at the ServiceTitan Stores screen. The Store Code field is a lookup that identifies the corresponding ServiceTitan store, and the Description field labels it for users. The Default Store checkbox matters to the data flow more than it looks: when it is selected, the system automatically sets and displays that store code on the processing screens, so users do not have to pick a store before they can retrieve anything. The Test Credentials action tests the connection through the API using the information on the Connection Settings tab, and is worth running before a scheduled import window, because a failed connection makes the processing screens return nothing rather than naming the credentials as the cause.
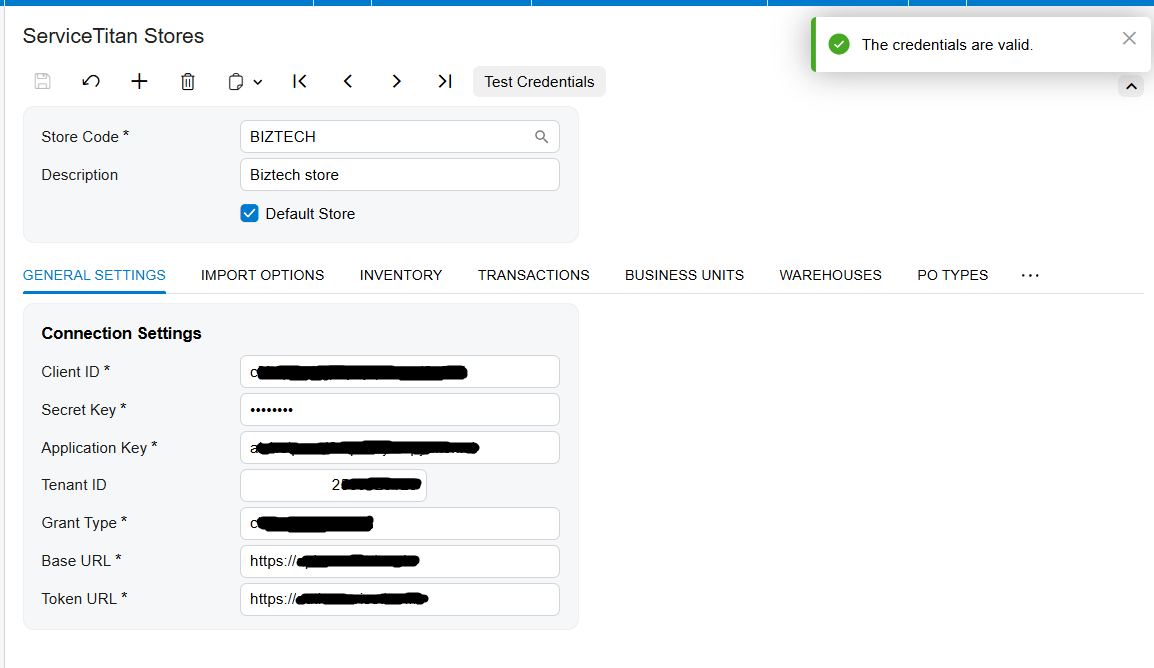
The Purchase Order Path: Why ServiceTitan Purchase Orders Must Come First
The purchase order sequence is the single most important rule in the ServiceTitan data flow, and it is where most import errors originate. The purchase order module workflow was updated so that ServiceTitan purchase receipts and bills cannot be imported into Acumatica unless the related ServiceTitan purchase order has already been imported. The purchase order is the anchor document; receipts and bills are attachments to it, not standalone records.
Step 1: Import ServiceTitan Purchase Orders
Purchase orders are imported from the Import ServiceTitan Purchase Orders screen and created in Acumatica as purchase orders, retrieved based on their updated date. Before this screen returns anything, the required preferences must be configured on the ServiceTitan Stores screen - in particular the PO Types mapping, which maps ServiceTitan purchase receipt PO order type names to Acumatica PO types, and the Return Types mapping, which maps ServiceTitan return types to Acumatica PO types. Without those mappings the Biz-Tech Services ServiceTitan Acumatica integrator cannot decide what kind of purchase order to create.
The purchase order import is also opportunistic. If a ServiceTitan purchase receipt or bill already exists at the moment the purchase order is imported, it is imported as part of the same process; if it does not exist yet, it is simply not imported. That is why one purchase order import can produce three linked documents in Acumatica and another produces only one.
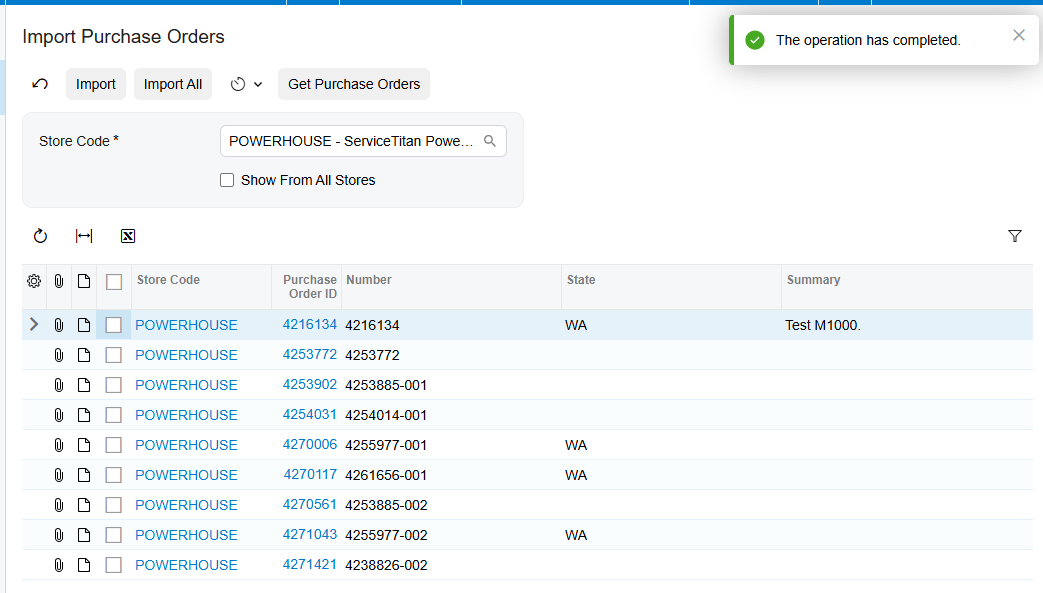
Step 2: Import ServiceTitan Receipts
The Import Purchase Receipts screen retrieves purchase order receipts based on the selected date and status defined in the Receipt Options settings of the ServiceTitan Store. Receipts are retrieved based on their updated date, and the synchronization can be run manually or automatically using the scheduler.
When the related purchase order has already been imported, the Biz-Tech Services Acumatica ServiceTitan integrator system locates it during the receipt import and attaches the receipt document to the PO History tab of the Purchase Orders screen. That tab is where your users should look to confirm a receipt landed against the right purchase order.
The status the receipt arrives in is decided by the ServiceTitan Store setup, not by the processing screen. If the Release checkbox is selected there, the receipt is imported with a Released status; if it is not selected, the receipt arrives with a balanced status and waits for someone to release it. Select it when your business wants ServiceTitan to be the point of control, and leave it clear when you want an Acumatica reviewer in the loop. Receipts can also pull a bill along with them: if the receipt includes a bill, the system imports the bill during the same process and attaches it to the same PO History tab. That behavior is enabled by the Activate Bill checkbox.
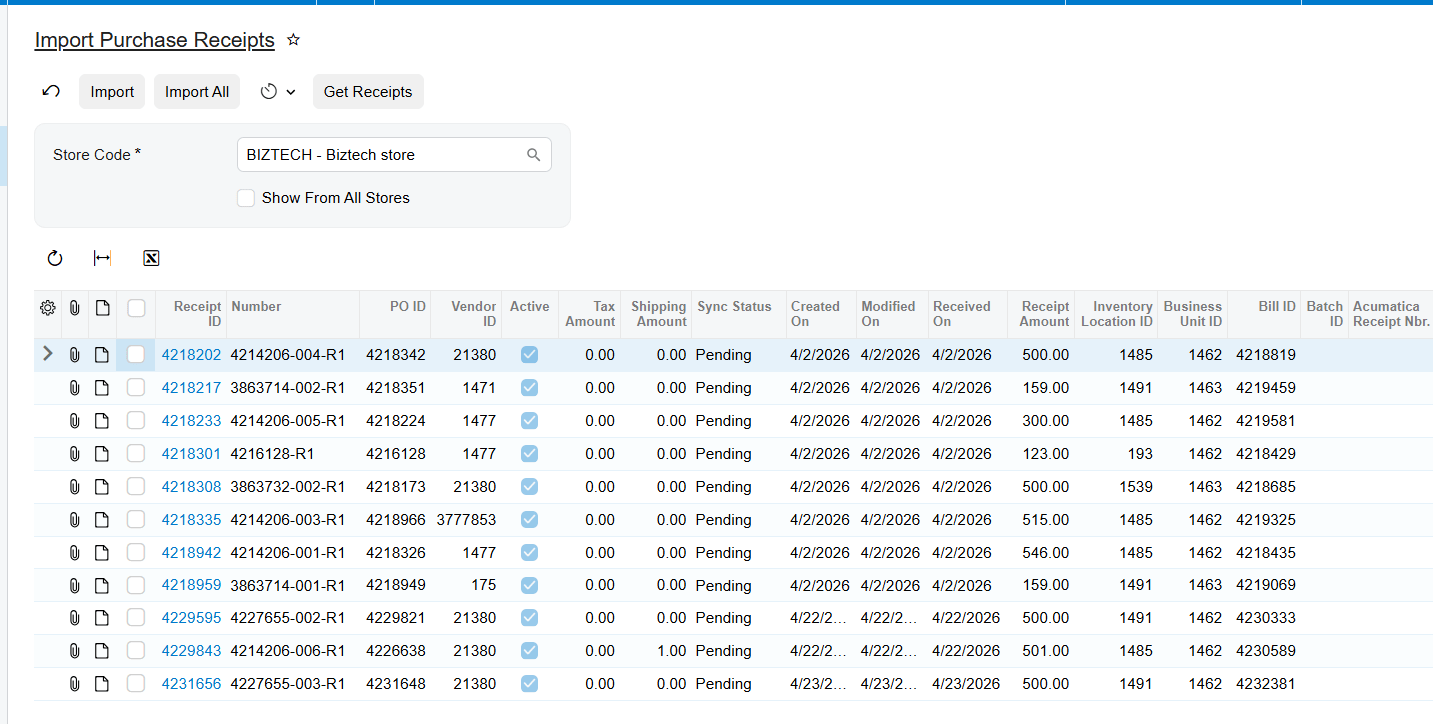
Step 3: Import ServiceTitan Bills
The Import Receipt Bills screen imports ServiceTitan bills into Acumatica, retrieved by their updated date. A bill cannot be imported separately without its corresponding purchase order; attempting it produces an error message. When the purchase order has already been imported, importing the bill later automatically locates that purchase order and attaches the bill to it. The net effect is that bills are always correctly linked to their related purchase orders, whether the bill arrived with the purchase order, with the receipt, or on its own afterwards.
One field is specific to this path: the Branch field used in the bills import process. It applies only when bills are imported and Bills and Adjustments documents are created, so it determines which branch those documents post to. That is why the ServiceTitan Business Units mapping has to be right before bills start flowing.
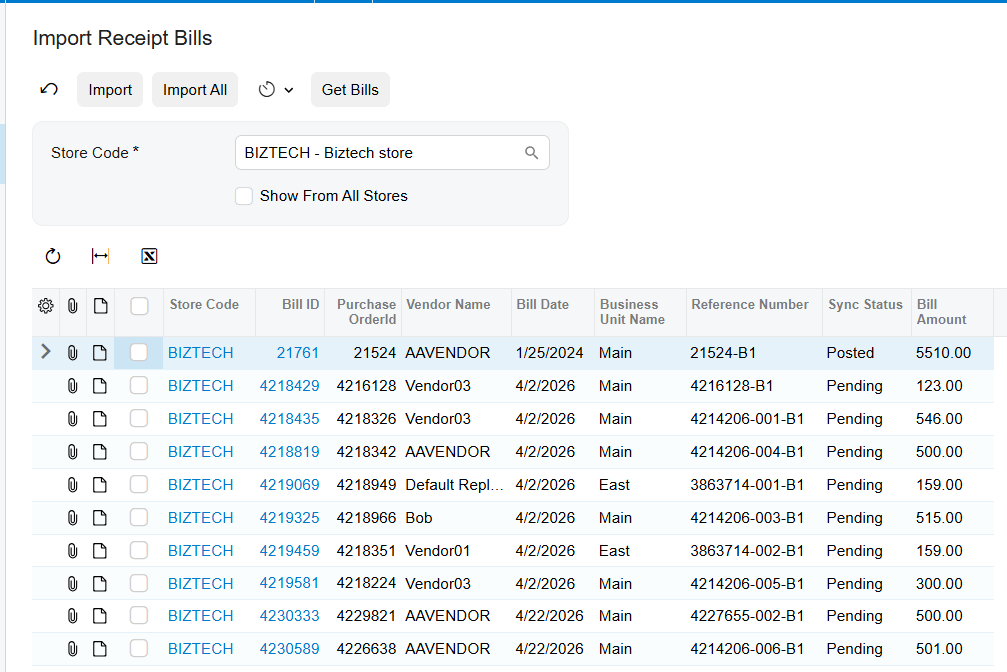
What Happens When the Purchase Order Has Not Been Imported Yet
If a purchase order receipt is imported before its purchase order, the system displays an error naming the receipt, in the form "POOrder document for Receipt 433272225 has not been created yet". The number is the ServiceTitan receipt identifier, which makes the error straightforward to resolve: take that number, find the corresponding purchase order, import it on the Import ServiceTitan Purchase Orders screen, then re-run the receipt import. The same rule and the same class of error apply to bills.
The Invoice and Payment Path: Three Matching Scenarios
Invoices are imported on the Import SO Invoices screen of Biz-Tech Services ServiceTitan Acumatica integration, which brings ServiceTitan sales invoices into Acumatica. They are retrieved based on their updated date and selected status, with the eligible statuses set by the Import with the following statuses option and the window bounded by the Begin Invoice Date and Last Invoice Date fields. ServiceTitan payments are imported on the Import Invoice Payments screen. Because an invoice and its payment can become available at different times, the Biz-Tech Services Acumatica ServiceTitan connector handles three scenarios, and in all of them the payment ends up matched to the correct invoice.
Scenario 1: The Invoice Arrives With Its Payment
If the invoice includes a payment at the time it is retrieved, both are imported together. The invoice is created in the Invoices and Memos screen, and the payment is created and applied on the Applications tab of that invoice. At the same time the corresponding payment identifier is removed from the Import Invoice Payments screen, because it was already processed as part of the invoice import. If a ServiceTitan payment vanishes from that processing screen without anyone running a payment import, this is why.
Scenario 2: The Invoice Is Already in Acumatica and the Payment Follows
If the invoice has already been imported but the payment is still sitting on the processing screen, the system locates the corresponding invoice during the payment import and applies the payment to it automatically. Users do not have to identify or apply the invoice manually.
Scenario 3: The Payment Lands First and the Invoice Follows
If the payment has already been made and the invoice is imported afterwards, the system automatically matches the payment with the corresponding invoice. This is the case that matters for businesses collecting in the field, where money is captured on the job before the invoice is finalized in ServiceTitan.
How the Import Invoice Payments Screen Behaves on Its Own
The Import Invoice Payments screen retrieves all payments from ServiceTitan and displays the associated Invoice ID next to each one, which is the field users should read when checking what a pending payment will attach to. If an invoice and its payment are both available, they are imported together. Payments can also be imported separately, either as a deposit or after the invoice has already been imported.
Two ServiceTitan Store settings govern how those payments are created. Payment Type determines whether payments imported from ServiceTitan are created with the payment or prepayment type in Acumatica. The Release Payment After Import checkbox determines whether they are released on arrival, which removes a manual step but also removes the review point.
What Rides Along With an Imported ServiceTitan Invoice
An invoice does not arrive alone. The Activate Invoice checkbox is the master switch: the interface changes based on the selected checkboxes, enabling import of invoices, taxes, payment methods, customer data and GL accounts. The Invoice Type field displays the type of invoice created in Acumatica for ServiceTitan invoices. Customer handling has two modes - if the Import Customer checkbox is not selected, invoices are imported with the default customer; if it is selected, the customer is created when missing, using the default customer class field. The Override Bill Address Information from Invoice and Override Ship Address Information from Invoice checkboxes decide whether the billing and shipping addresses travel with the invoice.
Tax Options enables Biz-Tech Services ServiceTitan Acumatica integrator to import invoices with taxes. Term Options maps ServiceTitan term values to their Acumatica equivalents, and Account Options maps the GL accounts, so imported documents post where your accounting team expects. Country names are imported in ISO country code format, defined by the International Organization for Standardization; note that the Country options become invisible when the Activate Payment checkbox is selected.
How ServiceTitan Inventory Transactions Reach Acumatica
Inventory has two halves in the ServiceTitan data flow: the items themselves, and the transactions that move them. Items come first, because a transaction has nowhere to land without them.
When the Import Item checkbox is selected, the Generate Item from ServiceTitan action method becomes available. It generates non-stock and stock items based on the Stock Item Class, Non-Stock Item Class and Unit of Measure, or UOM, values on the store record. The Load Materials, Equipment, Services action loads and displays the corresponding ServiceTitan items on the Inventory tab in Acumatica. The split is defined by the ServiceTitan category: stock items are created from Materials and Equipment, and non-stock items are created from Service. ServiceTitan items can also be mapped to existing Acumatica items manually instead of being created, which is the right choice when your item master is already the system of record. But make sure the Activate Invoice checkbox on Import Options tab is added to have Inventory tab available.
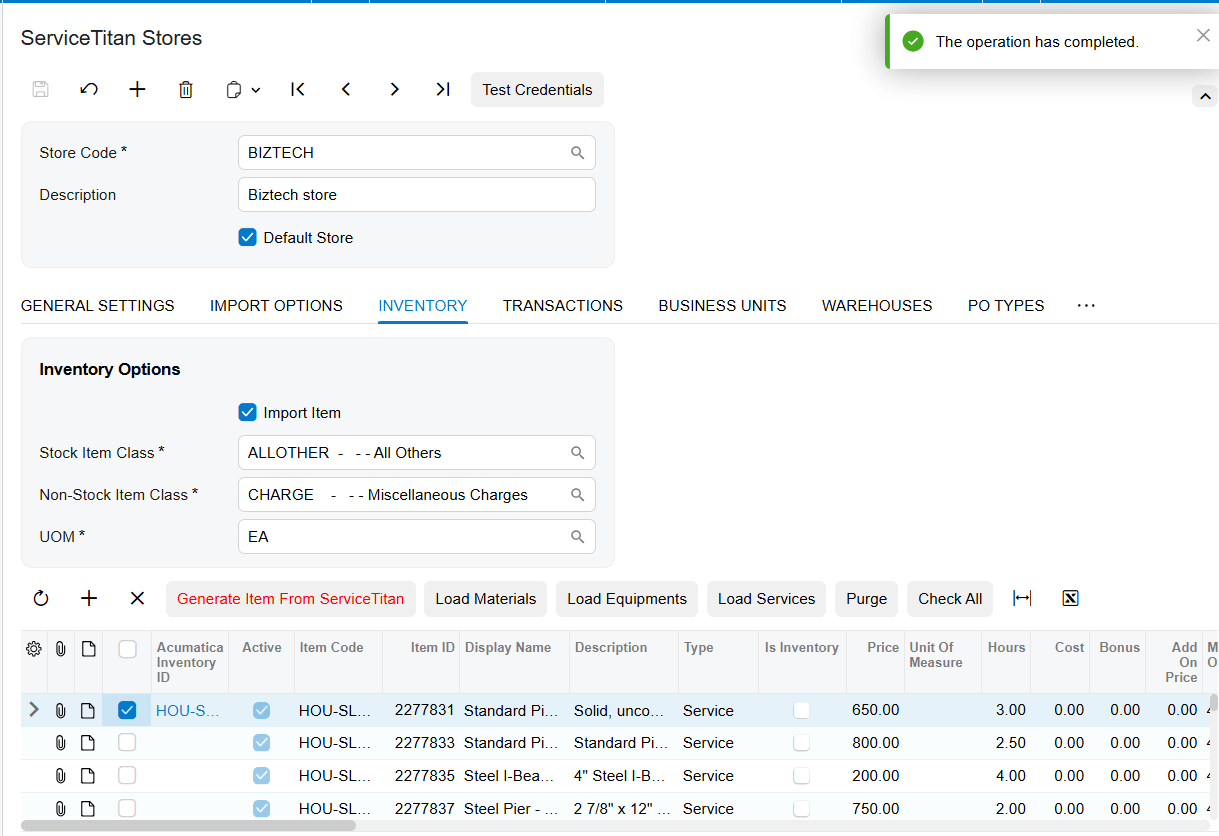
Transactions are configured on the Inventory Transactions tab, which holds setup options for Receipts, Transfers, Adjustments and Returns. Each type has its own release checkbox - Releasing Receipt After Import, Releasing Transfer After Import, Releasing Adjustment After Import and Releasing Return After Import. When those are selected, the Biz-Tech Services ServiceTitan Acumatica connector imports the documents into Acumatica and releases them. Selecting a release checkbox is the difference between a transaction that immediately affects your inventory balances and one that sits unreleased until a user acts on it.
Where those transactions land is decided by the Warehouses mapping, which maps Acumatica warehouses to ServiceTitan Warehouse and Truck IDs, and the Load Warehouses action retrieves those values for manual mapping. Truck IDs are the reason this mapping deserves attention: stock sitting on a truck in ServiceTitan has to correspond to a real Acumatica warehouse for the transaction to post correctly.
How ServiceTitan Journal Entries Flow into Acumatica
Journal entries are the alternative to the invoice path rather than an addition to it. The Journal Entry checkbox on the Import Options tab becomes available when the Activate Invoice checkbox is disabled, so a store is set up to import either detailed ServiceTitan invoices or summarized ServiceTitan journal entries.
The journal entry flow is bounded by its own date fields. Begin Journal Entry Date displays the date from which the first entry should be imported, and it is not set automatically the first time - a user has to set it manually. If your first journal entry import returns nothing, this is the field to check. Last Journal Entry Date displays the date of the last imported entry. Eligible statuses are set by the Import with the following statuses option for journal entries.
The Mapping Tables Every ServiceTitan Document Passes Through
Several mapping tables on the ServiceTitan Stores screen is not import steps in itself, but every imported document passes through them. Business Units maps ServiceTitan Business Unit IDs to Acumatica branches, and Load Business Units retrieves those values for manual mapping - this determines the branch on imported documents, including the Bills and Adjustments documents created by the bills import. Vendors work the same way on the purchasing side: when the Import Vendor checkbox is selected, ServiceTitan vendors are created in Acumatica, and Load Vendors retrieves all of them so they can also be mapped manually to existing Acumatica vendors. Because purchase orders, receipts and bills all carry a vendor, an unmapped vendor is a common reason a purchase document does not arrive as expected.
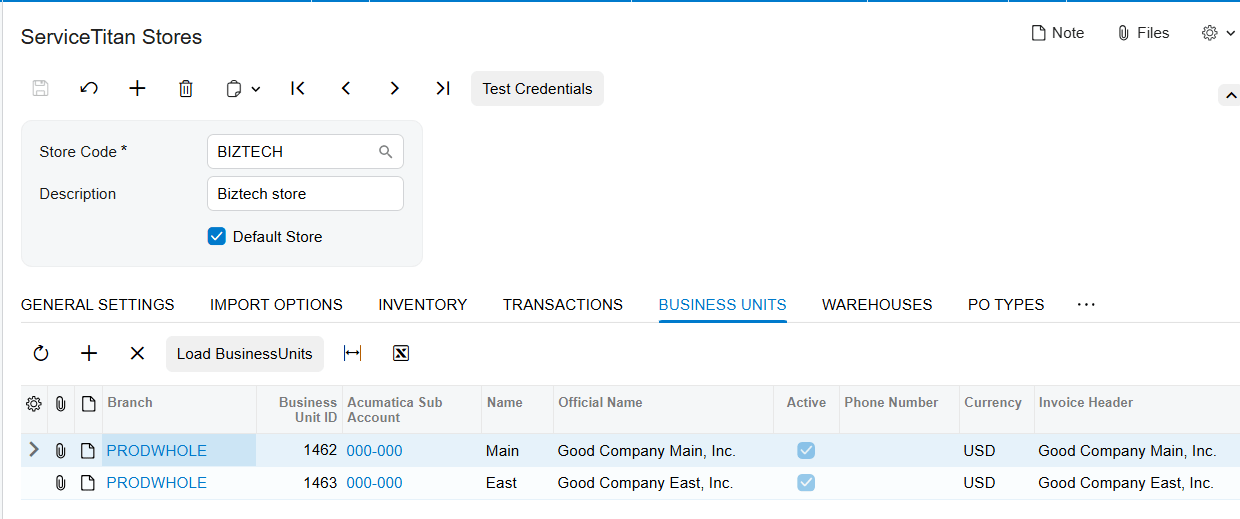
Where to Monitor ServiceTitan Results in Acumatica
Once imports are running, results show up in predictable places. These are the screens, tabs and fields your users should check as these are custom entites provided by Biz-Tech Services Acumatica ServiceTitan integration:
1. Purchase Orders screen, PO History tab - the most important place to look for purchase documents. Imported ServiceTitan receipts and bills are attached here against the purchase order they belong to.
2. Import ServiceTitan Purchase Orders screen - the purchase orders currently eligible for import based on their updated date.
3. Import ServiceTitan Receipts screen - receipts retrieved according to the date and status in the Receipt Options settings, and the place the "POOrder document for Receipt ... has not been created yet" error appears.
4. Import ServiceTitan Bills screen - bills waiting to be imported. A bill leaving this list without a separate bill import means it came across with its purchase order.
5. Invoices and Memos screen - where every imported ServiceTitan invoice is created in Acumatica.
6. Applications tab of the Invoice - where the imported ServiceTitan payment is applied, and the place to confirm a payment matched the right invoice.
7. Import Invoice Payments screen, Invoice ID field - all payments retrieved from ServiceTitan and the invoice each one is associated with.
8. Import SO Invoices screen - the invoices eligible under the current status filter and date window.
9. Last Invoice Date field on the ServiceTitan Stores screen - the date the last order was imported, and the reference point other invoice import processes count from.
10. Last Journal Entry Date field - the date of the last imported entry, and the quickest confirmation the journal entry flow is still running.
11. Inventory tab on the ServiceTitan Stores screen - the ServiceTitan materials, equipment and services loaded into Acumatica and how they map to stock and non-stock items.
12. Business Units, Warehouses, PO Types, Return Types and Vendors tabs - check these first when a document imports but posts to the wrong branch, warehouse, PO type or vendor.
ServiceTitan Acumatica Integration: Frequently Asked Questions
Why do I get "POOrder document for Receipt has not been created yet" when importing ServiceTitan receipts?
This error means the purchase order related to that receipt has not been imported into Acumatica yet. A purchase order receipt cannot be imported before its purchase order exists in Acumatica. Use the receipt number shown in the message to identify the purchase order, import it on the Import ServiceTitan Purchase Orders screen, then re-run the receipt import.
Why did my ServiceTitan bill disappear from the Import ServiceTitan Bills screen?
That is expected when the related purchase order was imported while the bill was sitting on the processing screen. In that case the bill is imported together with the purchase order and removed from the list. Check the PO History tab of the corresponding purchase order - the bill will be attached there.
In what order should ServiceTitan purchase documents be imported into Acumatica?
Purchase orders first, then receipts, then bills. ServiceTitan purchase receipts and bills cannot be imported unless the related ServiceTitan purchase order has already been imported. If the receipt or bill already exists when the purchase order is imported, the Biz-Tech Services Acumatica ServiceTitan integrator brings all of them across in a single run.
How does the ServiceTitan connector decide which records to import?
Every processing screen provided by Biz-Tech Services ServiceTitan Acumatica integration, retrieves ServiceTitan records based on their updated date. Invoices are additionally filtered by their selected status and by the Begin Invoice Date and Last Invoice Date fields, receipts by the date and status in the Receipt Options settings, and journal entries by the Begin Journal Entry Date, Last Journal Entry Date and their own status filter.
What happens if a ServiceTitan payment is imported before the invoice?
The Biz-Tech Services ServiceTitan Acumatica integrator handles it automatically. If the payment has already been made and the invoice is imported afterwards, the system matches the payment to the corresponding invoice on import. The same applies in reverse: if the invoice is already in Acumatica and the payment arrives later, the payment import locates the invoice and applies the payment on its Applications tab.
Why are ServiceTitan receipts arriving unreleased in Acumatica?
Release status is controlled by the Release checkbox in the ServiceTitan Store setup, not by the processing screen. When it is selected, receipts are imported with a Released status; when it is not, they arrive with a balanced status and must be released in Acumatica. The same pattern applies to inventory transfers, adjustments and returns through their own release checkboxes, and to payments through Release Payment After Import.
Which ServiceTitan items become stock items in Acumatica?
Stock items are created from ServiceTitan Materials and Equipment, and non-stock items are created from Service. They are generated using the Stock Item Class, Non-Stock Item Class and Unit of Measure values when the Import Item checkbox and the Generate Item option are used. You can also map ServiceTitan items to existing Acumatica items manually instead of generating new ones.
Can ServiceTitan imports run automatically in Acumatica?
Yes. The synchronization process can be performed manually from the processing screens or automatically using the scheduler. Because records are retrieved by updated date, a scheduled run picks up both new ServiceTitan records and existing ones that changed since the last import.
Work With the Biz-Tech Services ServiceTitan Connector
The ServiceTitan data flow into Acumatica is orderly once you know its rules: the store record defines what is eligible and how it arrives, every screen retrieves by updated date, purchase orders anchor their receipts and bills on the PO History tab, invoices and payments find each other in any order, and inventory transactions and journal entries land against the mapped warehouses, branches and GL accounts. Knowing which screen creates each document and which field shows the result turns most support questions into a two-minute check.
If your business runs field service operations in ServiceTitan and accounting in Acumatica, the Biz-Tech Services Acumatica ServiceTitan Connector is built to move those records between them reliably. Visit https://biz-techservices.com to learn more about our Acumatica expertise or to schedule a personalized demonstration.
How Salesforce CRM Data Flows into Acumatica ERP
How Salesforce CRM Data Flows into Acumatica ERP
Salesforce orders flow into Acumatica as sales orders through a connected store record, and updated order data flows back out to the CRM on demand. Salesforce is a Customer Relationship Management platform, or CRM, and Acumatica is an Enterprise Resource Planning system, or ERP. The Biz-Tech Services Salesforce Acumatica Connector is the bridge between them, moving orders, customers, contacts, items, price books and discounts across the gap so that sales, finance and inventory all work from the same numbers.
This article follows that path end to end: how the connection is established, how a Salesforce order becomes an Acumatica sales order, how customers and items are resolved along the way, how pricing and discounts are kept aligned, and how changes made in the ERP are pushed back out. Configuration is covered here only where a specific setting decides what happens at a handoff, because the settings are what make the flow behave one way rather than another.
What the Salesforce Connector for Acumatica Does
The Biz-Tech Services Salesforce Acumatica Connector is an integration product from Biz-Tech Services, Inc. that connects a Salesforce CRM org to an Acumatica ERP instance. It defines data synchronization, automates the workflows that move records between the two platforms, and keeps data flowing in both directions. On the ERP side it adds a Salesforce Store screen that holds the credentials and the rules for the integration, processing screens for importing orders and exporting customers, price books and discounts, and inquiry screens where the results of each transfer can be reviewed. The product must be installed on an Acumatica system carrying a PCSR PERP or SAAS license.
The Salesforce Data Flow at a Glance
Every record that crosses between the two systems follows the same broad path. These are the stages, in the order they occur:
1. The Salesforce Store screen holds the store code, its description, and the API credentials on the General Info tab that link the two systems.
2. The Test Credentials button under Actions in the screen header confirms the connection is valid before any data moves.
3. The Get Orders button on the Import Salesforce Orders screen retrieves orders dated after the value set in the Order Settings tab of the store.
4. Import or Import All turns the selected orders, or all displayed orders, into Acumatica sales orders of the configured Order Type.
5. During that import the connector resolves the customer and the items on the order, creating them in Acumatica or matching them to existing records, and applies the tax, payment and discount rules.
6. The resulting document can be opened from the Salesforce Orders Inquiry screen, which shows the original CRM detail alongside the SO number and SO status.
7. Customers, price books and discounts flow outbound through the Export Salesforce Customers screen and its counterparts for price books and discounts.
8. Order changes made in Acumatica flow back through the Sync Orders To Salesforce screen, updating the matching CRM order at both line and document level.
Stage One: Connecting Salesforce to Acumatica
Everything downstream depends on the Salesforce Store screen. The store code carries all the configuration and setup for the integration between the two systems, and the description field holds notes about what that store code represents. Underneath the code and description sit the tabs that govern the flow.
The General Info tab is where the API credentials that link the CRM with the ERP are entered. Once they are in place, the Test Credentials button in the header under Actions reports whether the credentials are correct. The Order Settings tab then defines how imported records behave: the order import process, order calculation, order type, import destination, order discount settings, payment methods and more. Because these settings are read at import time rather than at setup time, they are the switches that decide what each incoming Salesforce record turns into.
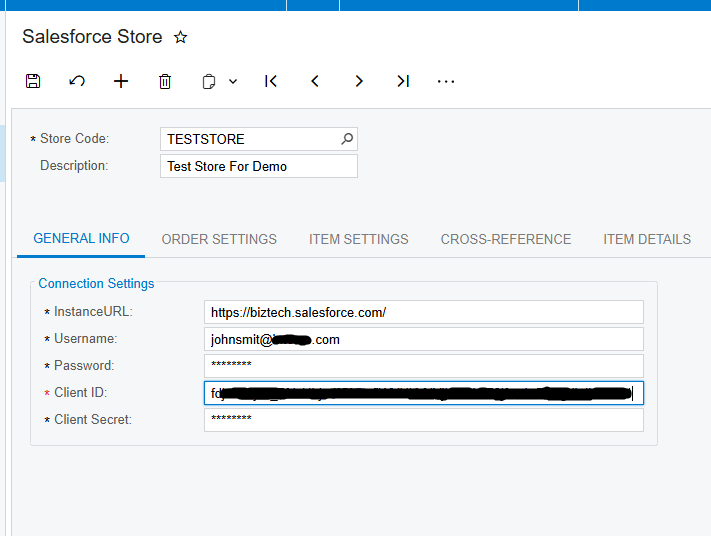
Inbound: How Salesforce Orders Become Acumatica Sales Orders
The Import Salesforce Orders screen is the transfer point for order data moving from the CRM platform into the ERP system. Pressing Get Orders retrieves the Salesforce orders related to the date set in the Order Settings tab of the store. The Import button brings in only the orders selected in the grid, while Import All brings in every order currently displayed.
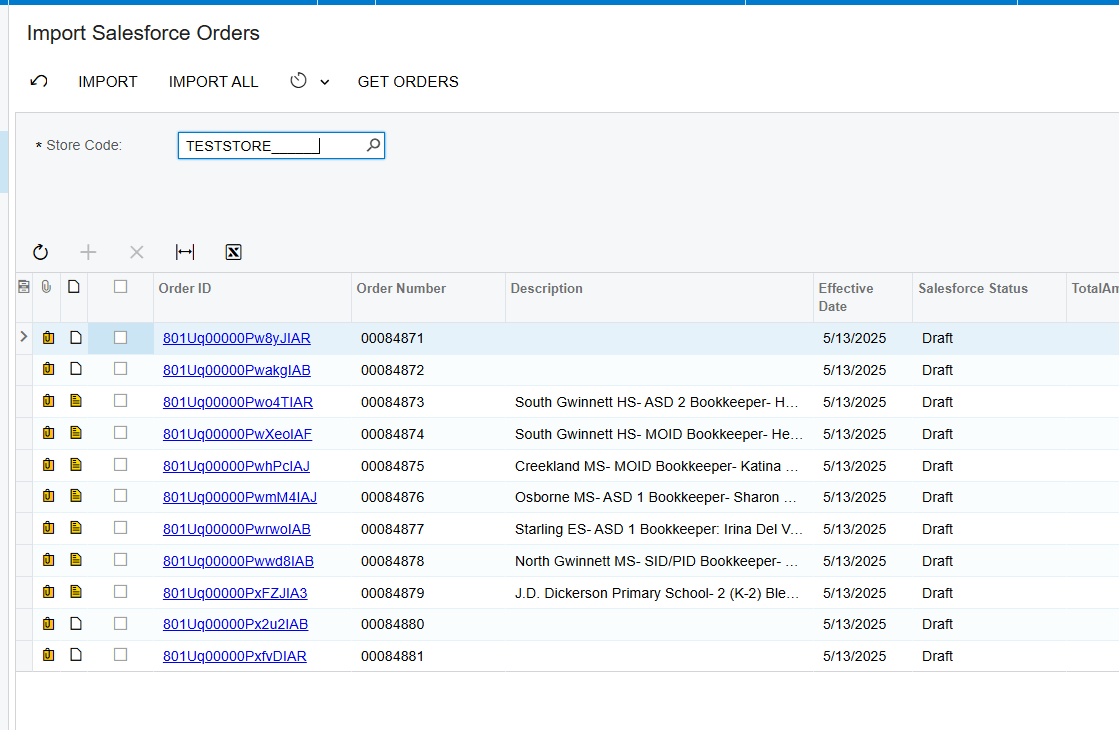
Which Default Import Options Shape the Result
Several fields in Default Import Options determine the shape of the resulting document. Order Type indicates the document type the order should be imported into and placed as in Acumatica. Warehouse ID sets the default warehouse for the order. Last Imported Order Date displays the date of the last imported order, and that date is used the next time orders are fetched to decide which orders count as new, so it is the field that keeps repeat pulls from re-importing history. Last Imported Price Book Date works the same way for price books.
Enable File Import Process controls whether attachments travel with the order. When the checkbox is selected, the file is retrieved from the Salesforce order and copied into the workspace on the Sales Orders screen at import time. When it is cleared, the file is not retrieved with the order at all.
How Tax Is Calculated on an Imported Order
Tax options allow for alternative tax calculations based on how the tax option is set up. Selecting Use External enables the calculation of alternative taxes such as Avalara tax. Setting up the Customer Tax Zone, Tax ID and Tax Category instead allows for the import of similar taxes, such as those coming from Salesforce. The choice determines whether the tax figure on the imported order is calculated locally or carried over.
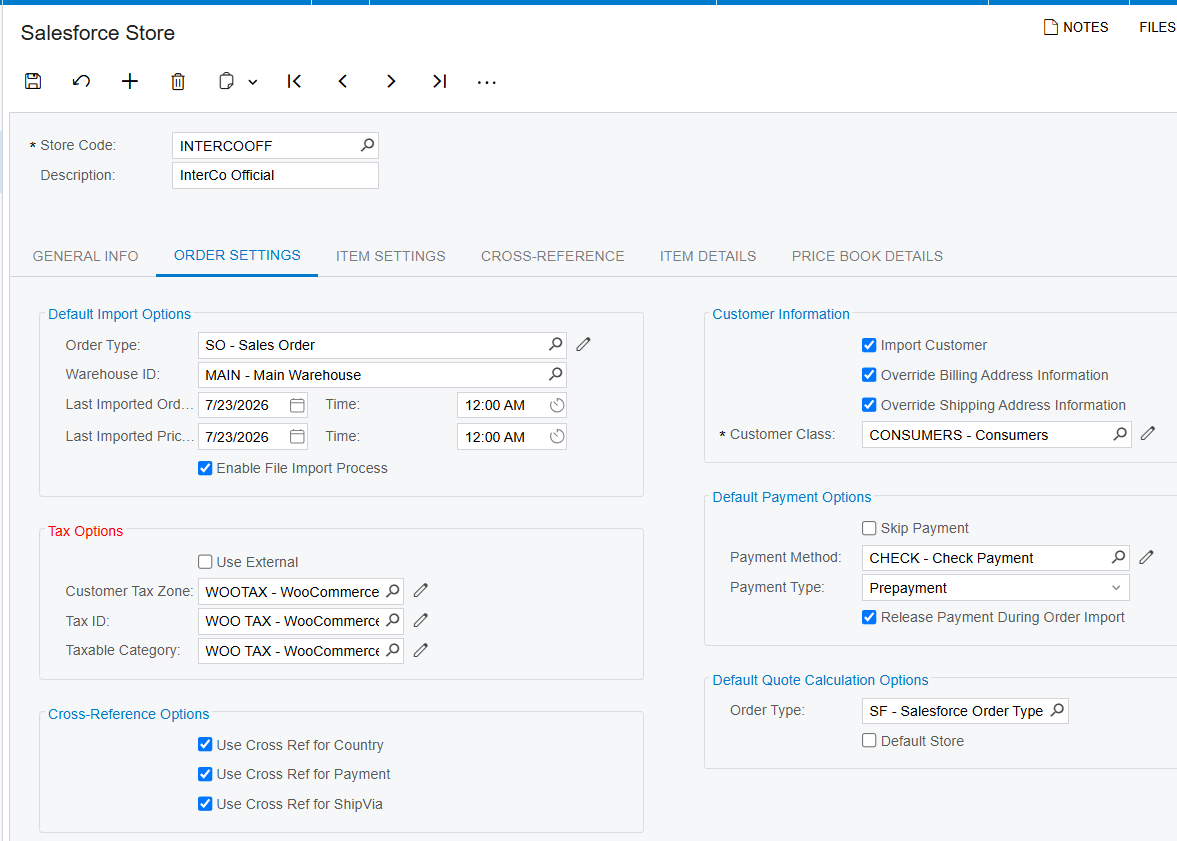
How Customers and Items Are Resolved During Import
An incoming Salesforce order is only useful if it lands on the right customer and the right inventory items. The connector resolves both during the import process.
Customer Creation and Address Handling
When the Import Customer checkbox is selected, a new customer is created in Acumatica during the order import process, using the email, the contact information and the selected customer class. When the checkbox is cleared, the system uses the default customer for every imported order instead, which keeps the customer list from growing with every CRM transaction.
The Override Billing Address Information and Override Shipping Address Information checkboxes decide which address ends up on the sales order. When they are selected, the import process overrides the customer addresses and sets the Salesforce order address on the sales order.
Item Matching and Product Creation
Item Settings governs how products are resolved. When the Import Item checkbox is selected, new items are created in Acumatica based on the configured settings as items are imported from Salesforce. When it is not selected, the program prohibits the import and creation of items unless the corresponding items already exist there. In that case the system searches for the Inventory CD using the Salesforce Product SKU: if it is found, that item is retrieved; if it is not, the error message "The item {0} does not exist in the system" is displayed and the record stops there. Add Items in Inventory Sync enables item synchronization, and Use Numbering Sequence for Product ID Generation makes the system automatically generate a unique product ID for each new product from a predefined numbering sequence.
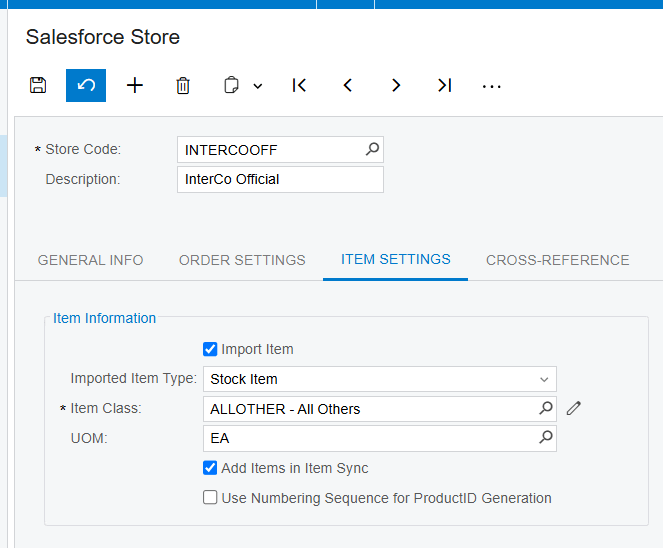
How Payments Ride Along With the Order
Default Payment Options controls the payment side of the import. Skip Salesforce Payment imports the order without a payment when selected. Payment Method sets the payment method applied during the order import process, and Payment Type determines the payment type of the imported order. Release Payment during Order Import releases the payment as part of that same import. Selecting the Use Cross Ref for Payment checkbox on the Order Settings tab enables payments through cross-reference, and when cross-reference is used for payment the payment must not be skipped. Cross-reference options more generally let your business link and map Acumatica and Salesforce values such as Payment, Country or Ship Via, with each option enabled by its checkbox and mapped on the Cross-Reference tab.
How Pricing and Discounts Stay Aligned
Prices reach the ERP through price books. Selecting the Last Imported Price Book Date on the Order Settings tab lets you load Salesforce price books into the Price Book Details tab based on that date. Each ID listed in that tab is a hyperlink to the Salesforce Price Books inquiry screen, where the list price can be changed and item lines added or deleted.
The Salesforce Price Books screen is also where synced products are added to a price book and the list price is defined manually. Selecting a preferred price book ID and clicking Get All Products in the Actions menu retrieves and displays every item in that price book. Two ordering rules matter here: items must be included in the standard price book before they are added to another price book, and if an item already exists in a price book it must be brought into Acumatica by importing an order, during which the item is automatically added to the corresponding price book.
Discounts follow their own path. When the Salesforce Synced checkbox is cleared on the Acumatica Discounts screen, the setup discount code appears on the Export Salesforce Discounts screen, where it can be created or updated and then used during order creation. Both line and document discount types are supported.
Outbound: Sending Acumatica Data Back to Salesforce
The flow does not end when an order lands in the ERP. Four screens move data in the other direction.
Exporting Customers and Contacts
The Export Salesforce Customers screen creates and updates Acumatica customers in Salesforce. Load Acumatica Customers loads and displays all of them, and the Export or Export All button creates or updates the selected customers or all of them in the CRM. If a customer has a primary contact, that primary contact is also created as a Contact during the customer creation process. Note that the export creates the primary contact only once and does not update it afterward, so later contact corrections do not travel.
Exporting Price Books
The Export Salesforce Price Books screen displays all the price books that have been loaded and are shown in the Price Book Details tab of the store screen. Process or Process All adds or updates products in the selected price books or in all of them. Only items that have been updated or changed are exported; unmodified items are not sent, which keeps each run small.
Syncing Order Changes Back to the CRM
The Sync Orders To Salesforce screen is where an order that came in from the CRM, was updated in Acumatica, and now needs to be pushed back gets processed. Updates are supported at both the order line level and the order document level. At the line level it updates the line description, discount code and discounted amount, and lines can be added and deleted. At the document level it updates the shipping and billing addresses, plus country, order date, order description, order total, freight amount, discount amount and tax amount. After changing that data, selecting the order and syncing it updates the CRM record to match. The screen also retrieves internal notes from Salesforce and displays them in the sales order Notes workspace, where they are read-only.
One filter governs what appears here: only modified orders with a status of On Hold or Open are displayed on this screen. An order that has moved past those statuses will not be listed, which is the first thing to check when an expected order is missing.
Where to Monitor Salesforce Results in Acumatica
Every stage of the flow leaves a visible trace. These are the exact places to look when you need to confirm that a record moved:
1. Import Salesforce Orders screen: the grid of orders retrieved by Get Orders, before and after Import or Import All is pressed.
2. Salesforce Orders Inquiry screen: reached by clicking the Order ID hyperlink on the import screen, showing the initial order details.
3. SO number and SO status on that inquiry screen: proof that the CRM order became an Acumatica sales order, and where that order now stands.
4. The workspace on the Sales Orders screen: holds the file copied from the Salesforce order when Enable File Import Process is selected.
5. The Notes workspace on the sales order: holds the internal notes retrieved from the CRM, which are uneditable.
6. Salesforce Info tab on the Customers screen: a generated ID plus a selected Salesforce customer checkbox means the record is a synced customer.
7. The Contacts screen: the same ID and checkbox logic applies to the primary contact.
8. The Export Salesforce Customers processing page: displays the Account ID and the last sync date for records already synced.
9. Item Details tab of the store screen: the synced item Salesforce ID, product code, product name, price and weight, populated by Load Acumatica Items, Sync to Salesforce and Sync all from Salesforce.
10. Price Book Details tab of the store screen: the price books loaded from the CRM, each ID linking through to the Salesforce Price Books inquiry screen.
11. Last Imported Order Date and Last Imported Price Book Date on the Order Settings tab: the watermark that decides what the next fetch pulls.
12. Salesforce Synced checkbox on the Discounts screen: cleared means the code is still waiting on the Export Salesforce Discounts screen.
Salesforce Acumatica Integration: Frequently Asked Questions
How do Salesforce orders get into Acumatica?
Press Get Orders on the Import Salesforce Orders screen. The connector retrieves the orders related to the date set in the Order Settings tab of the store and lists them in the grid. Then use Import to bring in only the orders you selected, or Import All to bring in every order displayed.
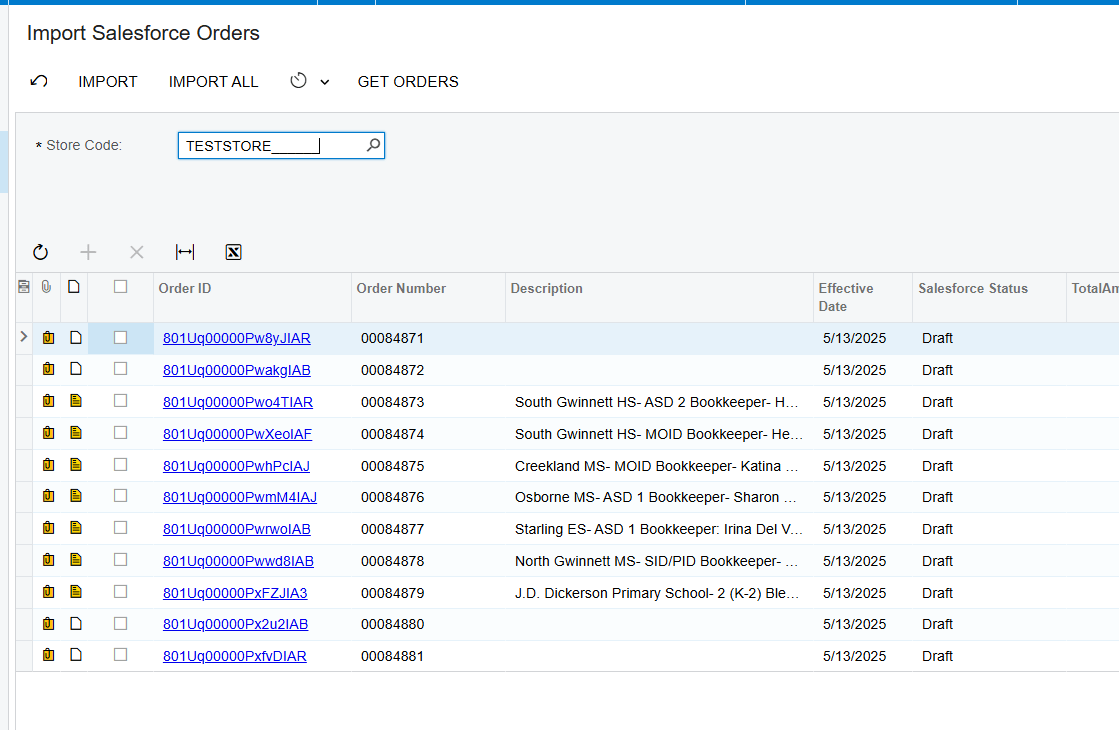
Does the connector create customers in Acumatica automatically?
Only if you tell it to. With the Import Customer checkbox selected, a new customer is created during the order import process with email, contact information and the selected customer class. With the checkbox cleared, every imported Salesforce order is placed on the default customer instead.
Can changes made in Acumatica be sent back to Salesforce?
Yes, through the Sync Orders To Salesforce screen. It updates the order at both line and document level, covering line description, discount code and discounted amount, added and deleted lines, shipping and billing addresses, country, order date, order description, order total, freight amount, discount amount and tax amount.
Why do I get "The item does not exist in the system" when importing a Salesforce order?
That message appears when the Import Item checkbox is not selected and the product on the order has no match in Acumatica. The system searches for the Inventory CD using the Salesforce Product SKU, and when nothing is found it cannot create the item on its own. Either create the item in Acumatica first, or select Import Item so new items are created from the configured settings during import.
Why is my modified order missing from the Sync Orders To Salesforce screen?
That screen only displays modified orders with a status of On Hold or Open. If the sales order has moved to another status, it will not appear in the list regardless of the changes made to it. Check the SO status on the Salesforce Orders Inquiry screen first.
Why does my imported order have no payment on it?
Check Skip Salesforce Payment in Default Payment Options, because when that checkbox is selected the order is imported without payment. Also check whether Use Cross Ref for Payment is selected on the Order Settings tab: when payments run through cross-reference, the payment must not be skipped, so the two settings have to agree.
Why can I not add a product to a Salesforce price book?
Items must be included in the standard price book before they can be added to another price book. If the item already exists in a price book, it has to be brought into Acumatica by importing an order first, and during that import the item is automatically added to the corresponding price book.
How do I confirm a customer is already synced?
Open the Customers screen and look at the Salesforce Info tab. When the Salesforce customer checkbox is selected and an ID has been generated there, the record is synced. The export processing page also shows the Account ID and the last sync date for customers that have already been sent across.
Work With the Biz-Tech Services Salesforce Connector
The data flow into Acumatica is a single continuous path: credentials on the Salesforce Store screen, orders pulled by Get Orders, customers and items resolved during import, tax and payment applied from the store settings, results visible on the Salesforce Orders Inquiry screen and on the sales order itself, and updates pushed back out through the Sync Orders To Salesforce and export screens. Knowing which screen owns which stage is what makes the integration straightforward to run day to day.
If your business runs Salesforce alongside Acumatica and wants that flow set up, tuned and monitored properly, the Biz-Tech Services Salesforce Acumatica Connector is built for exactly that. Visit https://biz-techservices.com to learn more about our Acumatica expertise or to schedule a personalized demonstration.
How EZCom EDI Data Flows Through Acumatica ERP
How EZCom EDI Data Flows Through Acumatica ERP
EZCom EDI data reaches Acumatica through an intermediate server: the connector pulls purchase orders out of the EZCom Electronic Data Interchange, or EDI, platform, imports the selected ones into Acumatica ERP as sales orders, and then sends acknowledgements, routing requests, warehouse orders, shipments and invoices back the other way. Nothing travels directly between the two systems: Acumatica connects to an intermediate server controlled by Biz-Tech Services, and that server connects to the EZCom EDI platform.
This article traces that path end to end for the Biz-Tech Services EZCom EDI Acumatica Connector: which screen retrieves each document, what the document becomes once it lands in Acumatica, which fields decide the customer, item and warehouse on the resulting sales order, and which screens you watch to confirm a document actually went out. Configuration appears only where a setting governs a handoff, because most of the flow logic in this product lives in per-partner settings rather than in the import screens themselves.
What the EZCom EDI Connector for Acumatica Does
The Biz-Tech Services Acumatica EZCom EDI Connector is an integration from Biz-Tech Services, Inc. that links the EZCom EDI platform to Acumatica ERP so trading-partner documents move between them without rekeying. The connection is managed by an intermediate server controlled by Biz-Tech Services. Based on the connection settings stored on the General Settings screen, the integration connects first to that intermediate server and then from the intermediate server to the corresponding EZCom EDI platform system. The integration also requires default options and the required values for the order import process. It retrieves orders from the EZCom system to the intermediate server and imports the selected order or orders into Acumatica ERP. When a user confirms the shipments created from those imported orders, fulfillment events are generated in the EZCom platform for each corresponding order.
The product is delivered as an Acumatica customization project and is installed from the Customization Projects form (SM204505), where the deployment package is imported, the project is validated and then published to the tenant. It must be installed on an Acumatica system carrying one of these licenses: PCSR, PERP or SAAS.
The EZCom EDI Data Flow at a Glance
The flow is a loop with a documented screen at every stage. Read the stages below in order and you have the full path a trading-partner document travels, from EZCom EDI into Acumatica and back out again.
1. Connect: General Settings stores the Account and API Key issued for each EZCom website plus the EZCom admin panel Login and Password, and tests the connection to the Acumatica-Biz-Tech server.
2. Load partners: Get Trading Partners on the Trading Partners screen retrieves all partners, and each Partner Code then carries its own import rules, export rules, cross-references and item mapping.
3. Retrieve inbound orders: Get Orders on the Import Purchase Orders screen pulls every order for the selected period from the EZCom partner into a grid.
4. Create sales orders: Import or Import All turns the selected EZCom orders into Acumatica sales orders, resolving customer, inventory item and warehouse from the Trading Partners setup.
5. Absorb updates: Import Changed Purchase Orders brings in revised orders, Import Routing Response applies carrier data to the shipment, and Import Warehouse Shipment writes shipped quantity and tracking number onto the shipment.
6. Review: the Inbound Purchase Orders screen displays all the information related to the EZCom order for the corresponding partner.
7. Send outbound documents: Send Outbound PO Acks., Send Routing Request, Send Warehouse Order, Send Outbound Shipments and Send Outbound Invoice push acknowledgements, routing requests, warehouse orders, shipment notices and invoices back to EZCom EDI.
8. Sync availability: Send Inventory Availability pushes item quantities to EZCom EDI per the mapping on the Inventory Availability tab of the Trading Partners screen.
Where the EZCom EDI Flow Starts: Connection and Trading Partner Settings
Two screens sit upstream of every document. General Settings decides whether Acumatica can reach EZCom EDI and over what date range; Trading Partners decides what each retrieved document turns into. Neither moves data by itself, but a wrong value on either one shows up later as a missing order or a sales order built on the wrong customer.
General Settings: credentials and the date window
When the Modify API Connectivity checkbox is selected on the General Settings screen, the system displays the Account and API Key fields, which are provided for each EZCom website, along with the EZCom admin panel Login and Password. Using the information on the API Connectivity tab, the system tests the ability to connect to the Acumatica-Biz-Tech server. Clicking the Test Credentials button under the Actions option verifies the credentials, which is the fastest way to prove the first hop of the flow is healthy before troubleshooting anything downstream.
The same screen carries the Default Import Options that set the retrieval window across the board. Get Order From All Partners retrieves orders from all partners based on the date configured on this screen, Get Change Order From All Partners does the same for changed orders, and Get Routing Response From All Partners does the same for routing responses. These options take effect only when the user selects the corresponding checkbox and then clicks the Apply Order Date Update for Partners button under the Actions option -- a common reason a new date appears to change nothing.
Trading Partners: the per-partner rules that shape every imported order
Click the Get Trading Partners button under the Actions option on the Trading Partners screen to retrieve all partners, then configure the options for each Partner Code. Partner Code is a lookup field that identifies the partner and Description holds the details about it. Under Partner Settings, the Default Import Options define what the connector builds: Order Type is the default type of orders created by the integration, and EZCom Status reflects the status of the corresponding EZCom order that will be imported into Acumatica. The corresponding order status checkbox must be selected for the order to be retrieved and imported, which makes EZCom Status the first filter in the inbound flow. Three date fields then narrow each inbound stream separately: Begin Order Date filters the order retrieval, Last Changed Order Date filters the changed order retrieval, and Routing Response Order Date filters the routing response retrieval.
One partner setting shortens the loop entirely. Set Order as Acknowledged marks the order as acknowledged during the order import process and sets the status of the sales order to Closed without sending any request to the website. If your business uses that option, the order never appears on the acknowledgement queue, because no acknowledgement request is sent at all.
Inbound EZCom EDI Documents: How Orders Reach Acumatica
Four screens bring data in, each handling a different stage of the partner order. All four follow the same outline: choose the partner, retrieve, review the grid, import.
Import Purchase Orders
The Import Purchase Orders screen retrieves and imports the orders of the corresponding partner from EZCom EDI into Acumatica. The Get Orders button retrieves the orders, and a timer then indicates the elapsed time until the process is complete. All orders for the selected period are retrieved and displayed at once rather than page by page, so the grid is the complete candidate list for that window. A user can cancel the process of getting orders by clicking the loading icon next to the timer. The Import button imports the selected orders, and Import All imports every order displayed on the grid.
Import Changed Purchase Orders
The Import Changed Purchase Orders screen retrieves and imports the changed orders of the corresponding partner from EZCom EDI into Acumatica. It is the same retrieve-and-import pattern applied to revisions rather than new documents, and the Last Changed Order Date field on the Trading Partners screen is what limits which revisions come back.
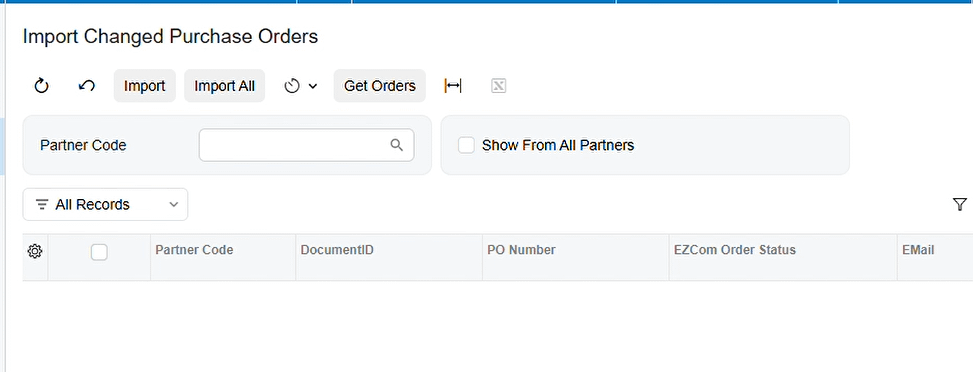
Import Routing Response
The Import Routing Response screen retrieves and imports the routing response orders of the corresponding partner. When the EZCom order reaches the shipment level, the get routing response process reads the Carrier Code and Carrier Service on the EZCom order, retrieves the corresponding Ship Via from the Cross Reference tab on the Trading Partners screen, and updates the shipment accordingly during the import process. This is where a partner routing instruction becomes an Acumatica shipment value, so the Ship Via cross-reference has to exist before routing responses are pulled.
Import Warehouse Shipment
If the EZCom order is at the shipment level and is imported from the Import Warehouse Shipment screen, the system imports the item quantity and tracking number from EZCom EDI, updating the shipped quantity and tracking number on the shipment. This button also exists on the shipment screen, so the same import can be triggered from the shipment record you are already working in.
What an Inbound EZCom EDI Order Becomes in Acumatica
Importing is not a straight copy. Every time the Biz-Tech Services EZCom EDI Acumatica Integration creates a sales order it has to answer three questions from the Trading Partners setup: which customer the order belongs to, which inventory item each line points at, and which warehouse, country and ship via values apply. Those three lookups are where imports usually succeed or fail.
Which customer the sales order is created for
The simple case is the Customer ID field under Customer Information on the Trading Partners screen: the integration imports the customer information from EZCom EDI into the Acumatica customer selected there. Override Ship Address Info from EZCom Order imports the address of the location the order is going to be shipped to from the EZCom order itself. If the Customer Ship To tab has a setup, the customer import follows that setup instead. The system first searches for the Trading Partner Ship To ID using the Location Number from the EZCom order; once the location is identified, it looks for a customer matching both the Child Customer and the Parent Customer on the Customers screen; then it searches for a matching Customer ID and Location CD in the Customer Ship To tab of the EZCom Store on the Customer Location screen. The customer found there is the one used to create the sales order. If the Customer Ship To tab is not set up, the system uses the customer configured in Partner Settings.
Which inventory item each order line lands on
The item on the EZCom order has to be mapped under the Inventory Items tab of the Trading Partners screen for the EZCom order to be imported into Acumatica. The dropdown fields in that tab's cross-reference section let you choose how to search for the item within the Partner Code and map it to the Acumatica Inventory ID. If the dropdown value is set to UPC Code, for example, the system searches for an item with the corresponding UPC Code number and associates it with the Acumatica inventory ID. Only the entities checked under Cross-Reference Options appear in that dropdown. If the items are not mapped, an error message appears during the order import process, so item mapping is the single most common blocker in the inbound flow.
Which warehouse, country and ship via values are used
Warehouse ID under Default Warehouse represents the default warehouse set on the orders imported from EZCom EDI. The Cross-Reference tab overrides that with matched values: on that tab, the Field column selects the entity whose EZCom and Acumatica values need to be matched. If the Use Cross Ref for Country checkbox is checked and the country is set up under the Cross-Reference tab, the system takes the cross-reference value during the EZCom order import process, and the Use Cross Ref for ShipVia and Use Cross Ref for warehouse checkboxes behave the same way for their entities. One dependency is easy to miss: the Default Warehouse field on the Trading Partners screen must be empty for the system to take the cross-reference warehouse value.
Outbound EZCom EDI Documents: What Acumatica Sends Back
Once the sales order exists in Acumatica the flow reverses. Five screens send documents out, and two of them double as queues catching whatever the automatic export settings did not handle.
Send Outbound PO Acks.
The Send Outbound PO Acks. screen displays all the orders of the corresponding partner that have an open Acknowledge status. Clicking the Send or Send All button sends an acknowledgement request for the selected orders, after which the EZCom order is marked as Acknowledged on the website and the status of the sales order in Acumatica changes to Closed. That status change on both sides is the confirmation that the acknowledgement actually reached EZCom EDI.
Send Routing Request
The Send Routing Request screen displays all the orders of the corresponding partner that are at shipment level. During the routing request process, the system sends the EZCom Order ID and submits a routing request indicating that the product is ready for shipment. The routing response that comes back later is imported from the Import Routing Response screen, which closes that half of the loop.
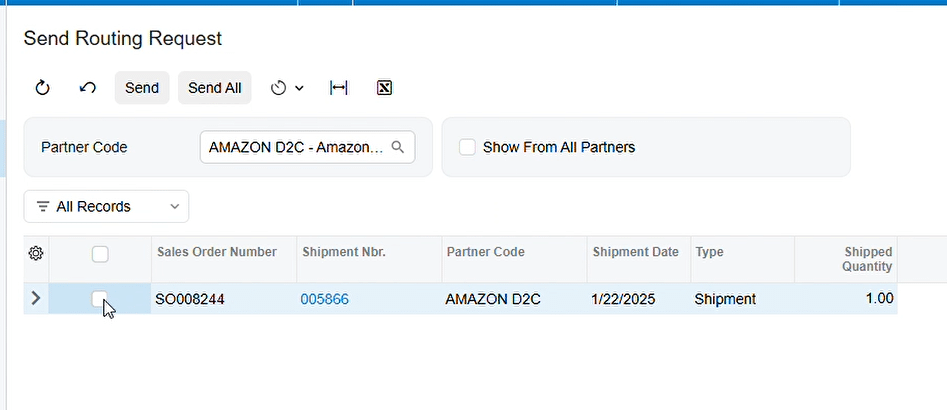
Send Warehouse Order
After the Get Warehouse Order process, the EZCom orders display on the Send Warehouse Order screen. By sending the warehouse order request, the system sends the warehouse Code, the UPC Code and the quantity for each item during the shipment process from the corresponding warehouse.
Send Outbound Shipments
The Export Shipment During Prepare Invoice checkbox under Default Export Options on the Trading Partners screen sends a request to the website during the Prepare Invoice process in Acumatica, after which the sales order status is updated to Closed. If that checkbox is not selected for the partner, the order instead appears on the Send Outbound Shipments screen after Prepare Invoice. Sending the request from there updates the order shipment status in Acumatica to Closed and updates the order in the EZCom store, so the manual path reaches the same end state as the automatic one.
Send Outbound Invoice
The invoice side mirrors the shipment side. Export Invoice During Release Invoice sends a request to the website during the invoice release process in Acumatica, after which the sales order status is updated to Closed. If that checkbox is not enabled during the Release Invoice process, the EZCom orders appear on the Send Outbound Invoice screen; sending from there updates the order invoice status in Acumatica to Closed and updates the order in the EZCom store.
Syncing Inventory Availability Back to EZCom EDI
Item quantity is the one non-order data stream the documentation describes, and it runs outbound only. The Send Inventory Availability screen displays all the items already loaded and checked under the Inventory Items tab of the Trading Partners screen for the corresponding partner. To send the quantities, the mapping must be set up under the Inventory Availability tab, where the Acumatica warehouse, the quantity option and the EZCom warehouse code, given as the item UPC code, are matched. After selecting the items and pressing Send or Send All, the item quantity is synced to EZCom EDI according to that mapping. No price sync is documented in either direction, so treat availability as the only inventory value this flow carries.
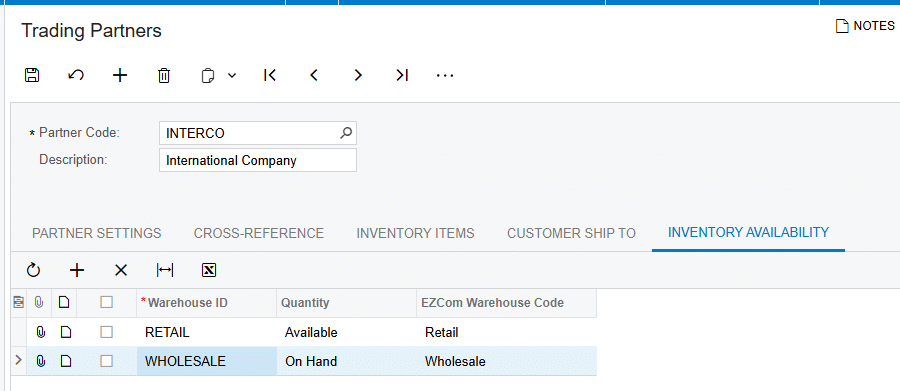
Errors and Reprocessing in the EZCom EDI Flow
Error handling runs through the screens themselves rather than a dedicated log, so recovery generally means fixing the setup that governs a handoff and running the retrieval or send again.
These are the failure points the documentation names explicitly.
1. Unmapped items stop an import: if items are not mapped under the Inventory Items tab, an error message appears during the order import process. Add the mapping and import again.
2. Bad credentials stop everything upstream: use Test Credentials under Actions on General Settings to confirm the connection to the Acumatica-Biz-Tech server before investigating individual documents.
3. A long retrieval can be stopped: click the loading icon next to the timer on the Import Purchase Orders screen to cancel the process of getting orders.
4. Missing orders usually mean a filter, not a failure: check that the corresponding order status checkbox is selected for the EZCom Status, and check Begin Order Date, Last Changed Order Date and Routing Response Order Date for that partner.
5. A new date that changes nothing usually means Apply Order Date Update for Partners was never clicked on General Settings after selecting the corresponding checkbox.
6. An ignored warehouse cross-reference usually means the Default Warehouse field still holds a value; it must be empty for the cross-reference value to be used.
7. Documents that did not export automatically are not lost: they queue on the Send Outbound Shipments and Send Outbound Invoice screens, where you resend them.
Where to Monitor EZCom EDI Results in Acumatica
Every stage of the Biz-Tech Services EZCom EDI Acumatica Integrator leaves visible evidence on a specific screen, and the outbound screens are self-clearing worklists: an order that is still listed has not been sent yet. Use the following checkpoints to confirm results.
1. Inbound Purchase Orders -- displays all the information related to the EZCom order for the corresponding partner, and is the reference view for anything already imported.
2. Import Purchase Orders grid -- after Get Orders, shows every order retrieved for the selected period, with the timer reporting elapsed time until the retrieval completes.
3. Import Changed Purchase Orders -- shows the changed orders retrieved for the partner, so you can tell a revision apart from an original.
4. Import Routing Response -- shows the routing response orders retrieved, and the shipment itself shows the Ship Via that the Carrier Code and Carrier Service resolved to through the Cross Reference tab.
5. The shipment record -- after Import Warehouse Shipment, carries the shipped quantity and tracking number brought in from EZCom EDI.
6. Send Outbound PO Acks. -- lists orders that still have an open Acknowledge status; an order that has left this screen has been acknowledged on the EZCom website.
7. Send Routing Request -- lists the orders at shipment level for the partner that are waiting for a routing request carrying the EZCom Order ID.
8. Send Warehouse Order -- lists the EZCom orders produced by the Get Warehouse Order process, waiting on warehouse Code, UPC Code and quantity per item.
9. Send Outbound Shipments -- the queue for partners without Export Shipment During Prepare Invoice selected; the order shipment status in Acumatica reads Closed after the request is sent.
10. Send Outbound Invoice -- the queue for partners without Export Invoice During Release Invoice selected; the order invoice status in Acumatica reads Closed after the request is sent.
11. Send Inventory Availability -- lists the items loaded and checked on the Inventory Items tab, and confirms that quantities went out through Send or Send All.
12. The sales order status in Acumatica -- reads Closed after an acknowledgement, a shipment export or an invoice export succeeds, making it the clearest end-of-flow indicator.
EZCom EDI Acumatica Integration: Frequently Asked Questions
How does an EZCom EDI order become a sales order in Acumatica?
You retrieve the orders for a partner with Get Orders on the Import Purchase Orders screen, then click Import or Import All. The Biz-Tech Services Acumatica EZCom EDI Integration creates the sales order using the Order Type set for that Partner Code, the customer resolved from Customer Information or the Customer Ship To tab, the inventory item resolved from the Inventory Items mapping, and the warehouse from Default Warehouse or the warehouse cross-reference.
Which EZCom EDI orders are retrieved when I click Get Orders?
All orders for the selected period are retrieved and displayed at once. The period is controlled by the Begin Order Date on the Trading Partners screen for that partner, or by the date on the General Settings screen when you use Get Order From All Partners. The order status also matters, because the corresponding order status checkbox must be selected for the order to be retrieved and imported.
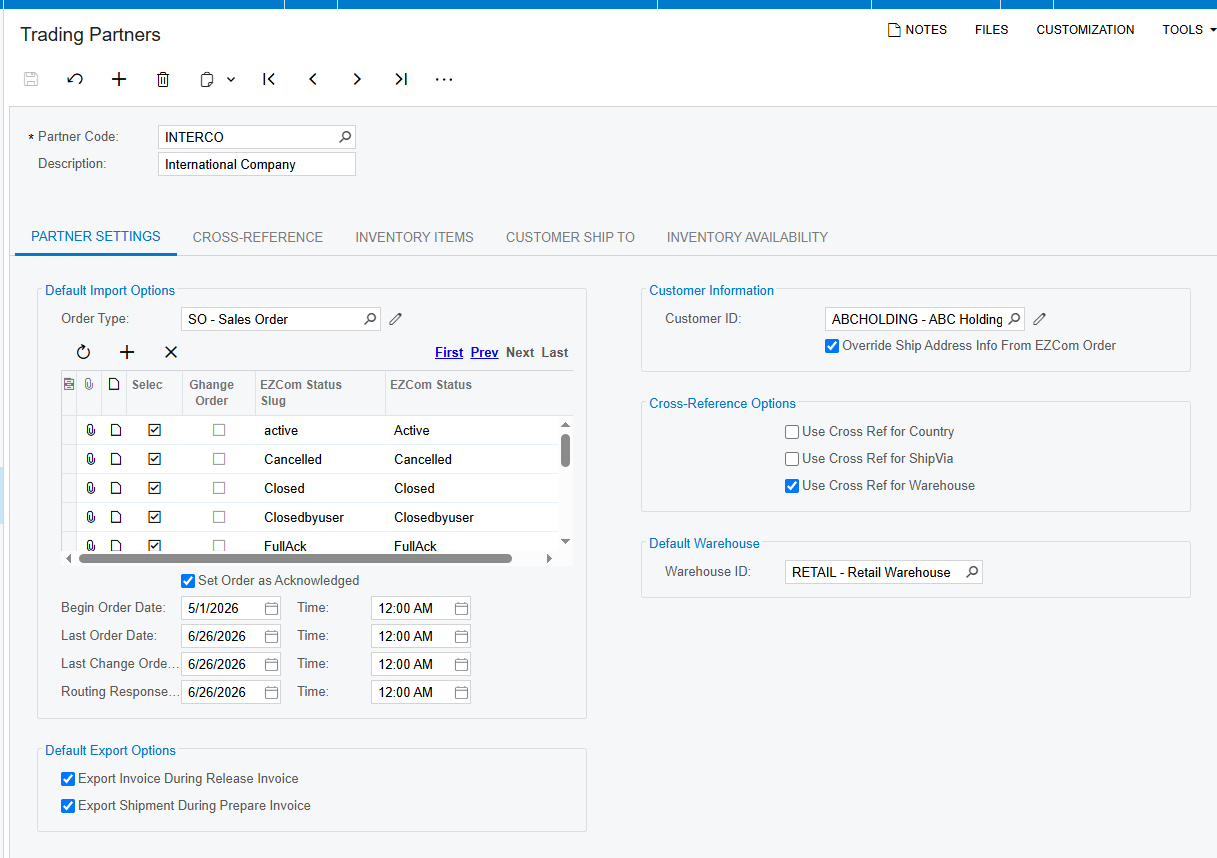
Why does my EZCom EDI order fail to import into Acumatica?
The documented cause is unmapped items: if the item on the EZCom order is not mapped under the Inventory Items tab of the Trading Partners screen, an error message appears during the order import process. Confirm that the cross-reference dropdown in that tab points at the entity you actually match on, such as UPC Code, and remember that only the entities checked under Cross-Reference Options appear in that dropdown.
Why is my order still sitting on the Send Outbound Invoice screen?
That screen is the catch-up queue for invoices that were not exported automatically. If the Export Invoice During Release Invoice checkbox is not enabled for the partner during the Release Invoice process in Acumatica, the EZCom orders appear there instead. Send them from that screen and the order invoice status in Acumatica updates to Closed and the order is updated in the EZCom store. The Send Outbound Shipments screen works the same way for Export Shipment During Prepare Invoice.
Why is the connector ignoring my warehouse cross-reference?
Check the Default Warehouse section on the Trading Partners screen. The Warehouse ID field there must not hold a value for the system to take the cross-reference value during the import. Also confirm that the Use Cross Ref for warehouse checkbox is checked and that the warehouse is actually set up under the Cross-Reference tab, since both conditions have to be true.
How does inventory quantity get sent back to EZCom EDI?
From the Send Inventory Availability screen, which lists the items already loaded and checked under the Inventory Items tab for that partner. The Acumatica warehouse, the quantity option and the EZCom warehouse code must be mapped on the Inventory Availability tab of the Trading Partners screen first. Select the items and press Send or Send All, and the quantities sync to EZCom EDI according to that mapping.
Does the connector bring shipment tracking numbers into Acumatica?
Yes. When the EZCom order is at the shipment level and is imported from the Import Warehouse Shipment screen, the system imports the item quantity and tracking number from EZCom EDI and updates the shipped quantity and tracking number on the shipment. The same button is available on the shipment screen, so you do not have to leave the shipment to run it.
Work With the Biz-Tech Services EZCom EDI Connector
Keep the shape of the flow in mind whenever a document goes missing. Orders travel from EZCom EDI through the intermediate server into the Import Purchase Orders, Import Changed Purchase Orders, Import Routing Response and Import Warehouse Shipment screens; the Trading Partners setup decides what they become in Acumatica; and acknowledgements, routing requests, warehouse orders, shipments, invoices and inventory quantities travel back out through the Send screens, each leaving a Closed status or an empty worklist behind as proof. Almost every problem in that loop traces back to a single field on the Trading Partners screen.
If your business runs EDI trading-partner orders and wants them landing correctly in Acumatica the first time, the Biz-Tech Services Acumatica EZCom EDI Integrator can be configured around the partners, items and warehouses you actually trade with. Visit https://biz-techservices.com to learn more about our Acumatica expertise or to schedule a personalized demonstration.

