

Acumatica Construction ERP 2026: Complete Guide to Job Costing, Project Accounting, Change Orders & Retainage

Acumatica Construction ERP 2026: The Complete Guide to Job Costing, Project Accounting, Change Orders, Retainage, Subcontracts, and Field Management
Construction companies do not lose margin only because a project was estimated incorrectly. Margin can disappear gradually through labor overruns, material price changes, unapproved scope, slow billing, unmanaged commitments, missing field information, retainage, subcontractor issues, and cost information that arrives too late to influence the project.
That is why modern construction ERP cannot simply be accounting software with a project number attached to every transaction.
A serious construction management platform must connect:
- project budgets;
- job costs;
- commitments;
- subcontracts;
- purchase orders;
- change requests;
- change orders;
- materials;
- labor;
- progress billing;
- retainage;
- accounts payable;
- accounts receivable;
- compliance;
- field activity;
- project documents;
- cash flow;
- financial reporting.
Acumatica Construction ERP is designed around that connected model.
Acumatica Construction Edition combines financial management, project accounting, job costing, construction project management, purchasing, subcontract management, inventory, field activity, reporting, CRM, mobile access, integrations, and workflow automation in one cloud ERP platform.
The objective is not merely to record the cost of a project after the cost has already happened.
The objective is to make project information visible early enough for management to act.
A construction ERP should not only tell you whether a project made money. It should help you understand whether the project is likely to make money while there is still time to change the outcome.
That difference becomes increasingly important as construction firms grow.
A contractor managing five projects can sometimes survive with accounting software, Excel, paper files, emails, and experienced employees who know where everything is.
A contractor managing fifty, one hundred, or several hundred active projects cannot scale that model safely.
Information becomes fragmented.
Finance knows one version of the project.
The project manager knows another.
The superintendent has information from the field.
The estimator has the original assumptions.
The subcontractor has another set of numbers.
The owner may be waiting for a change-order decision.
By the time all of those versions are reconciled, the cost may already be committed.
Acumatica Construction Edition is designed to reduce that fragmentation.
In Acumatica 2026 R1, the construction platform has expanded further with capabilities focused on earlier risk detection, more precise cost forecasting, streamlined change management, better project/entity alignment, and project materials management.
Construction organizations can use Acumatica to manage the complete lifecycle:
As an Acumatica Gold Partner, BizTech works with implementation, integrations, custom development, automation, financial reporting, ERP, CRM, EDI, warehouse management, and business process technology.
This is particularly important in construction because construction ERP rarely operates alone.
A contractor may need to connect Acumatica with:
- estimating software;
- payroll;
- time tracking;
- document management;
- field applications;
- CRM;
- supplier systems;
- payment platforms;
- BI tools;
- custom project portals;
- specialized construction applications.
This guide explores Acumatica Construction ERP from project setup and job costing through field execution, retainage, compliance, cash flow, implementation, migration, and long-term optimization.
What Is Acumatica Construction Edition?
Acumatica Construction Edition is a cloud ERP platform designed for construction organizations that need financial accounting, project accounting, job costing, project management, procurement, subcontract control, change management, field visibility, compliance, billing, and reporting in one connected environment.
It can be relevant to:
- general contractors;
- specialty contractors;
- subcontractors;
- restoration contractors;
- roofing contractors;
- electrical contractors;
- mechanical contractors;
- HVAC contractors;
- plumbing contractors;
- commercial contractors;
- construction developers;
- multi-entity construction groups.
Construction Edition can combine:
Financial Management
General Ledger, Accounts Payable, Accounts Receivable, cash, banking, financial reporting, multi-company operations, and related controls.
Project Accounting
Projects, tasks, account groups, cost codes, revenue budgets, cost budgets, actual costs, commitments, billing, and profitability.
Construction Management
Change requests, change orders, retainage, subcontracts, compliance, joint payments, project materials, and construction-specific workflows.
Field Management
Daily field reports, project issues, photo logs, drawing logs, submittals, mobile access, expenses, and site information.
The value is in the integration between these areas.
A subcontract commitment is not merely a project-management note.
It can influence the project budget and forecast.
A vendor bill is not merely accounts payable.
It can become a job cost.
A change request is not merely correspondence.
It can become a future cost, commitment, revenue change, and eventually a change order.
A material purchase can be tied directly to the project.
Retainage influences accounts payable, accounts receivable, project billing, and cash flow.
When construction and accounting live in the same ERP, those relationships become much easier to control.
What’s New in Acumatica Construction 2026 R1?
Acumatica 2026 R1 focuses heavily on construction cost control, project risk, project materials, and the relationship between operational project data and financial accounting.
Quantity and Unit-Rate Cost Forecasting
Construction forecasts become more useful when they are based on operational quantities rather than only dollar totals.
For example, a contractor may have:
- 1,000 feet of pipe budgeted;
- 600 feet installed;
- a revised unit rate;
- 400 feet remaining.
A quantity-driven forecast can provide a stronger basis for estimating the remaining cost than simply assuming that historical spending will continue at the same percentage.
2026 R1 improves forecasting around specific quantities and unit rates.
This can help project teams identify potential budget pressure earlier.
Faster Cost-Side Change Order Workflows
Construction companies often experience a timing mismatch.
A field condition may create additional subcontractor or material cost immediately, while customer approval for additional revenue may take days or weeks.
2026 R1 allows construction teams to move cost-side changes forward without necessarily waiting for final approval of the revenue side.
This can create a more realistic view of project exposure.
Project and Branch Alignment
Multi-entity construction companies need costs and commitments to reach the correct legal entity.
2026 R1 improves alignment of project and branch information in financial documents.
This can reduce errors where a project belongs to one branch or company but a related financial transaction is accidentally posted elsewhere.
Project Materials Management
Project Materials Management is one of the most important 2026 R1 construction enhancements.
Construction companies can increasingly manage materials directly around the project lifecycle.
The process can include:
- planning project materials;
- reserving stock;
- purchasing materials;
- delivering materials directly to project sites;
- issuing inventory to projects;
- tracking materials against project budget lines.
This helps eliminate unnecessary workarounds where materials had to flow through unrelated sales-order structures simply to reach a project.
AI-Driven Project Intelligence
Acumatica positioned the 2026 R1 construction release around earlier risk detection and more proactive project intelligence.
The strategic direction is clear:
construction ERP should surface problems before they become financial surprises.
From Opportunity to Project Closeout: The Construction Lifecycle in Acumatica
A construction ERP should follow the economic lifecycle of a project.
1. Opportunity and Estimate
The company identifies a potential job and estimates cost and revenue.
2. Contract and Project Setup
The awarded work becomes a project with:
- project tasks;
- budget;
- cost codes;
- revenue structure;
- cost structure;
- billing rules.
3. Commitments
Purchase orders and subcontracts create commitments against the project.
4. Field Execution
Labor, materials, subcontract work, expenses, and site activity begin creating real project costs.
5. Change Management
Potential changes can be tracked using change requests before becoming approved change orders.
6. Billing
Revenue may be billed according to progress, contract rules, project activity, or other configured billing methods.
7. Retainage
Part of vendor payments or customer billings may remain retained until contractual requirements are completed.
8. Forecasting
Management compares:
- original budget;
- revised budget;
- actual cost;
- committed cost;
- future forecast;
- expected final cost.
9. Closeout
Final billing, retainage release, compliance, subcontract closeout, and final project profitability can be completed in a controlled process.
Acumatica Construction Project Accounting
Project accounting provides the financial structure underneath Construction Edition.
Every major project transaction must eventually answer:
- Which project?
- Which task?
- Which cost category?
- Which cost code?
- Which account group?
- Which branch?
- Which vendor or subcontractor?
- Which budget line?
A strong project-accounting structure helps project managers and finance teams speak the same financial language.
Projects
The project represents the overall job, contract, development, or work scope being tracked.
Project Tasks
Tasks allow projects to be divided into meaningful work areas, phases, locations, or other structures.
Account Groups
Account groups provide a project-accounting classification for revenue, cost, assets, liabilities, and other project-related transactions.
Cost Codes
Cost codes add another level of construction-specific classification.
Budgets
Acumatica supports revenue and cost budgets so users can compare the planned economics of a project with its actual and committed performance.
Acumatica Job Costing: Understanding the Real Cost of Every Construction Project
Acumatica Job Costing is one of the central reasons construction companies evaluate Construction Edition.
Job costing answers a deceptively simple question:
How much is this project really costing us?
The answer can include:
- direct labor;
- materials;
- equipment;
- subcontracts;
- purchased services;
- expenses;
- overhead;
- other project costs.
But job costing becomes far more powerful when it also includes commitments.
If a subcontractor has not yet submitted an invoice, the cost may not be in the general ledger.
That does not mean the project has not economically committed to the cost.
A project manager evaluating only posted actuals can therefore believe that the project has more budget remaining than it really does.
Actual Cost
Costs that have already been posted against the project.
Committed Cost
Future costs represented by purchase orders, subcontracts, or other commitments.
Forecast Cost
The latest expected future cost based on current project information.
Cost to Complete
The expected additional cost required to finish the remaining project work.
Estimated Cost at Completion
A management view of the expected total project cost when the work is complete.
The more quickly a project manager can compare actual cost + committed cost + expected future cost against the revised project budget, the sooner the company can identify margin erosion.
Acumatica Cost Codes for Construction
Cost codes provide a construction-specific way to classify revenue and cost.
They can be used across project transactions including:
- project budgets;
- purchase orders;
- AP bills;
- change requests;
- change orders;
- project transactions;
- time and labor;
- expenses.
A contractor might use cost codes such as:
- Site Work;
- Concrete;
- Structural Steel;
- Electrical;
- Plumbing;
- HVAC;
- Doors;
- Windows;
- Finishes.
More detailed companies may use hundreds or thousands of cost codes.
Why Cost-Code Design Matters
Poor cost-code design can create either of two problems:
Too little detail: management cannot understand where the project lost money.
Too much detail: employees spend excessive time coding transactions and project reporting becomes difficult to interpret.
The implementation should therefore balance operational usefulness with usability.
Construction Project Budget Management
The project budget is both a financial plan and a control structure.
Acumatica can maintain:
- revenue budget;
- cost budget;
- original budget values;
- revised budget values;
- actual values;
- committed values;
- change-order values;
- potential change values;
- forecast information.
Original Budget
The original approved plan establishes the project’s baseline.
Revised Budget
Approved changes modify the current expected project economics.
Budget Control
Depending on configuration, Acumatica can help control whether certain transactions may exceed project budget values.
Potential Changes
Potential change orders can be visible before they become formally incorporated into the revised budget.
This is useful because project risk exists before paperwork is completely approved.
Construction Cost Forecasting, Quantity Forecasting, and Cost to Complete
Budget reporting explains what was originally expected.
Forecasting explains what management currently expects to happen.
Those are not the same thing.
Why Forecasting Matters
A project can still be technically under budget today while clearly heading toward an overrun.
Examples:
- labor productivity is lower than planned;
- material prices increased;
- more quantity remains than originally estimated;
- a subcontractor scope changed;
- rework is required;
- schedule extension creates additional overhead.
Quantity and Unit-Rate Forecasting in 2026 R1
Acumatica 2026 R1 strengthens project cost forecasting using quantities and unit rates.
This is especially valuable in construction because many costs are driven by measurable production quantities.
Examples include:
- feet of conduit;
- square feet of flooring;
- cubic yards of concrete;
- tons of steel;
- labor hours;
- number of fixtures;
- units installed.
Rather than forecasting only from percentages, the project can use operational production information to estimate remaining cost.
Construction Commitments in Acumatica
A commitment represents project cost that the organization expects to incur but which may not yet be reflected as an actual AP expense.
Commitments can come from:
- purchase orders;
- subcontracts;
- change orders;
- other committed project obligations.
Commitment visibility is critical for accurate job costing.
Example
A project may have a $1,000,000 electrical budget.
Only $200,000 has been invoiced by the electrical subcontractor.
But a $900,000 subcontract has already been executed.
Looking only at actual cost could suggest $800,000 of budget remains.
Looking at commitments shows that most of the budget has already been economically consumed.
Acumatica Subcontract Management
Subcontractors are central to the economics of many construction projects.
Acumatica supports subcontract workflows that can connect:
- vendor;
- project;
- project task;
- cost code;
- commitment;
- subcontract value;
- change orders;
- AP billing;
- retainage;
- payments;
- compliance.
Subcontract Creation
Subcontract documents establish committed scope and cost.
Subcontract Billing
Vendor bills can reduce the outstanding commitment while creating actual cost.
Subcontract Changes
Approved scope changes can modify the commitment through project change-management processes.
Retainage
Part of subcontractor billing can remain retained according to contractual rules.
Compliance
Subcontractor documentation can be managed alongside financial processes.
Acumatica Change Requests
Construction projects change constantly.
The dangerous part is not change itself.
The dangerous part is unmanaged change.
A Change Request can represent a potential change before final approval.
A request may include:
- project task;
- cost code;
- inventory item;
- quantity;
- unit cost;
- unit price;
- estimated cost;
- estimated revenue;
- vendor;
- potential commitment;
- markups.
Why Potential Change Visibility Matters
Suppose a superintendent discovers a field condition that will probably cost $50,000.
The formal owner approval may take a week.
Management should not have to pretend the potential cost does not exist during that week.
Change Requests allow potential cost and revenue impacts to become visible earlier.
Acumatica Change Orders
An approved change can move into a Change Order.
Change Orders can update:
- cost budgets;
- revenue budgets;
- quantities;
- commitments;
- project economics.
Two-Tier Change Management
Acumatica supports a two-tier process:
- Potential changes are captured as Change Requests.
- One or more Change Requests can be grouped into an approved Change Order.
This provides more visibility than waiting until every change is formally approved before entering it into the ERP.
Cost-Only Changes
Not every project cost change creates additional customer revenue.
Some changes may be cost-only.
Examples include:
- contractor error;
- rework;
- unrecoverable field condition;
- internal scope decision.
These costs still need to reach the forecast and project budget.
2026 R1 Cost-Side Release
Acumatica 2026 R1 provides additional flexibility where cost exposure needs to be recognized before final approval of related revenue.
This helps the cost forecast remain closer to project reality.
Construction Markups in Change Requests
Construction change pricing often includes more than raw cost.
Change Requests can include several markup concepts.
Price Markup
An item-specific markup can help transform estimated cost into a customer-facing unit price.
Line Markup
An additional markup can be applied to individual estimation lines.
Document-Level Markups
Document-level calculations can support:
- percentage markups;
- cumulative percentage markups;
- flat fees.
This can be useful for:
- overhead;
- profit;
- insurance;
- administrative fees;
- other contractually allowed add-ons.
Progress Billing, Construction Billing, and AIA Billing
Construction revenue often does not follow simple product invoicing.
Contractors may bill according to:
- progress;
- percent complete;
- project milestones;
- time and materials;
- contract schedules;
- schedule-of-values structures.
Progress Billing
Progress billing allows contractors to invoice customers as work progresses rather than waiting until project completion.
Schedule of Values
Projects can require billing to be broken into specific phases, tasks, cost areas, or contract lines.
AIA-Style Billing
Acumatica Construction Edition supports construction billing and reporting requirements used in AIA-style workflows.
For U.S. construction companies, this is particularly relevant where billing is expected to resemble the familiar:
- G702 Application and Certificate for Payment;
- G703 Continuation Sheet
structure.
2026 R1 Revenue Percentage Improvements
2026 R1 also includes improvements around automated revenue percentage calculations intended to support more accurate progress billing.
Acumatica Retainage: AP, AR, Project Billing, and Retainage Release
Retainage is one of the construction-specific financial processes that generic accounting systems often handle poorly.
A construction company may operate on both sides of retainage.
AP Retainage
The contractor may retain part of a subcontractor or vendor bill until contractual work is completed.
Acumatica can process AP bills with retained amounts and track retainage at the document-line level when retainage functionality is enabled.
AR Retainage
The project owner may retain part of the contractor’s invoice.
Acumatica can track the retained portion separately and later release it through retainage documents.
Partial Retainage Release
Retainage does not always need to be released in one final amount.
Businesses may release a percentage or amount as contractual requirements are met.
Consolidated Retainage
For qualifying AR scenarios, Acumatica can consolidate retainage from multiple original documents related to the same customer and project.
Retainage Cap
Construction contracts may stop additional retainage once the retained amount reaches an agreed cap.
Acumatica supports project billing scenarios with retainage caps.
Retainage rules can have significant accounting, contractual, tax, and cash-flow consequences. Configuration should be validated against the company’s actual contracts and accounting requirements.
Joint Payments and Joint Checks
Construction payment relationships can involve more than one payee.
A subcontractor may owe money to a supplier.
The general contractor or owner may need to issue a payment jointly to:
- the vendor;
- the vendor’s supplier;
- another subcontractor participating in the project.
Acumatica Construction Edition supports joint-payment scenarios associated with project AP documents.
This can help construction companies manage payment risk and subcontractor/supplier relationships more systematically.
Construction Compliance Documents and Lien Waivers
Construction firms must often verify that vendors and subcontractors have the required documentation before payment or continued work.
Compliance can involve:
- insurance certificates;
- licenses;
- bond information;
- certifications;
- lien waivers;
- other contractual documents.
Compliance Document Types
Acumatica allows organizations to define compliance-document requirements and custom attributes according to their own processes.
Expiration and Status
Compliance information can help warn users about missing or outstanding documents.
Lien Waivers
Acumatica supports lien-waiver generation and configuration as part of construction compliance workflows.
This can reduce the risk of managing waiver documentation exclusively through email, shared folders, and spreadsheets.
Acumatica Project Materials Management 2026
Project Materials Management expands the relationship between Construction Edition and inventory.
Materials can represent a major percentage of project cost.
Examples include:
- electrical components;
- pipe;
- fixtures;
- hardware;
- glass;
- insulation;
- roofing materials;
- equipment;
- finishes.
Construction firms may:
- purchase materials specifically for a project;
- hold common materials in a warehouse;
- transfer materials between locations;
- deliver materials directly to a site;
- issue stock to a project.
2026 R1 provides a more centralized project material workflow.
Reserve Inventory
Available stock can be identified for project needs.
Purchase for the Project
Material requirements can trigger procurement.
Deliver to Project Site
Acumatica supports project drop-ship purchasing where materials can be delivered directly to the project site.
Issue Materials to the Project
Inventory consumption can become project cost.
This connects physical inventory movement with job costing.
Construction Procurement: From Budget to Purchase Order and Subcontract
Construction procurement should remain connected to project budget and commitments.
A typical process may be:
The financial impact should remain traceable throughout the process.
This helps prevent a common construction problem:
the project manager believing budget remains available even though purchasing has already committed the funds.
Daily Field Reports
Construction happens in the field.
Accounting happens in the office.
The longer information takes to move between them, the more likely project decisions are based on outdated data.
Daily Field Reports provide a structured way to capture what happened on site.
They can include:
- progress worksheets;
- labor time and activity;
- change orders;
- change requests;
- subcontractor activity;
- project issues;
- weather;
- site visitors.
Subcontractor Activity
Daily reports can capture:
- which subcontractor was on site;
- number of workers;
- hours worked;
- cost codes related to the work.
Progress Worksheets
Field progress can update quantity information related to project budget lines.
Change Management from the Field
Change requests and change orders can be associated with daily field activity.
This helps preserve the operational context explaining why the project changed.
Construction Photo Logs
Photos are part of modern construction documentation.
They may document:
- work completed;
- site conditions;
- damage;
- progress;
- quality issues;
- pre-existing conditions;
- closeout.
Acumatica’s construction project-management capabilities include photo logs associated with projects.
This can help move project imagery away from individual employees’ phones and disconnected folders into a more controlled project record.
Construction Drawing Logs
Drawings change throughout a project.
Teams must know:
- which drawing is current;
- which revision is valid;
- what changed;
- which project it belongs to;
- who needs access.
Drawing logs provide project teams with a structured method for managing drawing information within the broader construction ERP environment.
Acumatica Construction Submittals
A submittal may include:
- shop drawings;
- product data;
- equipment information;
- cut sheets;
- material samples;
- other documents requiring approval before fabrication or installation.
Submittal delays can become schedule delays.
Construction Edition provides structured submittal processing including:
- creation;
- status;
- revisions;
- project linkage;
- approval-related tracking.
Construction Project Issues
Not every field problem immediately becomes a change order.
Projects can experience:
- quality problems;
- schedule issues;
- coordination issues;
- site conditions;
- missing information;
- design questions;
- safety-related concerns.
Tracking issues in the project environment makes it easier to connect operational problems with later financial or schedule consequences.
Construction Project Cash Flow
A profitable project can still create cash-flow problems.
Construction companies frequently pay:
- employees;
- suppliers;
- subcontractors;
- equipment costs
before receiving equivalent cash from the project owner.
Retainage increases the timing mismatch further.
Important Cash-Flow Components
- billed revenue;
- unbilled revenue;
- customer payments;
- vendor bills;
- paid AP;
- unpaid AP;
- unreleased retainage;
- commitments.
Acumatica 2026 R1 includes extended project financial information such as Project AP Details that can be used to review paid, unbilled, and unreleased-retainage information and support Project Cash Flow analysis.
Construction Inventory and Warehouse Management
Not every contractor needs sophisticated inventory management.
But many specialty contractors do.
Examples include:
- electrical contractors;
- plumbing contractors;
- HVAC companies;
- glass contractors;
- roofing contractors;
- maintenance contractors;
- companies with central material yards.
Inventory can include:
- materials;
- parts;
- equipment;
- consumables;
- project-specific stock.
The relationship between Inventory Management and Project Accounting can help ensure materials issued to a project become visible in job cost.
Field-to-Office Connectivity and Mobile Access
Construction ERP fails if the information is accurate only in the accounting office.
Project managers and field teams need access to current information.
Depending on role and configuration, mobile/cloud access can support:
- project information;
- expenses;
- approvals;
- field reporting;
- project documents;
- financial visibility;
- photo uploads.
The value is not simply convenience.
It reduces the delay between what happens on site and what management knows.
Construction Reporting, WIP, Dashboards, and Project Status
Construction businesses generate enormous amounts of data.
The reporting system should convert that data into decisions.
Project Status
Acumatica’s Project Status functionality can bring together project-related information including:
- financials;
- cost and revenue budgets;
- change requests;
- change orders;
- cost projections;
- pro forma invoices;
- subcontracts;
- purchase orders;
- daily field reports;
- project issues;
- drawing logs;
- photo logs;
- submittals;
- compliance documents.
Work in Progress Reporting
WIP reporting is essential for many contractors.
Management may need to understand:
- contract value;
- cost incurred;
- estimated total cost;
- percent complete;
- earned revenue;
- billings;
- overbilling;
- underbilling.
Executive Dashboards
Useful construction KPIs can include:
- project margin;
- forecast margin;
- budget variance;
- open commitments;
- unapproved changes;
- AR aging;
- AP aging;
- cash;
- retainage;
- project backlog;
- project cash flow.
Who Can Use Acumatica Construction ERP?
Project budgets, subcontractors, procurement, change management, compliance, field information, billing, and project profitability.
Detailed job costing, inventory, labor, retainage, field teams, compliance, and subcontractor/vendor processes.
Labor, materials, inventory, purchasing, cost codes, service, project billing, and warehouse stock.
Construction project accounting combined with parts inventory, service, equipment, and field operations.
High project volume, field mobility, document-heavy workflows, approvals, CRM, billing, and cash flow.
Project costing, field crews, material purchasing, subcontractors, change management, and project documentation.
Project accounting, labor, materials, job profitability, retainage, compliance, and specialized integrations.
Project budgets, procurement, commitments, multi-entity structures, project financials, and reporting.
Multiple companies, branches, intercompany workflows, consolidated reporting, shared management, and scalable ERP access.
Acumatica Construction Integrations
No modern construction ERP exists in isolation.
A contractor may already use specialized software for:
- estimating;
- project collaboration;
- time tracking;
- payroll;
- equipment;
- CRM;
- document management;
- field service;
- business intelligence;
- payments;
- supplier networks.
The goal should not automatically be to replace every application.
The goal is to establish a clear system architecture.
System of Record
The implementation should define where authoritative data belongs.
For example:
- Acumatica may own project financials;
- a specialist field platform may own specific site workflows;
- a payroll platform may own payroll processing;
- Acumatica can receive the resulting financial information.
API Integration
Acumatica’s API architecture allows external applications to exchange project and financial information.
BizTech Integration Development
BizTech provides:
- custom API integration;
- business workflow automation;
- EDI;
- CRM integration;
- warehouse integration;
- reporting integration;
- custom Acumatica development.
This is particularly useful when a construction company has a specialized technology stack that cannot be replaced with a generic connector.
Real Construction Results with Acumatica
Published customer stories provide useful examples of Acumatica Construction Edition in production.
These are company-specific results, not guarantees of future performance.
Alpha Insulation & Waterproofing
time savings in Work-in-Progress calculations reported in the published case study
real-time visibility across a multi-location specialty contractor
needed to create reports according to the case study
Alpha Insulation & Waterproofing uses Acumatica Construction Edition with Advanced Financial Management, Expense Management, Inventory Management, Warehouse Management, and Payroll.
The organization reduced WIP calculations from approximately 1.5 days to around ten minutes and gave field teams real-time access to project information.
IOC Construction
reassigned from manual data-entry responsibilities
spreadsheet formatting eliminated
paper project folders eliminated
IOC Construction consolidated several previously disconnected entities and processes into Acumatica Construction Edition.
Roberts Glass & Service
increase reported following implementation while maintaining profitability
labor-cost reporting delay eliminated
project updates through mobile access
Roberts Glass integrated Acumatica Construction Edition with ExakTime to improve labor-cost accuracy and project visibility.
American Asphalt
of paper project files eliminated annually
real-time field access
annual growth maintained according to the published case
Phoenix Renovation and Restoration
Phoenix Renovation manages more than 1,000 annual projects and uses Construction Edition for financial and project visibility.
The published case highlights:
- real-time field access;
- improved project transparency;
- automated workflows;
- improved cash-flow management;
- AIA invoicing and WIP functionality.
How to Implement Acumatica Construction ERP
A construction implementation should begin with the project’s economic lifecycle, not with software screens.
Phase 1: Construction Discovery
Document:
- business entities;
- project types;
- contract types;
- estimating process;
- project setup;
- job-cost structure;
- cost codes;
- subcontracts;
- purchase orders;
- change management;
- billing;
- retainage;
- payroll;
- field workflows;
- compliance;
- integrations;
- reporting.
Phase 2: Project Accounting Architecture
Design:
- companies;
- branches;
- projects;
- tasks;
- account groups;
- cost codes;
- budget levels;
- revenue structure;
- financial accounts.
Phase 3: Budget and Job Cost Design
Define:
- original budget;
- revised budget;
- actual cost;
- commitments;
- forecasting;
- WIP;
- cost to complete.
Phase 4: Procurement and Subcontracts
Configure:
- purchase orders;
- subcontracts;
- commitments;
- approvals;
- receipts;
- AP bills;
- payments.
Phase 5: Change Management
Define:
- change requests;
- change-order classes;
- cost-only changes;
- revenue changes;
- markups;
- approvals.
Phase 6: Billing and Retainage
Configure:
- project billing;
- progress billing;
- AIA-style reporting;
- AR retainage;
- AP retainage;
- retainage releases;
- retainage caps.
Phase 7: Field Management
Configure:
- Daily Field Reports;
- photo logs;
- drawing logs;
- submittals;
- issues;
- mobile access.
Phase 8: Compliance
Define:
- compliance document types;
- required attributes;
- expiration rules;
- lien-waiver workflows;
- payment controls.
Phase 9: Integration
Connect required third-party systems.
Phase 10: Testing
Test complete construction scenarios.
For example:
- Create a project.
- Load budget.
- Create a subcontract.
- Create a purchase order.
- Enter project material.
- Post labor and expense.
- Create change request.
- Approve change order.
- Enter AP bill with retainage.
- Bill customer.
- Release retainage.
- Review WIP and forecast margin.
Acumatica Construction Data Migration
Construction data migration is often more difficult than migrating generic financial data.
The business may have hundreds or thousands of projects with different statuses.
Master Data
Potentially migrated records include:
- customers;
- vendors;
- subcontractors;
- employees;
- inventory;
- cost codes;
- accounts;
- project templates.
Projects
For each open project, migration may require:
- project ID;
- customer;
- tasks;
- budget;
- cost codes;
- actual cost;
- commitments;
- billing;
- retainage;
- change orders;
- documents.
Open Commitments
Purchase orders and subcontracts must remain economically visible after go-live.
Open AR and AP
Project-related invoices, vendor bills, credits, and retainage must reconcile with the general ledger.
Historical Projects
The company should decide whether to:
- migrate full history;
- migrate selected active/recent projects;
- migrate summary history;
- keep completed projects in a legacy archive.
Documents
Construction documents may represent one of the largest migration datasets.
The company needs a strategy for:
- contracts;
- drawings;
- photos;
- submittals;
- compliance documents;
- project correspondence;
- attachments.
How Much Does Acumatica Construction ERP Cost?
There is no universal fixed Acumatica Construction price.
Software and implementation cost can depend on:
- Acumatica applications;
- resource requirements;
- deployment;
- number of companies;
- number of branches;
- active projects;
- project history;
- construction project management;
- payroll;
- inventory;
- field service;
- data migration;
- integrations;
- custom development;
- reporting;
- training;
- support.
| Cost Area | Typical Construction Scope |
|---|---|
| Acumatica Software | Construction Edition, financials, project functionality, optional applications and resource level |
| Discovery | Job cost, budgets, subcontracts, retainage, field processes, payroll, reporting and integrations |
| Data Migration | Financials, projects, commitments, subcontracts, retainage, open documents and history |
| Construction Configuration | Cost codes, project structure, change management, compliance, billing and field workflows |
| Integrations | Payroll, time, estimating, field systems, CRM, document systems and custom applications |
| Reporting | WIP, project status, cash flow, profitability, executive dashboards and custom reports |
| Training | Accounting, project managers, field staff, procurement, executives and administrators |
| Support | Go-live stabilization, optimization, new workflows and integrations |
How Long Does Acumatica Construction Implementation Take?
There is no universal implementation duration.
Timeline depends on:
- number of legal entities;
- number of active projects;
- job-cost complexity;
- cost codes;
- subcontracts;
- retainage;
- billing;
- payroll;
- field management;
- inventory;
- data migration;
- project documents;
- integrations;
- custom development;
- training;
- testing.
A small specialty contractor replacing QuickBooks has a very different implementation from a multi-entity general contractor migrating hundreds of active jobs, historical WIP, subcontracts, compliance, payroll, and multiple integrations.
Common Acumatica Construction Implementation Mistakes
Mistake 1: Poor Cost-Code Design
Too much or too little detail can make project reporting difficult.
Mistake 2: Copying the Legacy Chart of Accounts Exactly
The new ERP may allow a cleaner project/account/subaccount/cost-code structure.
Mistake 3: Ignoring Project-to-Branch Relationships
Multi-company contractors must ensure financial transactions reach the correct legal entity.
Mistake 4: Migrating Actual Costs but Forgetting Commitments
A project without open commitments can appear artificially profitable immediately after migration.
Mistake 5: Incorrect Retainage Migration
Retained AP and AR balances must reconcile with project and financial records.
Mistake 6: Designing the System Only with Accounting
Project managers, superintendents, procurement, and field users must participate.
Mistake 7: Recreating a Bad Change-Order Process
Migration is an opportunity to improve how potential and approved changes are tracked.
Mistake 8: Migrating Every Historical Project in Full Detail
Historical migration should create value, not merely consume budget.
Mistake 9: Leaving Integrations Until the End
Payroll, time, estimating, document systems, and field applications affect core ERP design.
Mistake 10: No Post-Go-Live Optimization
Real project data often reveals improvements impossible to identify during initial configuration.
How to Measure Construction ERP ROI
Construction ERP ROI should be measured across the entire project lifecycle.
Accounting
Track:
- month-end close;
- WIP preparation time;
- invoice processing;
- duplicate entry;
- financial report preparation.
Project Management
Track:
- time spent preparing job reports;
- forecast accuracy;
- budget overruns identified early;
- change-order cycle time;
- unapproved changes;
- project manager administrative hours.
Field
Track:
- paper forms eliminated;
- data-entry delay;
- mobile usage;
- daily report completion;
- photo/document retrieval time.
Procurement
Track:
- commitment visibility;
- purchase-order processing time;
- material waste;
- emergency purchasing;
- project material availability.
Cash
Track:
- days to invoice;
- days sales outstanding;
- retainage outstanding;
- AP timing;
- project cash flow;
- working-capital requirements.
Profitability
Track:
- original margin;
- forecast margin;
- final margin;
- margin erosion;
- cost variance;
- change recovery.
Why Work with BizTech for Acumatica Construction Implementation?
Construction ERP implementation requires a combination of accounting knowledge, project-process knowledge, data expertise, integration experience, reporting, and technical development.
BizTech is an Acumatica Gold Partner and a business technology consulting company providing ERP, accounting, CRM, EDI, warehouse management, financial reporting, implementation, and integration services.
BizTech reports more than 500 successful integrations, 15+ solutions, and work across more than 35 countries.
Acumatica Implementation
BizTech can support:
- business discovery;
- financial configuration;
- project accounting;
- job-cost structure;
- data migration;
- reporting;
- testing;
- training;
- go-live;
- post-go-live optimization.
Custom Development
Where standard functionality does not cover a real construction requirement, BizTech can develop:
- Acumatica customizations;
- custom APIs;
- automated workflows;
- custom inquiries;
- dashboards;
- specialized integrations.
Integration Architecture
BizTech can help construction companies connect Acumatica with:
- CRM;
- payroll;
- time tracking;
- field software;
- document management;
- supplier systems;
- EDI;
- BI tools;
- custom applications.
Source-System Experience
BizTech is also a Sage Certified Gold Development Partner.
This can be particularly useful for contractors migrating from Sage environments into Acumatica because the migration team can understand both the legacy system and the new ERP platform.
Construction ERP should connect the job site, project manager, accounting department, procurement team, subcontractors, project documents, and executive reporting. The implementation partner must understand all of those relationships—not only General Ledger configuration.
Acumatica Construction ERP Implementation Checklist
Organization
- Legal entities are documented.
- Branches are documented.
- Project types are documented.
- Business lines are documented.
- Security requirements are documented.
Project Accounting
- Project structure is approved.
- Task structure is approved.
- Account groups are approved.
- Cost codes are approved.
- Revenue budget structure is approved.
- Cost budget structure is approved.
Job Costing
- Labor costs are defined.
- Material costs are defined.
- Equipment costs are defined.
- Subcontract costs are defined.
- Committed costs are included.
- Forecast methodology is defined.
Change Management
- Change Request workflow is defined.
- Change Order classes are configured.
- Cost-only changes are tested.
- Revenue changes are tested.
- Markups are configured.
- Approvals are configured.
Subcontracts
- Subcontract workflow is defined.
- Commitment reporting is tested.
- AP billing is tested.
- Change Orders are tested.
- Compliance is tested.
- Retainage is tested.
Retainage
- AP retainage rules are configured.
- AR retainage rules are configured.
- Retainage release is tested.
- Partial release is tested.
- Retainage cap requirements are validated.
Billing
- Billing rules are approved.
- Progress billing is tested.
- AIA-related reporting is validated where required.
- Revenue recognition requirements are validated.
Compliance
- Compliance document types are defined.
- Required attributes are defined.
- Expiration tracking is tested.
- Lien-waiver process is tested.
- Joint-payment process is tested where required.
Materials
- Project material process is defined.
- Warehouses are configured.
- Project purchases are tested.
- Project drop-ship is tested where required.
- Material issue to project is tested.
Field
- Daily Field Reports are configured.
- Photo Logs are tested.
- Drawing Logs are tested.
- Submittals are tested.
- Project Issues are tested.
- Mobile access is tested.
Data Migration
- Customers are cleaned.
- Vendors are cleaned.
- Subcontractors are cleaned.
- Projects are mapped.
- Budgets are reconciled.
- Actual costs are reconciled.
- Commitments are reconciled.
- AR is reconciled.
- AP is reconciled.
- Retainage is reconciled.
- Open Change Orders are validated.
- Historical strategy is approved.
Integrations
- Every integration has an owner.
- Authentication is configured.
- Data ownership is defined.
- Cross-references are defined.
- Error handling is tested.
- Retry logic is tested.
- Monitoring is enabled.
Go-Live
- Opening financials reconcile.
- Project balances reconcile.
- Open commitments reconcile.
- Retainage reconciles.
- Users are trained.
- Dashboards are approved.
- Critical reports are approved.
- Field users are ready.
- Support coverage is active.
Final Conclusion: Why Acumatica Construction ERP Matters in 2026
Construction profitability is determined project by project.
That makes visibility unusually important.
Executives need to understand:
- which projects are profitable;
- which projects are losing margin;
- what has already been spent;
- what has already been committed;
- what costs are still expected;
- which changes are not yet approved;
- what has been billed;
- what cash has been collected;
- what retainage remains outstanding.
Project managers need to understand:
- budget remaining;
- subcontract status;
- material requirements;
- change exposure;
- field progress;
- compliance;
- project documentation.
Finance needs reliable numbers.
The field needs access to current project information.
Those requirements are difficult to satisfy when accounting, project management, field data, procurement, change orders, retainage, and compliance live in disconnected systems.
Acumatica Construction ERP provides a different model.
It connects:
- financial management;
- project accounting;
- job costing;
- project budgets;
- commitments;
- subcontracts;
- procurement;
- change management;
- billing;
- retainage;
- compliance;
- field reporting;
- project materials;
- cash flow;
- reporting.
Acumatica 2026 R1 strengthens this architecture with quantity and unit-rate forecasting, more flexible change-order processing, better branch/project alignment, Project Materials Management, and a stronger emphasis on proactive project intelligence.
The potential result is not simply faster accounting.
It is earlier visibility into project risk.
That is much more valuable.
But successful Construction ERP depends on implementation quality.
Cost codes must make sense.
Budgets must be structured correctly.
Commitments must be captured.
Retainage must reconcile.
Field teams must use the system.
Integrations must be reliable.
Legacy project data must be migrated intelligently.
That is where the implementation partner matters.
BizTech combines Acumatica Gold Partner expertise with ERP implementation, financial reporting, custom development, integrations, automation, EDI, CRM, warehouse management, data migration, and long-term support.
For construction organizations searching for:
- Acumatica Construction ERP;
- Acumatica Construction Edition;
- Construction ERP Software;
- Construction Accounting Software;
- Acumatica Job Costing;
- Acumatica Project Accounting;
- Acumatica Change Orders;
- Acumatica Retainage;
- Acumatica Subcontract Management;
- Acumatica AIA Billing;
- Acumatica Construction Implementation Partner;
- BizTech Acumatica Construction;
the next step is not simply purchasing construction software.
The next step is designing how the project lifecycle should operate inside one connected ERP.
Planning an Acumatica Construction ERP Implementation?
BizTech can assess your project accounting, job costing, cost codes, budgets, change orders, retainage, subcontracts, materials, field workflows, compliance, integrations, migration requirements, reporting, and Acumatica architecture before implementation begins.
FAQ: Acumatica Construction ERP
What is Acumatica Construction Edition?
Acumatica Construction Edition is a cloud ERP platform for construction organizations that connects financial management, project accounting, job costing, project budgets, commitments, subcontracts, purchasing, change management, billing, retainage, compliance, field information, reporting, and integrations.
What is new in Acumatica Construction 2026 R1?
Major 2026 R1 construction enhancements include quantity- and unit-rate-based cost forecasting, more flexible change-order workflows, improved project and branch alignment in financial documents, Project Materials Management, and additional project intelligence designed to identify financial risk earlier.
Does Acumatica support job costing?
Yes. Acumatica Construction Edition supports detailed project and job costing with actual costs, commitments, budgets, cost codes, forecasts, and project profitability information.
Does Acumatica support cost codes?
Yes. Cost codes can provide an additional construction-specific classification for project budgets, AP bills, purchase orders, change requests, change orders, project transactions, labor, and other costs.
What is the difference between actual cost and committed cost?
Actual cost represents cost already posted to the project. Committed cost represents future project obligations such as purchase orders and subcontracts that may not yet have become posted AP expenses.
Does Acumatica support construction project budgets?
Yes. Projects can contain cost and revenue budgets, original and revised values, actuals, commitments, potential change-order values, approved changes, and forecast information.
Does Acumatica support change requests?
Yes. Change Requests can track potential project cost and revenue changes before final approval and can later be grouped into Change Orders.
Does Acumatica support cost-only change orders?
Yes. Acumatica supports construction change-management scenarios where a project cost changes without corresponding additional customer revenue.
Does Acumatica support subcontract management?
Yes. Construction Edition supports subcontract workflows including commitments, subcontract billing, project costs, changes, retainage, vendor relationships, and related construction financial processes.
Does Acumatica support AP retainage?
Yes. When retainage functionality is enabled, AP bills can contain retained amounts that remain payable after contractual requirements are met.
Does Acumatica support AR retainage?
Yes. Customer invoices can include retained amounts that can later be released through retainage documents.
Does Acumatica support a retainage cap?
Yes. Acumatica supports project billing scenarios where contract retainage is subject to an agreed cap.
Does Acumatica support AIA billing?
Acumatica Construction Edition supports construction progress billing and reporting used in AIA-style workflows, including construction-oriented schedule-of-values and retainage requirements.
Does Acumatica support joint payments?
Yes. Construction Edition supports project AP scenarios where payments are issued jointly to a vendor and another supplier or subcontractor associated with project work.
Does Acumatica support lien waivers?
Yes. Construction compliance functionality can support lien-waiver generation and related compliance processes.
Can Acumatica track subcontractor compliance?
Yes. Compliance Documents can be used to track required documentation and custom compliance attributes for vendors, subcontractors, projects, and related entities.
Does Acumatica have Daily Field Reports?
Yes. Daily Field Reports can capture progress, labor, subcontractor activity, change requests, change orders, project issues, weather, visitors, and other job-site information.
Can Acumatica store construction photos?
Yes. Construction Project Management includes Photo Logs for project-related photographs and associated project documentation.
Does Acumatica support drawing logs?
Yes. Construction Project Management includes drawing-log functionality for tracking project drawings and related information.
Does Acumatica support construction submittals?
Yes. Construction Edition includes structured submittal processing, including revisions, status, project association, and related approval workflows.
What is Acumatica Project Materials Management?
Project Materials Management, expanded in 2026 R1, helps construction companies plan, purchase, reserve, deliver, and issue materials directly to projects while maintaining relationships with project budget lines.
Can materials be purchased directly to a project site?
Yes. Acumatica supports project drop-ship purchasing workflows where ordered materials can be delivered directly to a project site, including scenarios where receipt confirmation is required.
Does Acumatica support project cash-flow reporting?
Acumatica provides project financial information for analyzing items such as AP amounts, paid amounts, unbilled amounts, unreleased retainage, and related Project Cash Flow data.
Can Acumatica integrate with other construction software?
Yes. Acumatica provides APIs and integration capabilities for external construction, payroll, estimating, field, document, CRM, BI, and custom business applications.
How much does Acumatica Construction ERP cost?
There is no universal fixed price. Cost depends on required Acumatica applications, resource usage, entities, projects, construction functionality, data migration, integrations, customization, reporting, training, and support.
How long does Acumatica Construction implementation take?
Implementation time depends on the number of entities and projects, project-accounting complexity, cost codes, subcontracts, retainage, payroll, materials, field processes, migration, integrations, reports, testing, and user availability.
Can BizTech implement Acumatica Construction Edition?
Yes. BizTech is an Acumatica Gold Partner providing ERP implementation, data migration, custom development, integrations, workflow automation, financial reporting, testing, training, and ongoing support.
Why choose BizTech for Acumatica Construction implementation?
BizTech combines Acumatica implementation expertise with accounting, financial reporting, ERP, CRM, EDI, warehouse management, custom development, API integration, data migration, automation, and post-go-live support. BizTech is also a Sage Certified Gold Development Partner, which can be useful for construction organizations migrating from legacy Sage environments.


How to Sync DSCO Inventory Quantities from Acumatica
Accurate inventory publishing helps prevent DSCO from offering stock that Acumatica cannot fulfill. The Biz-Tech Sevices DSCO Connector provides a controlled workflow: define the store connection, map the items, choose the warehouses and quantity basis, then send selected quantities from the Export DSCO Inventory Quantities screen. The same screen also supports an intentional override when DSCO needs a quantity different from the current Acumatica value.
The key is to configure the calculation before pressing SYNC. The exported value can represent On Hand, Available, or Available for Shipment inventory, and it can be totaled across selected warehouses. A correct result therefore depends on three things working together: the item mapping, the warehouse selection, and the chosen quantity type.
What the DSCO inventory sync does
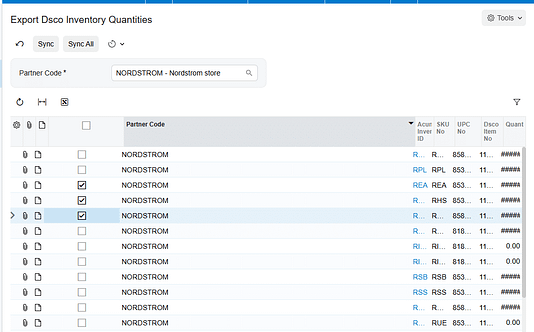
The Export DSCO Inventory Quantities screen sends inventory values from Acumatica to DSCO. It does not define which items or warehouses participate; those choices are made first on the DSCO Store screen. Once setup is saved, the export screen presents the eligible items and shows the Acumatica inventory quantity in a read-only Quantity field.
From that screen, an operator can use either of two supported methods. The standard method sends the displayed Acumatica quantity. The override method sends a manually entered DSCO Quantity instead. Because both methods use the same SYNC action, the operator should confirm which value is intended before selecting a row for processing.
Prerequisites and store connection settings
Before configuring inventory, confirm that the DSCO Connector customization package is installed and published in Acumatica. The connector guide identifies the Customization Projects form, SM204505, as the place to import, validate, and publish the deployment package.
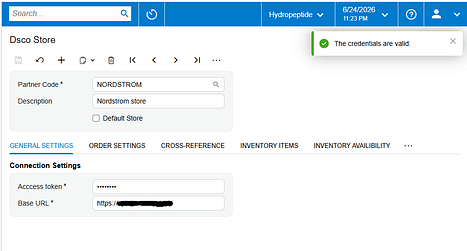
On the DSCO Store screen, complete the General Settings used for the API connection:
- Partner Code identifies the corresponding DSCO store.
- Description provides a recognizable label for the store configuration.
- Access Token supplies the credential used to authorize API access.
- Base URL supplies the root web address used by the connector.
Use Test Credentials after entering the connection information. A successful test confirms that the connector can reach DSCO with the saved General Settings. It does not, by itself, prove that inventory mappings or quantity rules are correct, so complete the item and availability setup before the first production sync.
Configure item mapping
Open the Inventory Items tab on the DSCO Store screen and select the items that should participate in synchronization. Save the store after making the selection; the connector guide specifically requires the items to be chosen and saved before they are processed on Export DSCO Inventory Quantities.
The Inventory Items cross-reference settings control how the connector finds a DSCO item and associates it with an Acumatica Inventory ID. The guide uses SKU as an example: when SKU is selected as the lookup value, the connector searches for the corresponding SKU and maps it to the Acumatica item. Review this mapping carefully. An omitted or incorrect item relationship can prevent the expected item from being processed and can also create errors in related DSCO order workflows.
Choose warehouses and the quantity basis
Use Inventory Availability to specify the warehouses that should be synchronized with DSCO. When warehouses are selected, the connector exports the sum of the item quantities across those selected warehouses. This is a critical control: adding or removing a warehouse changes the quantity offered through DSCO even when no item record has changed.
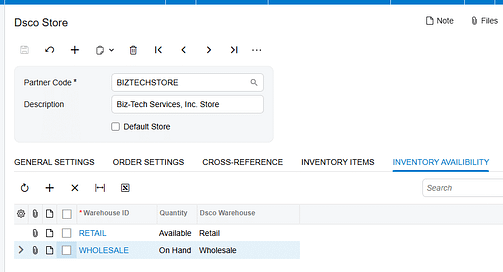
Next, choose the quantity type that the connector will publish:
- On Hand represents the recorded book quantity in inventory.
- Available represents the Acumatica available quantity under the applicable availability calculation.
- Available for Shipment represents the quantity available to support shipping and can be lower than on-hand inventory because demand and allocations affect it.
Choose the measure that matches the company’s fulfillment policy. On Hand may expose units that are already committed. Available or Available for Shipment may better reflect sellable supply, but the right choice depends on how the Acumatica tenant calculates availability and reserves inventory. The DSCO connector guide confirms the three choices; Acumatica’s availability rules determine the underlying values.
Run the inventory quantity sync
After the store, item, warehouse, and quantity settings are saved, open Export DSCO Inventory Quantities. Use one of the following workflows.
Send the current Acumatica quantity
- Locate the inventory item and review the read-only Quantity field. This field shows the item quantity calculated in Acumatica for the configured warehouses and quantity type.
- Select the checkbox for the item or items to process.
- Click SYNC. The connector updates the DSCO inventory quantity with the Acumatica Quantity value.
Send an intentional DSCO quantity override
- Enter the required value in the DSCO Quantity field for the item.
- Select the checkbox for that row.
- Click SYNC. The connector updates DSCO using the DSCO Quantity value rather than the read-only Acumatica Quantity value.
Treat an override as a deliberate operational exception. Document why it was used and remember that a later standard sync can replace it with the quantity calculated from Acumatica. The source guide confirms the override workflow but does not describe a permanent override rule.
Monitor and validate the result
Validate the first sync with a small, representative set of items before processing a larger group. Include an item stocked in one selected warehouse and, if applicable, an item stocked across multiple selected warehouses. Confirm the following:
- The expected item appears on Export DSCO Inventory Quantities after the Inventory Items selection is saved.
- The read-only Quantity value agrees with Acumatica for the selected quantity type.
- For multiple warehouses, the displayed quantity equals the sum across only the warehouses selected in Inventory Availability.
- After SYNC, the quantity shown in DSCO matches the intended Acumatica Quantity or the intentional DSCO Quantity override.
If processing reports an error, read the row-level message first. The connector guide’s processing screens use line-level errors and direct users to Tools > Trace for additional detail. Use the trace when the visible message is insufficient, then retest the specific row after correcting the connection, mapping, or setup issue.
Common pitfalls
Items do not appear for export. Confirm that the required items were selected on the DSCO Store screen and that the store was saved. Then verify the DSCO-to-Acumatica item cross-reference, including the selected lookup method such as SKU.
The exported quantity is too high or too low. Review Inventory Availability. The connector sums quantities across selected warehouses, so an unintended warehouse can inflate the result and a missing warehouse can suppress it. Also confirm whether On Hand, Available, or Available for Shipment is selected.
The connection test fails. Recheck Partner Code, Access Token, and Base URL, then run Test Credentials again. Inventory troubleshooting should wait until the API connection succeeds.
A manual value is overwritten later. The DSCO Quantity field provides an alternate value for a specific sync. A later run using the Acumatica Quantity can replace that value. Keep overrides controlled and visible to the team.
A successful sync is assumed without external validation. Verify the receiving quantity in DSCO, especially after configuration changes. The Acumatica screen shows the value being prepared; the DSCO result confirms what the channel received.
Frequently asked questions
Which Acumatica quantity can be sent to DSCO
The connector supports On Hand, Available, and Available for Shipment. Select the basis in the DSCO Store inventory availability settings before running the export.
How are quantities handled when more than one warehouse is selected
The exported item quantity is the sum of the quantities from the selected warehouses.
Can I send a quantity different from the Acumatica value
Yes. Enter the desired value in DSCO Quantity, select the row, and click SYNC. The connector then updates DSCO from the DSCO Quantity field.
Is the Quantity field editable
No. The guide defines Quantity as a read-only field that displays the inventory quantity from Acumatica.
Why should I test only a few items first
A small test makes it easier to identify whether a mismatch comes from item mapping, warehouse scope, the quantity basis, or an override. Once those controls are verified, expand the run to the remaining selected items.
Keep DSCO inventory aligned with Acumatica
A reliable inventory sync starts with precise configuration and ends with validation in DSCO. Select and save the right items, map them to Acumatica inventory IDs, include only the warehouses that should feed the channel, and choose the quantity measure that reflects fulfillment policy. Then use the standard Quantity workflow for routine updates and reserve DSCO Quantity overrides for controlled exceptions.
Need help configuring, validating, or troubleshooting the DSCO Connector for Acumatica? Visit Biz-Tech Services to discuss your integration requirements.
Check this video for details https://www.youtube.com/watch?v=Hk296jscNtA
How to Update Acumatica Shipments with ShipStation Tracking Data
How to Update Acumatica Shipments with ShipStation Tracking Data
Updating Acumatica with ShipStation tracking data is a controlled two-system workflow: send an eligible Acumatica order to ShipStation, complete the shipment there, and then import the shipment back into Acumatica. When the integration is configured correctly, Acumatica adds the shipment number and tracking number to the corresponding order and updates the order status to Prepare Invoice. This guide explains the required settings, the operational steps, the fields to verify, and the common configuration problems that interrupt the handoff.
How the ShipStation Tracking Update Works
The relevant integration direction is Acumatica to ShipStation. Within that direction, the Process Flow must be set to Shipment in ShipStation. Acumatica remains the source of the order, while ShipStation is where the shipment is created. After shipping activity is complete, Acumatica retrieves the corresponding ShipStation shipment and associates it with the order that was exported.
The ShipStation Order ID provides the key operational link. When an order is exported, ShipStation creates the order and Acumatica displays that identifier in the ShipStation Order ID field on the Sales Orders screen. The later import uses the established relationship to bring the shipment number and tracking number back to the correct Acumatica order.
Configure the ShipStation Store in Acumatica
Begin on the ShipStation Store screen. Select the correct Store Code and add a useful Description so administrators can distinguish the connection. Under Connection Settings, enter the Consumer Key, Consumer Secret, and ShipStation Base URL. These values authenticate API communication between Acumatica and ShipStation. Use Test Credentials before attempting an export or import. If the test fails, use Edit Credentials to correct the values before troubleshooting order data.
Set the Direction and Process Flow
Set Integration Option to Acumatica to ShipStation. This selection makes Process Flow available. Choose Shipment in ShipStation for a workflow in which orders leave Acumatica, shipments are created in ShipStation, and shipment details return to Acumatica. Do not choose Shipment in Acumatica for this scenario; that alternative creates the ShipStation order and shipment from Acumatica during shipment confirmation and uses a different sequence.
Load Supporting ShipStation Values
For an Acumatica-to-ShipStation setup, the store screen includes General Info, Carriers and Services, Packages, and ShipStation Warehouses. Open each applicable tab and retrieve its values from ShipStation. For example, Get Carriers loads carrier codes and Get Packages loads available packages. Select the records that should be used for order processing. The ShipStation Warehouses tab follows the same retrieve-and-select pattern. Accurate carrier, service, package, and warehouse choices reduce mapping errors when Acumatica creates orders in ShipStation.
Workflow for Updating Acumatica with Tracking Data
1 Confirm the store configuration
Verify the Store Code, credentials, Integration Option, and Process Flow. The required combination is Acumatica to ShipStation plus Shipment in ShipStation.
2 Export the Acumatica order
Open Create Orders in ShipStation to view eligible Acumatica orders. Select the required order and process it using the configured Store Code and ShipStation Store ID. You can also open the Sales Orders screen and choose Create ShipStation Order from the ShipStation group in the Actions menu.
3 Validate the outbound result
Return to the Sales Orders screen and confirm that the ShipStation Order ID field is populated. This shows that the order was created in ShipStation and that Acumatica retained the external identifier needed for the return flow.
4 Create the shipment in ShipStation
Process the exported order in ShipStation and create its shipment. The shipment must exist in ShipStation before Acumatica can retrieve its shipment and tracking details.
5 Import the shipment into Acumatica
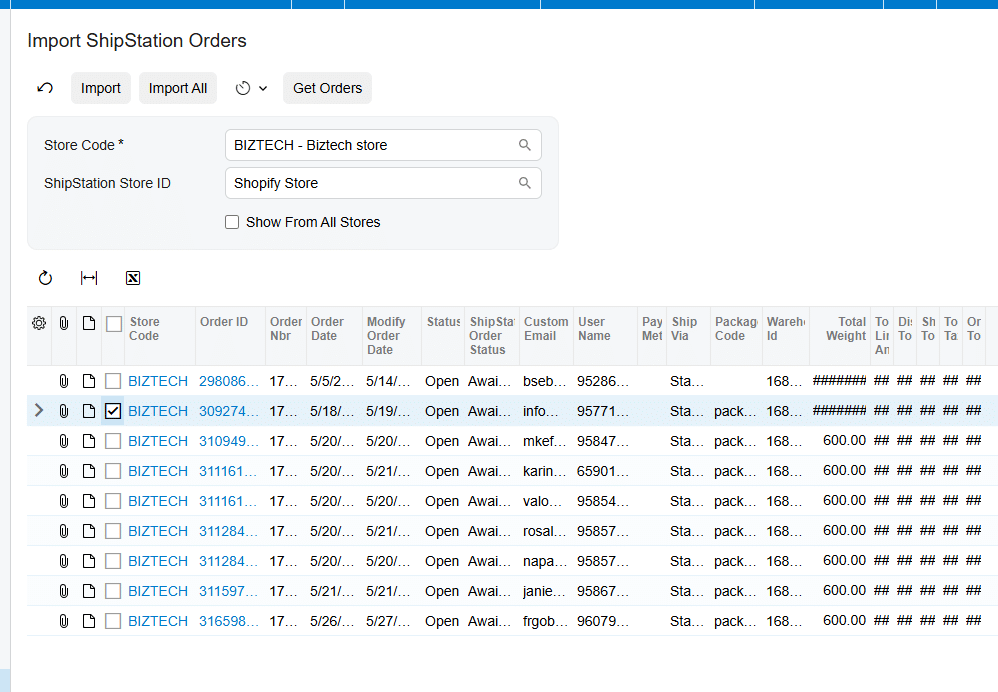
Open Import Shipment from ShipStation. This processing screen displays Acumatica orders that have already been exported to ShipStation. Process the order after its ShipStation shipment exists. As an alternative, use Get ShipStation Shipments from the ShipStation group in the Sales Orders Actions menu.
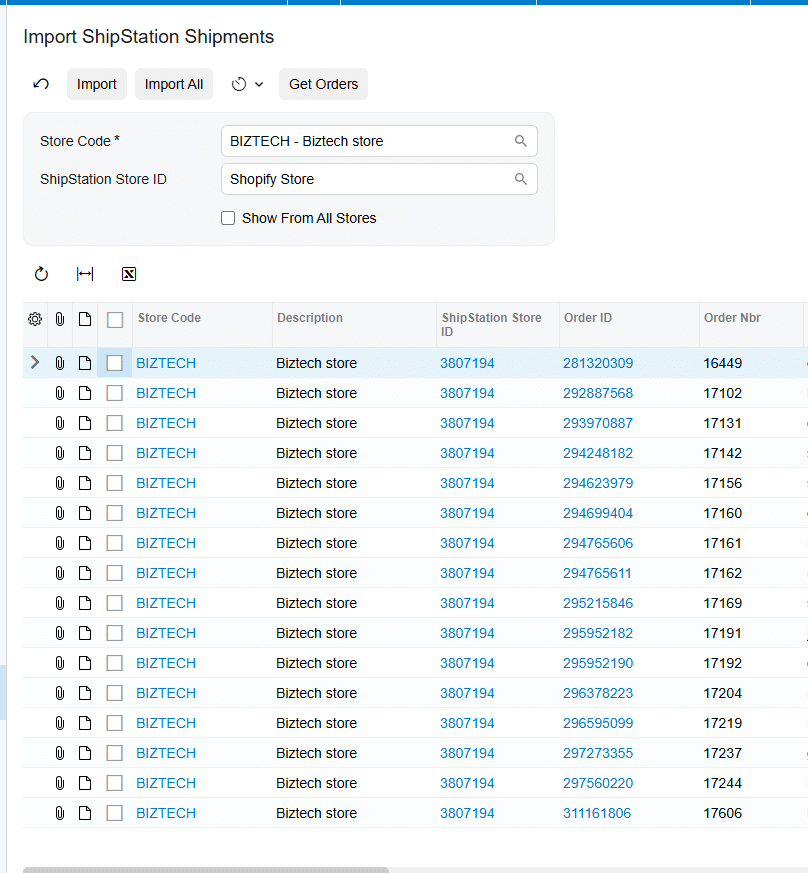
6 Verify the Acumatica update
Confirm that the shipment number and tracking number were added to the corresponding Acumatica order. The documented workflow also updates the order status to Prepare Invoice.
Key Fields and Settings to Check
1. Store Code identifies the ShipStation store used by the integration.
2. ShipStation Store ID determines the connected store used when Acumatica exports the order.
3. Consumer Key, Consumer Secret, and Base URL control API authentication and connectivity.
4. Integration Option must be Acumatica to ShipStation for this workflow.
5. Process Flow must be Shipment in ShipStation to retrieve shipments created in ShipStation.
6. ShipStation Order ID should appear on the Acumatica sales order after export.
7. Shipment number and tracking number should return to the corresponding Acumatica order after import.
8. Order status should advance to Prepare Invoice after the shipment is imported.
Monitoring and Validation
Monitor the integration at each handoff instead of waiting until invoicing. First, test the API credentials on the store record. Next, verify that the outbound process places a ShipStation Order ID on the sales order. After the shipment is created in ShipStation, confirm that the order appears on the Import Shipment from ShipStation screen. Finally, inspect the Acumatica order for the imported shipment number, tracking number, and Prepare Invoice status.
The ShipStation Orders and ShipStation Shipments screens are Generic Inquiries that expose the initial integration information for orders and shipment orders. Use them as operational views when confirming whether data has reached Acumatica. They complement, but do not replace, checking the actual sales order fields and status after processing. Review these views regularly during testing and routine operations.
Common Pitfalls
1. Wrong integration direction: If the store is configured as ShipStation to Acumatica, the outbound Create Orders in ShipStation and return-shipment workflow described here is not the applicable process.
2. Wrong process flow: Shipment in Acumatica follows a different model in which a sales order and shipment are created in Acumatica, ShipStation information is entered on the shipment, and confirmation creates both records in ShipStation.
3. Credentials were entered but not tested: A failed connection blocks both outbound order creation and inbound shipment retrieval. Test credentials before analyzing individual transactions.
4. The order was never exported: Import Shipment from ShipStation lists Acumatica orders that were previously exported. If the ShipStation Order ID is missing, correct the outbound step first.
5. The shipment does not yet exist in ShipStation: Acumatica cannot import tracking data until ShipStation has created the shipment for the exported order.
6. Carrier package or warehouse values were not loaded: Incomplete selections on the Acumatica-to-ShipStation store tabs can disrupt the order and shipment setup that precedes tracking retrieval.
Frequently Asked Questions
Which integration settings are required to import ShipStation tracking data into Acumatica
Set Integration Option to Acumatica to ShipStation and Process Flow to Shipment in ShipStation.
Where can I start the outbound order export
Use the Create Orders in ShipStation processing screen, or run Create ShipStation Order from the ShipStation group in the Sales Orders Actions menu.
Where can I import the ShipStation shipment
Use Import Shipment from ShipStation, or run Get ShipStation Shipments from the ShipStation group in the Sales Orders Actions menu.
What information is updated in Acumatica
The documented workflow adds the shipment number and tracking number to the corresponding order and changes the order status to Prepare Invoice.
How can I tell whether the order was exported successfully
Check the ShipStation Order ID field on the Sales Orders screen. A populated value indicates that the ShipStation order was generated and linked.
Can Acumatica create the shipment instead
Yes, but that requires Process Flow set to Shipment in Acumatica. In that workflow, users create the sales order and shipment in Acumatica, complete the ShipStation Information area on the shipment, and confirm the shipment to create the order and shipment in ShipStation.
Get Help with Acumatica and ShipStation Integration
A reliable tracking-data workflow depends on correct store credentials, direction, process flow, and transaction matching. If you need help configuring the integration or validating the order-to-shipment handoff, contact Biz-Tech Services to discuss your Acumatica and ShipStation requirements.
How to Update Acumatica Shipments with ShipStation Tracking Data
How to Update Acumatica Shipments with ShipStation Tracking Data
Updating Acumatica with ShipStation tracking data is a controlled two-system workflow: send an eligible Acumatica order to ShipStation, complete the shipment there, and then import the shipment back into Acumatica. When the integration is configured correctly, Acumatica adds the shipment number and tracking number to the corresponding order and updates the order status to Prepare Invoice. This guide explains the required settings, the operational steps, the fields to verify, and the common configuration problems that interrupt the handoff.
How the ShipStation Tracking Update Works
The relevant integration direction is Acumatica to ShipStation. Within that direction, the Process Flow must be set to Shipment in ShipStation. Acumatica remains the source of the order, while ShipStation is where the shipment is created. After shipping activity is complete, Acumatica retrieves the corresponding ShipStation shipment and associates it with the order that was exported.
The ShipStation Order ID provides the key operational link. When an order is exported, ShipStation creates the order and Acumatica displays that identifier in the ShipStation Order ID field on the Sales Orders screen. The later import uses the established relationship to bring the shipment number and tracking number back to the correct Acumatica order.
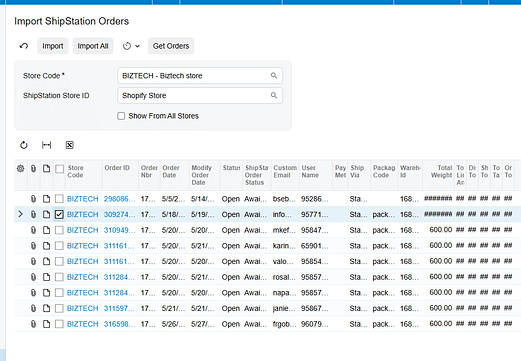
Configure the ShipStation Store in Acumatica
Begin on the ShipStation Store screen. Select the correct Store Code and add a useful Description so administrators can distinguish the connection. Under Connection Settings, enter the Consumer Key, Consumer Secret, and ShipStation Base URL. These values authenticate API communication between Acumatica and ShipStation. Use Test Credentials before attempting an export or import. If the test fails, use Edit Credentials to correct the values before troubleshooting order data.
Set the Direction and Process Flow
Set Integration Option to Acumatica to ShipStation. This selection makes Process Flow available. Choose Shipment in ShipStation for a workflow in which orders leave Acumatica, shipments are created in ShipStation, and shipment details return to Acumatica. Do not choose Shipment in Acumatica for this scenario; that alternative creates the ShipStation order and shipment from Acumatica during shipment confirmation and uses a different sequence.
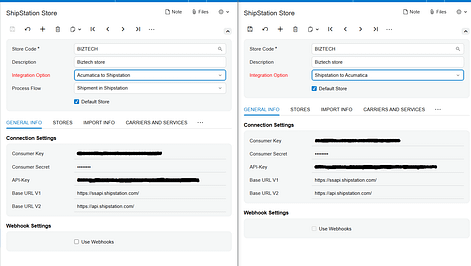
Load Supporting ShipStation Values
For an Acumatica-to-ShipStation setup, the store screen includes General Info, Carriers and Services, Packages, and ShipStation Warehouses. Open each applicable tab and retrieve its values from ShipStation. For example, Get Carriers loads carrier codes and Get Packages loads available packages. Select the records that should be used for order processing. The ShipStation Warehouses tab follows the same retrieve-and-select pattern. Accurate carrier, service, package, and warehouse choices reduce mapping errors when Acumatica creates orders in ShipStation.
Workflow for Updating Acumatica with Tracking Data
1 Confirm the store configuration
Verify the Store Code, credentials, Integration Option, and Process Flow. The required combination is Acumatica to ShipStation plus Shipment in ShipStation.
2 Export the Acumatica order
Open Create Orders in ShipStation to view eligible Acumatica orders. Select the required order and process it using the configured Store Code and ShipStation Store ID. You can also open the Sales Orders screen and choose Create ShipStation Order from the ShipStation group in the Actions menu.
3 Validate the outbound result
Return to the Sales Orders screen and confirm that the ShipStation Order ID field is populated. This shows that the order was created in ShipStation and that Acumatica retained the external identifier needed for the return flow.
4 Create the shipment in ShipStation
Process the exported order in ShipStation and create its shipment. The shipment must exist in ShipStation before Acumatica can retrieve its shipment and tracking details.
5 Import the shipment into Acumatica
Open Import Shipment from ShipStation. This processing screen displays Acumatica orders that have already been exported to ShipStation. Process the order after its ShipStation shipment exists. As an alternative, use Get ShipStation Shipments from the ShipStation group in the Sales Orders Actions menu.
6 Verify the Acumatica update
Confirm that the shipment number and tracking number were added to the corresponding Acumatica order. The documented workflow also updates the order status to Prepare Invoice.
Key Fields and Settings to Check
- Store Code identifies the ShipStation store used by the integration.
- ShipStation Store ID determines the connected store used when Acumatica exports the order.
- Consumer Key, Consumer Secret, and Base URL control API authentication and connectivity.
- Integration Option must be Acumatica to ShipStation for this workflow.
- Process Flow must be Shipment in ShipStation to retrieve shipments created in ShipStation.
- ShipStation Order ID should appear on the Acumatica sales order after export.
- Shipment number and tracking number should return to the corresponding Acumatica order after import.
- Order status should advance to Prepare Invoice after the shipment is imported.
Monitoring and Validation
Monitor the integration at each handoff instead of waiting until invoicing. First, test the API credentials on the store record. Next, verify that the outbound process places a ShipStation Order ID on the sales order. After the shipment is created in ShipStation, confirm that the order appears on the Import Shipment from ShipStation screen. Finally, inspect the Acumatica order for the imported shipment number, tracking number, and Prepare Invoice status.
The ShipStation Orders and ShipStation Shipments screens are Generic Inquiries that expose the initial integration information for orders and shipment orders. Use them as operational views when confirming whether data has reached Acumatica. They complement, but do not replace, checking the actual sales order fields and status after processing. Review these views regularly during testing and routine operations.
Common Pitfalls
- Wrong integration direction: If the store is configured as ShipStation to Acumatica, the outbound Create Orders in ShipStation and return-shipment workflow described here is not the applicable process.
- Wrong process flow: Shipment in Acumatica follows a different model in which a sales order and shipment are created in Acumatica, ShipStation information is entered on the shipment, and confirmation creates both records in ShipStation.
- Credentials were entered but not tested: A failed connection blocks both outbound order creation and inbound shipment retrieval. Test credentials before analyzing individual transactions.
- The order was never exported: Import Shipment from ShipStation lists Acumatica orders that were previously exported. If the ShipStation Order ID is missing, correct the outbound step first.
- The shipment does not yet exist in ShipStation: Acumatica cannot import tracking data until ShipStation has created the shipment for the exported order.
- Carrier package or warehouse values were not loaded: Incomplete selections on the Acumatica-to-ShipStation store tabs can disrupt the order and shipment setup that precedes tracking retrieval.
Frequently Asked Questions
Which integration settings are required to import ShipStation tracking data into Acumatica
Set Integration Option to Acumatica to ShipStation and Process Flow to Shipment in ShipStation.
Where can I start the outbound order export
Use the Create Orders in ShipStation processing screen, or run Create ShipStation Order from the ShipStation group in the Sales Orders Actions menu.
Where can I import the ShipStation shipment
Use Import Shipment from ShipStation, or run Get ShipStation Shipments from the ShipStation group in the Sales Orders Actions menu.
What information is updated in Acumatica
The documented workflow adds the shipment number and tracking number to the corresponding order and changes the order status to Prepare Invoice.
How can I tell whether the order was exported successfully
Check the ShipStation Order ID field on the Sales Orders screen. A populated value indicates that the ShipStation order was generated and linked.
Can Acumatica create the shipment instead
Yes, but that requires Process Flow set to Shipment in Acumatica. In that workflow, users create the sales order and shipment in Acumatica, complete the ShipStation Information area on the shipment, and confirm the shipment to create the order and shipment in ShipStation.
Get Help with Acumatica and ShipStation Integration
A reliable tracking-data workflow depends on correct store credentials, direction, process flow, and transaction matching. If you need help configuring the integration or validating the order-to-shipment handoff, contact Biz-Tech Services to discuss your Acumatica and ShipStation requirements.
How to Sync ShipHero Inventory with Acumatica
How to Sync ShipHero Inventory with Acumatica
A reliable ShipHero Acumatica inventory sync starts with one clear decision: which system initiates the operational workflow. The connector supports ShipHero to Acumatica and Acumatica to ShipHero integration options. That choice controls the available setup tabs, the direction of order processing, and how shipments return to Acumatica. Inventory accuracy then depends on consistent item, warehouse, location, vendor, and quantity settings across both systems.
This guide covers inventory items and the orders, shipments, receipts, transfers, and returns that change inventory.
Choose the ShipHero Acumatica Sync Direction
The Integration Option on the ShipHero Store determines the overall flow. With ShipHero to Acumatica selected, the connector retrieves and imports shipped orders and retains generated labels and tracking numbers. The store exposes setup areas for General Info, Import Info, Ship Via Cross Reference, Warehouse Cross Reference, Inventory Details, Sync Info, and Locations.
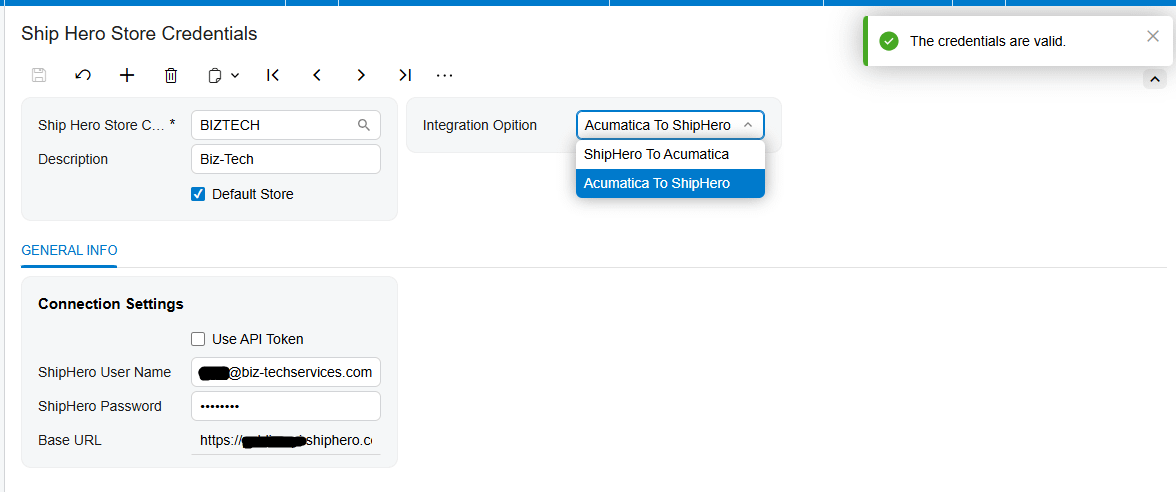
With Acumatica to ShipHero selected, users export Acumatica orders for fulfillment and bring the resulting shipments back. This direction adds box mapping, vendor sync, order-type, and return reason-code settings.
For multiple stores, Default Store determines the store code shown during Acumatica sync processes. Confirm it before loading records.
Configure the ShipHero Store Connection
Install the connector package through Acumatica's Customization Projects screen, form SM204505, then validate and publish the project. After publication, configure a ShipHero Store record.
Enter the ShipHero username, password, and base URL under Connection Settings. Use Test Credentials to confirm that Acumatica can connect to ShipHero through the API. Use Edit Credentials when those values must change. Select the ShipHero Store Code and enter a description that clearly identifies the corresponding ShipHero store.
A successful credential test proves connectivity, not mapping accuracy. Validate mappings before processing live inventory transactions.
Map Warehouses Locations and Shipping Values
Warehouse Cross Reference maps ShipHero warehouses to Acumatica warehouses. The connector uses this mapping during item synchronization and order import. Imported orders receive the mapped warehouse on the Acumatica sales order, and synchronized items are associated with the warehouse defined by the same setup.
Enable Use Cross Ref for Warehouse when warehouse values differ between the systems. Enable Use Cross Ref for Ship Via when carrier or service values require mapping; the corresponding cross-reference tabs then become available. These mappings also matter for return processing, where the documentation requires both reason-code and ship-via mappings before returns are exported.
For warehouse locations, first enable Multiple Warehouse Locations through Acumatica's Enable Disable Features screen. The store setup then exposes Sellable Location, Non Sellable Location, Release Transfer During Import Process, and Begin Bin Transfers Date. If Use Location Mapping is enabled, map locations in the Locations grid. Otherwise, configure the two default sellable and non-sellable locations.
For purchase-order receipts created in ShipHero, this setup determines the default sellable and non-sellable quantities in Acumatica. For an exported Acumatica sales order returned as a shipment, the connector sets the sellable location on the lines.
Set Inventory Item Defaults and Quantity Rules
The Inventory Details tab is the working area for loading and synchronizing item records:
1. Load Acumatica Items displays Acumatica inventory items, and Sync Acumatica Items exports selected items to ShipHero.
2. Load ShipHero Items displays ShipHero items, and Sync ShipHero Items imports selected items into Acumatica.
3. Select All selects or clears all displayed items, while Purge removes the displayed rows from the Inventory Details grid.
The connector includes previously synchronized vendor information with a ShipHero stock item. Set Default Vendor Class ID before using Sync ShipHero Vendors.
The Import Item option controls how unknown products are handled during item synchronization and order import. When enabled, the connector can create a missing Acumatica item. The Imported Item Type, Item Class, UOM, and Warehouse ID fields supply the defaults for that new record. Review these values carefully because they determine how newly created inventory items enter Acumatica.
When Import Item is disabled, the connector does not create the missing product. Instead, it uses the configured Replace Missing Products item and the Warehouse ID value. This can keep an order moving, but it also means the transaction will not identify the original product as a new Acumatica inventory item. Monitor use of the replacement item so unresolved product mappings do not accumulate.
For exports to ShipHero, Export Price Type selects either the default item price or MSRP. Export Price Quantity selects the inventory basis sent to ShipHero: On Hand, Available, or Available for Shipment. Choose the quantity that matches the business promise made in the storefront and fulfillment process. The documentation lists the choices but does not define their Acumatica calculation rules, so confirm the selected measure against the site's own inventory configuration.
Run a Practical Inventory Sync Workflow
1. Create the ShipHero Store record, choose the integration direction, and test the credentials.
2. Set warehouse and ship-via cross references. If bin-level inventory is required, enable multiple warehouse locations and configure location mapping or the default sellable and non-sellable locations.
3. Configure Import Item behavior and the defaults for item type, item class, UOM, and warehouse. Select the price and quantity values to export.
4. Load a limited set of items from the intended source system. Review the displayed records, select only the pilot items, and run the matching Sync action.
5. Validate the resulting item and warehouse records in the destination. If locations are in scope, load and synchronize locations only for warehouses already configured in Warehouse Cross Reference.
6. Test one operational cycle. Depending on the integration direction, import a ShipHero order or export an open Acumatica order whose order type is active for export. Then import its ShipHero shipment into Acumatica.
7. Test inventory-increasing and movement transactions separately by exporting an open purchase order, importing its receipt, and importing a bin transfer when multiple warehouse locations are enabled.
Process Transactions That Change Inventory
The Import ShipHero Orders screen retrieves orders for the selected store. Get Orders places them on the ShipHero Order screen, and Import creates the Acumatica document defined by the store setup, either a sales order or an invoice. Import Freight and Import Tax control whether those amounts are included.
For the opposite direction, Export ShipHero Order displays eligible Acumatica orders only when they are open and their order type is configured and active in Order Types to Export. Export creates the order in ShipHero. Import Shipments from ShipHero then retrieves shipment records; Import creates the shipment in Acumatica and confirms it.
Purchase orders follow a similar cycle. Only open purchase orders appear for export to ShipHero. Import Receipts from ShipHero retrieves receipts for exported purchase orders and creates Acumatica purchase receipts. If Release PO Receipt During Import Process is enabled, imported receipts are released automatically; otherwise, they remain unreleased. The documentation also notes that the last receipt in a partial-receipt sequence is released.
Bin transfers are imported according to the Begin Bin Transfers Date and appear on the Transfers screen with the source and destination locations inside the same warehouse. They can be released automatically when Release Transfer During Import Process is enabled. This process works only when Multiple Warehouse Locations is selected.
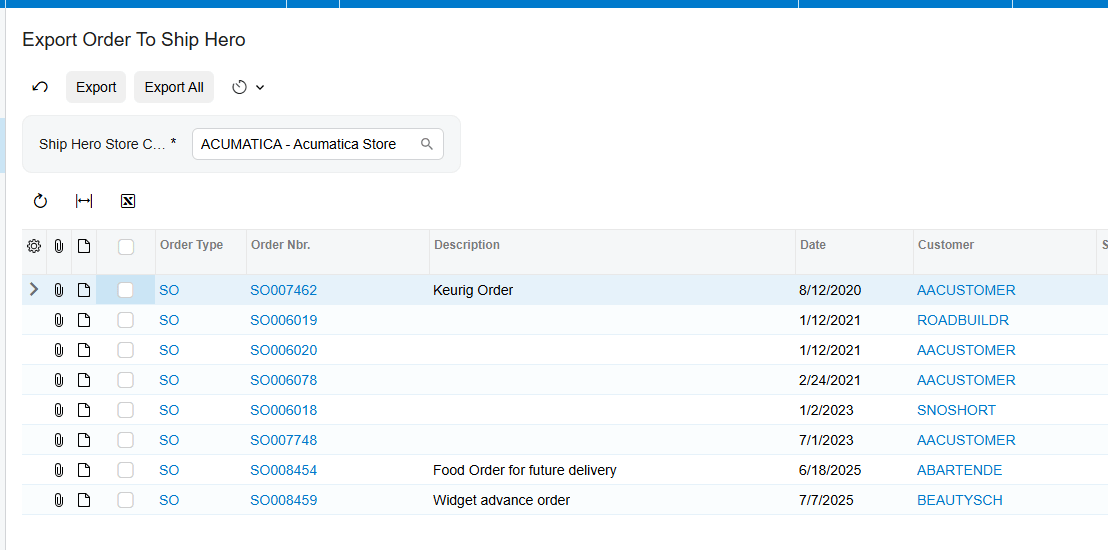
Use Webhooks for Real Time Processing
The Biz-Tech Services ShipHero Acumatica connector can receive ShipHero events through webhooks. Enable Use Webhook to expose Webhook Settings. The Webhook Name on the Webhooks screen must exactly match the Webhook Type in the ShipHero Store; otherwise, the webhook will not work. Generate the URL, place it in Webhook Settings, and select Create Webhook to register it with ShipHero for POST requests. The same URL can be registered only once.
Select Branch for Webhooks before enabling processing. The connector processes incoming shipments, purchase receipts, transfers, and returns under this branch. A missing branch prevents the webhooks from working. The grid shows Webhook Type, Webhook URL, Registered, and Enabled. Use Enable Webhook to start receiving events and Disable Webhook to stop events while retaining the configuration.
Webhook events can import shipments, create purchase receipts, update received quantities, capture return receipts, and import transfers. Check Registered and Enabled, then verify the resulting Acumatica document.
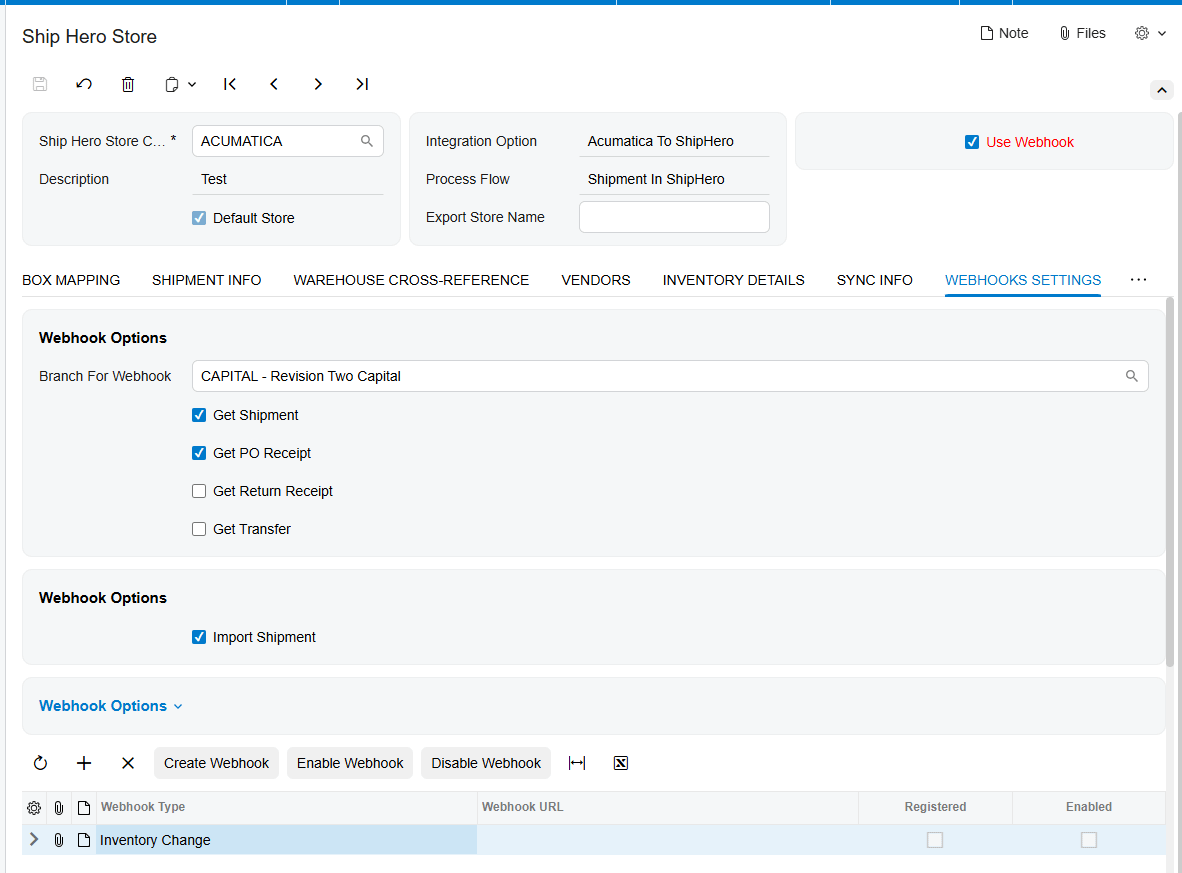
Monitor and Validate the Integration
Use Last Import Date and Last Imported Order Date to confirm the processing window. Review the ShipHero Order inquiry for identifiers, statuses, line details, and linked shipments. Review the ShipHero Shipment inquiry for package and label information and the Processed indicator.
The ShipHero Item inquiry shows warehouse availability, vendors, and bin transfers. Update Item retrieves ShipHero changes, Sync ShipHero Item imports the item, and Update Warehouse in ShipHero sends updated quantity. For purchase orders, Update Order retrieves ShipHero changes.
For each pilot, compare the inventory ID, warehouse, location, quantity basis, status, and related shipment or receipt. Confirm automatic releases, or review unreleased documents when release is disabled.
Common ShipHero Acumatica Sync Pitfalls
1. Wrong integration direction. Confirm it before configuring mappings.
2. Missing warehouse mapping. Item sync and order import both rely on Warehouse Cross Reference.
3. Unexpected replacement products. With Import Item disabled, unknown products use Replace Missing Products instead of creating a new inventory item.
4. Incorrect quantity exposure. Validate On Hand, Available, or Available for Shipment against the intended sales promise.
5. Bin transfers that never appear. Multiple Warehouse Locations must be enabled, and the begin date and location setup must be correct.
6. Webhooks that do not process. Match the event names, select a branch, and verify Registered and Enabled.
7. Orders missing from export. Acumatica orders must be open, and their order type must be configured as active for the selected store.
ShipHero Acumatica Inventory Sync FAQ
Can the connector create missing inventory items in Acumatica
Yes. Enable Import Item and configure Imported Item Type, Item Class, UOM, and Warehouse ID. If Import Item is disabled, the connector uses the configured replacement product instead of creating the missing item.
Which inventory quantity can Acumatica send to ShipHero
The choices are On Hand, Available, and Available for Shipment. Select the intended measure and validate it with a controlled item test.
Can ShipHero inventory locations sync with Acumatica
Yes. Enable Multiple Warehouse Locations, configure warehouse cross references, and either use the Locations grid for mapping or set default sellable and non-sellable locations. The Locations grid loads records only for warehouses already included in Warehouse Cross Reference.
Can purchase receipts and transfers release automatically
Yes. Release PO Receipt During Import Process and Release Transfer During Import Process control automatic release. Leave them disabled when the business requires review before release.
Does the connector support real time synchronization
The documented webhook setup supports real-time event handling for shipments, purchase receipts, returns, transfers, and inventory-change event types. Correct event names, a unique registered URL, an assigned branch, and an enabled status are required for processing.
Plan Your ShipHero Acumatica Integration
A successful rollout depends on disciplined mapping and small, traceable tests before broad synchronization. BizTech Services can help configure the connector around your item, warehouse, location, order, receipt, transfer, and return workflows. Contact BizTech Services to discuss your ShipHero and Acumatica integration.
How to Sync ShipHero Inventory with Acumatica
A reliable ShipHero Acumatica inventory sync starts with one clear decision: which system initiates the operational workflow. The connector supports ShipHero to Acumatica and Acumatica to ShipHero integration options. That choice controls the available setup tabs, the direction of order processing, and how shipments return to Acumatica. Inventory accuracy then depends on consistent item, warehouse, location, vendor, and quantity settings across both systems.
This guide covers inventory items and the orders, shipments, receipts, transfers, and returns that change inventory.
Choose the ShipHero Acumatica Sync Direction
The Integration Option on the ShipHero Store determines the overall flow. With ShipHero to Acumatica selected, the connector retrieves and imports shipped orders and retains generated labels and tracking numbers. The store exposes setup areas for General Info, Import Info, Ship Via Cross Reference, Warehouse Cross Reference, Inventory Details, Sync Info, and Locations.
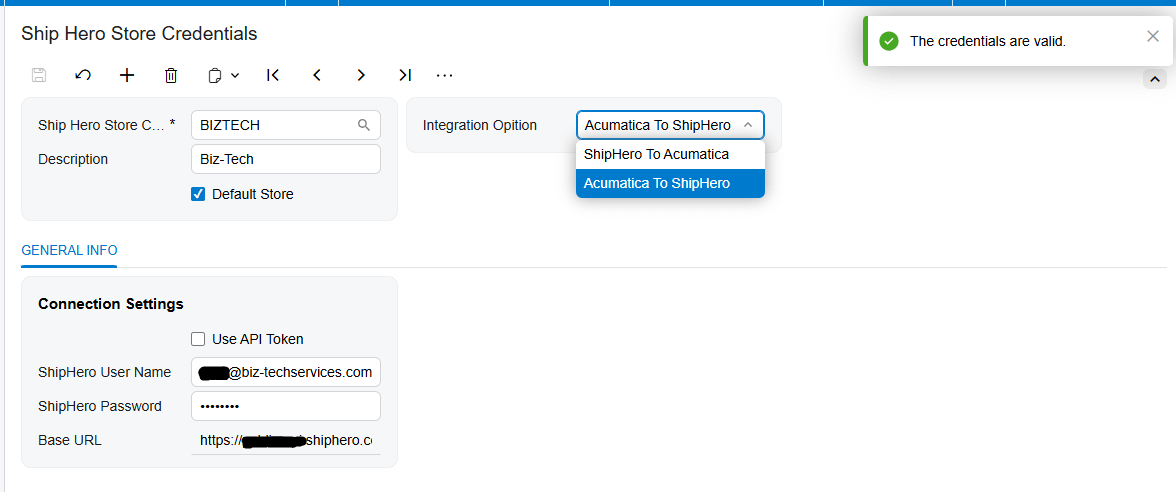
With Acumatica to ShipHero selected, users export Acumatica orders for fulfillment and bring the resulting shipments back. This direction adds box mapping, vendor sync, order-type, and return reason-code settings.
For multiple stores, Default Store determines the store code shown during Acumatica sync processes. Confirm it before loading records.
Configure the ShipHero Store Connection
Install the connector package through Acumatica's Customization Projects screen, form SM204505, then validate and publish the project. After publication, configure a ShipHero Store record.
Enter the ShipHero username, password, and base URL under Connection Settings. Use Test Credentials to confirm that Acumatica can connect to ShipHero through the API. Use Edit Credentials when those values must change. Select the ShipHero Store Code and enter a description that clearly identifies the corresponding ShipHero store.
A successful credential test proves connectivity, not mapping accuracy. Validate mappings before processing live inventory transactions.
Map Warehouses Locations and Shipping Values
Warehouse Cross Reference maps ShipHero warehouses to Acumatica warehouses. The connector uses this mapping during item synchronization and order import. Imported orders receive the mapped warehouse on the Acumatica sales order, and synchronized items are associated with the warehouse defined by the same setup.
Enable Use Cross Ref for Warehouse when warehouse values differ between the systems. Enable Use Cross Ref for Ship Via when carrier or service values require mapping; the corresponding cross-reference tabs then become available. These mappings also matter for return processing, where the documentation requires both reason-code and ship-via mappings before returns are exported.
For warehouse locations, first enable Multiple Warehouse Locations through Acumatica's Enable Disable Features screen. The store setup then exposes Sellable Location, Non Sellable Location, Release Transfer During Import Process, and Begin Bin Transfers Date. If Use Location Mapping is enabled, map locations in the Locations grid. Otherwise, configure the two default sellable and non-sellable locations.
For purchase-order receipts created in ShipHero, this setup determines the default sellable and non-sellable quantities in Acumatica. For an exported Acumatica sales order returned as a shipment, the connector sets the sellable location on the lines.
Set Inventory Item Defaults and Quantity Rules
The Inventory Details tab is the working area for loading and synchronizing item records:
1. Load Acumatica Items displays Acumatica inventory items, and Sync Acumatica Items exports selected items to ShipHero.
2. Load ShipHero Items displays ShipHero items, and Sync ShipHero Items imports selected items into Acumatica.
3. Select All selects or clears all displayed items, while Purge removes the displayed rows from the Inventory Details grid.
The connector includes previously synchronized vendor information with a ShipHero stock item. Set Default Vendor Class ID before using Sync ShipHero Vendors.
The Import Item option controls how unknown products are handled during item synchronization and order import. When enabled, the connector can create a missing Acumatica item. The Imported Item Type, Item Class, UOM, and Warehouse ID fields supply the defaults for that new record. Review these values carefully because they determine how newly created inventory items enter Acumatica.
When Import Item is disabled, the connector does not create the missing product. Instead, it uses the configured Replace Missing Products item and the Warehouse ID value. This can keep an order moving, but it also means the transaction will not identify the original product as a new Acumatica inventory item. Monitor use of the replacement item so unresolved product mappings do not accumulate.
For exports to ShipHero, Export Price Type selects either the default item price or MSRP. Export Price Quantity selects the inventory basis sent to ShipHero: On Hand, Available, or Available for Shipment. Choose the quantity that matches the business promise made in the storefront and fulfillment process. The documentation lists the choices but does not define their Acumatica calculation rules, so confirm the selected measure against the site's own inventory configuration.
Run a Practical Inventory Sync Workflow
1. Create the ShipHero Store record, choose the integration direction, and test the credentials.
2. Set warehouse and ship-via cross references. If bin-level inventory is required, enable multiple warehouse locations and configure location mapping or the default sellable and non-sellable locations.
3. Configure Import Item behavior and the defaults for item type, item class, UOM, and warehouse. Select the price and quantity values to export.
4. Load a limited set of items from the intended source system. Review the displayed records, select only the pilot items, and run the matching Sync action.
5. Validate the resulting item and warehouse records in the destination. If locations are in scope, load and synchronize locations only for warehouses already configured in Warehouse Cross Reference.
6. Test one operational cycle. Depending on the integration direction, import a ShipHero order or export an open Acumatica order whose order type is active for export. Then import its ShipHero shipment into Acumatica.
7. Test inventory-increasing and movement transactions separately by exporting an open purchase order, importing its receipt, and importing a bin transfer when multiple warehouse locations are enabled.
Process Transactions That Change Inventory
The Import ShipHero Orders screen retrieves orders for the selected store. Get Orders places them on the ShipHero Order screen, and Import creates the Acumatica document defined by the store setup, either a sales order or an invoice. Import Freight and Import Tax control whether those amounts are included.
For the opposite direction, Export ShipHero Order displays eligible Acumatica orders only when they are open and their order type is configured and active in Order Types to Export. Export creates the order in ShipHero. Import Shipments from ShipHero then retrieves shipment records; Import creates the shipment in Acumatica and confirms it.
Purchase orders follow a similar cycle. Only open purchase orders appear for export to ShipHero. Import Receipts from ShipHero retrieves receipts for exported purchase orders and creates Acumatica purchase receipts. If Release PO Receipt During Import Process is enabled, imported receipts are released automatically; otherwise, they remain unreleased. The documentation also notes that the last receipt in a partial-receipt sequence is released.
Bin transfers are imported according to the Begin Bin Transfers Date and appear on the Transfers screen with the source and destination locations inside the same warehouse. They can be released automatically when Release Transfer During Import Process is enabled. This process works only when Multiple Warehouse Locations is selected.
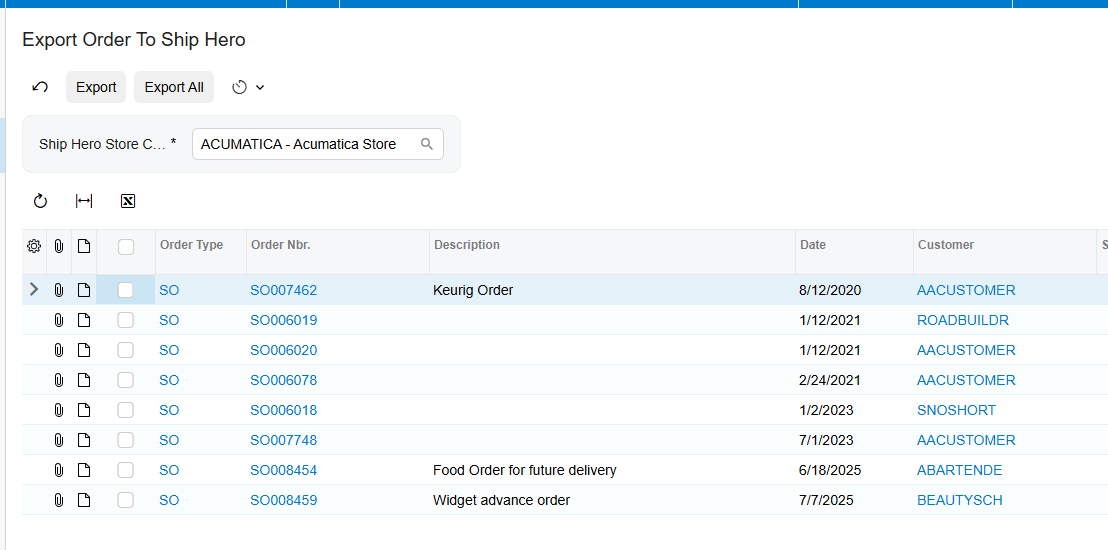
Use Webhooks for Real Time Processing
The Biz-Tech Services ShipHero Acumatica connector can receive ShipHero events through webhooks. Enable Use Webhook to expose Webhook Settings. The Webhook Name on the Webhooks screen must exactly match the Webhook Type in the ShipHero Store; otherwise, the webhook will not work. Generate the URL, place it in Webhook Settings, and select Create Webhook to register it with ShipHero for POST requests. The same URL can be registered only once.
Select Branch for Webhooks before enabling processing. The connector processes incoming shipments, purchase receipts, transfers, and returns under this branch. A missing branch prevents the webhooks from working. The grid shows Webhook Type, Webhook URL, Registered, and Enabled. Use Enable Webhook to start receiving events and Disable Webhook to stop events while retaining the configuration.
Webhook events can import shipments, create purchase receipts, update received quantities, capture return receipts, and import transfers. Check Registered and Enabled, then verify the resulting Acumatica document.
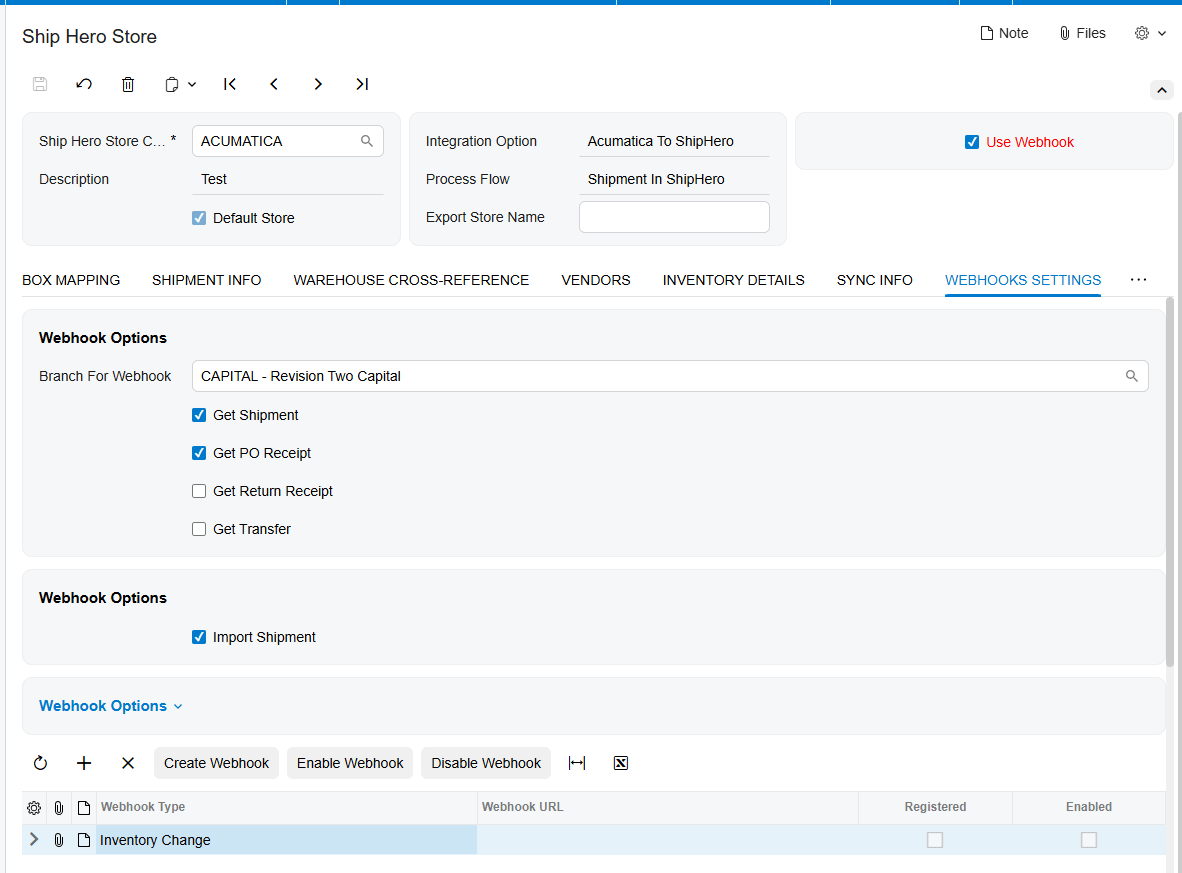
Monitor and Validate the Integration
Use Last Import Date and Last Imported Order Date to confirm the processing window. Review the ShipHero Order inquiry for identifiers, statuses, line details, and linked shipments. Review the ShipHero Shipment inquiry for package and label information and the Processed indicator.
The ShipHero Item inquiry shows warehouse availability, vendors, and bin transfers. Update Item retrieves ShipHero changes, Sync ShipHero Item imports the item, and Update Warehouse in ShipHero sends updated quantity. For purchase orders, Update Order retrieves ShipHero changes.
For each pilot, compare the inventory ID, warehouse, location, quantity basis, status, and related shipment or receipt. Confirm automatic releases, or review unreleased documents when release is disabled.
Common ShipHero Acumatica Sync Pitfalls
1. Wrong integration direction. Confirm it before configuring mappings.
2. Missing warehouse mapping. Item sync and order import both rely on Warehouse Cross Reference.
3. Unexpected replacement products. With Import Item disabled, unknown products use Replace Missing Products instead of creating a new inventory item.
4. Incorrect quantity exposure. Validate On Hand, Available, or Available for Shipment against the intended sales promise.
5. Bin transfers that never appear. Multiple Warehouse Locations must be enabled, and the begin date and location setup must be correct.
6. Webhooks that do not process. Match the event names, select a branch, and verify Registered and Enabled.
7. Orders missing from export. Acumatica orders must be open, and their order type must be configured as active for the selected store.
ShipHero Acumatica Inventory Sync FAQ
Can the connector create missing inventory items in Acumatica
Yes. Enable Import Item and configure Imported Item Type, Item Class, UOM, and Warehouse ID. If Import Item is disabled, the connector uses the configured replacement product instead of creating the missing item.
Which inventory quantity can Acumatica send to ShipHero
The choices are On Hand, Available, and Available for Shipment. Select the intended measure and validate it with a controlled item test.
Can ShipHero inventory locations sync with Acumatica
Yes. Enable Multiple Warehouse Locations, configure warehouse cross references, and either use the Locations grid for mapping or set default sellable and non-sellable locations. The Locations grid loads records only for warehouses already included in Warehouse Cross Reference.
Can purchase receipts and transfers release automatically
Yes. Release PO Receipt During Import Process and Release Transfer During Import Process control automatic release. Leave them disabled when the business requires review before release.
Does the connector support real time synchronization
The documented webhook setup supports real-time event handling for shipments, purchase receipts, returns, transfers, and inventory-change event types. Correct event names, a unique registered URL, an assigned branch, and an enabled status are required for processing.
Plan Your ShipHero Acumatica Integration
A successful rollout depends on disciplined mapping and small, traceable tests before broad synchronization. BizTech Services can help configure the connector around your item, warehouse, location, order, receipt, transfer, and return workflows. Contact BizTech Services to discuss your ShipHero and Acumatica integration.
How to Sync Magento Inventory with Acumatica
How to Sync Magento Inventory with Acumatica
Biz-Tech Serives Acumatica Magento Connector gives Acumatica users a controlled way to send inventory quantities to Magento while keeping item identity, warehouse scope, and sellable quantity rules explicit. A reliable setup starts by choosing which Acumatica warehouses contribute stock, selecting the quantity basis that Magento should receive, and confirming that each synchronized item has both a Magento Product SKU and an Acumatica Inventory ID.
This guide explains the inventory workflow documented for the connector: how items become eligible for quantity export, how warehouse quantities are combined, how stock visibility is managed, where quantity checks protect invoice processing, and how to reconcile the two systems without assuming behavior that the product documentation does not define.
Inventory sync at a glance
1. Connect the Magento store and open its settings in Acumatica.
2. Choose the Acumatica warehouses whose quantities should be synchronized.
3. Select On Hand, Available, or Available for Shipment as the quantity basis.
4. In Inventory Details, select and save the items to include, then confirm Magento Product SKU and Acumatica Inventory ID values.
5. Use Export Magento Inventory Quantities to review the Magento Quantity value and run Sync for selected items or Sync All for the displayed list.
6. Monitor item identity, warehouse scope, quantity basis, publication status, and invoice quantity-check results; investigate differences before the next run.
How Magento Connector determines inventory quantity
Choose the quantity basis
The Warehouse Details area of the Magento Store configuration provides three documented quantity choices: On Hand, Available, and Available for Shipment. The selected value determines which Acumatica quantity is synchronized to Magento. This setting matters because the three measures answer different inventory questions. On Hand reflects physical stock, while Available and Available for Shipment reflect Acumatica availability measures. The connector documentation does not redefine those measures, so their exact values remain governed by the Acumatica inventory configuration and transactions in the implementation.
Choose one basis that matches the business promise made on the storefront. If Magento should show a more operationally constrained quantity than physical stock, evaluate the documented availability choices in Acumatica and confirm the result with representative items before broad synchronization.
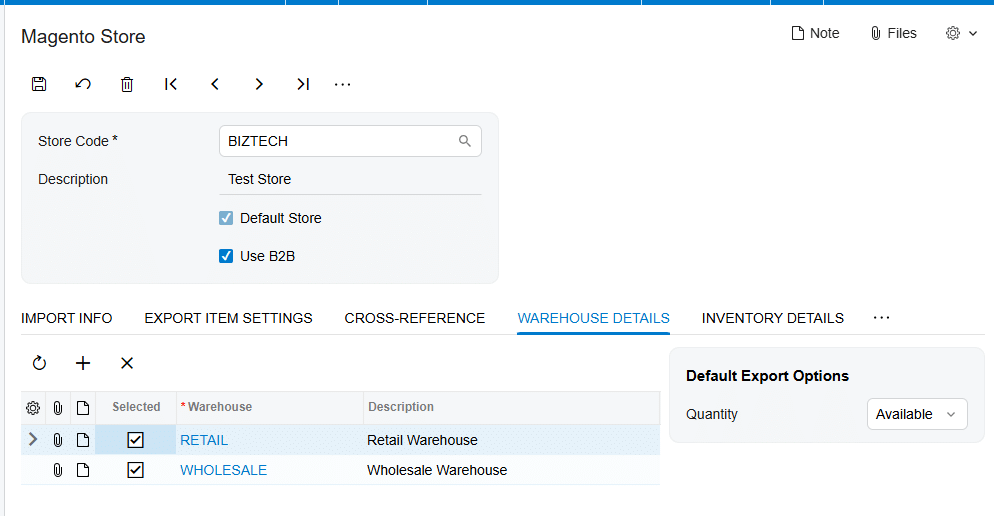
Define the warehouse scope
Warehouse Details is also where users identify the warehouses whose quantities need to be synchronized with Magento. When one or more warehouses are selected, the exported item quantity is the sum across those selected warehouses. That rule makes warehouse selection a central part of storefront availability: adding or removing a warehouse changes the quantity pool that can be presented to Magento.
The Magento Store settings also include a Warehouse ID used as the default warehouse on orders imported from Magento. The documentation presents this order warehouse setting separately from the Warehouse Details list used for quantity export. Review both settings together so the stock offered online and the warehouse assigned to imported orders make operational sense, while recognizing that the manual does not state that they must be identical.
Establish item identity before quantity sync
Select and save items in Inventory Details
The Export Magento Inventory Quantities screen does not automatically list every Acumatica item. First, use the Inventory Details tab on the Magento Store screen to choose the required items, select their checkboxes, and save. The Magento Product SKU and Acumatica Inventory ID fields must also be set. Only after these steps do the items appear for inventory quantity export.
This prerequisite creates a useful reconciliation key. The Magento Product SKU connects the storefront product to the Acumatica inventory record, while the Acumatica Inventory ID identifies the ERP item. Validate both values when an expected item is missing or when a quantity appears to update the wrong product.
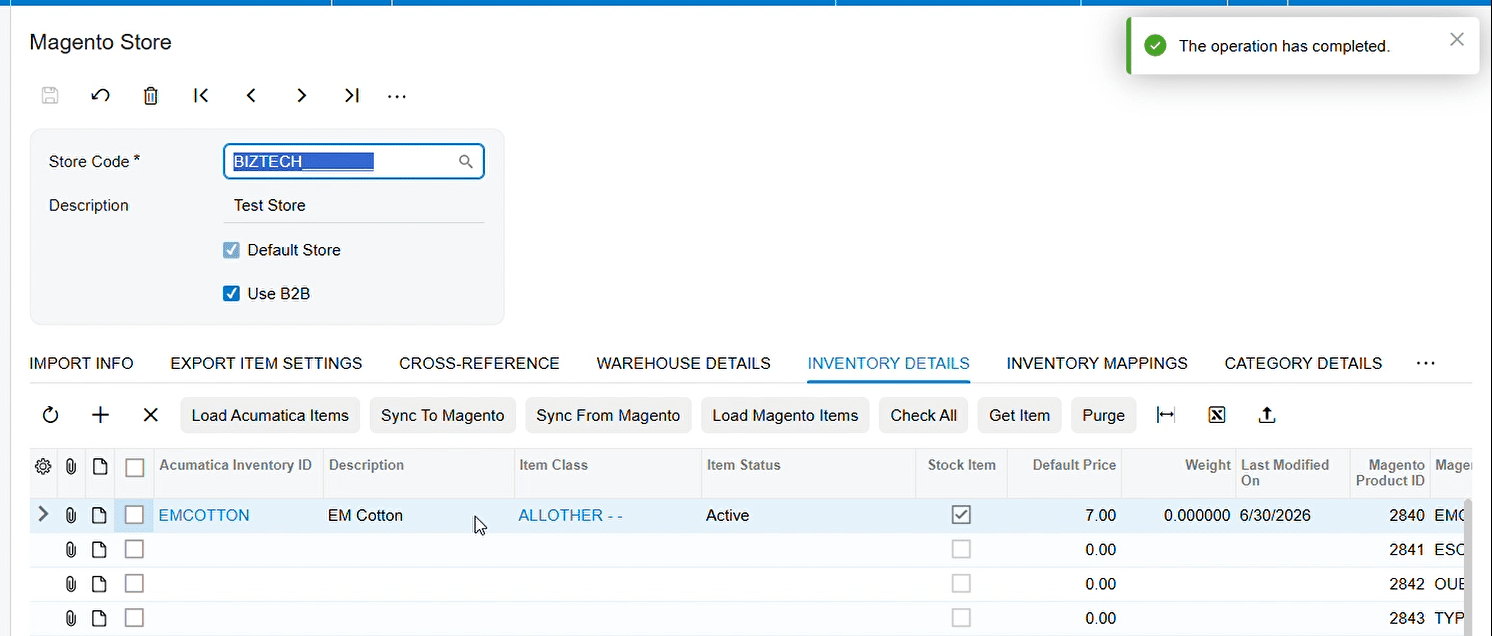
Understand item creation and matching
Inventory Details can load Acumatica stock and non-stock items, load Magento items, synchronize items in either direction, and publish or unpublish selected products. When an Acumatica item is synchronized to Magento and a new Magento item is created, Magento generates a unique product ID. The connector displays that ID in the Magento Store and on the stock item’s Magento Inventory tab. The Export Magento Items process likewise records the Magento Product ID and marks the Magento Item checkbox after synchronization.
During Magento order import, item matching uses the Magento product SKU to search for an Acumatica Inventory CD. If the item is not found, the result depends on configuration: Import Item can allow creation according to the configured item type, item class, warehouse, and unit of measure; when item import is disabled, the connector can use a configured replacement item, or it reports that the item does not exist. These order-import controls support clean item identity, but they are distinct from the prerequisites for exporting inventory quantities.
Run the inventory quantity synchronization
Review the Magento Quantity value
On Export Magento Inventory Quantities, choose the relevant store and review the displayed items. For a particular item, enter or confirm the value in Magento Quantity, select the row, and click Sync. The Magento store quantity is updated from the Magento Quantity value. Use Sync All when every item displayed on the screen is ready to be processed.
The manual documents both the warehouse-derived quantity settings and the editable Magento Quantity field on the export screen, but it does not explain when or how that field is populated from the selected quantity basis. Treat the screen value as the final value to verify before synchronization, especially after changing the warehouse list or quantity basis.
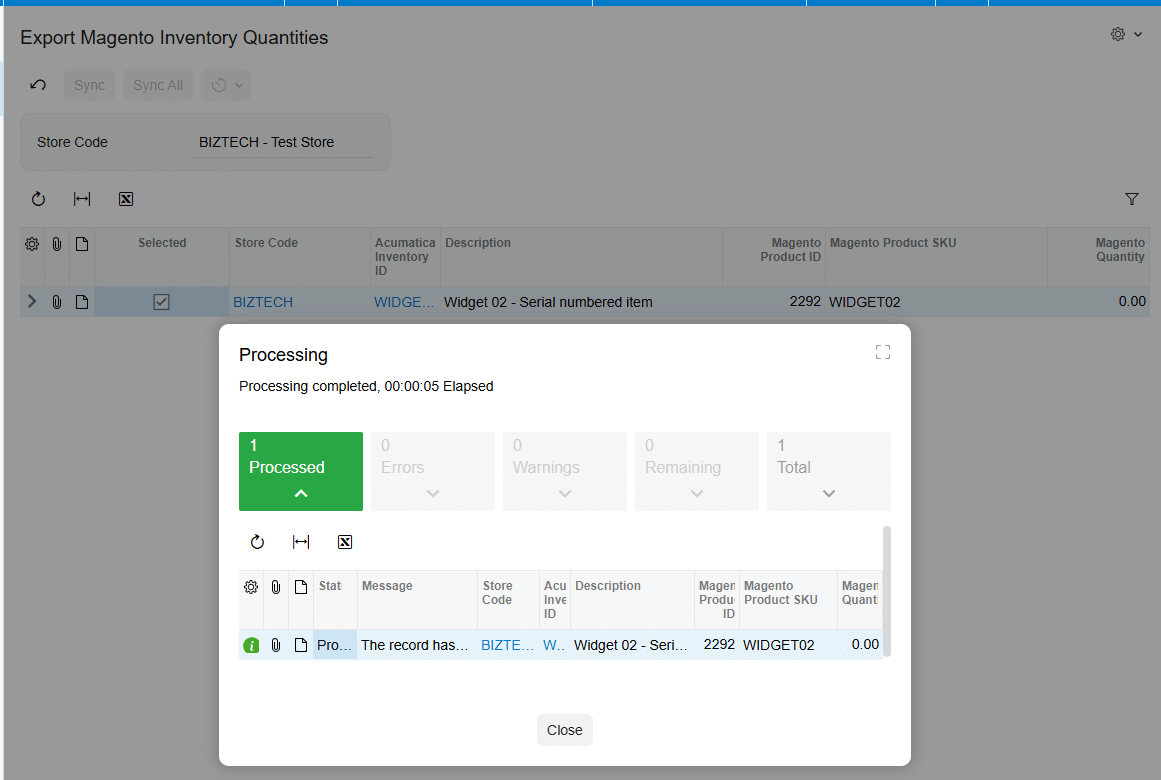
Control stock visibility with publication status
Quantity and product visibility are related but separate controls. Inventory Details tab provides Publish Items in Magento, which sets selected products to Enabled, and Unpublish Items in Magento, which removes the Enabled status and makes the selected products unavailable for purchase. A correct quantity does not by itself prove that a product is purchasable; include publication status in every stock-visibility check. The same item synchronization, publishing, and unpublishing processes can also be performed from the Stock Items and Non-Stock Items screens.
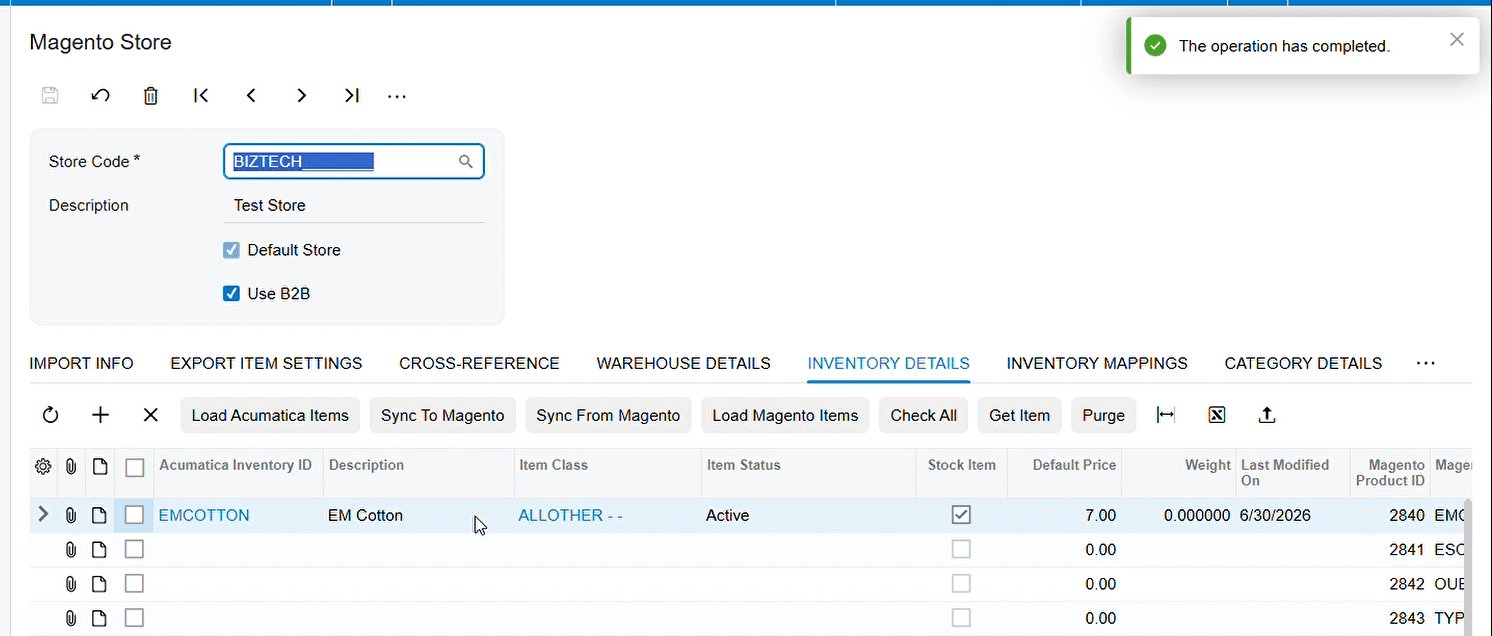
Handle allocation without assuming undocumented logic
The product documentation does not describe a separate Magento Connector allocation, reservation, safety-stock, or oversell engine. Its documented controls are the selected Acumatica quantity basis, the sum across selected warehouses, the Magento Quantity value sent during export, and optional Magento quantity validation during invoice processing. Accordingly, allocation policy should be expressed through the Acumatica quantity measure and warehouse scope chosen for the storefront, then validated in the export screen.
Two Magento Store options can check Magento quantity during Acumatica processing: Check Magento Qty While Prepare Invoice validates that the required Magento stock is available before the invoice is created, and Check Magento Qty While Release Invoice validates Magento product quantities during invoice release. These checks help identify insufficient storefront stock at defined transaction points. The manual does not say that they reserve stock or automatically reconcile differences, so use them as validation controls rather than treating them as an allocation mechanism.
Monitor and reconcile Magento and Acumatica inventory
Use a repeatable reconciliation routine
1. Confirm scope: verify the Magento store, selected warehouses, and quantity basis before comparing values.
2. Confirm identity: check Magento Product SKU, Acumatica Inventory ID, and—where the item has been synchronized—the Magento Product ID.
3. Confirm eligibility: make sure the item is selected and saved in Inventory Details and appears on Export Magento Inventory Quantities.
4. Confirm the outbound value: compare the Magento Quantity field with the expected sum for the selected warehouses and chosen Acumatica quantity basis.
5. Confirm execution: run Sync for approved rows or Sync All only when all displayed rows are ready, then verify the resulting quantity in Magento.
6. Confirm visibility: check whether the item is published and Enabled when it should be available for purchase, or unpublished when it should not be sold.
7. Review transaction checks: investigate failures from the prepare-invoice or release-invoice quantity validations if those options are enabled.
Troubleshoot common discrepancies
If an item is absent from the export screen, return to Inventory Details and verify selection, save status, Magento Product SKU, and Acumatica Inventory ID. If the item appears but the expected quantity differs, recheck the warehouse list and whether On Hand, Available, or Available for Shipment is selected. If quantity is correct but the product cannot be purchased, verify publication status. If invoice preparation or release stops on a Magento quantity validation, compare the required order quantity with current Magento stock and then examine whether a more recent Acumatica quantity needs to be synchronized.
For controlled operations, test configuration changes with a small item set before using Sync All. Record the store, warehouse selection, quantity basis, item identifiers, value reviewed, and time of the sync in an operational log. This logging practice is a recommended control rather than a connector feature described in the manual.
Frequently asked questions
Which Acumatica quantity can Magento Connector send to Magento?
The documented choices are On Hand, Available, and Available for Shipment. The selected value on Warehouse Details determines the Acumatica quantity basis used for synchronization.
How does the connector handle multiple warehouses?
When one or more warehouses are selected in Warehouse Details, the exported item quantity is the sum across those selected warehouses.
Why is an item missing from Export Magento Inventory Quantities?
The item must be selected and saved on the Magento Store Inventory Details tab, and both Magento Product SKU and Acumatica Inventory ID must be set before it appears on the export screen.
Can users synchronize one item instead of the full list?
Yes. Select the item and use Sync. Sync All processes all items displayed on the screen.
Does publishing an item also synchronize its quantity?
The documentation treats publishing and quantity export as separate processes. Publishing sets the selected Magento item to Enabled; quantity synchronization is performed from Export Magento Inventory Quantities.
Does Magento Connector allocate or reserve inventory?
The documentation does not define a connector-level allocation or reservation feature. It documents quantity-basis selection, summed warehouse scope, quantity export, publication controls, and optional Magento quantity checks during invoice preparation and release.
How can Acumatica validate Magento stock during invoicing?
Enable Check Magento Qty While Prepare Invoice to validate stock before invoice creation, or Check Magento Qty While Release Invoice to validate quantities during invoice release.
Build a dependable Magento inventory workflow
A dependable Magento inventory sync is built on explicit choices: which Acumatica warehouses contribute stock, which quantity basis represents sellable inventory, which item identifiers bind the systems, and whether the Magento product is published. Review those controls before each broad synchronization, use the invoice-stage quantity checks where they fit the process, and reconcile exceptions by moving from scope to identity to outbound value to storefront visibility.
For implementation help with Magento Connector and Acumatica, contact Biz-Tech Services.
How to Sync Amazon Inventory with Acumatica for FBA and FBM
How to Sync Amazon Inventory with Acumatica for FBA and FBM
Synchronizing Amazon inventory with Acumatica requires two related workflows. For Fulfillment by Merchant, or FBM, Acumatica sends the quantity that Amazon can sell. For Fulfillment by Amazon, or FBA, the connector imports Amazon shipment, delivery, warehouse, and order activity so Acumatica can reflect inventory moving into and through Amazon fulfillment centers. The quality of the result depends on accurate store settings, item mappings, warehouse rules, and disciplined validation after each process.
The Biz Tech Amazon Connector routes the connection through a Biz Tech managed intermediate server. It retrieves Amazon data for Acumatica and sends supported inventory and fulfillment events back to Amazon. This guide explains the documented steps for keeping FBA and FBM inventory aligned.
How Amazon inventory sync works in Acumatica
FBM inventory sync is quantity driven. You select the Acumatica warehouses that contribute inventory, choose which quantity basis to publish, map each Amazon SKU to an Acumatica inventory item, and run Export FBM Inventory Quantities screen. The quantity sent to Amazon can come from the Acumatica Quantity column or from an entered Amazon Quantity override.
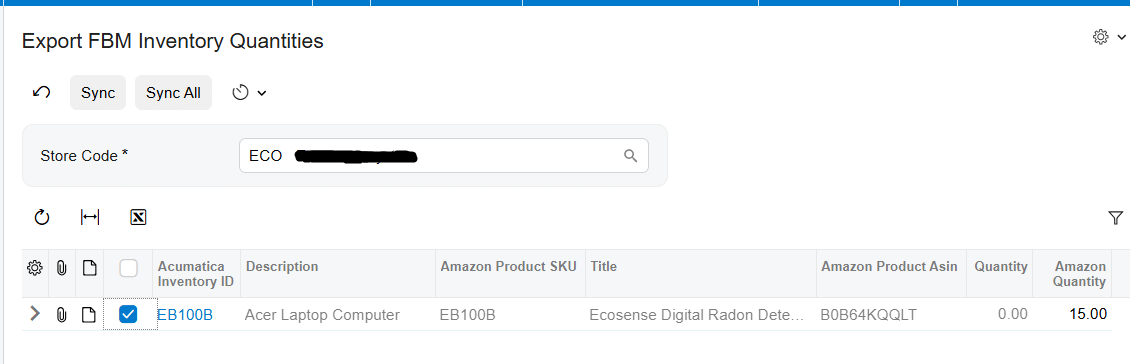
FBA inventory sync is transaction and warehouse driven. Amazon stores and ships the product, while Acumatica imports FBA shipments, deliveries, and orders. A shipment import creates an Acumatica transfer order using the configured transfer order type. After the transfer is confirmed and updated, delivery processing creates a purchase receipt based on Amazon received quantities. Acumatica can then show inventory in the destination warehouse associated with the FBA flow.
Configure the Amazon Store connection
Begin on the Amazon Store screen. Store Code identifies the Amazon store, while Description labels it in Acumatica. Marking a store as the Default Store causes it to appear automatically on processing and store screens. Connection Settings are used to test the connection between Acumatica and the Amazon server.
The source documentation identifies these connection values:
1․ Client ID and Client Secret for application authentication
2․ Refresh Token for obtaining new access tokens
3․ Marketplace and AWS Region for the Amazon store location
4․ Consumer Key and Consumer Secret
5․ External System Store ID
6․ Seller ID and MWS Auth Token generated through the developer authorization process
Treat these credentials as controlled configuration. Test the connection before configuring inventory processes, because a warehouse or SKU mapping cannot compensate for a failed connection.
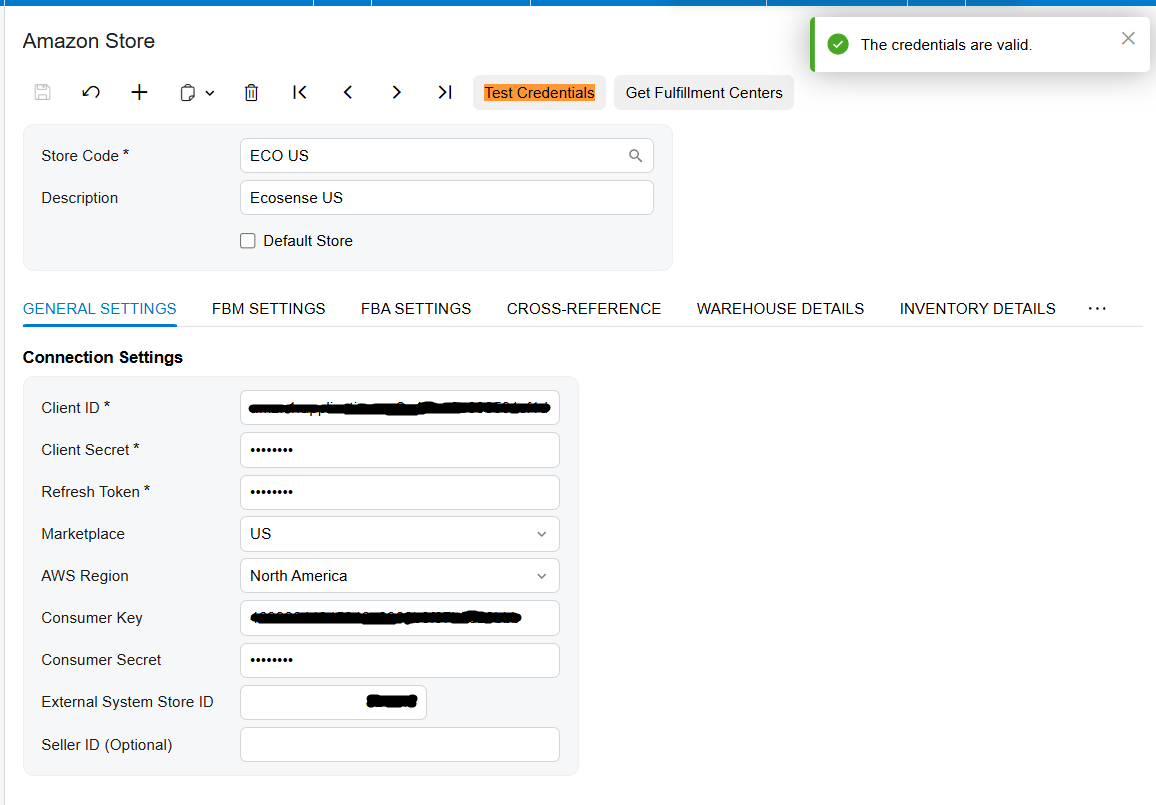
Set up FBM inventory quantity synchronization
Choose the warehouses and quantity basis
In Warehouse Details, add every Acumatica warehouse that should contribute to the Amazon quantity. When more than one warehouse is selected, the exported item quantity is the sum across those warehouses. Select the quantity basis that matches your availability policy: On Hand, Available, or Available for Shipment. The selected value determines which Acumatica quantity is synchronized to Amazon.
The manual defines these settings but does not prescribe one for every business. Select the measure that matches how your organization reserves stock and decides what it can promise to Amazon buyers.
Map Amazon SKUs to Acumatica items
Create SKU mappings in the Amazon Store screen’s Inventory Details tab. You can retrieve a product by ASIN or Seller SKU. Load FBA Products displays products for the store, and Sync From Amazon can create a selected FBA item in Acumatica using the product SKU.
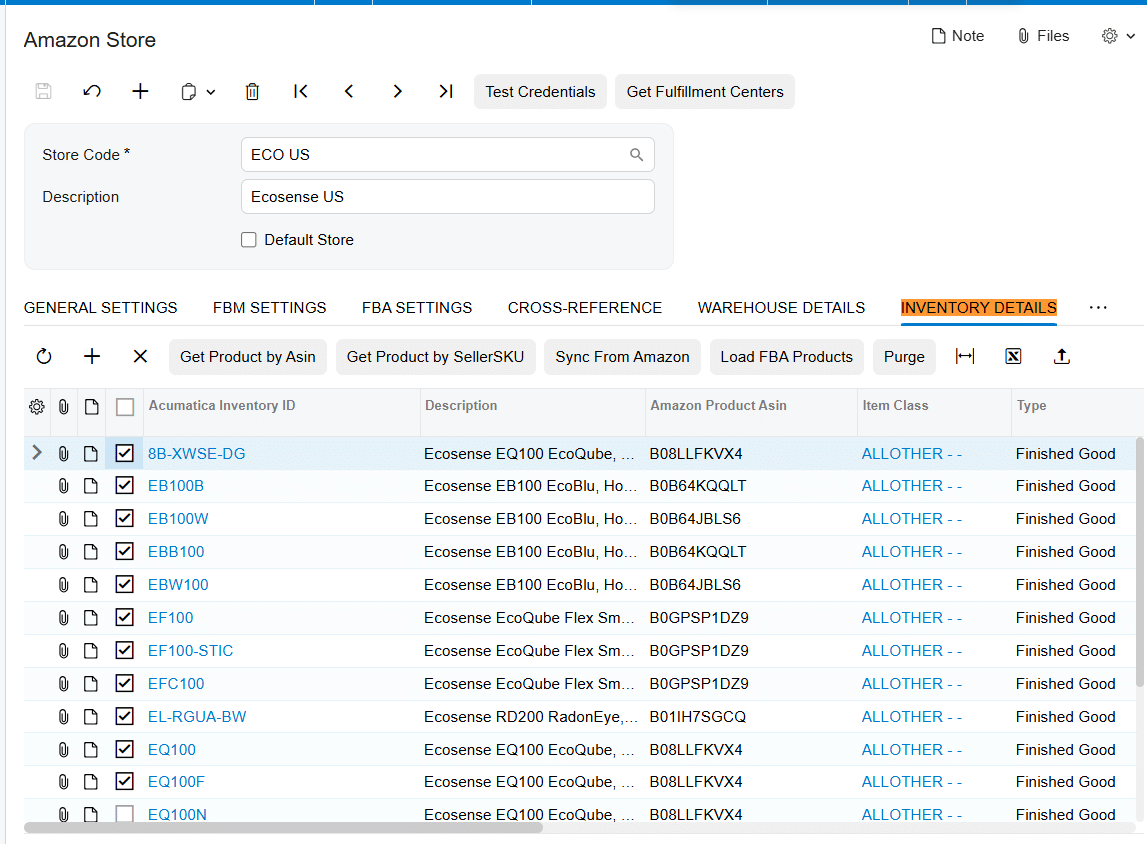
The Import Item setting controls what happens when an imported order contains a product that does not exist in Acumatica. When enabled, the connector creates an Acumatica Inventory ID based on the Amazon SKU. When disabled, the missing item causes an integration error. Insert Item in Inventory Details Tab adds items to the mapping area during order import. The documentation also states that an existing mapping can be updated with a different SKU without creating a new Acumatica item.
Confirm the Warehouse ID and unit of measure used for imported orders. A SKU match alone is not enough if the order points to the wrong warehouse or the unit of measure does not match the item setup.
Export FBM quantities to Amazon
1․ Open Export Amazon Inventory Quantities and review the selected store and mapped items.
2․ Compare the Acumatica Quantity value with the amount you intend to make available on Amazon.
3․ For the normal Acumatica driven value, leave the row override checkbox unselected and run Sync. Amazon Inventory Quantity is updated from the Quantity column.
4․ To send a different value, enter it in Amazon Quantity, select the checkbox for that row, and run Sync.
5․ Verify the resulting Amazon quantity and investigate any item that did not update.
An override is a deliberate exception to the calculated Acumatica quantity. Document why it was used and remove or revise it when the underlying condition ends, so a temporary decision does not become a persistent inventory discrepancy.
Configure FBA warehouse and order settings
The FBA settings in the Amazon Store control how orders and inventory movements enter Acumatica. FBA orders are imported as invoices. Begin Order Date filters retrieval, and Last Imported Order Date records the most recent imported order date. Status mappings connect Amazon order statuses to Acumatica statuses; the corresponding Order Status checkbox must be selected for an order to be retrieved and imported.
Key FBA warehouse and shipment settings include:
1․ Destination Warehouse, which identifies where Amazon goods are intended to be received in Acumatica
2․ Enable Ship From Mapping, which maps each Amazon Fulfillment Center to an Acumatica Ship From Warehouse ID
3․ Ship From Warehouse ID, used as the source warehouse when fulfillment center mapping is disabled
4․ Destination Order Type, which must be a transfer order type for FBA shipment imports
5․ Select Shipments and Select Deliveries, which enable the corresponding import processes
6․ Release PO Receipt During FBA Shipment Import, which imports the purchase receipt as released when selected
7․ Last Imported Shipment Date and Last Imported Deliveries Date for tracking the latest imported activity
The same transfer order type can be configured in only one store. The connector also provides a Destination Order Type indicator for transfer order types; when selected, the Order Type field is disabled to identify the Amazon FBA order type.
Run the FBA inventory workflow
1․ Retrieve FBA shipments from Amazon Seller Central on the Import FBA Shipments screen.
2․ Import the shipment. Acumatica creates a sales order with the transfer order type configured for the FBA store. The grid shows the destination warehouse, while the order line shows the source warehouse.
3․ Confirm the transfer shipment and use Update In. This moves the items from the source warehouse to the destination warehouse in Acumatica.
4․ After the shipment is closed in Seller Central, retrieve it through Import FBA Deliveries.
5․ Process the delivery so Acumatica creates a purchase receipt based on the received quantity. Release the receipt when required by your configuration and process, then verify the destination warehouse quantity.
6․ Import FBA orders according to the configured dates and statuses. The imported FBA orders appear on the Sales Order Invoice screen.
The FBA Destination Warehouse Quantities screen supports warehouse level validation by showing quantities for the selected destination warehouse and the current warehouse. The FBM and FBA Orders screen distinguishes the two channels through the Fulfillment Channel field.
Monitor and validate the synchronization
Use a repeatable validation routine after each quantity export or FBA import. Check the store, SKU, Acumatica inventory item, warehouse, quantity basis, and fulfillment channel before investigating the integration itself. For FBM, compare the Acumatica Quantity, any Amazon Quantity override, and the quantity visible in Amazon. For FBA, compare shipped quantity, received quantity, source warehouse movement, destination warehouse quantity, and purchase receipt status.
The connector records Last Imported Order Date, Last Imported Shipment Date, and Last Imported Deliveries Date. These dates indicate whether a process has run but do not replace transaction review. Import errors appear on the affected line; more detail may be available from the red cross and Tools and Trace. FBM settings can also enable email notifications for order IDs with errors.
Common pitfalls to avoid
1․ Publishing the wrong availability measure. On Hand, Available, and Available for Shipment can produce different sellable quantities.
2․ Leaving out a warehouse or including one that should not contribute. The connector sums quantities across selected warehouses.
3․ Using an incorrect or missing SKU mapping. Verify Inventory Details before assuming an inventory calculation is wrong.
4․ Relying on Import Item without reviewing item setup. Automatic creation uses the Amazon SKU as the Acumatica Inventory ID, but warehouse and unit of measure still require attention.
5․ Reusing an FBA transfer order type across stores. The documentation states that the same order type cannot be configured in more than one store.
6․ Importing an FBA delivery when received quantity exceeds shipped quantity. The connector raises an error; adjust quantities on the FBA Shipments screen before importing.
7․ Confusing FBA with FBM. Use the Fulfillment Channel field to identify the flow before correcting inventory or order records.
Frequently asked questions
Which Acumatica quantity is sent to Amazon for FBM
The value depends on the Warehouse Details setting. You can synchronize On Hand, Available, or Available for Shipment. If multiple warehouses are selected, their quantities are summed. A selected override row sends the entered Amazon Quantity instead.
How are Amazon SKUs connected to Acumatica inventory items
Mappings are maintained in the Amazon Store Inventory Details tab. Products can be retrieved by ASIN or Seller SKU. Import Item can create a missing Acumatica inventory item during order import, and Sync From Amazon can create a selected loaded FBA product using its SKU.
What documents are created for FBA inventory movements
An imported FBA shipment creates a sales order with the configured transfer order type. FBA delivery processing creates a purchase receipt based on the received quantity. FBA customer orders are imported as invoices.
What happens when Amazon receives less or more than it shipped
A delivery can be imported when received quantity equals shipped quantity or is lower. If received quantity is greater than shipped quantity, the connector displays an error and the quantities must be adjusted on the FBA Shipments screen before import.
How often does inventory synchronization run
The supplied documentation explains the processing screens and actions but does not define an automatic schedule, polling interval, or recommended frequency. Confirm the operating cadence configured for your implementation.
Does the documentation define conflict resolution or retry rules
No. It describes visible processing errors, trace access, and selected process controls, but it does not specify retry limits, duplicate handling, API throttling, or a formal source of truth when quantities conflict. These rules should be confirmed during implementation.
Plan your Amazon Acumatica inventory integration
A reliable Amazon Acumatica inventory sync starts with correct store credentials, explicit warehouse rules, clean SKU mappings, and separate operating procedures for FBA and FBM. Biz Tech Services can help configure and validate the connector for your fulfillment model. Contact Biz Tech Services to discuss your Amazon and Acumatica integration.
How to Sync Shopify Inventory with Acumatica
How to Sync Shopify Inventory with Acumatica
Accurate inventory depends on more than sending a quantity from one system to another. The Biz-Tech Services Acumatica Shopify connector links Acumatica inventory records, warehouses, and quantity settings to Shopify products and locations. A reliable setup begins with product identity and location mapping, then uses Acumatica as the source for the quantity exported to Shopify.
The documented workflow supports manual processing and scheduled quantity synchronization. It can combine quantities from selected Acumatica warehouses and publish the result according to one of three quantity measures: On Hand, Available, or Available for Shipment. The important work happens before automation starts: confirm credentials, decide which warehouses and items belong to the store, and choose the quantity definition that matches what customers should be able to buy.
How Shopify Inventory Sync with Acumatica Works
The Biz-Tech Services Shopify Acumatica connector maintains the relationship between the Shopify store and Acumatica through the Shopify Stores configuration. From there, the Warehouse Details area retrieves Shopify locations and maps them to Acumatica warehouses. When inventory quantities are exported, the connector updates the corresponding Shopify location.
For stores supplied by more than one warehouse, the connector can export the sum of quantities across the selected warehouses. The selected quantity basis controls which Acumatica figure is sent. This distinction matters because On Hand, Available, and Available for Shipment can represent different operational positions. Select the measure that reflects the inventory promise your business intends to make online.
Product identity is equally important. On export, the connector uses the Acumatica Inventory CD as the Shopify SKU. The manual states that item mapping is not supported during the Acumatica-to-Shopify item export process. Mapping is available when importing Shopify items into Acumatica. Therefore, teams should verify Inventory IDs and Shopify SKUs before relying on quantity updates.
Settings and Fields to Review Before Syncing
Store connection
Open the Shopify Store configuration and identify the correct Store Code. If one store should appear automatically on processing and store screens, select Default Store. Use Test Credentials to verify the API connection with the values on the Connection Settings tab. Edit Credentials is available when connection details need to change.
The Biz-Tech Services Shopify Acumatica integration package must also be installed and published in Acumatica through the customization project process. The source manual identifies the Customization Projects form as SM204505 and lists PCSR, PERP, and SAAS as supported license designations. Confirm the applicable licensing and deployment details for your environment before configuration.
Warehouse and Shopify location mapping
In Warehouse Details, use Load Shopify Locations to retrieve locations from Shopify. Map each relevant Shopify location to the Acumatica warehouse that supplies it. If several warehouses are selected, the exported item quantity is the sum across those warehouses. Review this scope carefully so a warehouse intended for another channel, market, or purpose is not included by mistake.
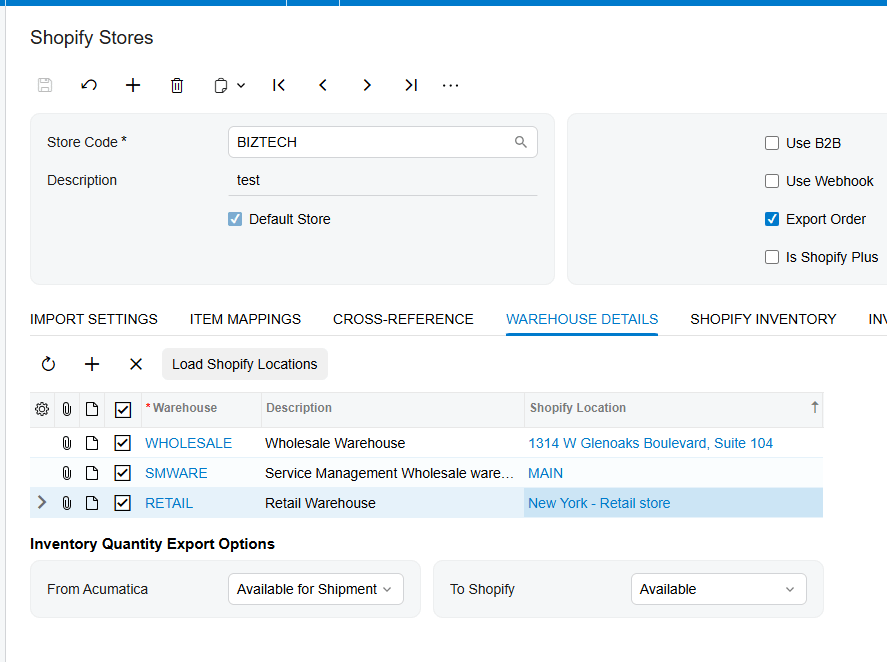
Quantity basis and tracking
Choose On Hand, Available, or Available for Shipment from the quantity selection. The manual does not define the formulas behind these values, so confirm their meaning in your Acumatica configuration and business rules. The exported value should match the quantity the storefront is allowed to offer, not simply the easiest number to retrieve.
Review Track Quantity as well. The documentation says that if Track Quantity is cleared in both Shopify and Acumatica, synchronization produces an error. If it is cleared in Shopify but selected in Acumatica, the sync updates the quantity and automatically selects tracking in Shopify. The same manual later notes that quantity can be updated even when Track Quantity is not selected for an item. Because those statements may depend on context or connector version, test the behavior in a nonproduction item before rollout.
Item selection and product fields
The Shopify Inventory tab can load Acumatica stock and non-stock items with Load Acumatica Items, or retrieve Shopify products with Load Shopify Items. It supports Sync to Shopify, Sync from Shopify, publish, unpublish, Get Item by ID, and Purge. The list can also be imported or exported as an Excel document.
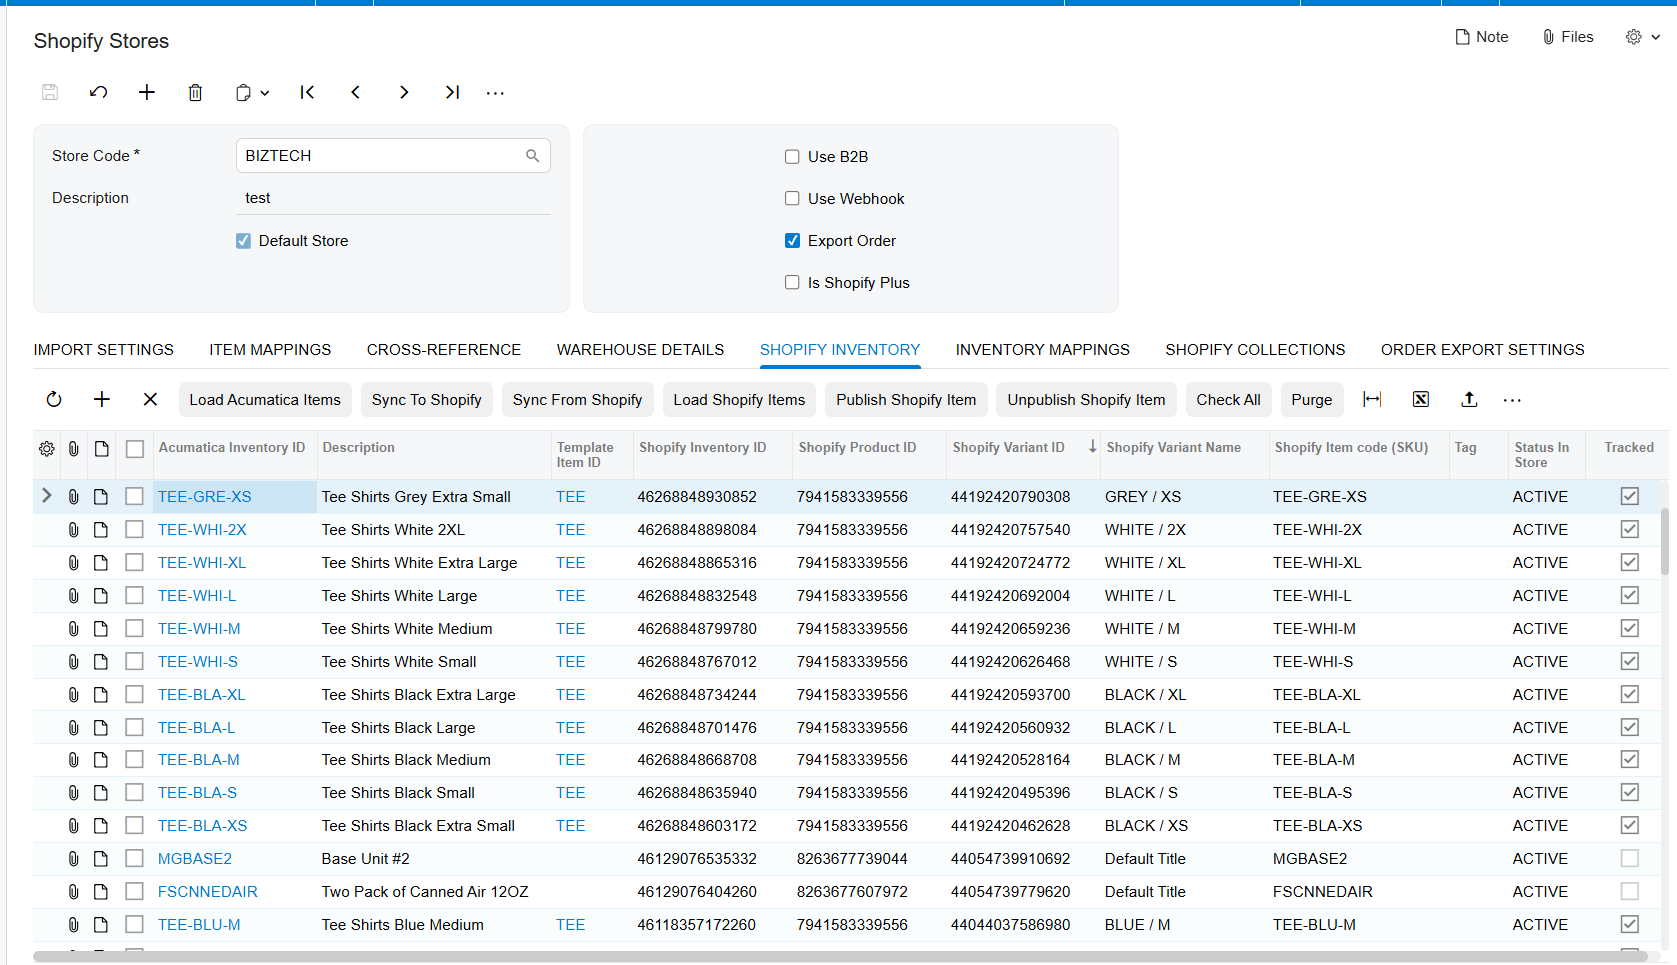
Export Item Mappings controls which product-related values are updated. Clear fields that should not be exported, and select every field required for the processing operation. The manual specifically warns that unselected fields such as price, description, or weight are not updated. Inventory Mapping separately connects Acumatica attributes, item currency settings, and user-defined fields to Shopify fields, including product- or variant-level metafields. Use Get Metafields to retrieve existing Shopify metafields, and select the import or export checkbox for each active mapping.
Practical Shopify and Acumatica Inventory Workflow
1. Validate the connector deployment and license. Confirm the customization package is installed, validated, and published for the intended Acumatica tenant.
2. Test the Shopify connection. Select the Store Code, review connection settings, and run Test Credentials before loading products or locations.
3. Load and map Shopify locations. In Warehouse Details, retrieve Shopify locations and map only the Acumatica warehouses that should contribute inventory to each location.
4. Choose the exported quantity. Select On Hand, Available, or Available for Shipment according to the storefront promise and the organization’s inventory rules.
5. Verify item identity. Compare Acumatica Inventory CDs with Shopify SKUs. Resolve duplicates, blanks, or unintended identifiers before export because Acumatica item export uses Inventory CD as SKU.
6. Load the product records. Use Shopify Inventory to load Acumatica items or Shopify items. If products must first be created or updated in Shopify, use Sync to Shopify or the Export Shopify Inventory Items screen. Select Sync for specific records or Sync All for all displayed records.
7. Enable the required export fields. Check Export Item Mappings and any Inventory Mapping rows needed for product or variant data. A processing screen cannot update a field that has not been selected for creation or update.
8. Select inventory items for quantity export. In Shopify Inventory on the Shopify Store screen, select the required items and save the selection.
9. Run a controlled quantity sync. Open Export Shopify Inventory Quantities and process a small set first. Confirm that Shopify receives the expected quantity at the expected location.
10. Schedule recurring synchronization. After the controlled test passes, use the scheduling option on Export Shopify Inventory Quantities to reduce manual processing. Choose the interval according to sales velocity and operational needs; the source does not prescribe a frequency.
How to Monitor and Validate Inventory Synchronization
Start validation with a small, representative sample: one simple stock item, one item held in multiple selected warehouses, and, if applicable, one variant or matrix item. Record the Acumatica quantity under the selected basis, run the export, and compare the resulting Shopify location quantity. For a multiwarehouse item, independently add the contributing quantities and confirm that Shopify receives the same total.
Use the processing screen as the operational checkpoint. Confirm that the intended Store Code and records are selected before running Sync, Sync All, Process, or a schedule. If a product does not appear as expected, return to Shopify Inventory and verify that it was loaded and selected. If product details fail to update, inspect Export Item Mappings and the import or export checkbox on Inventory Mapping.
After deployment, periodically test credentials, review location-to-warehouse mappings, and compare a sample of Acumatica and Shopify quantities. Revalidate after adding a warehouse, Shopify location, product, variant, or metafield. The source manual does not document a dedicated inventory exception report, retry policy, alert, or synchronization history, so confirm the available monitoring and logging features in the installed connector version.
Common Pitfalls in Shopify Acumatica Inventory Sync
1. Mismatched SKU and Inventory ID. Acumatica-to-Shopify item export uses Inventory CD as the SKU, and export-time item mapping is not supported. A mismatch can prevent the intended product relationship.
2. Incorrect warehouse scope. Selecting extra warehouses inflates the summed quantity; omitting a supplying warehouse understates it.
3. Wrong quantity definition. On Hand may not equal the amount that should be offered for sale. Validate Available or Available for Shipment against business rules before choosing.
4. Inactive field mappings. Required values do not update when their Export Item Mappings or Inventory Mapping checkboxes are not selected.
5. Assuming products already exist. Export Shopify Inventory Items may create products automatically when the connector cannot find them in the Shopify store. Test this behavior to avoid unintended catalog records.
6. Using Sync All too early. A broad export can amplify configuration errors. Begin with selected records and expand only after validating location, SKU, and quantity results.
7. Treating documentation ambiguities as guarantees. The manual contains two statements about Track Quantity that may apply in different contexts. Confirm the installed version’s behavior before production scheduling.
Frequently Asked Questions
Can Acumatica update inventory at multiple Shopify locations
Yes. Warehouse Details retrieves Shopify locations and maps them to Acumatica warehouses. The quantity export updates the corresponding location. When multiple warehouses are selected, the connector exports their summed quantity.
Which Acumatica quantity is sent to Shopify
The connector can use On Hand, Available, or Available for Shipment. The source does not define those calculations, so review your Acumatica rules and select the value that represents sellable inventory for the store.
Can Shopify products be mapped to different Acumatica item codes
Mapping is supported during import from Shopify to Acumatica. During export from Acumatica, the connector uses the item’s Inventory CD as the Shopify SKU and does not support mapping in that export process.
Can inventory synchronization run automatically
Yes. Export Shopify Inventory Quantities supports scheduling as well as manual processing. The documentation does not specify a recommended interval, so set and test a cadence that fits order volume and operational requirements.
What should be checked when a quantity does not update
Check credentials, Store Code, item selection, SKU alignment, location-to-warehouse mapping, quantity basis, Track Quantity behavior, and the required mapping checkboxes. Then rerun a single-item export and compare the Acumatica source quantity with the Shopify location quantity.
Plan a Reliable Shopify Acumatica Integration
A dependable Shopify inventory sync starts with controlled scope and verifiable identifiers. Establish the store connection, map locations to the right warehouses, choose the correct quantity basis, and validate a small item set before scheduling broader updates.
If you need help configuring, testing, or extending a Shopify and Acumatica integration, contact Biz-Tech Services to discuss your inventory workflow and connector requirements.

Acumatica Distribution ERP 2026: Complete Guide to Inventory, Warehousing, DRP & Omnichannel Distribution

Acumatica Distribution ERP 2026: The Complete Guide to Inventory, Warehousing, DRP, Order Management, Fulfillment, and Omnichannel Distribution
Distribution is no longer a simple process of buying products, placing them in a warehouse, and shipping them when customers call. Modern distributors operate across warehouses, eCommerce stores, marketplaces, retail partners, EDI networks, drop-ship suppliers, global vendors, multiple currencies, and increasingly demanding customer expectations.
The distributor that wins is usually not the company with the largest warehouse.
It is the company that can see what is happening across its supply chain and respond faster.
That requires accurate answers to questions such as:
- What inventory do we actually have?
- Where is it located?
- What is already allocated?
- What inventory is in transit?
- What should we reorder?
- Which purchase orders are late?
- Which warehouse should fulfill the order?
- Which customers are profitable?
- Which channels are creating margin?
- Which products are moving too slowly?
- Which orders are at risk of missing delivery expectations?
This is where Acumatica Distribution ERP becomes valuable.
Acumatica Distribution Edition brings financial management, inventory control, purchasing, order management, warehouse management, demand planning, distribution requirements planning, CRM, reporting, automation, commerce, and integrations into one connected cloud ERP environment.
The objective is not simply to replace spreadsheets.
The objective is to connect the complete distribution lifecycle.
A customer order can create demand.
Inventory availability can determine whether the order can be fulfilled immediately.
Distribution Requirements Planning can identify future shortages.
Purchasing can respond to supply requirements.
The warehouse can receive and put away stock.
Orders can move into picking, packing, and shipping workflows.
Tracking can flow back to customers or marketplaces.
Invoices can update accounts receivable and financial reporting.
Management can monitor inventory, margins, fulfillment performance, sales, purchasing, and cash from the same platform.
The value of a modern distribution ERP is not one warehouse feature. It is the ability to connect supply, demand, inventory, orders, fulfillment, finance, eCommerce, and decision-making in one operating system.
Acumatica 2026 R1 extends this model with new capabilities for distributors, including more flexible picking, recommended put-away, inventory-adjustment approvals, multi-currency requisitions, shipping-document automation, and improved print queue management.
Acumatica has also introduced APEX for Distribution, a right-sized offering designed for smaller distribution businesses with up to 50 employees that need modern financial, inventory, warehouse, and operational capabilities without beginning with a larger ERP footprint.
For BizTech, Distribution Edition is especially important because distribution businesses are often integration-heavy.
A modern distributor may simultaneously operate:
- Amazon;
- Shopify;
- WooCommerce;
- Magento;
- retail partner networks;
- EDI;
- ShipHero;
- ShipStation;
- CommerceHub;
- DSCO;
- Salesforce;
- payment platforms;
- custom warehouse systems.
BizTech is an Acumatica Gold Partner and develops proprietary Acumatica integrations and operational enhancements for many of these scenarios.
This guide explains Acumatica Distribution Edition from the inventory item all the way through purchasing, warehouse operations, eCommerce, fulfillment, profitability, implementation, and integration.
What Is Acumatica Distribution Edition?
Acumatica Distribution Edition is a cloud ERP platform built for wholesale distributors and inventory-focused businesses that need to connect financial management with inventory, purchasing, order management, warehouse operations, demand planning, CRM, commerce, reporting, and external systems.
Distribution Edition can serve as the operational core for companies that buy products from manufacturers or suppliers and then sell those products to:
- retailers;
- dealers;
- other distributors;
- manufacturers;
- commercial customers;
- consumers;
- marketplaces;
- eCommerce customers.
A distribution company may use Acumatica to manage:
- general ledger;
- accounts payable;
- accounts receivable;
- cash management;
- inventory;
- sales orders;
- purchase orders;
- warehouses;
- replenishment;
- DRP;
- customer pricing;
- CRM;
- shipping;
- returns;
- eCommerce;
- marketplaces;
- EDI;
- reporting.
The major advantage is the relationship between these areas.
Purchasing does not need to maintain one spreadsheet while sales maintains another.
Warehouse operations do not need to live completely outside accounting.
Management does not need to wait for several applications to be reconciled before understanding inventory or profitability.
What’s New for Distributors in Acumatica 2026 R1?
Acumatica 2026 R1 introduces several distribution improvements focused on warehouse flexibility, inventory control, global procurement, and shipping operations.
Change Picking Locations During the Picking Process
Real warehouses do not always behave exactly as the ERP expected.
An item may have been moved.
A bin may be temporarily inaccessible.
The expected location may not have enough quantity.
Acumatica 2026 R1 improves warehouse flexibility by allowing picking-location adjustments while the picking process is already underway.
This can reduce:
- warehouse interruptions;
- manual corrections;
- unnecessary supervisor intervention;
- delays caused by real-world inventory movement.
Recommended Put-Away Guidance
Receiving inventory is only half the job.
The product must also be placed in an appropriate warehouse location.
Recommended put-away guidance can help warehouse employees determine where received inventory should go.
This can improve:
- warehouse organization;
- travel efficiency;
- stock placement consistency;
- future picking efficiency.
Approval Workflows for Inventory Adjustments
Inventory adjustments can affect both operational stock and financial value.
Acumatica 2026 R1 strengthens governance by allowing configurable approval processes for inventory adjustments.
This is useful where companies want additional control over:
- write-offs;
- quantity corrections;
- cost adjustments;
- inventory discrepancies.
Multi-Currency Requisition Management
Global procurement often requires distributors to buy inventory from suppliers operating in different currencies.
2026 R1 strengthens multi-currency requisition workflows, making the feature particularly relevant for international sourcing and multi-entity organizations.
Automated Shipping Paperwork
Shipping operations can generate significant paperwork.
2026 R1 introduces improvements designed to reduce manual effort around shipping documents.
Improved Print Queue Management
High-volume warehouses may generate:
- pick lists;
- packing documents;
- shipping labels;
- customer documents;
- warehouse paperwork.
Print queue improvements help reduce administrative friction around those processes.
Acumatica APEX for Distribution: A Right-Sized Option for Smaller Distributors
In 2026, Acumatica introduced APEX for Distribution.
The offering is designed specifically for smaller businesses with up to approximately 50 employees that need modern distribution ERP capabilities but may not require the full breadth of a larger implementation on day one.
This is important because smaller distributors face many of the same operational problems as larger businesses:
- inventory accuracy;
- warehouse visibility;
- order fulfillment;
- purchasing;
- financial reporting;
- multi-user collaboration.
The problem is often that traditional ERP projects feel too large or expensive for the organization’s current stage.
APEX creates another entry point into the Acumatica ecosystem.
For a smaller distributor, the ERP decision is no longer necessarily “basic accounting software or a massive ERP project.” Acumatica now offers a more graduated path.
How Acumatica Distribution Works: From Customer Demand to Cash
The strongest way to understand Distribution Edition is through an end-to-end workflow.
1. Customer Demand Arrives
Demand may come from:
- a salesperson;
- customer service;
- an eCommerce store;
- Amazon;
- EDI;
- CommerceHub;
- DSCO;
- a B2B portal;
- another integrated channel.
2. Acumatica Evaluates Inventory
The system can evaluate inventory according to warehouses, availability rules, allocations, and open supply.
3. Inventory Is Allocated or Supply Is Planned
If sufficient inventory exists, the order can continue toward fulfillment.
If inventory is insufficient, planning and purchasing processes can help address future demand.
4. Warehouse Execution Begins
Orders can move into:
- picking;
- packing;
- shipping.
5. Shipment Information Is Captured
Carrier, tracking, package, and shipment information can be associated with the transaction.
6. Customer and Channel Are Updated
Where integrations are configured, fulfillment information can flow back to the source sales channel.
7. Financial Documents Are Created
Invoices and payments update financial records.
8. Management Can Analyze the Result
Executives can evaluate:
- revenue;
- margin;
- inventory;
- warehouse performance;
- customer profitability;
- channel performance;
- cash.
What Types of Distributors Can Use Acumatica?
Acumatica Distribution Edition is used across a wide range of wholesale and product-centric businesses.
Parts, equipment, tools, maintenance products and industrial supplies.
Serial-controlled products, global sourcing, technical components and equipment.
Multi-warehouse product distribution combined with field service and contractor customers.
Lumber, masonry, fixtures, hardscape, hardware and construction supplies.
Healthcare supplies, safety products, regulated inventory and lot-controlled goods.
High-SKU consumer products, retailers, eCommerce and marketplace channels.
Matrix items, styles, colors, sizes, seasonal products and high SKU counts.
Furniture, décor, lighting, flooring, kitchen, bath and home products.
Lot control, expiry considerations, multiple currencies and complex fulfillment.
Parts distribution combined with service, installation and multi-location operations.
DTC, B2B, marketplace, wholesale and retail distribution from one inventory pool.
Commercial, professional, construction and specialized equipment.
Acumatica Inventory Management for Distribution
Inventory is the financial and operational center of most distribution businesses.
If inventory is wrong, everything else becomes less reliable.
Sales may promise unavailable goods.
Purchasing may order unnecessary stock.
Warehouses may waste time searching for products.
Customer service may provide incorrect information.
Finance may struggle to trust inventory valuation and margin.
Acumatica Inventory Management can help distributors manage:
- stock items;
- non-stock items;
- warehouses;
- warehouse locations;
- availability;
- allocations;
- cost;
- lots;
- serial numbers;
- replenishment;
- transfers;
- adjustments;
- physical inventory.
Inventory by Location
Distributors can track stock across several locations rather than relying on one company-wide quantity.
Inventory Transfers
Stock can move between warehouses based on operational requirements.
Inventory Adjustments
Adjustments can correct discrepancies and, in 2026 R1, can be subject to stronger approval controls.
Inventory Availability and Allocation
“On hand” does not always mean “available to sell.”
A distributor may have 100 units physically in the warehouse, but:
- 60 are already allocated to sales orders;
- 10 are being transferred;
- some are unavailable due to operational status;
- some may belong to specific fulfillment logic.
This is why distribution ERP needs several inventory perspectives.
The business must distinguish concepts such as:
- on hand;
- available;
- allocated;
- available for shipment;
- on purchase order;
- in transit.
Reliable availability helps improve:
- sales promises;
- order allocation;
- customer service;
- eCommerce synchronization;
- replenishment decisions.
Acumatica Distribution Requirements Planning (DRP)
Distribution Requirements Planning is one of the most strategically important capabilities for distributors.
DRP provides time-phased planning across the supply chain.
Instead of asking only:
“How much inventory do we have today?”
DRP helps answer:
“When will we run short based on future supply and demand?”
Demand Can Include
- sales orders;
- forecasts;
- transfer demand;
- other time-based requirements.
Supply Can Include
- on-hand stock;
- purchase orders;
- transfer supply;
- inventory already in transit.
Date-Specific Planning
Timing matters.
Having 1,000 units arriving next month does not solve a shortage tomorrow.
DRP evaluates supply and demand by date to provide more useful planning recommendations.
Exception Messages
Planning can identify issues such as supply arriving too late to satisfy demand.
This helps planners focus attention on exceptions rather than manually reviewing every item.
Inventory Replenishment
Replenishment controls how inventory is restored when stock falls below the desired level.
A distributor may replenish inventory through:
- purchasing;
- warehouse transfers;
- other configured supply methods.
Good replenishment design can reduce both extremes:
- stockouts;
- excess inventory.
The implementation should carefully define:
- lead times;
- minimum order quantities;
- safety stock;
- reorder points;
- vendor relationships;
- warehouse-specific requirements.
Bad planning parameters create bad replenishment recommendations no matter how powerful the ERP is.
Acumatica Purchasing and Procurement
Purchasing is not simply the act of creating a purchase order.
A distributor needs to manage:
- demand;
- vendors;
- cost;
- lead time;
- currency;
- quantity;
- delivery dates;
- approvals;
- receipts;
- vendor performance.
Purchase Orders
Purchase orders connect supply requirements with vendors and inbound inventory.
Requisitions
Procurement processes may begin with internal requisitions rather than direct POs.
Vendor Bidding
For relevant procurement scenarios, requisitions can support comparison of suppliers and bids.
Multi-Currency Procurement
Global distributors may purchase goods in several currencies.
Acumatica 2026 R1 strengthens multi-currency requisition management for international and multi-entity procurement.
Acumatica Warehouse Management System (WMS)
Distribution ERP becomes much more valuable when inventory records and physical warehouse activity stay aligned.
Acumatica WMS supports warehouse processes with mobile and barcode-oriented workflows.
A connected WMS can help with:
- receiving;
- put-away;
- inventory movement;
- picking;
- packing;
- shipping;
- barcode scanning.
Why Embedded Warehouse Management Matters
When ERP and WMS operate as completely disconnected systems, companies often struggle with:
- delayed inventory updates;
- duplicate data;
- shipment reconciliation;
- receipt reconciliation;
- inventory discrepancies.
An integrated approach reduces the number of synchronization points.
Receiving and Put-Away
Warehouse efficiency begins before picking.
Inbound inventory must be received accurately and placed correctly.
Receiving
Warehouse employees may receive products against purchase orders and other inbound documents.
Accurate receiving updates:
- inventory;
- purchase orders;
- vendor-related records;
- future availability.
Put-Away
Put-away determines where inventory should physically live.
Acumatica 2026 R1’s recommended put-away guidance helps warehouse workers choose appropriate storage locations.
Why Put-Away Affects Picking
Poor stock placement increases:
- warehouse travel;
- search time;
- picking errors;
- congestion.
Receiving and fulfillment should therefore be treated as one connected warehouse design.
Picking, Packing, and Shipping
The fulfillment process converts an ERP sales order into a physical customer delivery.
Picking
The system directs warehouse employees toward inventory required for an order.
2026 R1 improves flexibility by allowing location changes during the picking process when real warehouse conditions differ from the original plan.
Packing
Packing confirms what is being shipped and can associate package information with the shipment.
Shipping
Shipping completes the physical fulfillment event and can capture:
- carrier;
- service;
- tracking number;
- package information;
- shipment documents.
Shipping Paperwork
2026 R1 introduces automation aimed at reducing manual shipping-document work.
Acumatica Sales Order Management
Sales Order Management sits at the center of the distribution order-to-cash process.
Sales orders may originate from:
- internal salespeople;
- customer service;
- CRM;
- eCommerce;
- marketplaces;
- EDI;
- other integrations.
Order Processing
An order may include:
- customer;
- shipping address;
- items;
- quantities;
- prices;
- discounts;
- taxes;
- warehouse;
- shipping method;
- payment information;
- customer PO reference.
Allocation
Inventory can be allocated against demand so that salespeople and warehouse employees understand what stock is committed.
Backorders
Where available stock cannot satisfy the entire order, backorder processes can help manage remaining demand.
Customer-Specific Pricing, Discounts, and Distribution Sales
Wholesale distribution pricing can become extremely complex.
A distributor may have:
- list pricing;
- customer pricing;
- customer-class pricing;
- quantity-based pricing;
- promotional pricing;
- contract pricing;
- channel-specific pricing.
ERP should help centralize pricing rather than forcing sales teams to maintain separate spreadsheets.
Margin Protection
Pricing should also be evaluated in relation to:
- cost;
- freight;
- discounts;
- customer profitability;
- channel economics.
Drop Shipping
Distribution companies increasingly use drop shipping to fulfill orders directly from suppliers.
Drop-ship scenarios can reduce:
- warehouse handling;
- inventory ownership;
- shipping steps.
But they introduce coordination challenges.
The ERP must connect:
- customer order;
- supplier purchase order;
- vendor fulfillment;
- tracking;
- customer communication;
- financial posting.
Distribution Edition is designed to support environments where warehouse fulfillment and drop-ship fulfillment operate together.
Returns and RMA Management
Distribution operations do not end when an order ships.
Returns can influence:
- inventory;
- customer credit;
- warehouse activity;
- quality;
- vendor returns;
- profitability.
A controlled return process should distinguish between:
- resalable inventory;
- damaged inventory;
- vendor-return inventory;
- customer credit;
- replacement orders.
Matrix Items for Apparel, Footwear, and Variant-Rich Distribution
Some distributors manage products with large numbers of variations.
Examples include:
- size;
- color;
- style;
- material;
- packaging.
Acumatica matrix-item functionality can help manage variant-rich product catalogs without treating every variation as an entirely unrelated product.
This is particularly relevant for:
- fashion;
- footwear;
- apparel;
- consumer products.
Lot and Serial Number Tracking
Lot and serial tracking can be essential for distributors of:
- electronics;
- medical products;
- food;
- beauty products;
- industrial equipment;
- regulated products.
Lot Tracking
Lot-controlled inventory helps identify groups of products that share production or receipt history.
Serial Tracking
Serial numbers identify individual units.
Business Benefits
Traceability supports:
- warranty;
- customer service;
- recalls;
- compliance;
- quality control.
Kits, Bundles, and BizTech Kit Processing
Distributors often sell combinations of products as bundles or kits.
This can be straightforward when the kit is always identical.
It becomes more complex when components may vary.
BizTech has developed a Kit Processing solution for Acumatica that can extend kit workflows for more advanced business scenarios.
Kit-related requirements may include:
- component visibility;
- kit configuration;
- serialized components;
- component changes;
- purchasing;
- fulfillment;
- inventory control.
Consignment Inventory
Consignment creates a unique ownership and inventory problem.
Physical inventory may be located at a customer or partner location while ownership remains with the distributor until consumption or sale.
BizTech has developed Consignment Processing functionality for Acumatica.
The process can include:
- consignment warehouses;
- customer-to-warehouse relationships;
- inventory transfers;
- consignment sales orders;
- invoicing;
- returns;
- inventory visibility.
Multi-Warehouse and Multi-Location Distribution
As distributors grow, inventory often becomes geographically distributed.
The same SKU may exist in:
- East Coast warehouse;
- West Coast warehouse;
- regional distribution center;
- retail location;
- 3PL;
- consignment location.
Multi-location distribution creates questions around:
- availability;
- transfer planning;
- freight;
- customer proximity;
- replenishment;
- order routing;
- inventory carrying cost.
Acumatica’s warehouse, branch, inventory, DRP, and transfer capabilities can provide one ERP foundation for these operations.
Global Distribution and Multi-Currency Procurement
International distributors may:
- buy from Asia;
- hold inventory in the United States;
- sell into Canada;
- operate a European entity;
- report in a consolidated currency.
This requires ERP support for:
- multiple currencies;
- multiple entities;
- global purchasing;
- currency rates;
- intercompany accounting;
- consolidation.
2026 R1’s multi-currency requisition improvements are particularly relevant to global procurement.
Acumatica Distribution ERP for eCommerce and Omnichannel Sales
Many distributors are no longer purely wholesale businesses.
They may sell simultaneously through:
- sales representatives;
- dealer networks;
- B2B portals;
- Shopify;
- WooCommerce;
- Magento;
- Amazon;
- retailers;
- marketplaces;
- EDI.
This creates a central inventory problem.
All channels may be selling against the same physical stock.
If channel inventory is not synchronized reliably:
- overselling increases;
- stockouts increase;
- customer cancellations increase;
- warehouse exceptions increase;
- reporting becomes fragmented.
Acumatica as the Operational Center
Acumatica can serve as the core system for:
- items;
- inventory;
- orders;
- customers;
- payments;
- warehouses;
- fulfillment;
- financials.
Amazon FBA and FBM for Distributors
Amazon creates two very different distribution models.
Fulfillment by Merchant
With FBM, the distributor controls:
- inventory;
- warehouse;
- picking;
- packing;
- shipment;
- tracking.
Fulfillment by Amazon
With FBA, Amazon handles fulfillment from Amazon-controlled inventory locations, while the distributor still needs internal financial and inventory visibility.
BizTech Amazon Connector
The BizTech Amazon Connector supports workflows including:
- Amazon order import;
- FBA and FBM operations;
- PO acknowledgements;
- fulfillment events;
- tracking;
- inventory synchronization;
- refunds;
- warehouse mapping.
EDI, DSCO, CommerceHub, and Retail Partner Networks
Wholesale distribution often involves large retailers.
These relationships may require structured electronic exchange of:
- purchase orders;
- acknowledgements;
- inventory;
- shipments;
- tracking;
- invoices;
- cancellations.
DSCO
BizTech’s DSCO integration can automate the flow between retail partner orders and Acumatica.
CommerceHub
The BizTech CommerceHub Connector supports retail-network exchange through controlled order, inventory, shipment, and invoice workflows.
Why ERP-Centered EDI Matters
The ERP should remain aware of every retail order.
Otherwise, operations may become fragmented between:
- retailer portals;
- EDI middleware;
- warehouse systems;
- accounting.
Shipping, Carriers, and Logistics
Shipping is one of the largest cost and customer-experience variables in distribution.
The ERP environment may need to coordinate:
- carrier selection;
- service levels;
- package information;
- labels;
- tracking;
- freight cost;
- customer notifications.
ShipStation
BizTech’s ShipStation Connector can help synchronize order and fulfillment data between Acumatica and shipping operations.
ShipHero
The BizTech ShipHero integration can connect Acumatica with warehouse and fulfillment activity including:
- orders;
- shipments;
- purchase orders;
- receipts;
- inventory movements;
- returns.
Webhook-based processing can allow relevant warehouse activity to update Acumatica quickly.
Financial Management for Distribution
A distribution ERP should connect warehouse activity to financial truth.
Every operational decision eventually affects:
- cash;
- inventory asset value;
- COGS;
- gross margin;
- accounts receivable;
- accounts payable;
- freight expense;
- customer profitability.
Accounts Receivable
Customer invoices, payments, credits, and collections connect directly to sales activity.
Accounts Payable
Vendor bills connect purchasing and inventory acquisition with financial obligations.
Inventory Valuation
Inventory accuracy is therefore not only an operational problem.
It is a balance-sheet problem.
Margin
Distribution executives should understand margin by:
- product;
- product category;
- customer;
- channel;
- warehouse;
- salesperson.
Acumatica Distribution Reporting, Dashboards, and KPIs
A modern distributor should not wait until month-end to understand what happened.
Inventory KPIs
- inventory value;
- inventory turns;
- days on hand;
- slow-moving inventory;
- dead stock;
- stockouts;
- fill rate.
Warehouse KPIs
- orders picked;
- lines picked;
- orders shipped;
- picking errors;
- receiving throughput;
- order cycle time.
Purchasing KPIs
- purchase volume;
- late purchase orders;
- vendor lead time;
- vendor performance;
- purchase price variance;
- open commitments.
Sales KPIs
- revenue;
- gross margin;
- average order value;
- customer profitability;
- channel profitability;
- salesperson performance.
Cash and Finance KPIs
- AR aging;
- AP aging;
- cash position;
- working capital;
- inventory-to-cash cycle.
Acumatica Distribution Integrations
Distribution is one of the most integration-heavy ERP industries.
The technology stack may contain:
- eCommerce;
- marketplaces;
- EDI;
- WMS;
- 3PL;
- shipping;
- CRM;
- payments;
- tax;
- BI;
- customer portals;
- vendor portals;
- custom applications.
BizTech Integration Portfolio
BizTech develops Acumatica solutions for:
- Amazon;
- Shopify;
- WooCommerce;
- Magento;
- PayPal;
- ShipHero;
- ShipStation;
- DSCO;
- CommerceHub;
- Salesforce;
- ServiceTitan;
- EDI;
- custom APIs.
The objective is not simply to connect systems.
The objective is to design reliable operational flows including:
- authentication;
- mapping;
- cross-references;
- error handling;
- retry logic;
- logging;
- monitoring;
- reconciliation.
Real Distribution Results with Acumatica
Published Acumatica customer stories provide useful examples of Distribution Edition in production.
These are company-specific results and should not be interpreted as universal guarantees.
NuvoH2O
reduction in software costs in the first year after switching to Acumatica
faster month-end close, from 15 days to 5 days
business and transaction volume
NuvoH2O uses Acumatica Distribution Edition with Inventory Control, Order Management, Warehouse Management, CRM, BigCommerce, Amazon, and SPS Commerce.
Its published case study also reports that fulfillment throughput quadrupled and shipping costs declined by up to 8%.
Digital Planet
faster order processing
reduction in warehouse procurement processing time
increase in finance team productivity
Digital Planet uses Distribution Edition with inventory, order management, WMS, CRM, and related financial functions.
Global Beauty Care
reduction in order processing time reported in the case study
saved per order entry
retail stores in the company’s global sales footprint
Timebomb Trading
unified web stores, shipping, ordering and ERP operations
time saved connecting systems
seasonal SKUs no longer requiring manual entry
A Priori Specialty Foods
saved weekly by the fulfillment team
time saved processing price changes
saved weekly by the sales team
These examples show why Distribution ERP ROI should be evaluated across the entire company rather than only the accounting department.
How to Implement Acumatica Distribution ERP
Distribution implementation should begin with business processes, not software screens.
Phase 1: Distribution Discovery
Document:
- products;
- warehouses;
- sales channels;
- customers;
- vendors;
- pricing;
- inventory planning;
- purchasing;
- warehouse workflows;
- shipping;
- returns;
- integrations;
- reporting.
Phase 2: ERP Architecture
Design:
- companies;
- branches;
- warehouses;
- warehouse locations;
- item classes;
- customer classes;
- vendor classes;
- order types;
- security;
- financial structure.
Phase 3: Master Data
Prepare:
- items;
- customers;
- vendors;
- prices;
- warehouses;
- UOMs;
- lots;
- serials;
- cross-references.
Phase 4: Order-to-Cash
Configure and test:
- sales orders;
- availability;
- allocation;
- warehouse fulfillment;
- shipping;
- invoicing;
- payments;
- returns.
Phase 5: Procure-to-Pay
Configure:
- requisitions;
- purchase orders;
- receiving;
- vendor invoices;
- payments.
Phase 6: Inventory Planning
Configure:
- DRP;
- replenishment;
- forecasts;
- lead times;
- safety stock;
- order quantities;
- transfer logic.
Phase 7: Warehouse Management
Configure:
- receiving;
- put-away;
- locations;
- mobile devices;
- barcoding;
- picking;
- packing;
- shipping.
Phase 8: Integrations
Connect commerce, marketplaces, EDI, WMS, shipping, CRM, payments, and custom systems.
Phase 9: Reporting
Build dashboards and reports for finance, purchasing, sales, operations, warehouse, and management.
Phase 10: Testing
Test complete workflows rather than isolated screens.
Phase 11: Training
Train each role according to its actual process.
Phase 12: Go-Live
Migrate final data, reconcile inventory and financial balances, activate integrations, and begin production use.
Acumatica Distribution Data Migration
Distribution data migration is frequently more complex than a financial conversion because inventory and open operational documents must remain accurate.
Items
Potential fields include:
- SKU;
- description;
- item class;
- UOM;
- cost;
- price;
- vendor;
- lot/serial rules;
- replenishment parameters;
- attributes.
Inventory
Migrate and reconcile:
- warehouse;
- location;
- quantity;
- cost;
- lot;
- serial;
- allocated quantity;
- open supply;
- open demand.
Open Sales Orders
Partially fulfilled orders need special review.
Open Purchase Orders
Partially received orders also require careful mapping.
Historical Transactions
The company should decide whether it needs:
- full detailed history;
- selected detailed history;
- summary history;
- opening balances and open documents only.
How Much Does Acumatica Distribution ERP Cost?
There is no single fixed Acumatica Distribution price.
Total cost depends on:
- Acumatica product level;
- applications;
- resource consumption;
- deployment;
- warehouses;
- entities;
- WMS;
- DRP;
- data migration;
- integrations;
- customization;
- reporting;
- training;
- support.
A distributor implementing core financials, inventory and order management has a different project from a multinational distributor implementing:
- ten warehouses;
- WMS;
- Amazon;
- Shopify;
- EDI;
- DSCO;
- CommerceHub;
- multiple currencies;
- custom pricing;
- historical migration.
How Long Does Acumatica Distribution Implementation Take?
Implementation duration depends on scope.
Key timeline drivers include:
- number of warehouses;
- number of entities;
- inventory data quality;
- customer pricing complexity;
- WMS;
- DRP;
- eCommerce channels;
- EDI;
- custom development;
- historical data;
- testing;
- training.
The correct implementation timeline should be based on discovery and complexity rather than a generic promise.
Common Acumatica Distribution Implementation Mistakes
Mistake 1: Migrating Dirty Inventory
If the old inventory is wrong, moving it into Acumatica will not fix it.
Mistake 2: Configuring DRP Before Cleaning Lead Times
Planning is only as reliable as the underlying parameters.
Mistake 3: Treating Every Warehouse the Same
Different locations may require different:
- replenishment;
- put-away;
- picking;
- customer allocation;
- shipping rules.
Mistake 4: Ignoring Customer Pricing Complexity
Pricing should be designed before migration rather than recreated after go-live.
Mistake 5: Implementing WMS Without Warehouse Employees
Warehouse users must participate in design and testing.
Mistake 6: Ignoring eCommerce and EDI Until the End
External sales channels affect item, customer, order, warehouse, tax, payment, and fulfillment architecture.
Mistake 7: Rebuilding Every Legacy Customization
Use standard Acumatica functionality first.
Mistake 8: Testing Screens Instead of Complete Orders
Test:
Order → Allocation → Pick → Pack → Ship → Invoice → Payment → Return.
Mistake 9: No Exception Handling for Integrations
An integration is not complete simply because successful records synchronize.
It must also handle failures.
Mistake 10: No Post-Go-Live Optimization
Real warehouse and customer activity frequently reveals improvements that were impossible to see during implementation.
How to Measure Distribution ERP ROI
ROI should be measured across operations, not only accounting.
Inventory
Track:
- inventory value;
- inventory turns;
- carrying cost;
- stockouts;
- obsolete inventory;
- write-offs;
- inventory accuracy.
Warehouse
Track:
- receiving time;
- put-away time;
- pick time;
- orders per employee;
- picking errors;
- shipment throughput.
Orders
Track:
- order-entry time;
- order cycle time;
- fill rate;
- on-time shipment;
- backorders;
- returns.
Purchasing
Track:
- planner hours;
- emergency purchases;
- supplier lead time;
- purchase price;
- late purchase orders.
Financial
Track:
- gross margin;
- month-end close;
- working capital;
- AR;
- AP;
- inventory-to-cash cycle.
IT and Administration
Track:
- manual integrations;
- spreadsheet work;
- duplicate data entry;
- support hours;
- number of disconnected applications.
Why Work with BizTech for Acumatica Distribution Implementation?
Distribution ERP implementation is not simply a financial-system project.
It crosses:
- inventory;
- sales;
- purchasing;
- warehouse;
- shipping;
- eCommerce;
- EDI;
- payments;
- finance;
- reporting.
BizTech is an Acumatica Gold Partner specializing in ERP implementation, integration, customization, automation, reporting, and custom Acumatica solutions.
Distribution Implementation
BizTech can help configure:
- inventory;
- warehouses;
- sales orders;
- purchase orders;
- allocation;
- replenishment;
- WMS;
- pricing;
- returns;
- financials;
- reporting.
Integration Development
BizTech’s existing solutions include:
- Amazon FBA/FBM;
- Shopify;
- WooCommerce;
- Magento;
- PayPal;
- ShipHero;
- ShipStation;
- DSCO;
- CommerceHub;
- Salesforce;
- ServiceTitan;
- EDI;
- custom integrations.
Custom Distribution Solutions
BizTech also develops specialized Acumatica functionality such as:
- Kit Processing;
- Consignment Processing;
- Gift Card Processing;
- custom warehouse workflows;
- custom marketplace workflows;
- custom API integrations.
Experience Across the Complete ERP Lifecycle
BizTech can support:
- discovery;
- implementation;
- data migration;
- customization;
- integration;
- testing;
- training;
- go-live;
- post-go-live support.
For a distributor, the best ERP implementation partner is not simply the company that can configure the accounting module. It is the company that understands how orders, inventory, warehouses, integrations, and financials operate as one system.
Acumatica Distribution ERP Implementation Checklist
Business and Organization
- Companies are documented.
- Branches are documented.
- Warehouses are documented.
- Sales channels are documented.
- Customer segments are documented.
- Vendor structure is documented.
Inventory
- Item master is cleaned.
- Item classes are approved.
- Units of measure are approved.
- Costing method is approved.
- Lot and serial rules are approved.
- Warehouse quantities are reconciled.
- Replenishment parameters are reviewed.
Planning
- DRP requirements are defined.
- Forecast requirements are defined.
- Lead times are validated.
- Safety stock is validated.
- Minimum order quantities are validated.
- Transfer logic is defined.
Purchasing
- Vendor terms are configured.
- Purchase approval process is defined.
- Requisition requirements are defined.
- Multi-currency requirements are defined.
- Receiving workflows are tested.
Warehouse
- Warehouse locations are configured.
- Receiving is tested.
- Put-away is tested.
- Picking is tested.
- Packing is tested.
- Shipping is tested.
- Barcode devices are tested.
- Inventory adjustments are controlled.
Sales
- Order types are configured.
- Pricing is approved.
- Discounts are approved.
- Allocation logic is tested.
- Backorders are tested.
- Drop shipping is tested.
- Returns are tested.
Integrations
- Every sales channel is documented.
- Every warehouse integration is documented.
- EDI partners are documented.
- Authentication is configured.
- Cross-references are defined.
- Error handling is tested.
- Retries are tested.
- Monitoring is enabled.
- Inventory sync is tested.
- Orders are tested.
- Fulfillment is tested.
- Refunds are tested.
Finance
- Chart of accounts is approved.
- Opening balances reconcile.
- AR reconciles.
- AP reconciles.
- Cash reconciles.
- Inventory valuation reconciles.
Go-Live
- Final inventory count is approved.
- Open sales orders are validated.
- Open purchase orders are validated.
- Users are trained.
- Dashboards are approved.
- Reports are approved.
- Integrations are active.
- Support coverage is active.
Final Conclusion: Why Acumatica Distribution ERP Matters in 2026
Distribution has become a technology business.
The physical product still matters.
The warehouse still matters.
The supplier relationship still matters.
But competitive advantage increasingly depends on information.
The strongest distributors know:
- what is in stock;
- where it is located;
- what has been allocated;
- what is arriving;
- what needs to be reordered;
- which warehouse should fulfill an order;
- which purchase orders are late;
- which products are profitable;
- which channels are growing;
- which customers create margin;
- where working capital is trapped.
A disconnected combination of accounting software, spreadsheets, warehouse tools, marketplace portals, shipping platforms, and manual reports makes these questions difficult to answer.
Acumatica Distribution ERP provides a different model.
It connects:
- financials;
- inventory;
- sales orders;
- purchasing;
- DRP;
- replenishment;
- warehouses;
- shipping;
- CRM;
- eCommerce;
- marketplaces;
- EDI;
- reporting.
Acumatica 2026 R1 strengthens that distribution model through more flexible picking, recommended put-away, stronger inventory adjustment controls, global procurement enhancements, and additional shipping automation.
For smaller distributors, APEX for Distribution also creates a new path to modern ERP without beginning with an oversized implementation.
But software alone does not create distribution efficiency.
Inventory data must be accurate.
Warehouse workflows must match reality.
Replenishment parameters must be trustworthy.
Customer pricing must be designed correctly.
External sales channels must be integrated.
Employees must use the system.
That is why implementation quality matters.
BizTech combines Acumatica Gold Partner expertise with distribution ERP implementation, warehouse workflows, eCommerce, marketplaces, EDI, payment integrations, logistics integrations, custom development, automation, data migration, reporting, and support.
For businesses searching for:
- Acumatica Distribution ERP;
- Acumatica Distribution Edition;
- Wholesale Distribution ERP;
- Distribution ERP Software;
- Acumatica Inventory Management;
- Acumatica DRP;
- Acumatica Warehouse Management;
- Acumatica WMS;
- Acumatica Order Management;
- Acumatica eCommerce Integration;
- Acumatica Distribution Implementation Partner;
- BizTech Acumatica Distribution;
the next step is not simply purchasing a Distribution Edition license.
The next step is designing how Acumatica should operate across the real supply chain.
Planning an Acumatica Distribution ERP Implementation?
BizTech can assess your inventory, warehouses, purchasing, DRP, customer pricing, fulfillment, eCommerce, EDI, shipping, integrations, migration requirements, reporting, and Acumatica architecture before implementation begins.
FAQ: Acumatica Distribution ERP
What is Acumatica Distribution Edition?
Acumatica Distribution Edition is a cloud ERP solution for wholesale distributors and inventory-focused businesses. It connects financial management, inventory, order management, purchasing, warehouse operations, planning, CRM, reporting, commerce, and integrations.
What is new for distributors in Acumatica 2026 R1?
Acumatica 2026 R1 adds improvements including real-time picking-location changes, recommended put-away guidance, approval workflows for inventory adjustments, multi-currency requisitions, automated shipping paperwork, and print queue enhancements.
What is Acumatica APEX for Distribution?
APEX for Distribution is an Acumatica offering introduced for smaller distribution businesses, particularly organizations with up to approximately 50 employees that need modern ERP capabilities in a right-sized package.
Does Acumatica support Distribution Requirements Planning?
Yes. Acumatica DRP provides time-phased inventory planning based on supply, demand, forecasts, purchase orders, transfers, existing inventory, and related planning information.
What is the difference between DRP and MRP?
Both use time-phased supply and demand planning. DRP is designed for distribution planning, while MRP extends the planning model to include production orders and manufacturing requirements.
Does Acumatica have warehouse management?
Yes. Acumatica Warehouse Management supports mobile and barcode-oriented warehouse workflows including receiving, inventory movement, picking, packing, and shipping.
Can Acumatica manage several warehouses?
Yes. Acumatica supports multi-warehouse and multi-location inventory operations, transfers, inventory visibility, planning, and warehouse-specific processes.
Can Acumatica manage lot and serial numbers?
Yes. Lot and serial tracking can support traceability, warranty, compliance, recalls, customer service, and inventory control.
Does Acumatica support matrix items?
Yes. Matrix-item functionality can help manage variant-rich products such as apparel and footwear with dimensions like size, color, and style.
Can Acumatica support drop shipping?
Yes. Distribution workflows can support direct fulfillment from vendors where customer demand and supplier purchasing need to remain connected.
Does Acumatica support eCommerce?
Yes. Acumatica can serve as the ERP behind eCommerce and marketplace operations. BizTech develops connectors for Amazon, Shopify, WooCommerce, Magento, and other commerce platforms.
Can Acumatica integrate with Amazon FBA and FBM?
Yes. BizTech’s Amazon Connector supports Amazon FBA and FBM workflows including orders, acknowledgements, inventory synchronization, fulfillment, tracking, refunds, and warehouse mapping.
Can Acumatica integrate with DSCO?
Yes. BizTech provides DSCO integration capabilities for retailer orders, acknowledgements, inventory, fulfillment, invoicing, and related automation.
Can Acumatica integrate with CommerceHub?
Yes. BizTech’s CommerceHub Connector can support order, inventory, shipment, invoice, and retail-network workflows between CommerceHub and Acumatica.
Can Acumatica integrate with ShipHero?
Yes. BizTech’s ShipHero integration can synchronize orders, shipments, purchase orders, receipts, transfers, returns, and inventory activity with Acumatica.
Can Acumatica integrate with ShipStation?
Yes. BizTech provides a ShipStation Connector for Acumatica supporting order and fulfillment-related workflows.
Does Acumatica support consignment inventory?
Consignment can be supported through configured workflows and specialized solutions. BizTech has developed Consignment Processing functionality for Acumatica.
Does Acumatica support kits?
Yes. Acumatica supports kit scenarios, and BizTech has developed additional Kit Processing functionality for more specialized kit and component workflows.
How much does Acumatica Distribution ERP cost?
There is no universal fixed price. Cost depends on Acumatica applications, resource requirements, deployment, warehouses, WMS, planning functionality, integrations, migration, customization, reporting, training, and support.
How long does Acumatica Distribution implementation take?
Implementation time depends on the number of entities, warehouses, items, customers, pricing rules, DRP requirements, WMS, integrations, eCommerce channels, EDI, migration complexity, testing, and user availability.
Can BizTech implement Acumatica Distribution Edition?
Yes. BizTech is an Acumatica Gold Partner providing implementation, data migration, custom development, eCommerce and marketplace integrations, warehouse integrations, EDI, automation, reporting, testing, training, and ongoing support.
Why choose BizTech for Acumatica Distribution implementation?
BizTech combines Acumatica implementation expertise with proprietary solutions for Amazon, Shopify, WooCommerce, Magento, ShipHero, ShipStation, DSCO, CommerceHub, PayPal, Salesforce, ServiceTitan, EDI, consignment, kits, and custom business systems. This is particularly valuable for distributors operating across many connected sales and fulfillment channels.
How to Sync WooCommerce Inventory with Acumatica
How to Sync WooCommerce Inventory with Acumatica
Synchronizing WooCommerce inventory with Acumatica gives an online store a stock figure derived from the warehouses and quantity definition selected in the ERP. In the Biz-Tech WooCommerce Connector, inventory quantity flows from Acumatica to WooCommerce through the Export WooCommerce Inventory Quantities processing screen. A reliable setup depends on more than running that process: products must be linked, inventory details must be loaded and selected, warehouses must be included, and the correct quantity basis must be chosen.
This guide explains the documented workflow for WooCommerce inventory sync with Acumatica, the fields that control the result, and the checks that help prevent missing products or misleading availability.
How WooCommerce Inventory Sync with Acumatica Works
Acumatica is the source of the quantity exported by this connector workflow. For every eligible item, the connector totals the selected quantity across all warehouses included on the WooCommerce Store's Warehouse Details tab. That combined value appears on the Export WooCommerce Inventory Quantities processing screen and can then be sent to WooCommerce.
The quantity type is configurable. The documented choices are On Hand, Available, and Available for Shipment. This choice matters because each measure represents a different view of stock. The connector documentation identifies the options but does not prescribe one universal choice; the business should select the measure that matches its promise to online customers.
Prerequisites for Acumatica WooCommerce Inventory Integration
Before syncing quantities, confirm the connector package has been published and the WooCommerce workspace is available in Acumatica. Configure the connection in WooCommerce Store Preferences with the Store Code, Base URL, Consumer Key, Consumer Secret, WordPress Login, and WordPress Password. Use Test Credentials and continue only after Acumatica reports that the credentials are valid.
The WooCommerce REST API keys are generated in WooCommerce under Settings, Advanced, REST API. The source documentation says to add a key, select the WordPress user and access level, and generate the Consumer Key and Consumer Secret. Because the connector updates WooCommerce, the credentials must provide the access required by the intended integration operations.
Three item-level conditions must also be satisfied before a product appears on the quantity processing screen:
1. The product must already be represented as a WooCommerce item in Acumatica.
2. The item must be loaded, checked, and saved in the Inventory Details or Item Details area of the WooCommerce Store setup.
3. At least one relevant warehouse and a quantity type must be selected on the Warehouse Details tab.
Practical Workflow to Sync WooCommerce Inventory with Acumatica
1. Open WooCommerce Store Preferences, enter the WooCommerce connection values, and run Test Credentials. Saving the credentials establishes the store connection used by the remaining connector screens.
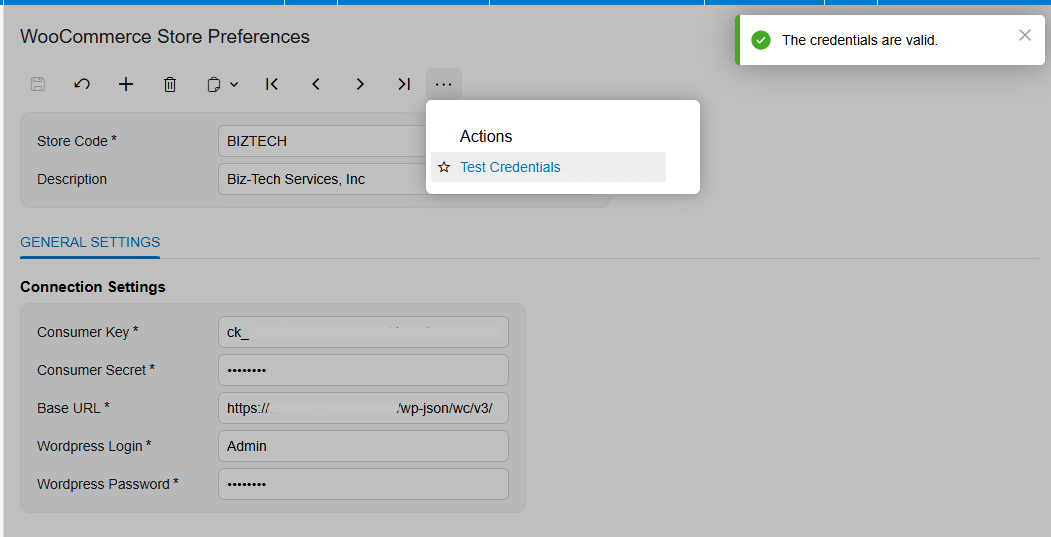
2. Open the WooCommerce Store screen for the correct Store Code. If one store should be preselected on processing screens, select Default Store in the header.
3. Review Item Settings. Decide whether the connector may create missing Acumatica items during imports by using Import Item. When matching imported products, the connector searches Acumatica Inventory CD using the WooCommerce Product SKU. If Import Item is off and no match exists, the process returns an item-not-found error.
4. Establish the product link. On Item Details, load Acumatica items or WooCommerce items as appropriate, select the required records, and synchronize them. When an Acumatica item is created in WooCommerce, WooCommerce generates a product ID that is stored in Acumatica. For exports, the connector uses the Acumatica Inventory CD as the WooCommerce SKU.
5. On the Warehouse Details tab, add every Acumatica warehouse whose stock should contribute to the web quantity. Exclude warehouses that should not support ecommerce availability.
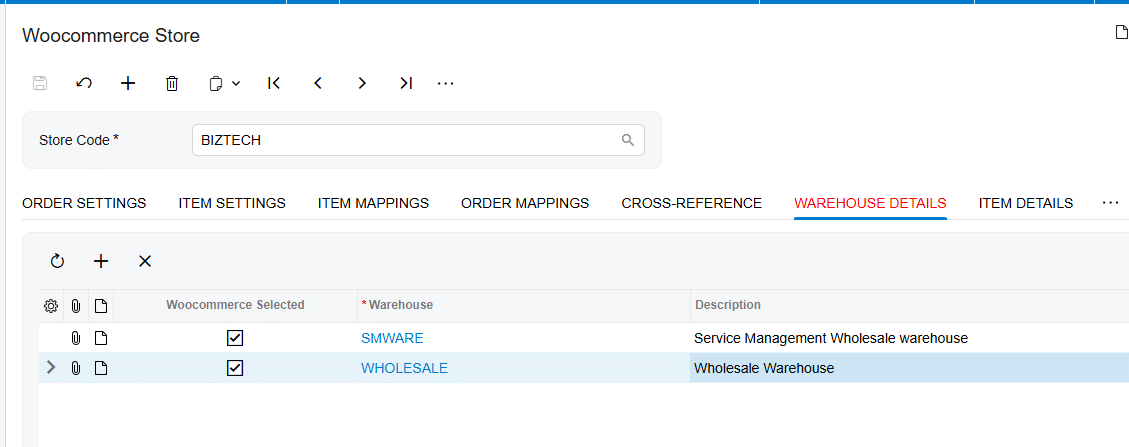
6. For each included warehouse, select the quantity basis: On Hand, Available, or Available for Shipment. Use one definition that reflects the operational meaning of stock you want WooCommerce shoppers to see.
7. Return to Item Details or Inventory Details, load the relevant inventory, check the items to include, and save. A product that is not loaded, selected, and saved will not meet the documented eligibility requirements for the quantity screen.
8. Open Export WooCommerce Inventory Quantities. Select the Store Code if it is not already supplied by Default Store, then review the eligible products and calculated values.
9. Compare Quantity with the expected aggregate from the selected warehouses. Quantity is read-only and shows the connector's calculated total. WooCommerce Quantity is editable and is the value to be synchronized, allowing an operator to adjust the outgoing amount when the business process requires it.
10. Process the selected items. After a controlled manual run validates the setup, configure the screen's scheduler if recurring automatic synchronization is needed.
Key Fields and Settings That Control Inventory Sync
Store Code and Default Store
Store Code identifies the WooCommerce store connected to the process. In a multi-store environment, selecting the wrong store can direct product or quantity updates to the wrong endpoint. Default Store can automatically populate Store Code on processing screens, reducing repetitive selection while making it important to verify the default.
Warehouse Details
Warehouse Details defines the inventory locations included in the calculation. The connector adds the chosen quantity across all selected warehouses and presents one combined quantity for each item. The source does not describe warehouse-specific quantities in WooCommerce, allocation rules, or safety-stock deductions, so those behaviors should not be assumed.
Quantity Type
The quantity basis can be On Hand, Available, or Available for Shipment. Validate the selected basis against a sample item in Acumatica before enabling automation. A technically successful export can still publish an unsuitable figure if the chosen measure does not match the ecommerce fulfillment policy.
Quantity and WooCommerce Quantity
On the processing screen, Quantity is the read-only aggregate calculated from Acumatica. WooCommerce Quantity is editable and represents the amount selected for synchronization. Treat edits as controlled exceptions and document why an override was used, because repeated manual changes can obscure whether the warehouse setup is producing the intended result.
SKU and WooCommerce Product ID
Product identity is foundational. During WooCommerce-to-Acumatica item lookup, the connector searches Inventory CD by WooCommerce SKU. During Acumatica-to-WooCommerce export, Inventory CD becomes the WooCommerce SKU. A newly created WooCommerce product receives a unique WooCommerce ID, which is displayed in the WooCommerce Store and on the Stock Item's WooCommerce Inventory tab.
Monitoring and Validation
Start with a small, representative set that includes a single-warehouse item, a multi-warehouse item, and a product with low or zero stock. For each item, confirm the SKU and WooCommerce product ID, verify that the item is selected and saved, and recalculate the expected total using only the warehouses and quantity basis configured in Warehouse Details.
On Export WooCommerce Inventory Quantities, compare the read-only Quantity with that expected total and review any edited WooCommerce Quantity before processing. After the run, inspect the matching product in WooCommerce to confirm that its inventory reflects the intended value. The connector's export processing is batch-oriented; the documentation states that Export Item Processes sends one API request for 100 items, which is useful context when assessing batch behavior.
For scheduled synchronization, validate at least one manual cycle first, then review subsequent runs for omitted products, unexpected totals, and stale values. The documentation confirms that quantity synchronization can run manually or through a scheduler, but it does not specify a recommended frequency, retry policy, or dedicated quantity-error screen. Set the interval and operational review procedure according to order volume and stock volatility.
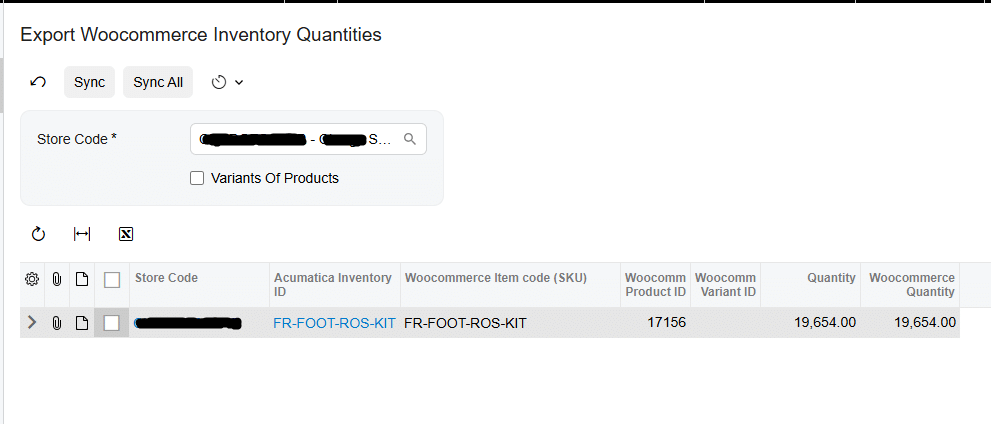
Common Pitfalls
1. Missing items on the processing screen. Confirm that each product is already a WooCommerce item in Acumatica and is loaded, checked, and saved in the store's inventory details.
2. Incorrect aggregate stock. Recheck which warehouses are selected and whether the quantity basis is On Hand, Available, or Available for Shipment.
3. SKU mismatches. WooCommerce SKU and Acumatica Inventory CD are central to item identification. Missing or inconsistent values can prevent matching; if SKU generation is enabled but its numbering sequence is absent, the connector reports an error.
4. Unintended manual overrides. Because WooCommerce Quantity is editable, an operator can send a value different from the calculated Quantity. Review overrides before processing.
5. Assuming item mapping applies to Acumatica item export. The documentation says Inventory Mapping does not support mapping during Acumatica item export; it is available for mapping WooCommerce items to Acumatica during import.
6. Automating too early. First verify credentials, item links, warehouse inclusion, quantity definition, and the resulting web stock with a limited manual run.
Frequently Asked Questions
Which system supplies the inventory quantity?
In the documented quantity export workflow, Acumatica supplies the value. The connector calculates quantity from the selected Acumatica warehouses and exports it to WooCommerce.
Can inventory from multiple Acumatica warehouses be combined?
Yes. The connector totals the chosen quantity across all warehouses selected on Warehouse Details and displays that combined amount on the processing screen.
Which Acumatica quantity can be synchronized?
The documented options are On Hand, Available, and Available for Shipment. The correct choice depends on how the business defines sellable ecommerce inventory.
Why is a product missing from Export WooCommerce Inventory Quantities?
Check the three documented requirements: it must exist as a WooCommerce item in Acumatica, be loaded and saved in Inventory Details, and have the required warehouse and quantity selection configured.
Can the inventory sync run automatically?
Yes. The quantity synchronization can be run manually or through a scheduler. The source does not specify a universal schedule interval, so test manually and choose timing that fits the operation.
Can I change the quantity before sending it to WooCommerce?
Yes. Quantity is read-only, while WooCommerce Quantity is editable. Any override should be reviewed because it can differ from the Acumatica aggregate.
Build a Reliable Acumatica WooCommerce Inventory Workflow
A dependable WooCommerce inventory sync starts with product identity and a deliberate inventory policy. Validate credentials, connect each product, select only the warehouses that support online fulfillment, choose the right quantity basis, and compare calculated values before processing. Once the manual workflow is proven, scheduling can keep WooCommerce stock aligned with Acumatica while routine checks catch exceptions.
Need help configuring or validating the connector? Contact Biz-Tech Services to discuss your WooCommerce and Acumatica integration.

