Today, we’re focusing on the absolute lifeblood of modern e-commerce. We’ve got a rapid-fire explainer lined up for you, entirely dedicated to configuring the Biz-Tech software to link your Acumatica ERP directly with your Shopify storefront. We’re skipping all the fluff today. We’re diving straight into the UI to look at the exact setup screens, the configuration toggles, and the mapping logic that makes Day One automation a reality.
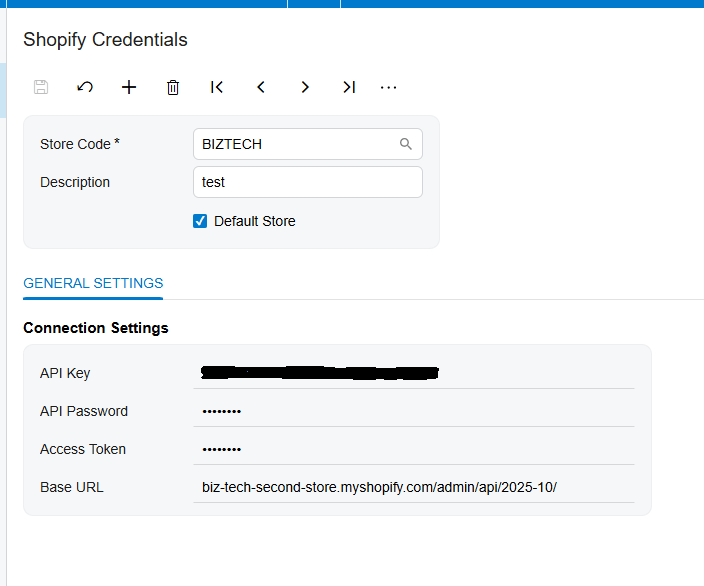
First up on the list: Shopify credentials. Honestly, this is the bedrock of your entire integration because before a single piece of inventory can even think about syncing, Acumatica and Shopify need a secure encrypted line of communication. And right below that, you’ve got your API key, password, and access token. Now, these aren’t just random strings of text. These are the secure digital handshakes that authorize the system to pull and push your valuable data. It’s really just three straightforward steps: Create a unique store code, enter your secure API keys, and test the connection.
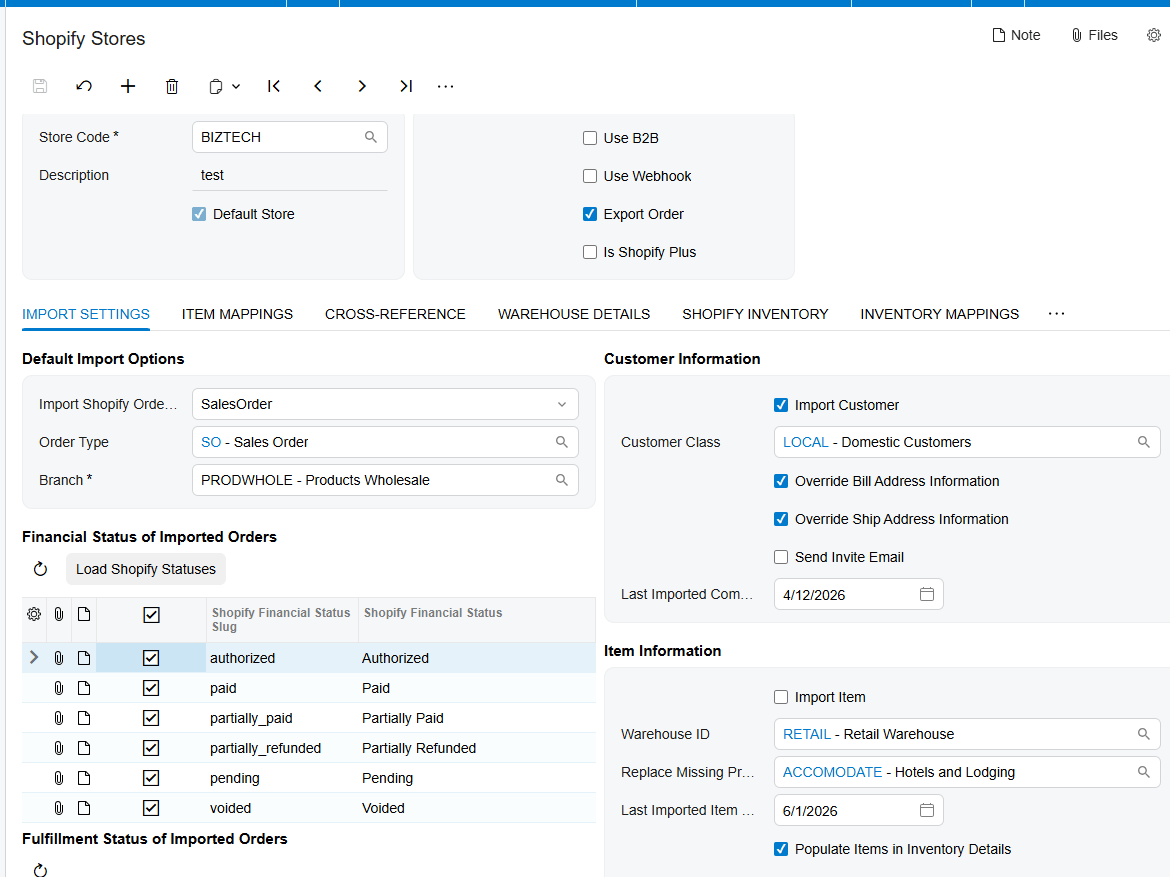
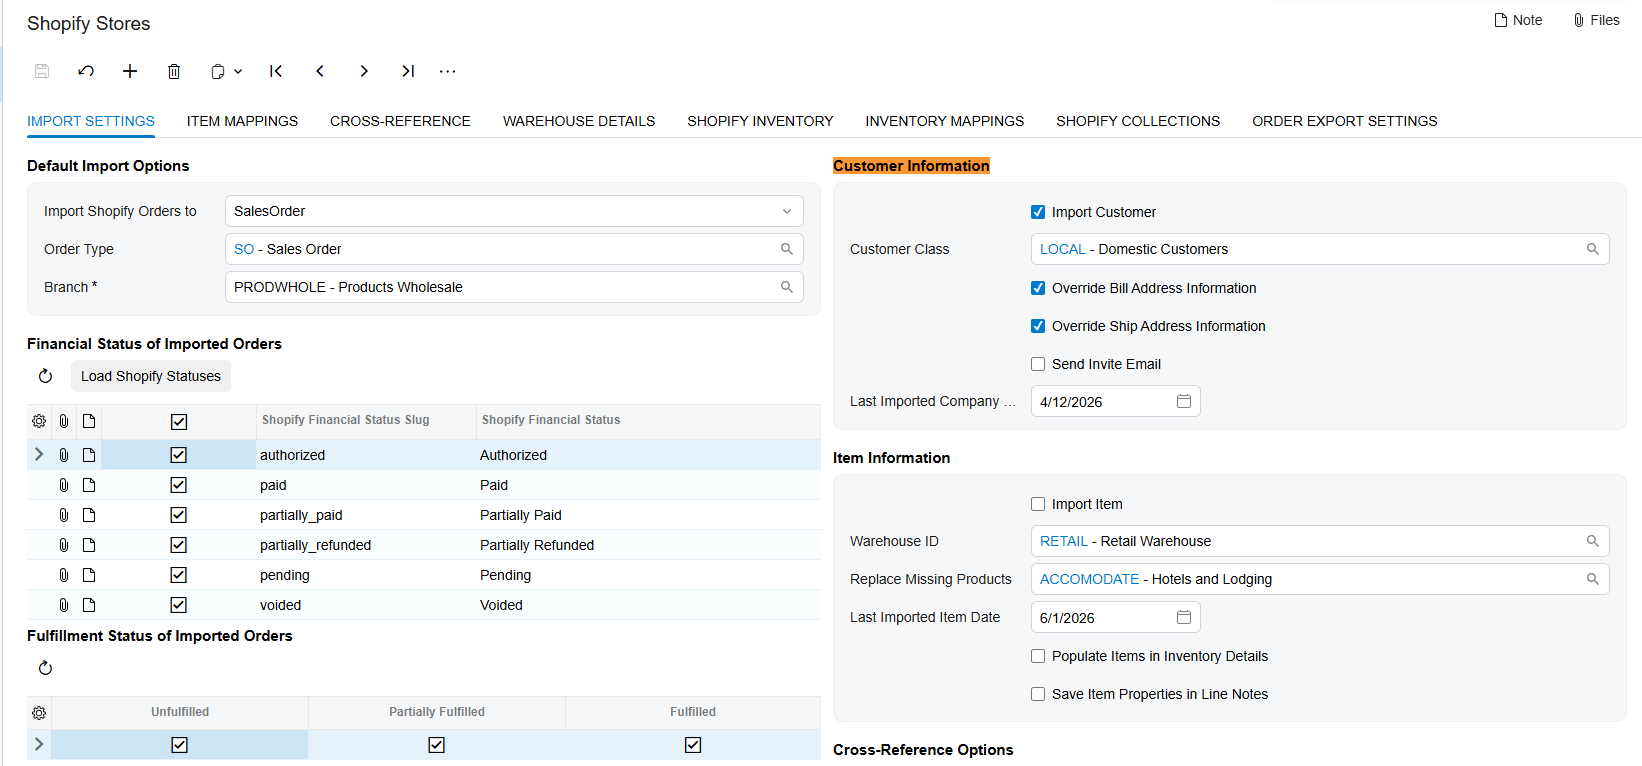
Let’s move over to the import settings. And I’ve got to say, this is where the sheer flexibility of the Shopify connector really starts to shine. Take a look at the default import options section. You aren’t forced into one rigid path here at all. You can dynamically map incoming Shopify orders so they land in Acumatica as standard sales orders, sales order invoices, or even direct accounts receivable invoices. It totally adapts to how your specific branch actually operates.
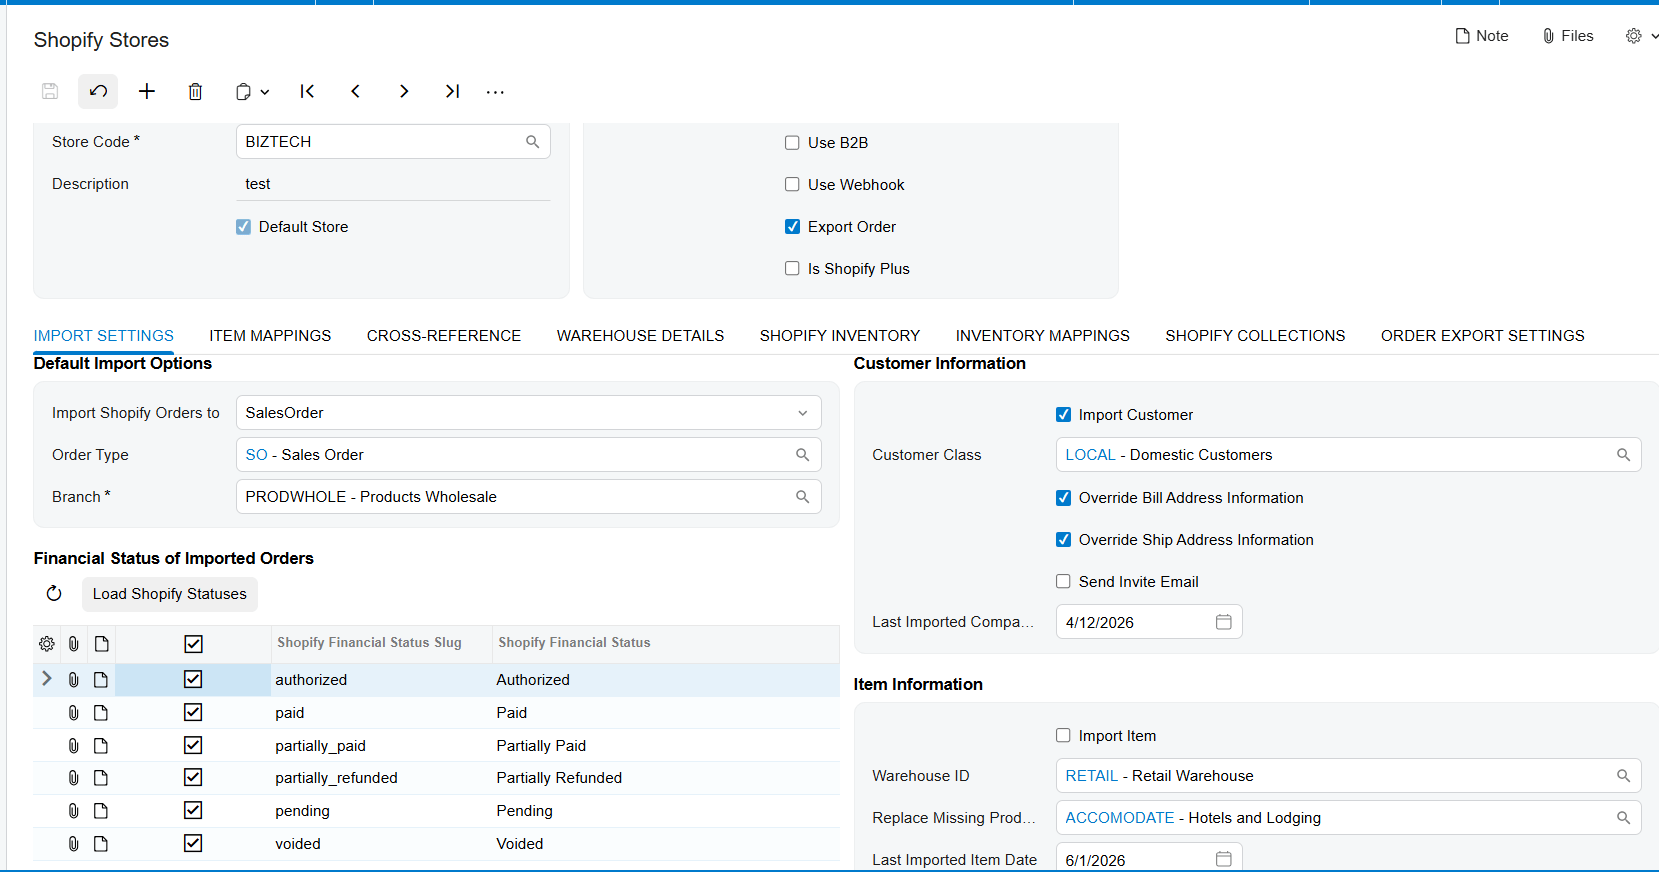
Now, sticking with that same screen, but just panning down a bit, we hit the financial status mapping matrix. What’s super fascinating here is how it bridges the language barrier between e-commerce and enterprise accounting. Shopify uses these very specific statuses, right? Things like ‘authorized’ or ‘partially_refunded’. Well, this matrix lets you map those exact tags directly into Acumatica. So, an order marked ‘paid’ in Shopify instantly behaves exactly like a paid entity in your ERP. Zero guesswork required.
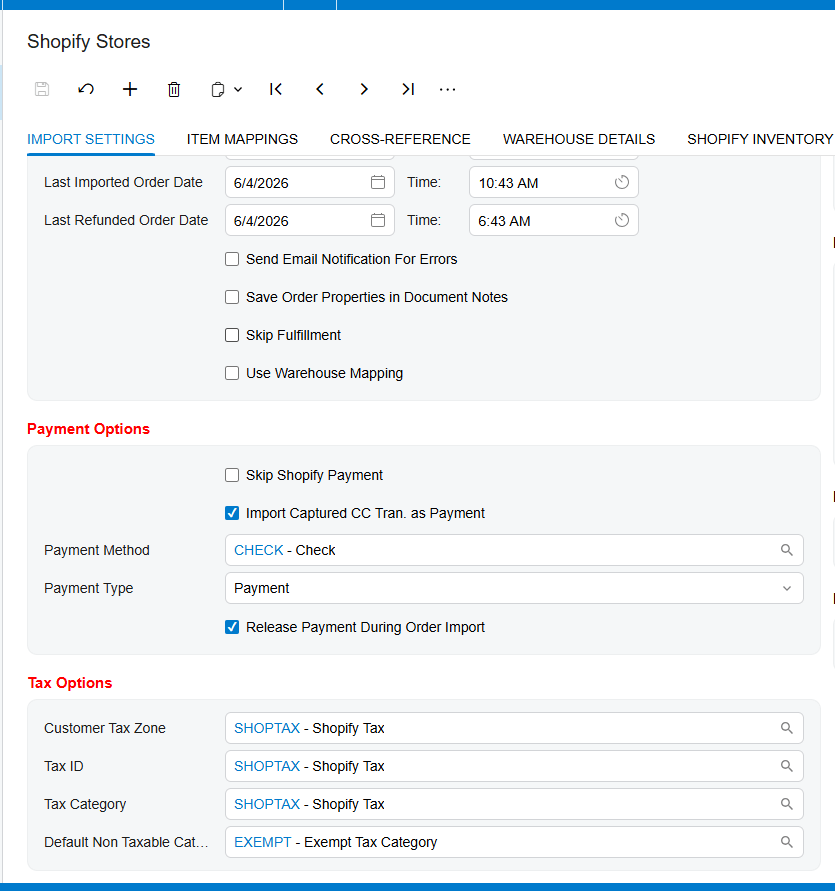
Continuing on with the financial setup, let’s look at the payment options block. When a customer swipes a credit card on your Shopify store, that captured transaction obviously needs a home in Acumatica. See that ‘payment method’ field that’s currently set to ‘check’? This allows you to meticulously link those digital transactions to your internal payment types in the ERP. You can even set it to automatically release the payment right during the import. That means you’re automating cash receipts from the exact second the customer hits checkout. Right below payments: taxes. You’ll notice fields for customer tax zone, tax ID, and tax category. And they’re mapped here with the code ‘shop tax’. Since tax liability is usually determined by where the customer or vendor is geographically located, this configuration makes sure the integration automatically assigns the correct tax zones and filters out exempt items.
Glancing over to the right side of the import settings, we find the customer and item information panels. Just imagine a brand new customer buys a newly launched product variant on your site. Well, by simply checking ‘import customer’ and ‘import item,’ the system automatically ingests that fresh data and builds entirely new profiles and inventory records in Acumatica totally from scratch.
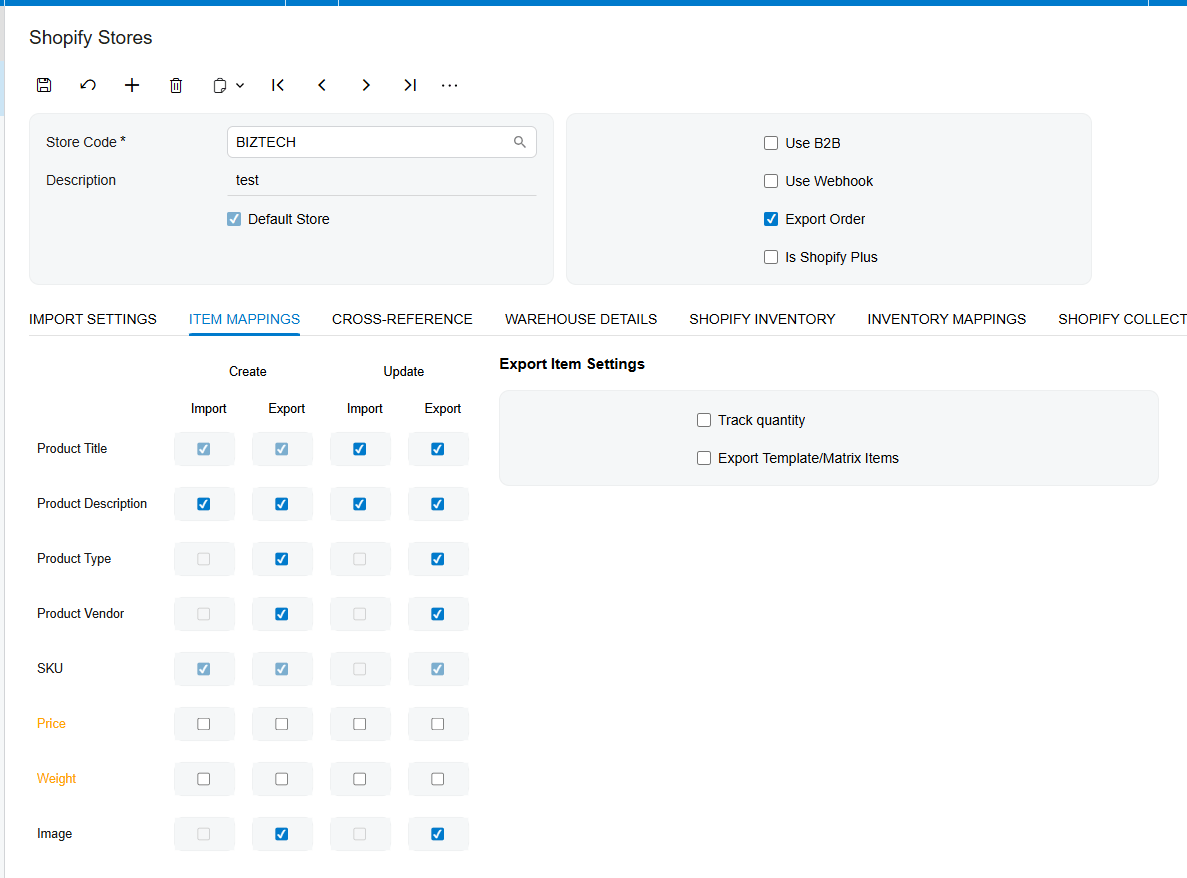
Let’s zoom in a little tighter on the item mappings tab. Think of this as the absolute control center for your product data. Notice those columns: create, update, import, and export. This is bidirectional synchronization in action. Basically, you dictate exactly which system is the source of truth. Want Acumatica to control the price and push it out to Shopify? Check ‘export’. Want Shopify to dictate the product description? Check ‘import’. If you leave these specific mapping checkboxes unselected for fields like price or weight, the Shopify integrator is going to bypass them entirely during its sync cycle.
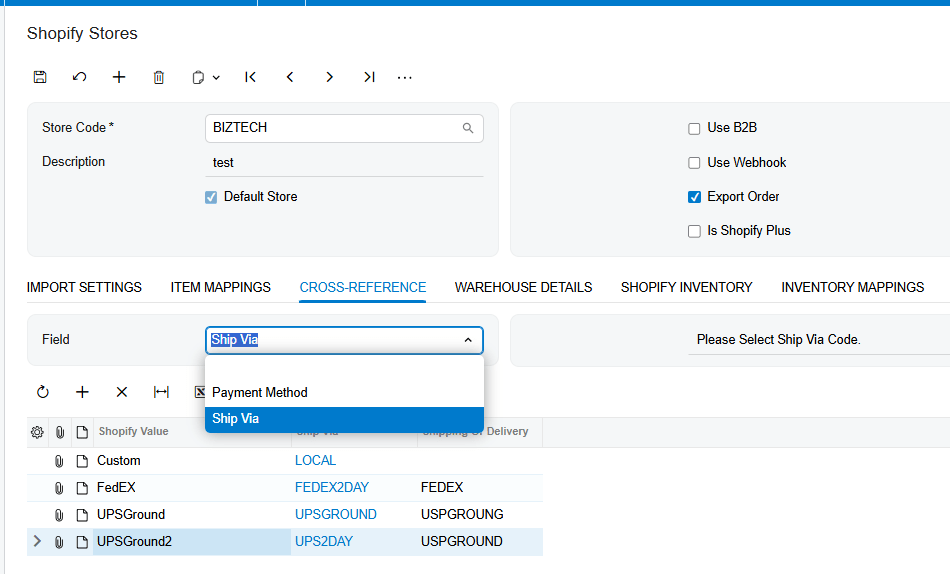
Next up is the cross-reference tab. This drop-down functionality maps Shopify shipping carriers precisely to Acumatica’s ‘ship via’ codes. For example, if a customer selects UPS ground at checkout, mapping UPS ground to your internal code makes sure the delivery settings on the sales order are populated flawlessly. Similarly, by toggling the field selector to Payment Method, you can map your Shopify payment sources directly to your corresponding Acumatica payment types to ensure accurate financial tracking for every order
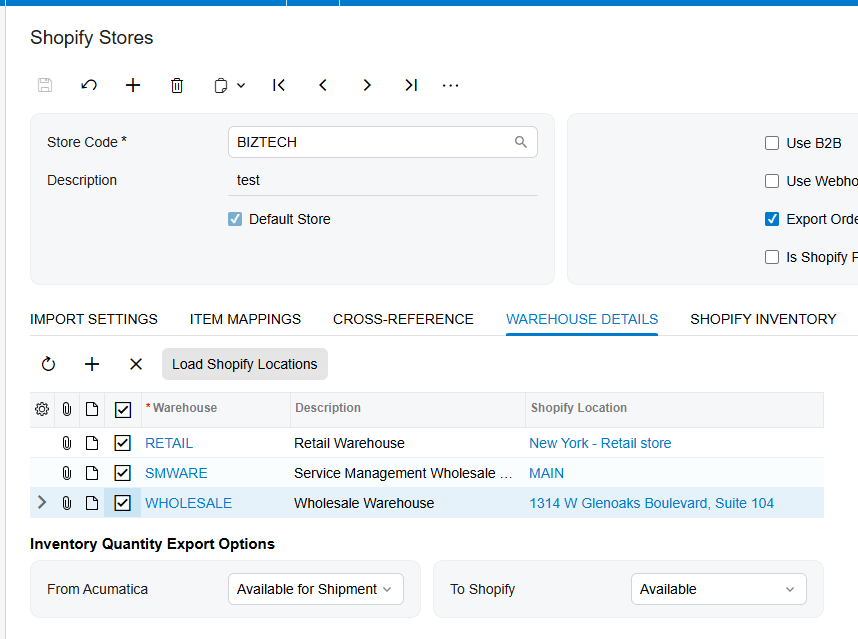
And beyond just shipping methods, we actually have to align where the physical goods reside, right? That’s done through location synchronization. This underlying logic maintains flawless warehouse data between both platforms. The crucial detail here is that the location ID from Acumatica is securely stored directly within Shopify’s info tab. This precise link ensures that inventory is decremented from the correct physical warehouse, preventing that nightmare of overselling and keeping your physical and digital shelves perfectly aligned.
A tool like the Biz-Tech Shopify connector is incredibly powerful, but its true magic relies entirely on the precision of these initial setups. So, review your own implementation checklists, tune those default options, and prepare to truly reap the rewards of seamless automation.”