
Shopify Acumatica Connector Configuration Checklist
Launching a new integration between your Shopify storefront and your Enterprise Resource Planning system, or ERP, is an exciting step toward total business automation. At Biz-Tech Services, we’ve seen that the most successful go-live events are the result of meticulous preparation. Before you turn on the automated sync, it’s essential to follow a structured pre-launch checklist. This makes sure your data is mapped correctly, your settings align with your business rules, and your team is ready to handle the flow of information. By verifying these steps now, you prevent common integration hurdles and ensure a seamless experience for your customers from day one.
Establishing required configuration
Your first step begins with the technical foundation inside Acumatica. Before any data can move, confirm that your Acumatica system is running one of the approved licenses for the connector, specifically the PCSR, PERP, or SAAS license types. Once the license is confirmed, you move to installation. On the Customization Projects form, you upload the Biz-Tech Shopify Connector deployment package. It’s vital to validate the project first, to catch any environment conflicts, before you publish the customization to your tenant.
With the package published, a Shopify workspace appears in your menu, and your next priority is establishing the secure bridge between the two platforms. On the Shopify Credentials screen, you input your Application Programming Interface, or API, details. That includes your API key, your API password, your access token, and your store’s base web address. We highly recommend using the Test Credentials action right after entering this data. A successful test confirms that Acumatica can communicate with the Shopify API, which is your green light to begin the detailed configuration.
Data preparation and strategic mapping
Once the connection is live, you define how the two systems will share information. Start on the Shopify Stores screen by setting your store code and description. If your business operates in a business-to-business, or B2B, environment, make sure to select the Use B2B option. This is critical, because it enables Shopify Plus features like company profiles, multiple contacts per company, and custom price lists. Whit this option enabled, the Biz-Tech Services Shopify Integrator maps the Acumatica Customers to Shopify Companies and Acumatica Contacts to Shopify Customers. Without the B2B checkbox, Acumatica Customer and Shopify Customer are mapped.
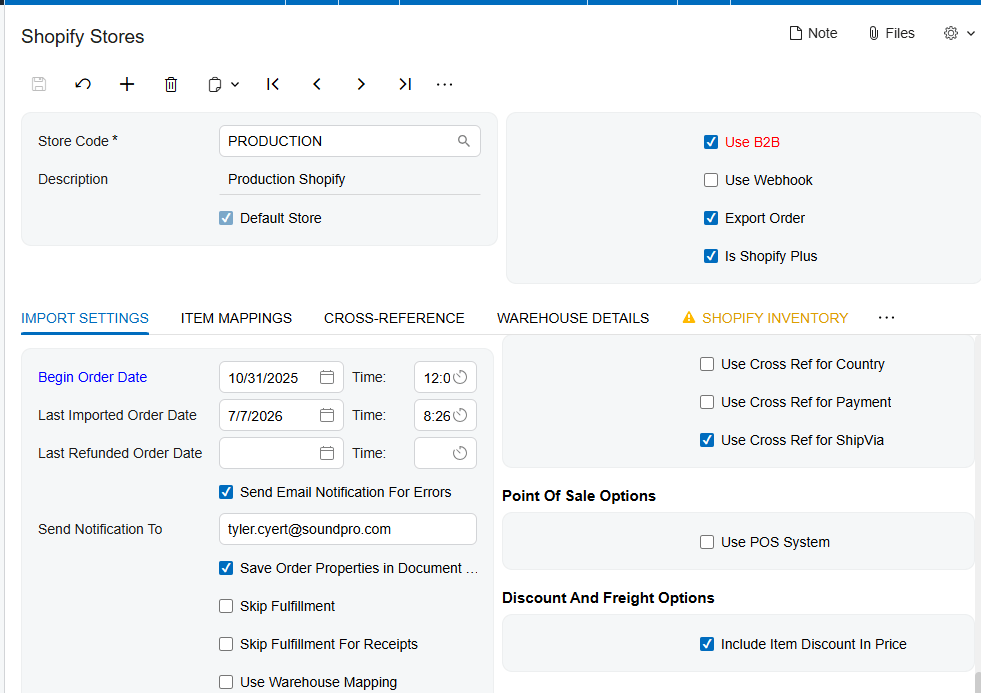
Next, prepare your order and item rules. First, confirm your begin order date. That date tells the connector exactly when to start looking for Shopify orders, and prevents accidentally importing old historical data.
For your inventory, decide whether the system should automatically create new records in your ERP when they don’t already exist. If you enable the Import Item setting, you also define the default item class, the unit of measure, or UOM, and the default warehouse. And to keep your catalog organized, consider setting up a numbering sequence for automatic Stock Keeping Unit, or SKU, generation during import.
Validation and cross-referencing
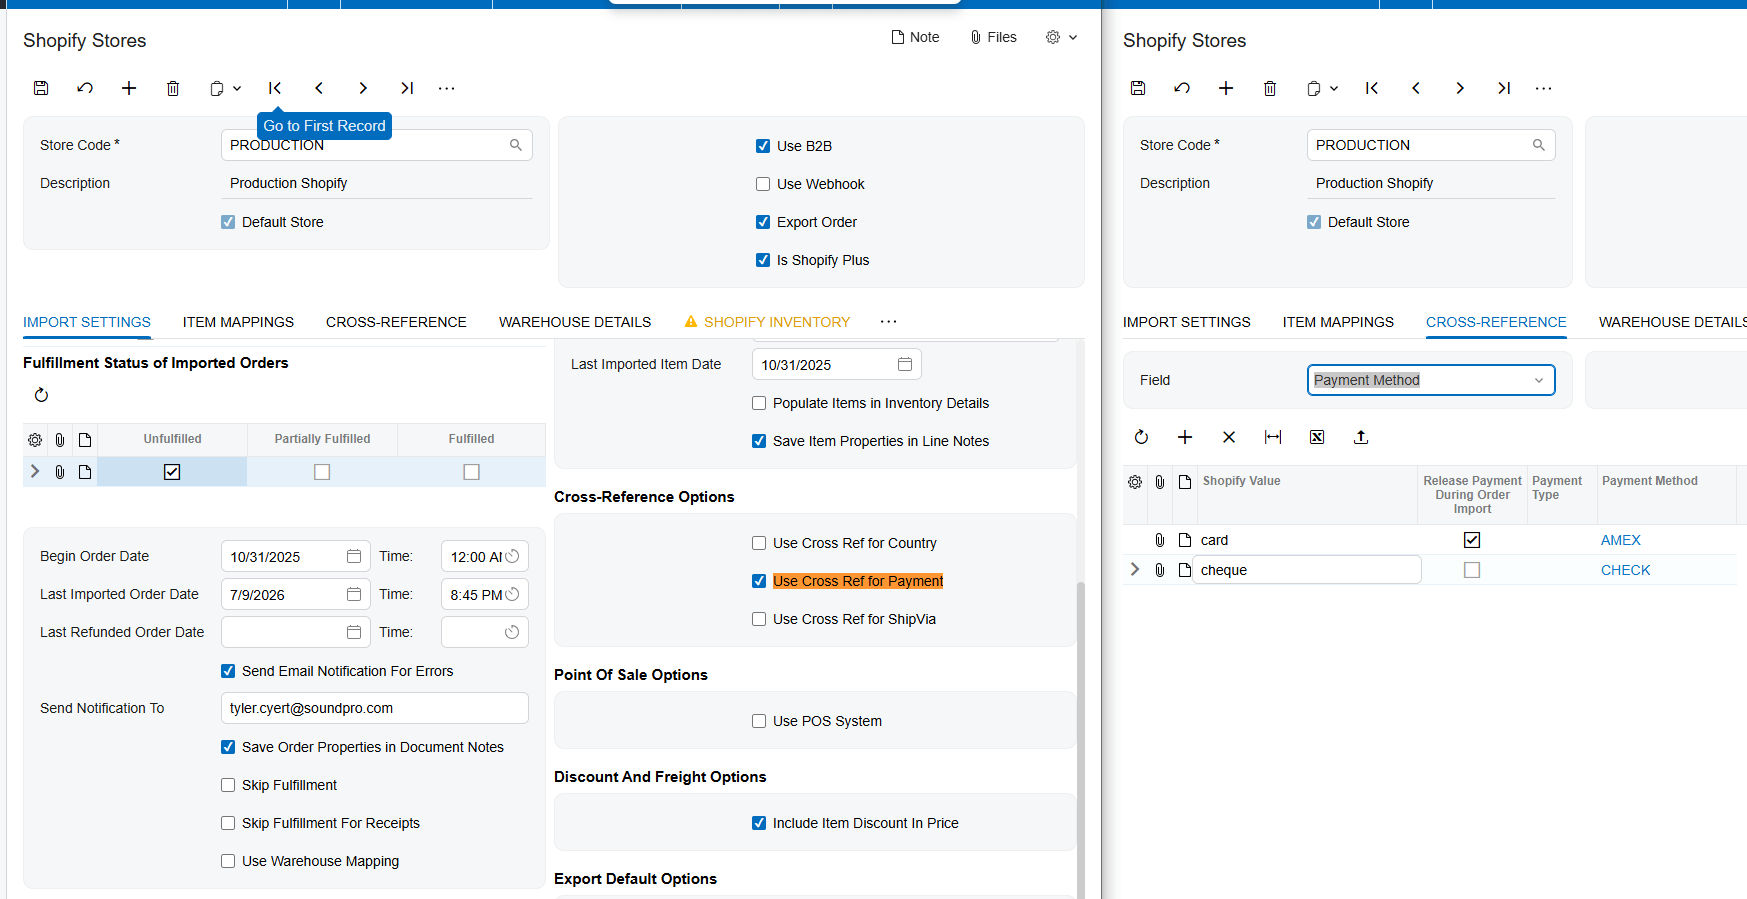
Validation is the process of making sure that specific values in Shopify have a matching home in Acumatica. In the Cross-Reference tab, your first task is to map your Shopify shipping methods to your Acumatica ship-via codes. That way, when a customer selects a shipping service on your site, it appears correctly on the sales order for your warehouse team.
You also validate your financial workflows. Make sure you’ve matched your Shopify payment methods to the corresponding payment types in Acumatica, like credit cards or electronic transfers, and if you want to automate the accounting side, you can choose to release payments automatically during order import. Don’t forget to validate your tax settings by mapping customer tax zones and tax IDs. Finally, in the Warehouse Details tab, use Load Shopify Locations to map your physical Acumatica warehouses to your Shopify locations, so the inventory quantities synced to your storefront reflect the true stock available for sale across your selected sites.
User access and B2B security
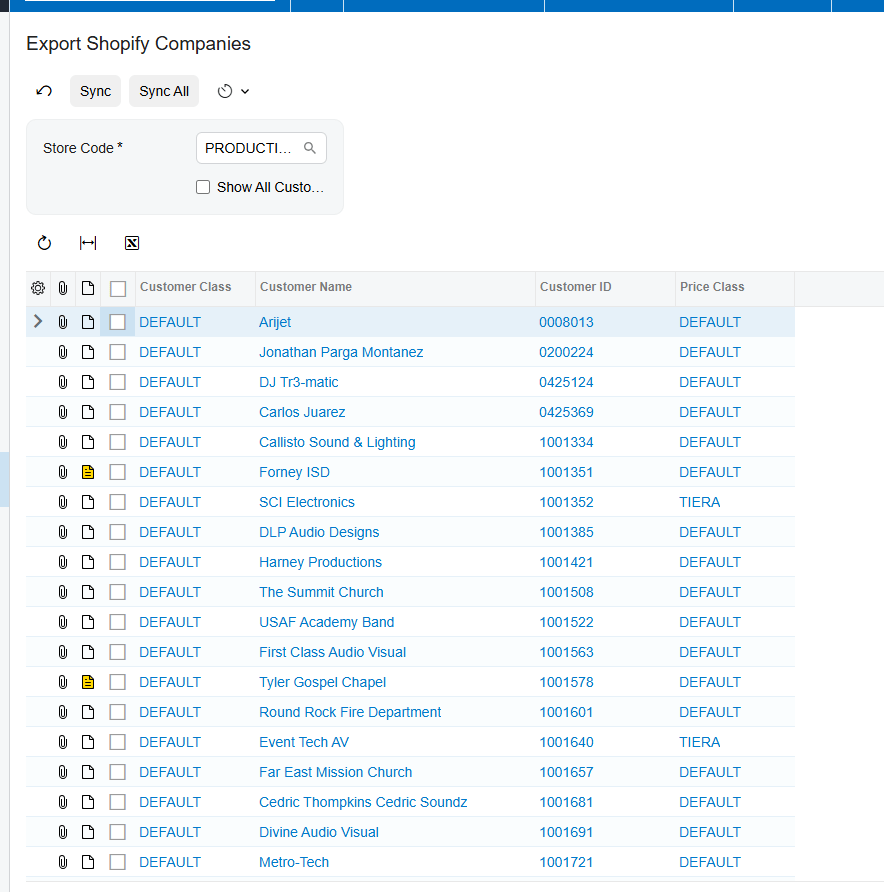
For businesses using the B2B functionality, managing user access is a key part of your readiness. Because Acumatica acts as the source of truth for customer details for Biz-Tech Services Shopify Inegrator, you need to make sure your company profiles and contacts are synchronized. When you sync a contact, the connector lets you manage the Shopify account password directly within that contact record in Acumatica. This two-way synchronization makes sure your B2B customers, their locations, and their contacts always have the correct permissions and information when they log in to your store.
Testing the workflow
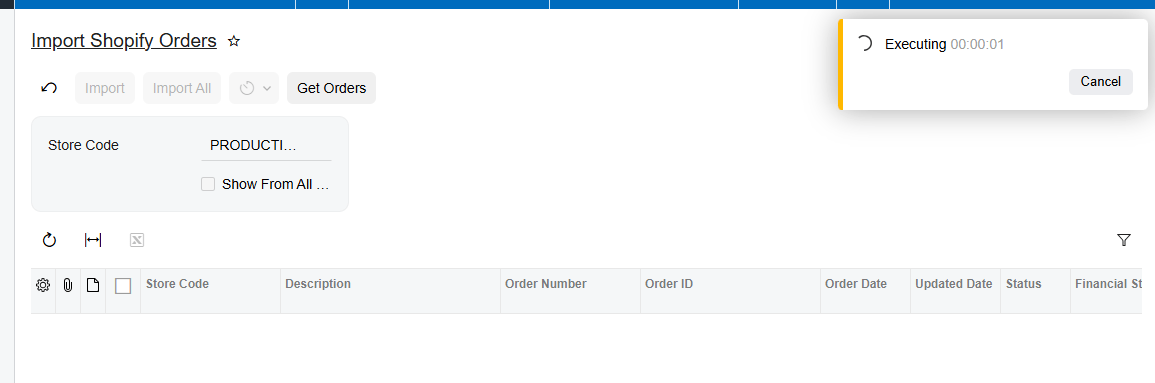
Before you flip the switch on your live environment, walk through the get-and-process cycle. Start by testing the order import. Use the Get Orders action on the Import Shopify Orders screen of Biz-Tech Services Shopify Integrator to retrieve recent web transactions, and verify that the order statuses, customer details, and line items appear exactly as they do in Shopify. Then import the records as sales orders or invoices accourding to store configuration.
Next, test your inventory and product sync. Sync a test item and its images to Shopify to confirm that descriptions and pricing flow correctly. And if your business handles returns, it’s essential to test the Import Shopify Refunded Orders process. That lets you see how the system handles different scenarios, like creating credit memos or processing customer refunds, based on whether a shipment was already confirmed in the ERP.
Go-live readiness and automation
The final stage of your checklist is moving from manual testing to full automation. To keep your data in sync without manual clicks, configure your webhook settings. By enabling webhooks for orders, fulfillments, and refunds, you let Shopify notify Acumatica the moment a change happens. Finally, set up your automation schedules for background tasks like syncing inventory quantities or sales prices.
The most important takeaway for go-live readiness is that a successful Biz-Tech Services Shopify integration isn’t just about moving data; it’s about moving the right data at the right time. When your credentials are tested, your cross-references are mapped, and your webhooks are active, you’re ready to launch.
If you’d like to see these steps in action, or want a guided tour of how the Shopify Integration with Acumatica can streamline your business, visit biz-techservices.com to schedule a demo today.

