
WooCommerce Acumatica Connector Configuration Checklist
Launching a new integration between your e-commerce storefront and your Enterprise Resource Planning system, or ERP, is a significant milestone for any growing business. At Biz-Tech Services, we know the secret to a smooth go-live isn’t just the software itself, but the preparation that happens before the first order ever flows through. A thorough pre-launch checklist makes sure your data is clean, your connection is secure, and your team is ready for the automated workflows. Follow it, and you’ll move from a manual process to a fully synchronized environment with confidence.
Establishing your required configuration
The first phase begins with the technical foundation inside Acumatica. Before you can sync any data, make sure your system is properly licensed, running one of the approved licenses, such as PCSR, PERP, or SAAS. Once that’s verified, install the Biz-Tech Services, Inc. WooCommerce Connector customization package. On the Customization Projects form, you upload the deployment package, validate the project to catch any conflicts, and publish it to your tenant.
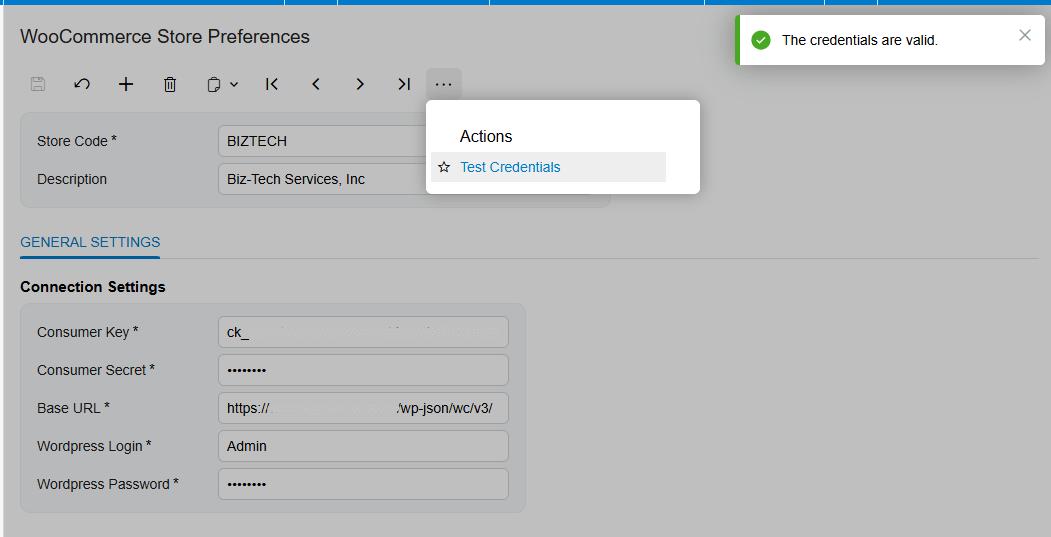
With the package published, a WooCommerce workspace appears in your Acumatica menu, and now you establish the API connection. WooCommerce Integrator works on REST API. In your WordPress site, under the WooCommerce settings, you generate a consumer key and a consumer secret with read and write permissions. Then, on the WooCommerce Store Preferences screen in Acumatica, you enter your base web address, your WordPress login, and your password. The final step here is the Test Credentials action; a message that your credentials are valid is your green light to move on.
Data preparation and strategic mapping
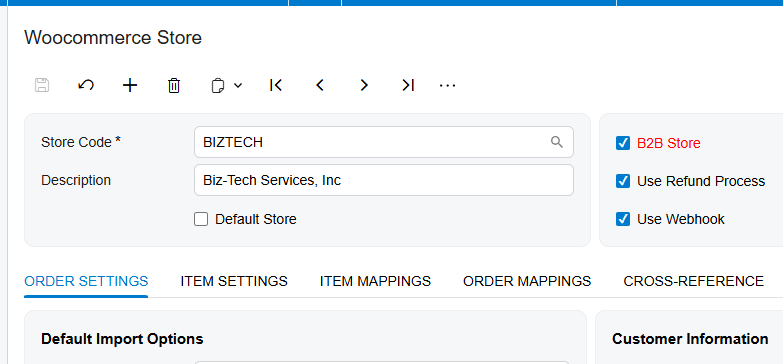
After the connection is established, you move into the WooCommerce Store screen, which acts as the brain of the integration. Your first task is to define your high-level operating rules. Decide whether you’re running a business-to-business operation by selecting the B2B Store option, which changes how customers and contacts are synchronized. With this option enabled, the Acumatica Contacts are exported to WooCommerce as Users. Withouth the option, the Acumatica Customer with its main Contact is exported to WooCommerce.
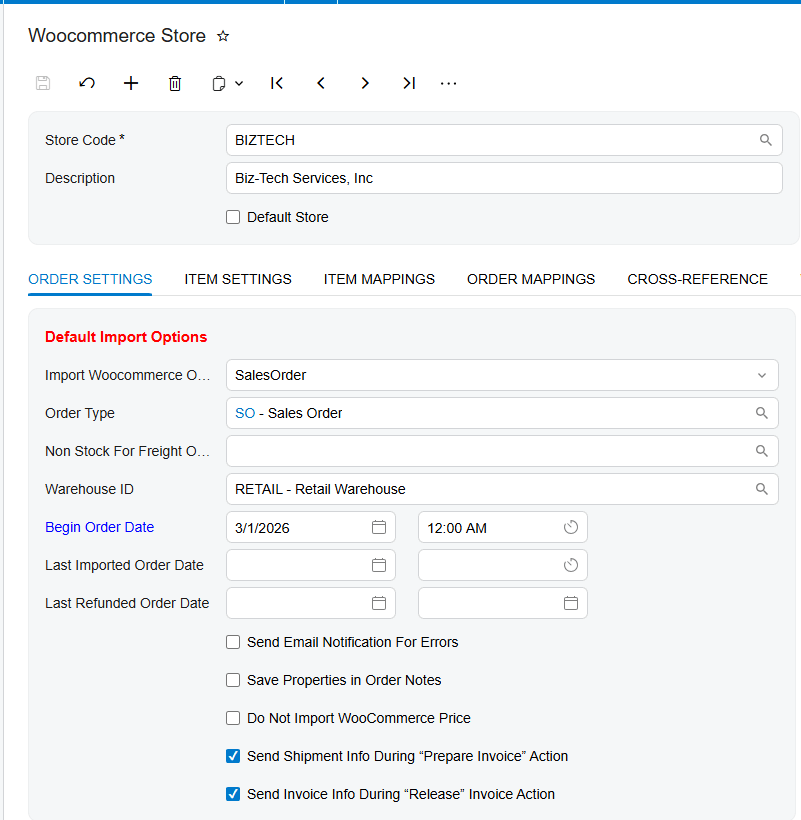
Next, prepare your order settings. Confirm the Acumatica order type and the default warehouse that will be assigned to every incoming WooCommerce order. You also set a Begin Order Date, which tells the system exactly when to start looking for orders and prevents accidentally importing years of historical data. This needs to be configured once, as after the firt Get Orders request. When a new Store code is configured, the WooCommerce Integrator automatically adds value to this field. The Last Imported Order Date is updated to provide data for next get request.
Data preparation extends to your inventory. In the Item Settings tab, define the default item class and the unit of measure, or UOM, for new items. If your business relies on specific identifiers, you can enable a numbering sequence for Stock Keeping Unit, or SKU, generation. And in the Warehouse Details tab, select the specific warehouses that contribute to the total quantity synced back to your web store, so your customers always see accurate stock levels.
Validation and cross-referencing
Validation is about making sure the language WooCommerce speaks matches the language of your ERP, and that’s handled mostly through the Cross-Reference tab. To have option avalable here, the checkboxes are required. You map your WooCommerce shipping methods to your Acumatica ship-via codes, so shipping services are identified correctly on every sales order. You do the same for payments, matching your web payment gateways, like credit cards or PayPal, to the right payment methods and types in your accounts receivable.
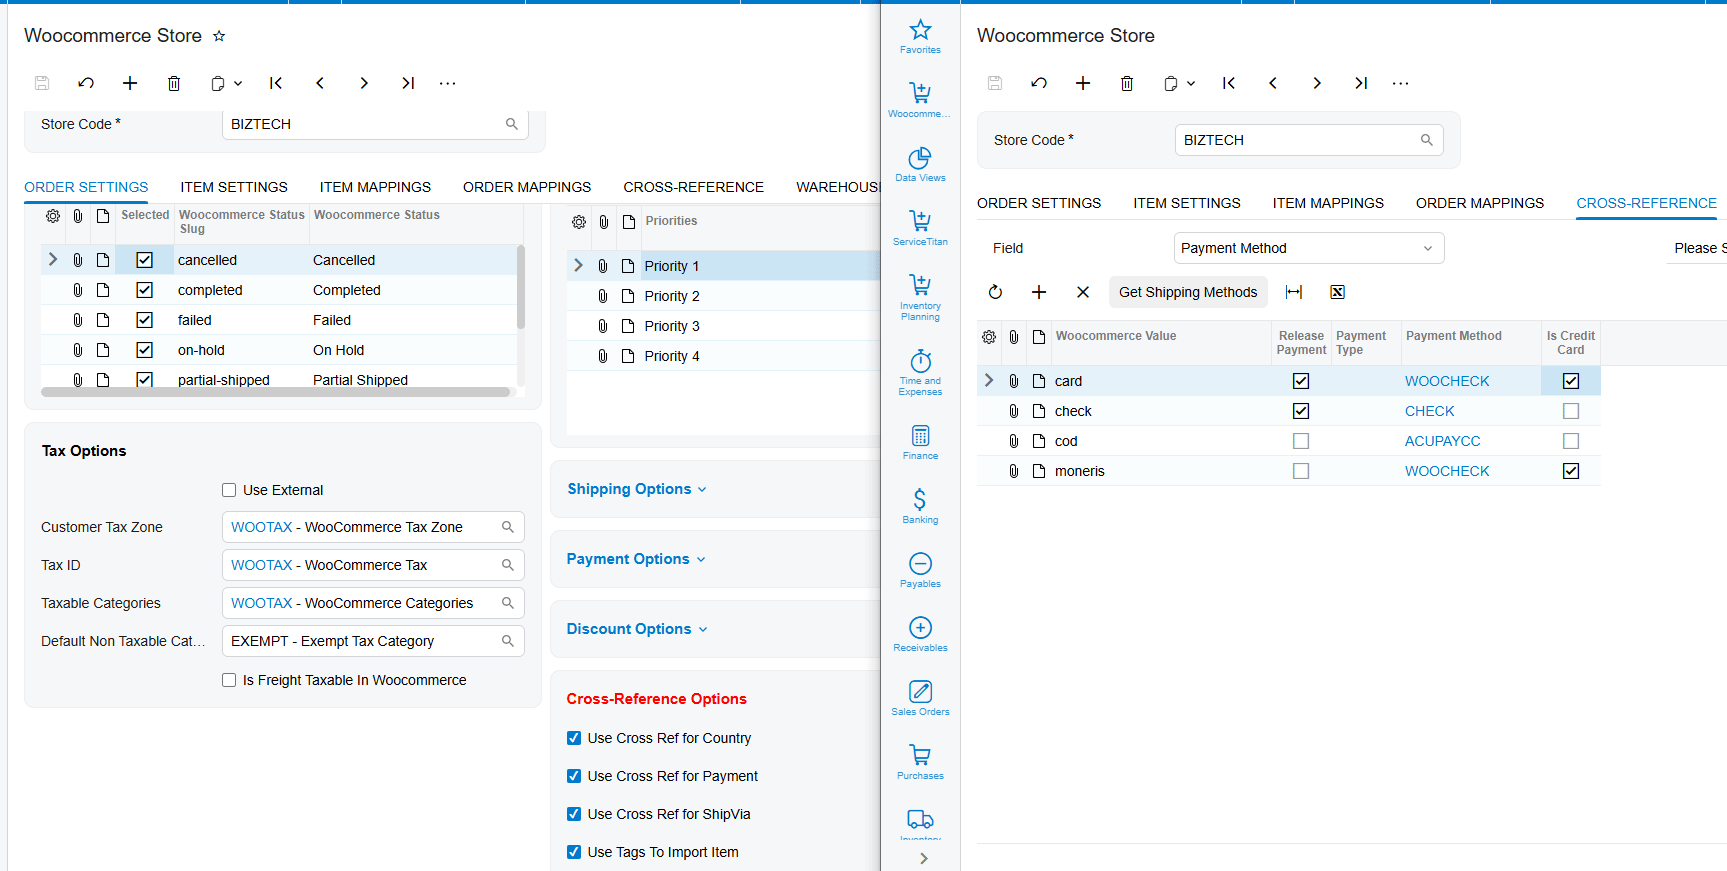
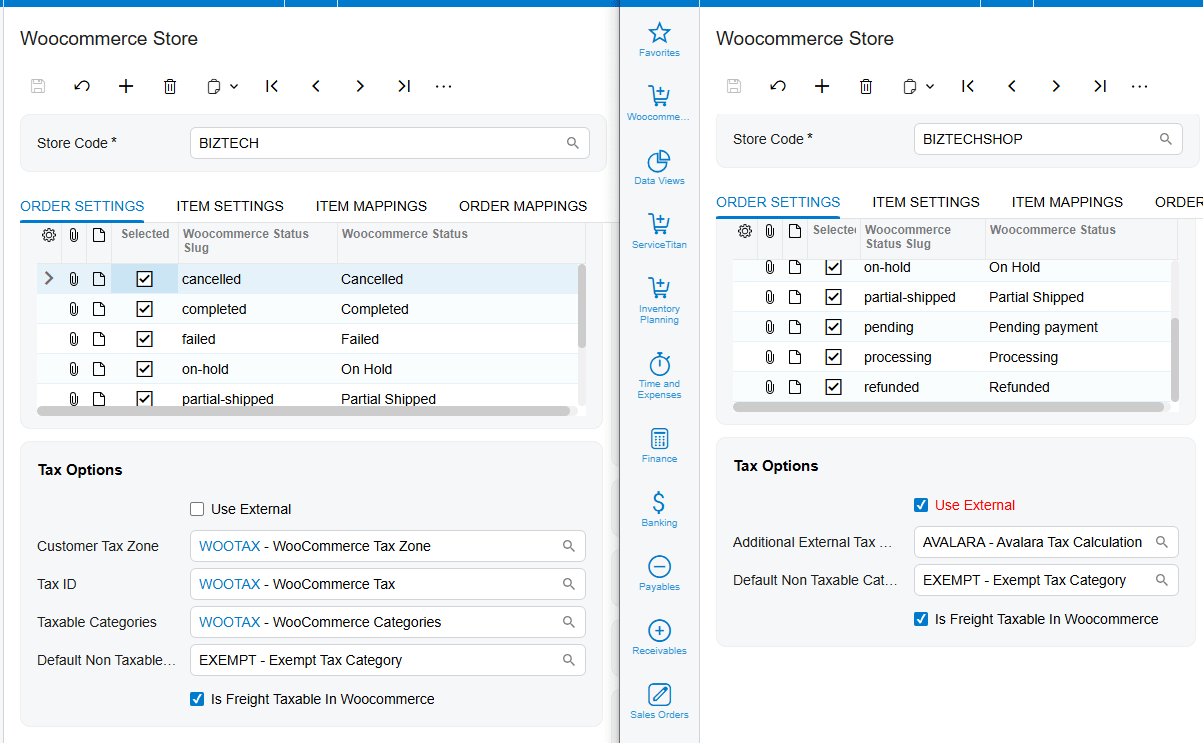
You also validate how taxes are handled. In the tax options, you decide whether to use an External Tax service like Avalara or to map specific customer tax zones and tax IDs directly.
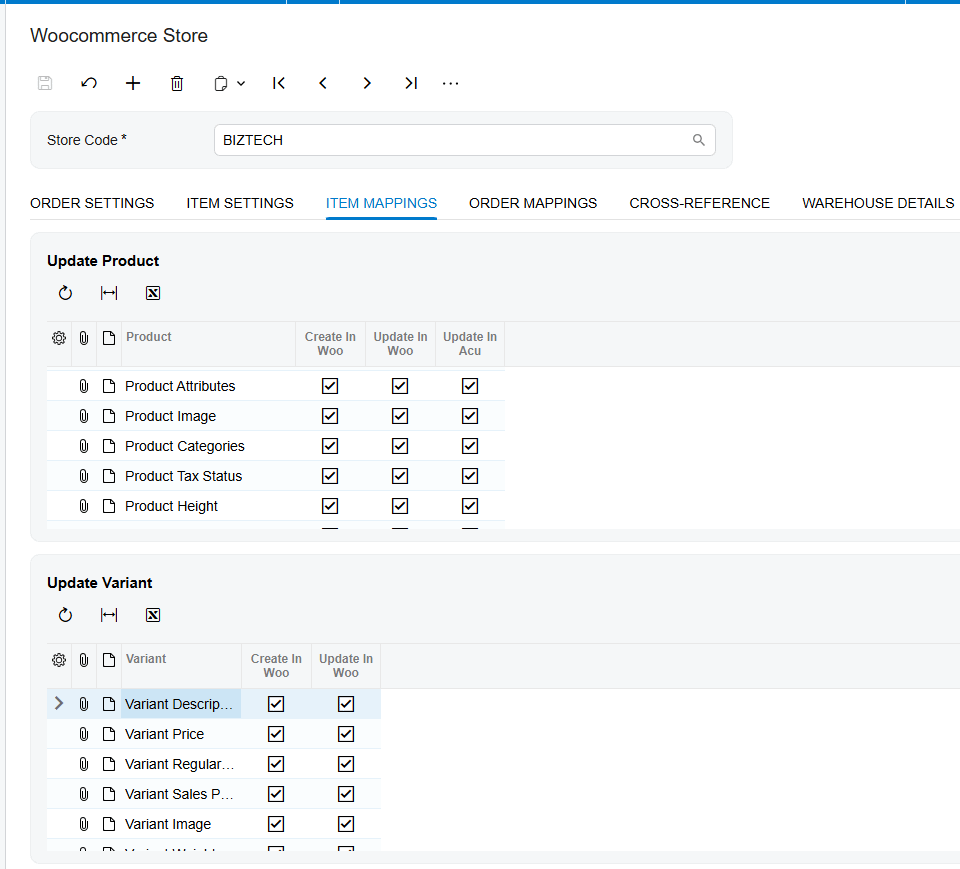
And to finalize everything, use the Load WooCommerce Fields action in the Order Mappings tab, so every piece of data, from the order date to a customer note, has a designated home in Acumatica.
User access and security
Security matters when you connect two systems. For your internal team, make sure the WordPress user tied to the API keys has the right permissions to allow the data flow. And on the Acumatica side, if you run a B2B store, remember that any contact you want to export as a web user must have a password set on their contact record.
Also, if you’re moving from an older version of the WooCommerce Connector or an existing store, use the Update Synchronized Customers action. That transfers your existing customer information into the integration tabs, so your current client base is recognized by the new system without creating duplicate records.
Testing the workflow
Never go live without a full test. Your first test should be the Get Orders process. On the Import WooCommerce Orders screen, retrieve your recent web orders and confirm they appear with the correct statuses, like Processing or On Hold. Besides Import WooCommerce Order screen, Biz-Tech Services, Inc. WooCommerce Integrator provides ability to retrieve an individual order via its WooCommerce ID on WooCommerce Orders screen.
Next, test item synchronization. Use the export item process to sync a test item, and verify that the price, description, and images appear correctly on your website. Finally, walk through a complete fulfillment cycle: import a test order, create a shipment, confirm it, and prepare the invoice. Verify that the tracking number writes back to WooCommerce and that the web order status updates to Completed. If anything goes wrong, the Get Order Process Error Messages screen helps you identify and resolve the issue.
Go-live readiness and automation
The final step is moving from manual clicks to automated efficiency. You configure your automation schedules to decide how often the system runs Get Orders and Import All, and we recommend setting those to intervals that match your business volume.
The single most important takeaway for go-live readiness is to verify your last imported order date and your warehouse quantities one last time before you enable the schedules. When those are confirmed, your integration is ready to give your customers a seamless experience and your team an efficient workflow.
If you’re ready to see how this WooCommerce connector can transform your operations, visit biz-techservices.com to schedule a personalized demo today.
WooCommerce Acumatica Connector Configuration Checklist
Launching a new integration between your e-commerce storefront and your Enterprise Resource Planning system, or ERP, is a significant milestone for any growing business. At Biz-Tech Services, we know the secret to a smooth go-live isn’t just the software itself, but the preparation that happens before the first order ever flows through. A thorough pre-launch checklist makes sure your data is clean, your connection is secure, and your team is ready for the automated workflows. Follow it, and you’ll move from a manual process to a fully synchronized environment with confidence.
Establishing your required configuration
The first phase begins with the technical foundation inside Acumatica. Before you can sync any data, make sure your system is properly licensed, running one of the approved licenses, such as PCSR, PERP, or SAAS. Once that’s verified, install the Biz-Tech Services, Inc. WooCommerce Connector customization package. On the Customization Projects form, you upload the deployment package, validate the project to catch any conflicts, and publish it to your tenant.
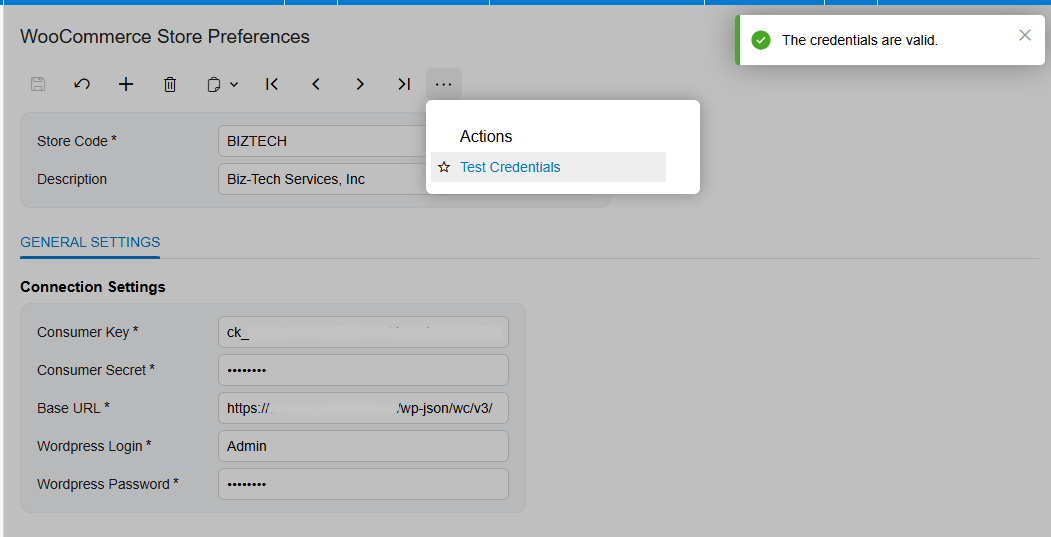
With the package published, a WooCommerce workspace appears in your Acumatica menu, and now you establish the API connection. WooCommerce Integrator works on REST API. In your WordPress site, under the WooCommerce settings, you generate a consumer key and a consumer secret with read and write permissions. Then, on the WooCommerce Store Preferences screen in Acumatica, you enter your base web address, your WordPress login, and your password. The final step here is the Test Credentials action; a message that your credentials are valid is your green light to move on.
Data preparation and strategic mapping
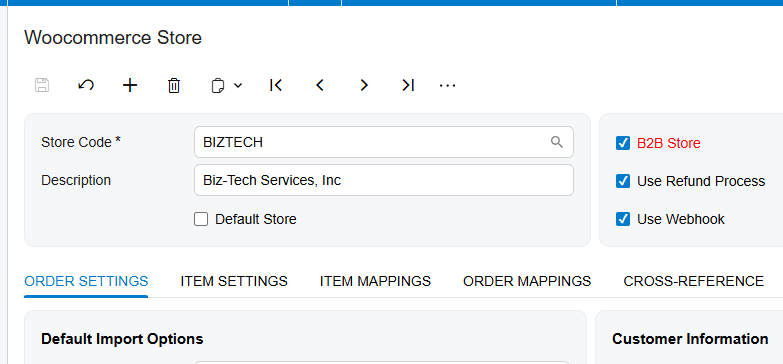
After the connection is established, you move into the WooCommerce Store screen, which acts as the brain of the integration. Your first task is to define your high-level operating rules. Decide whether you’re running a business-to-business operation by selecting the B2B Store option, which changes how customers and contacts are synchronized. With this option enabled, the Acumatica Contacts are exported to WooCommerce as Users. Withouth the option, the Acumatica Customer with its main Contact is exported to WooCommerce.
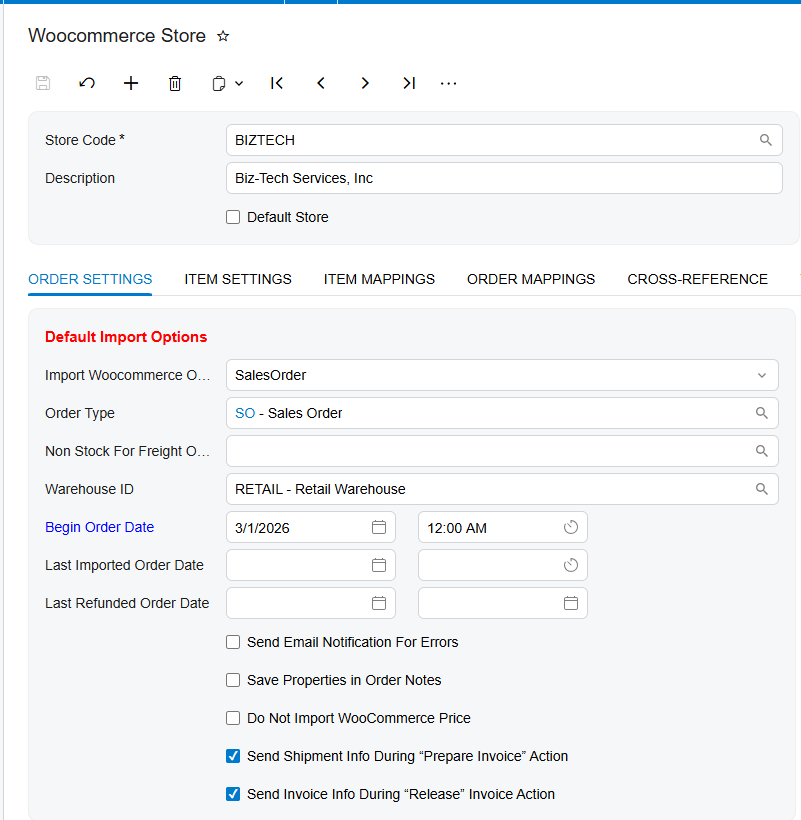
Next, prepare your order settings. Confirm the Acumatica order type and the default warehouse that will be assigned to every incoming WooCommerce order. You also set a Begin Order Date, which tells the system exactly when to start looking for orders and prevents accidentally importing years of historical data. This needs to be configured once, as after the firt Get Orders request. When a new Store code is configured, the WooCommerce Integrator automatically adds value to this field. The Last Imported Order Date is updated to provide data for next get request.
Data preparation extends to your inventory. In the Item Settings tab, define the default item class and the unit of measure, or UOM, for new items. If your business relies on specific identifiers, you can enable a numbering sequence for Stock Keeping Unit, or SKU, generation. And in the Warehouse Details tab, select the specific warehouses that contribute to the total quantity synced back to your web store, so your customers always see accurate stock levels.
Validation and cross-referencing
Validation is about making sure the language WooCommerce speaks matches the language of your ERP, and that’s handled mostly through the Cross-Reference tab. To have option avalable here, the checkboxes are required. You map your WooCommerce shipping methods to your Acumatica ship-via codes, so shipping services are identified correctly on every sales order. You do the same for payments, matching your web payment gateways, like credit cards or PayPal, to the right payment methods and types in your accounts receivable.
You also validate how taxes are handled. In the tax options, you decide whether to use an External Tax service like Avalara or to map specific customer tax zones and tax IDs directly.
And to finalize everything, use the Load WooCommerce Fields action in the Order Mappings tab, so every piece of data, from the order date to a customer note, has a designated home in Acumatica.
User access and security
Security matters when you connect two systems. For your internal team, make sure the WordPress user tied to the API keys has the right permissions to allow the data flow. And on the Acumatica side, if you run a B2B store, remember that any contact you want to export as a web user must have a password set on their contact record.
Also, if you’re moving from an older version of the WooCommerce Connector or an existing store, use the Update Synchronized Customers action. That transfers your existing customer information into the integration tabs, so your current client base is recognized by the new system without creating duplicate records.
Testing the workflow
Never go live without a full test. Your first test should be the Get Orders process. On the Import WooCommerce Orders screen, retrieve your recent web orders and confirm they appear with the correct statuses, like Processing or On Hold. Besides Import WooCommerce Order screen, Biz-Tech Services, Inc. WooCommerce Integrator provides ability to retrieve an individual order via its WooCommerce ID on WooCommerce Orders screen.
Next, test item synchronization. Use the export item process to sync a test item, and verify that the price, description, and images appear correctly on your website. Finally, walk through a complete fulfillment cycle: import a test order, create a shipment, confirm it, and prepare the invoice. Verify that the tracking number writes back to WooCommerce and that the web order status updates to Completed. If anything goes wrong, the Get Order Process Error Messages screen helps you identify and resolve the issue.
Go-live readiness and automation
The final step is moving from manual clicks to automated efficiency. You configure your automation schedules to decide how often the system runs Get Orders and Import All, and we recommend setting those to intervals that match your business volume.
The single most important takeaway for go-live readiness is to verify your last imported order date and your warehouse quantities one last time before you enable the schedules. When those are confirmed, your integration is ready to give your customers a seamless experience and your team an efficient workflow.
If you’re ready to see how this WooCommerce connector can transform your operations, visit biz-techservices.com to schedule a personalized demo today.

