DocVision PDF Automation Configuration Checklist for Acumatica
When you’re ready to transform your sales operations by automating document entry, having a clear roadmap is the difference between a bumpy start and a seamless transition. At Biz-Tech Services, we know the key to success with DocVision PDF Automation, our solution for Portable Document Format, or PDF, scan and import, is preparation. This pre-launch checklist walks your business through the essential steps to make sure your Enterprise Resource Planning system, or ERP, is fully ready to turn incoming customer documents into accurate orders instantly. Follow it, and you’ll maximize efficiency, reduce data-entry mistakes, and get your team ready for go-live.
Establishing your foundational configuration
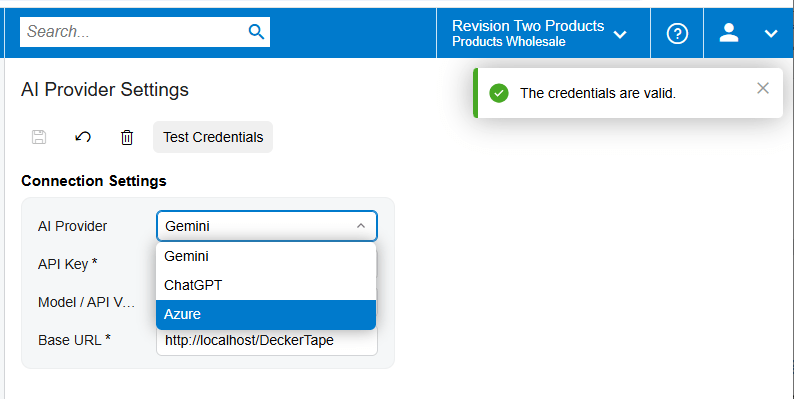
Your journey begins with the core connection between Acumatica and the cloud infrastructure it relies on. First, confirm that your Azure setup is complete, so your ERP can use cloud services like storage and virtual machines to process incoming files. Within the connection settings, verify that your Application Programming Interface key, or API key, along with the API version and the base web address, are all entered correctly.
We always recommend using the Test Credentials feature before you move forward. Running that test confirms the system can communicate with the cloud platform, which is the essential backbone for importing your customer Purchase Order files, or POs, and converting them into sales orders.
Preparing your customer and inventory data
Once the connection is established, your next priority is data preparation. DocVision uses a per-customer PDF mapping approach, which means you can adapt to the unique document structure of every client you serve. For each unique format you receive, you create a template ID.
A critical part of this stage is setting up your customer cross-references. Make sure the system can accurately identify the customer values and locations on the PDF and map them to the matching records in Acumatica. That way, when a document arrives, the system knows exactly which customer account to credit and where the goods should ship.
After the customer setup, prepare your item data through the inventory cross-reference system. You can manually map individual PDF line items to your Acumatica inventory IDs, or, if you have a high volume of items, import those mappings in bulk from an Excel file. This step is vital, because it bridges the gap between how your customers describe a product and how it’s stored in your database.
Mapping and validation points
With your data prepared, you move into fine-tuning your document mappings, where you define exactly which pieces of information from the PDF are extracted and where they land in your system. First, confirm the mapping of your header fields, like the date or customer name, using the Sales Order Advanced target. Next, make sure you’ve mapped the transaction details using the Sales Order Details Advanced target.
During this, pay close attention to the Dynamic PO Number setting. If a customer document happens to be missing a purchase order number, the system can flag it and issue a warning, letting you choose an alternative number so the process keeps moving.
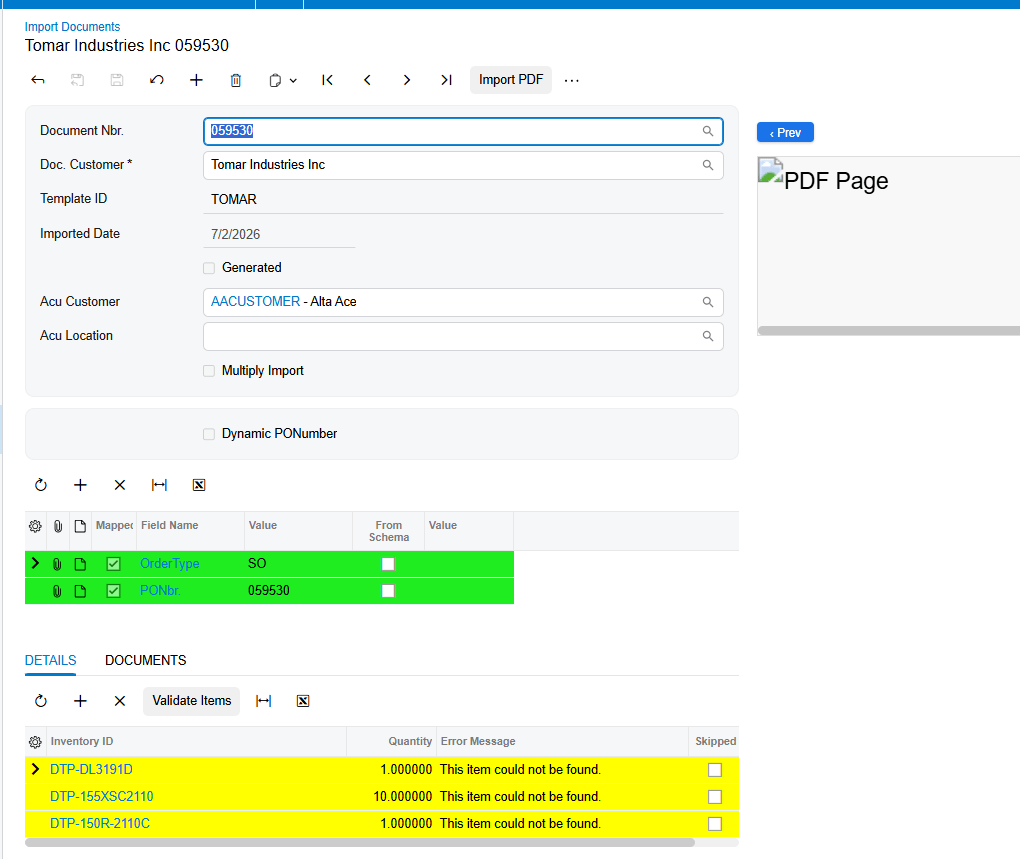
And before you consider a template ready for production, learn the validation signals in the interface. When you review an imported document, watch the color indicators. Green means everything is mapped correctly and you’re ready to generate an order. Yellow means some items aren’t linked yet, and you should use the Validate Items button to resolve them. Red signals a specific error that needs your attention before the order can proceed.
User access and security
Because DocVision is built natively for Acumatica, it’s designed to work inside your existing secure environment. Before going live, verify that your user permissions are configured correctly. The system respects your established audit trails and security protocols, so only authorized team members can generate or modify orders. And because it’s a native integration, you don’t have to worry about external dependencies compromising your data security or your system’s performance.
Final testing and go-live readiness
The final step is a full test of the end-to-end workflow. Practice importing a document, then use the three-dots menu to select Generate Sales Order. Confirm that the system successfully creates the order and that the Generated checkbox is automatically selected on the document record.
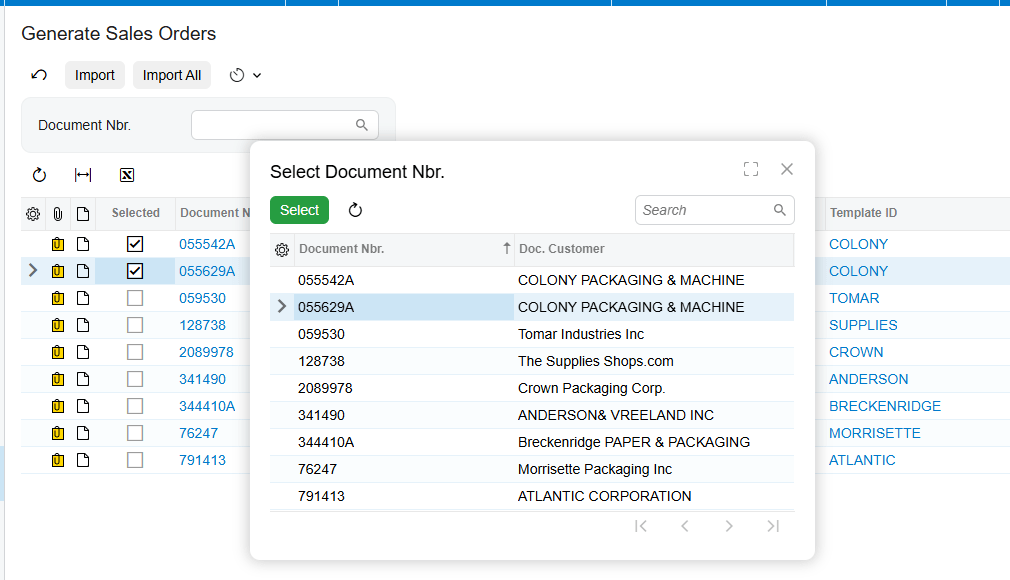
For high-volume operations, we suggest testing the batch-processing capabilities. On the Generate Sales Orders screen of DocVision Integration, you can filter by document number and process many orders at once, which is a big part of the time savings your business is after. It is available on Import Documents screen as well to create individual Sales Orders. Finally, get your team familiar with the generic inquiry built specifically for DocVision. It acts as your central command center, where you can track all your document numbers, template IDs, and generation dates in one place.
The single most important takeaway for go-live readiness is that validation is the key to automation. When your cross-references are accurate and your templates validate with a green status, you can trust the system to handle the heavy lifting of data entry. If you’re ready to see how these configurations work in the real world, visit biz-techservices.com to schedule a demo and start your journey toward a more efficient, automated future.