
CRV Configuration Checklist for Acumatica Beverage Distributors
Managing a beverage distribution business in California brings unique regulatory requirements, especially when it comes to the California Redemption Value, or CRV. When you run on an Enterprise Resource Planning system, or ERP, like Acumatica, accuracy isn’t just a goal, it’s a requirement for compliance and financial integrity. At Biz-Tech Services, we know the move to automated environmental-fee tracking can feel complex, which is exactly why a thorough pre-launch checklist matters. This checklist makes sure your system is configured correctly, your data is prepared, and your team is ready for a smooth go-live.
Required configuration: defining the foundation
The first step toward automated compliance is setting up the CRV items themselves. In Acumatica, these are Non-Stock Items, designed to be added automatically to sales transactions whenever you sell beverages that fall under the state’s recycling program. Here, ECOFEE is the non-stock item. So first, confirm that your CRV non-stock items are created and correctly categorized, and that they’re available in both the inventory and the sales modules.
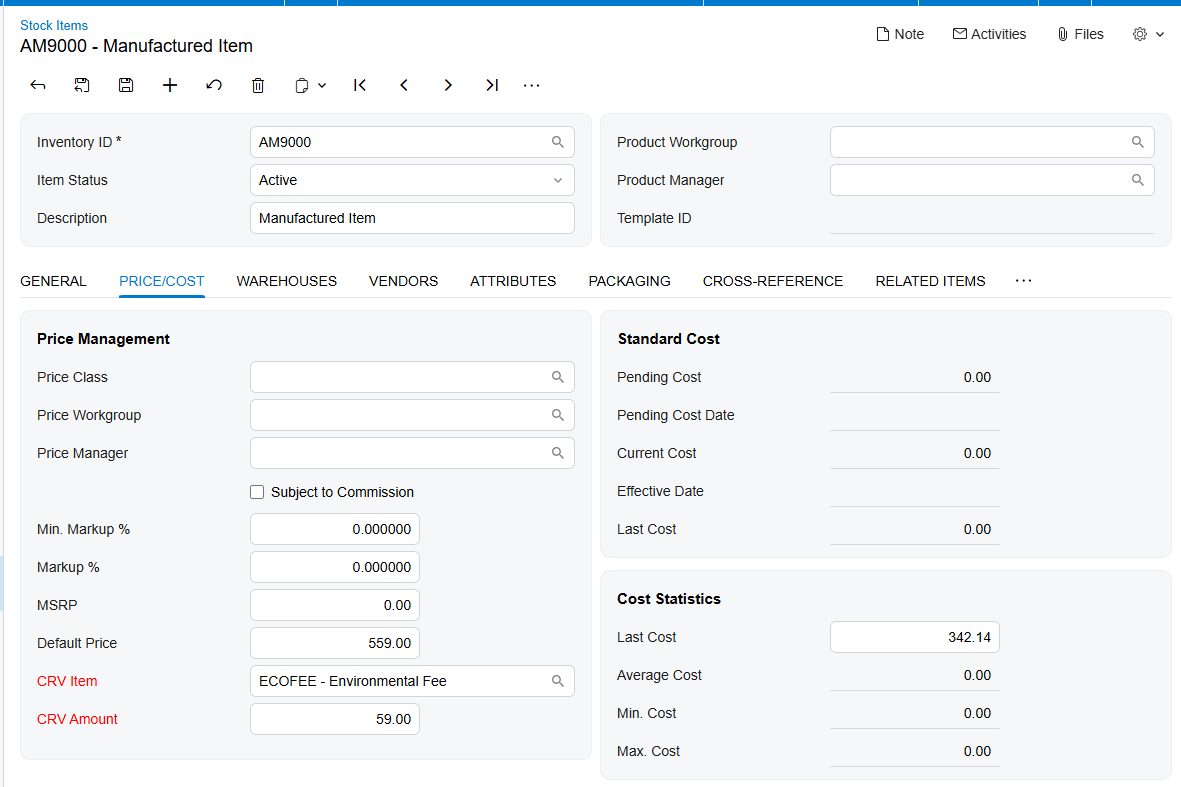
Once those items exist, your next task is to bridge the gap between your beverage products and these fees. On the Stock Item screen for each beverage, go to the Price and Cost tab and select the matching non-stock CRV item in the designated field. That link is what tells the system exactly which fee to apply when a specific beverage is sold.
Data preparation: pricing and units of measure
Next, make sure your pricing and unit data are carefully prepared. It’s not enough to link a beverage to a CRV fee; you also have to define the fee’s specific value. On the Stock Item screen, focus on two areas. First, verify the CRV amount field on the Price and Cost tab, which lets you define a separate price for the fee item.
For many distributors, though, the fee isn’t one-size-fits-all; it often depends on the container size or volume. To handle that, confirm the setup on the General tab of the Stock Item screen, where another CRV amount field sets the fee based on the selected Unit of Measure, or UOM. With that in place, whether you’re selling a single bottle or a full case, the system calculates the redemption value precisely.
Customer validation: controlling the automation
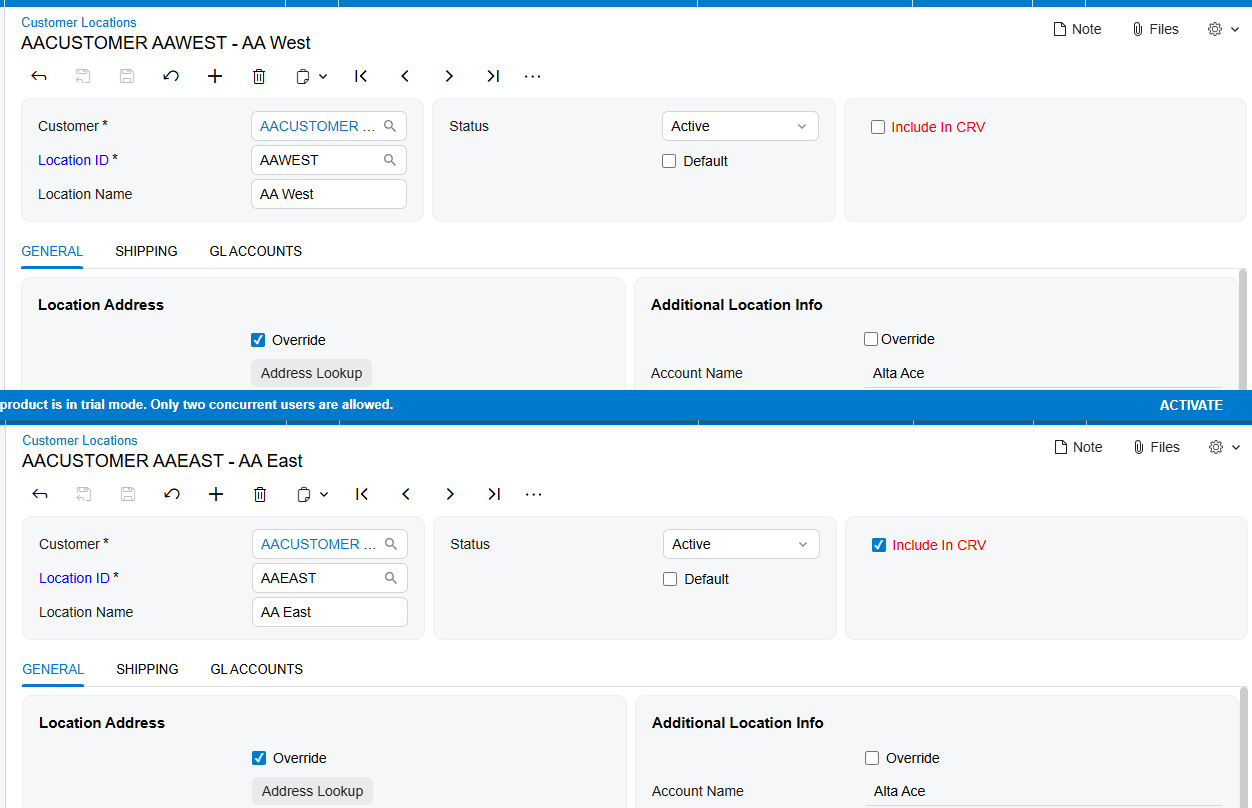
Once your items are configured, validate your customer records, because not every customer or transaction requires CRV tracking, and the system lets you toggle the automation at the source. Confirm that the Include in CRV checkbox is set correctly on the customer’s default location on Customer Locations screen. This is a critical validation point, since that checkbox decides whether the fee item automatically appears on a sales order based on the location of the Customer.
As you prepare for launch, we suggest auditing your customer list to make sure this flag is active for all of your relevant California-based accounts. That way the automation runs only when it should, which prevents unnecessary manual corrections during a busy sales cycle.
User access and tracking points
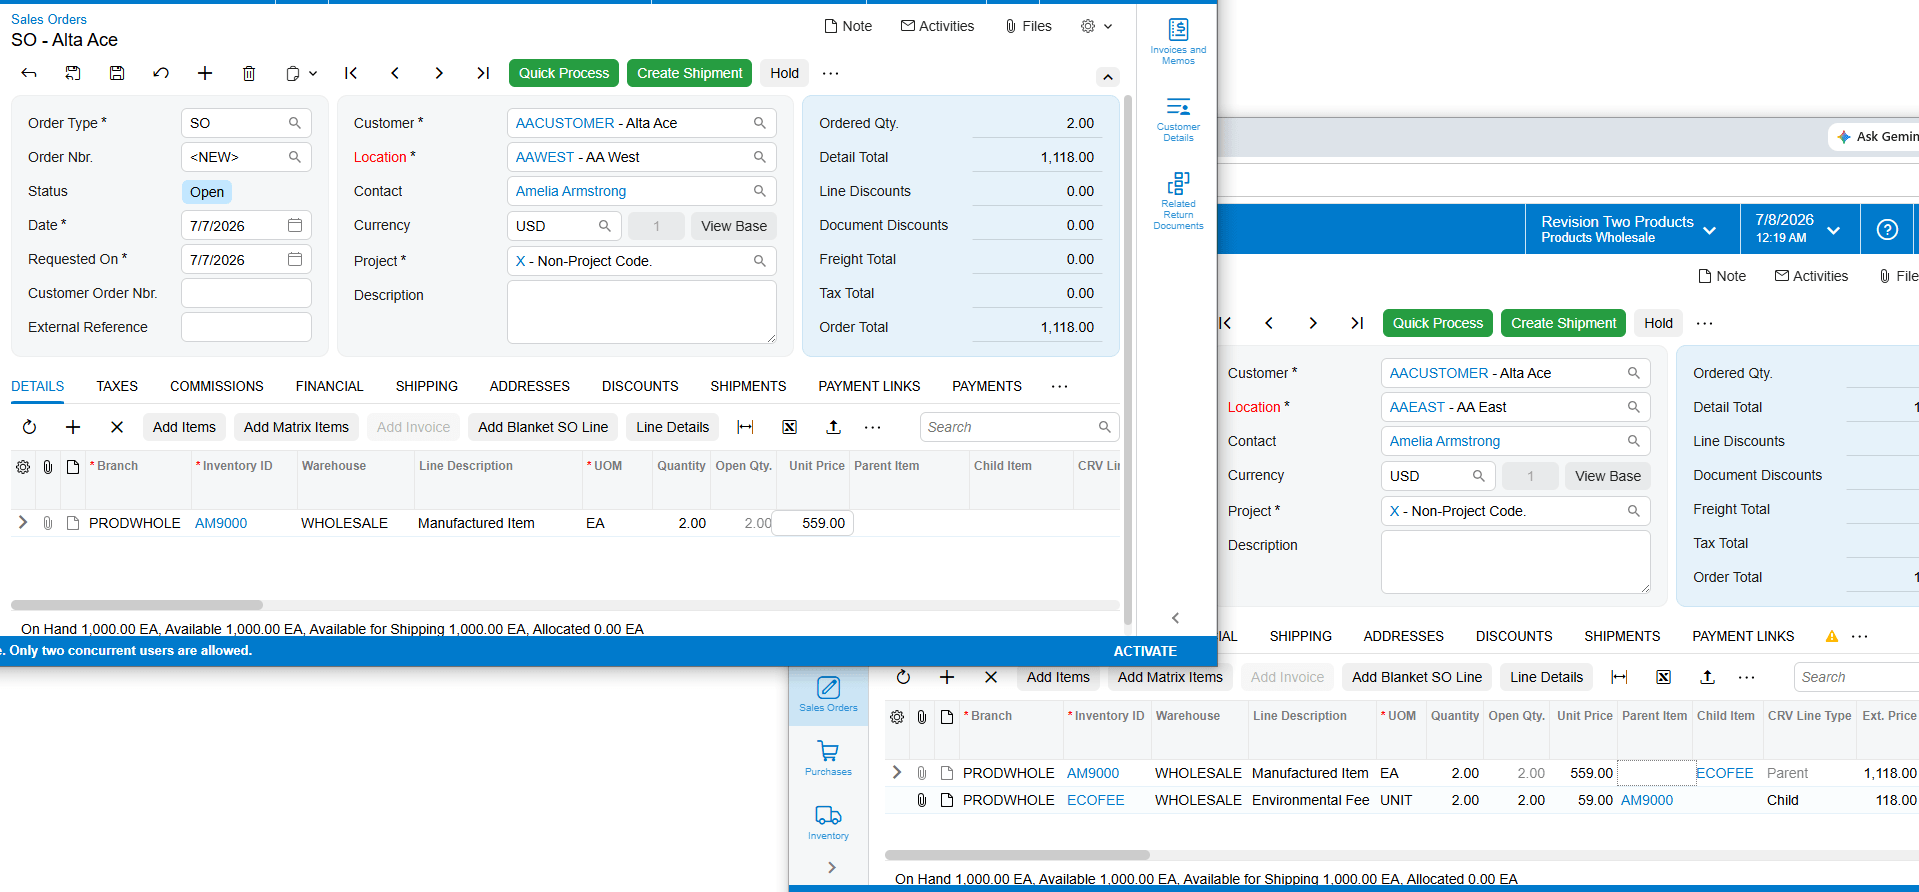
As you move closer to go-live, make sure your team knows how to verify the automation is working. We’ve enhanced the standard Acumatica screens to give clear visibility into these fees. In particular, make sure your sales and warehouse teams are familiar with the new Parent Item and Child Item fields, which we’ve added to the Sales Orders, Shipments, and Invoices screens. They make it easy to identify the main beverage product, the parent, and its associated environmental fee, the child, which matters a lot in a high-speed distribution environment.
Testing: the sales order workflow
Before you officially flip the switch, a rigorous testing phase is essential, and we recommend a series of end-to-end tests in a sandbox environment. First, confirm the automation by going to the Sales Orders screen and choosing a customer whose location is flagged to include these fees. When you add a parent beverage item to the order, watch for the system to automatically add the matching CRV item as a new line.
During that test, pay close attention to the details. The system should give the child item the same quantity and the same warehouse as the parent. If the fee line appears instantly, with matching quantity and warehouse, you know your configuration is sound.
Go-live readiness and final validation
The final stage is confirming readiness across the whole document lifecycle, because compliance doesn’t stop at the sales order; it has to flow through to the final invoice. So verify that the parent-and-child relationship is visible not just on the sales order, but also on the shipment and the invoice. That end-to-end visibility keeps both your financial reporting and your customer’s billing accurate and transparent.
The real takeaway for go-live readiness is this: consistency between your Stock Item settings and your customer location flags is what drives a successful, automated environmental-fee program. When those elements line up, the system removes the burden of manual entry and reduces the risk of regulatory errors.
If you’re ready to see how these automated workflows can transform your beverage distribution business, we’d love to help. Visit biz-techservices.com today to schedule a demo and see the Acumatica CRV configuration in action.

