
How Amazon FBA and FBM Data Flows into Acumatica ERP
Amazon order data flows into Acumatica ERP through the Biz-Tech Services Amazon Connector, which retrieves orders from Amazon into an intermediate server, imports the selected orders into Acumatica as sales orders or invoices, and then sends purchase order acknowledgements, fulfillment events, refunds, and inventory quantities back to Amazon. The connection is never direct. Every request travels through an intermediate server controlled by Biz-Tech Services, and the settings that govern that connection live on the Amazon Stores screen in Acumatica. Once those settings are in place, the Biz-Tech Services Acumatica Amazon connector handles two distinct fulfillment channels: Fulfillment by Merchant, or FBM, where your business ships the goods, and Fulfillment by Amazon, or FBA, where Amazon ships from its own fulfillment centers.
Those two channels take different paths through Acumatica, and understanding the difference is the key to using the Biz-Tech Services Acumatica Amazon connector well. FBM orders become sales orders that your warehouse picks, packs, ships, and invoices, with acknowledgements and fulfillment documents flowing back at each step. FBA records arrive as transfer orders, purchase receipts, and invoices, because the movement being recorded is a transfer of your stock into Amazon inventory rather than a shipment to a shopper. This article traces the whole path in the order the records travel, names the screens, tabs, buttons, and fields involved at each stage, and points out where users should look when something does not land as expected.
What the Amazon Connector for Acumatica Does
The Amazon Connector is an Acumatica ERP customization from Biz-Tech Services, Inc. that links Amazon, the e-commerce platform, with Acumatica enterprise resource planning. It is delivered as a customization project and must be installed on an Acumatica system carrying one of the supported licenses, PCSR, PERP, or SAAS.
The documented capabilities cover both directions of travel. Inbound, the Biz-Tech Services Acumatica Amazon connector imports Amazon orders as either sales order or invoice document types, creates the customer on the fly when that customer does not yet exist in Acumatica, imports sales tax, and imports payment information. Outbound, it sends purchase order acknowledgements, sends fulfillment documents when shipments are confirmed, and sends inventory status documents so Amazon sees the quantity your business actually has available. A cross-reference layer sits between the two systems and matches items, payments, and Ship Via values so that Amazon terminology resolves to Acumatica records instead of failing.
Several of the outbound actions can be run three ways: from the Actions menu on a single Sales Orders document, from a processing screen where many records are selected and pushed at once, or automatically. Acknowledgements can be sent automatically with a Success status, and fulfillment documents can be sent automatically when an invoice is prepared. That mix matters because a business running a handful of orders a day works differently from one running hundreds, and the same configuration supports both.
The Amazon Data Flow at a Glance
Before looking at individual screens, here is the path records travel through the Amazon Connector from setup to settlement of the last refund:
- Credentials are entered and tested on the Connection Settings tab of the Amazon Store screen, which confirms Acumatica can reach the Biz-Tech server that fronts Amazon.
- The rest of the Amazon Store screen defines behavior: FBM Settings and FBA settings tabs, plus Cross-Reference, Warehouse Details, Inventory Details, Carriers Code, Cancel Reasons, and Adjustment Reasons tabs.
- For FBM, the Get Orders button on the Import Amazon Orders screen pulls Amazon orders into a grid, filtered by Start Date and End Date, where they can be reviewed before anything is committed.
- The Import or Import All button turns the selected Amazon orders into Acumatica documents, applying the customer, item, tax, payment, and cross-reference rules configured on the store.
- Outbound acknowledgement is sent from the Sales Orders Actions menu or from the Export Amazon PO Acknowledgement processing screen, which pushes the acknowledgement through the Biz-Tech server to Amazon.
- Fulfillment follows the standard Acumatica chain, Create Shipment, Confirm Shipment, Prepare Invoice, and Release, with Prepare Invoice fulfilling the order in Amazon.
- For FBA, Import FBA Shipments creates transfer orders and purchase receipts as stock moves into Amazon fulfillment centers, while Import FBA Orders brings in the resulting FBA sales as invoices.
- Refunds travel back through Import Amazon Refunded Orders, which produces a customer refund payment or a credit memo depending on how far the original order had progressed.
- Inventory quantities travel outward from the Export Amazon Inventory Quantity screen, summed across the warehouses listed on the Warehouse Details tab.
FBA and FBM: Two Fulfillment Paths, One Amazon Connector
Fulfillment by Amazon is a service Amazon provides so sellers can streamline logistics and order fulfillment. Under FBA, sellers store their products in Amazon fulfillment centers, and Amazon handles the storage, packing, shipping, and customer service for those items. Fulfillment by Merchant is the opposite arrangement: the seller keeps the stock and ships the order. Because the physical goods behave differently, the Acumatica documents behave differently too, and the Biz-Tech Services Acumatica Amazon integrator keeps the two channels on separate tabs and separate processing screens.
The practical consequence is that FBM is an order-to-cash flow and FBA is partly an inventory-transfer flow. An FBM order becomes a sales order of the type configured on the FBM Settings tab, and your business creates the shipment, enters the tracking number, and confirms it. An FBA record set arrives in pieces: shipments of your stock into Amazon become transfer orders, deliveries become purchase receipts in the destination warehouse, and the actual FBA sales come in as invoices. FBA settings therefore include warehouse mapping and a Destination Order Type that has to be a Transfer order type, which has no equivalent on the FBM side.
Both channels can be reviewed together. The FBM and FBA Orders screen shows both kinds of order in one place, and the distinction between them is indicated by the Fulfillment channel field. When users are not sure which path a given order took through Acumatica, that field is the answer.
Stage One: Installing the Package and Connecting Acumatica to Amazon
The Biz-Tech Services Acumatica Amazon integration arrives as a customization project, a set of changes and additional files used to modify the Acumatica ERP application. Administrators import the deployment package, open it for editing in the Customization Project Editor if needed, validate it, and publish it for one tenant or several. Publishing uploads the package, creates the corresponding customization project, and saves it in the database. None of the Biz-Tech Services Acumatica Amazon connector screens exist until that happens.
What the Amazon Store screen identifies
The Amazon Store screen is the anchor record for everything else. Store Code is a lookup field that indicates the corresponding store, and Description describes it. The data on the General tab is provided automatically for the Store Code entered. When the Default Store checkbox is selected, that store appears automatically whenever a user opens a processing screen or a store screen and clicks into the Store code field. On an installation with a single marketplace this saves a click on every process; on an installation with several stores it prevents the more expensive mistake of running a process against the wrong marketplace.
Which credentials the Connection Settings tab holds
The Connection Settings tab uses the information specified on it to test whether Acumatica can connect to the Acumatica to Biz-Tech server. Get a successful test here before touching any other tab, because a failed import caused by a bad credential looks very similar to one caused by a bad mapping.
The fields on this tab are the OAuth and Amazon identifiers the intermediate server needs. Client ID is the identifier associated with an application that assists with client and server OAuth 2.0 authentication. Client secret is a secret known only to the application and the authorization server, and functions as the application own password. A refresh token is a special key that lets a client retrieve new access tokens without requiring the user to perform a complete login, which is what allows scheduled processes to run unattended. Marketplace is the store location, and AWS Regions are the physical locations where Amazon clusters data centers for application and service delivery in AWS Availability Zones.
The remaining values complete the picture. Consumer Key is the API key a service provider issues to a consumer, and it identifies that consumer. Consumer Secret is the consumer password, used along with the consumer key to request authorization to a user resources. External System Store ID is an identifier used to track data in relation to external systems integrated with the Amazon platform. Seller ID and MWS Auth Token are generated when the new developer authorization process is passed. If any of these are wrong, nothing downstream works.
Stage Two: FBM Settings That Govern How Amazon Orders Import
The FBM Settings tab on the Amazon Store screen decides what an imported Amazon order looks like in Acumatica. Import Amazon Orders specifies where to import the Amazon orders in the Acumatica system, and Order Type is the default type of order the Biz-Tech Services Acumatica Amazon integration creates. The Last Imported Order Date field shows the date the latest order was imported, which is the quickest sanity check that the flow is still running. When the Send Email Notifications for Errors checkbox is selected, the Biz-Tech Services Acumatica Amazon connector sends email notifications listing the Order IDs that hit errors, so nobody has to sit watching a grid.
How customer records are created from Amazon orders
When the Import Customer checkbox is selected, the Biz-Tech Services Acumatica Amazon integration imports the customer information from Amazon into a new customer record in Acumatica. When it is not selected, orders are imported against the default customer instead. This is a real business decision: importing customers gives your business a per-shopper record and history, while a single default customer keeps the customer ledger compact when shoppers are not accounts you intend to manage.
Two checkboxes control addresses. Override Ship Address Information from Amazon Order imports the address of the location the order is going to be shipped to from Amazon. Override Bill Address Information from Amazon Order imports the address information of whoever will pay the order bill from Amazon. Where the Amazon-supplied address must win over whatever is stored on the Acumatica customer, these are the settings that make it win.
How Amazon items are matched or created on import
The Import Item checkbox tells the Biz-Tech Services Acumatica Amazon integrator to import new product information from Amazon into Acumatica when that product does not yet exist in the Acumatica system. If the checkbox is not selected and an unknown item arrives, an error will occur during integration. That single checkbox is behind a large share of first-week import failures, so it is worth checking first when imports stop.
There is a documented nuance about descriptions. If the item already exists on the Stock Items screen, the Biz-Tech Services Acumatica Amazon connector does not update its description, but it does set the Amazon item title as the description in the Line description on the Sales Orders screen. The Acumatica master record keeps your naming, and the order line carries the marketplace wording that a shopper would quote.
Warehouse ID is the default warehouse set on imported orders, and UOM, the unit of measure, is used to quantify the inventory items. When the Insert Item in Inventory Details Tab checkbox is selected, items are retrieved into the Inventory Details tab of the Amazon Store screen while orders are being imported, which builds the mapping table as a side effect of normal trading rather than as a separate data-entry project.
Tax and payment defaults applied during import
Three tax fields sit on the same tab. Taxable Category is used to create or edit the tax categories applied to products. Customer Tax Zone is the combined set of effective taxes for a zone, defined according to the locations of vendors or customers. Tax ID is the client tax identifier. Because the Biz-Tech Services Acumatica Amazon connector can import sales tax from Amazon, these defaults are what the imported tax lands against, and a missing tax zone is a common reason an otherwise valid Amazon order will not post.
Under Payment Options, Payment Method is the default payment method set for the new customer records generated in Acumatica from the Amazon orders. Cross-Reference options is the setting that selects which entities should be matched between Amazon and Acumatica during the transition, and it directly controls the next tab.
Cross-References, Warehouses, Carriers, and Reason Codes
Between the credentials and the processing screens sits a set of tabs whose only job is translation. They are unglamorous and they are where most integration problems are actually solved.
The Cross-Reference tab
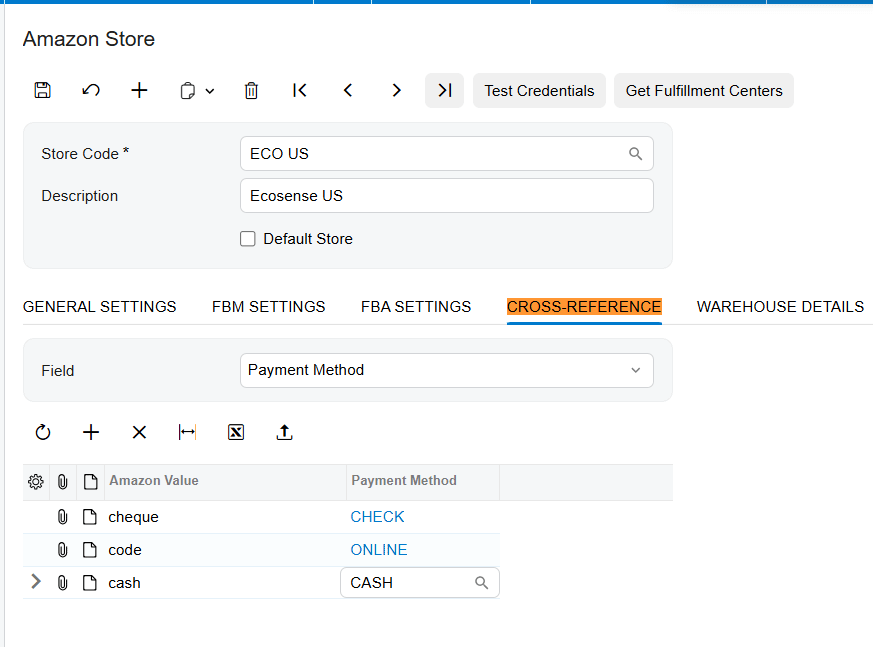
On the Cross-Reference tab, the Field column selects the entity whose Amazon and Acumatica values should be matched, and only the entities selected under Cross-Reference Options appear in that drop-down. Amazon Value then specifies which Amazon value must match which Acumatica Value. The documented example to verify afterwards is Ship Via: after the Amazon order import process, the Ship Via value should be visible in the Delivery Settings area of the Shipping tab on the Sales Orders screen. If it is blank there, the cross-reference is the place to look, not the order.
The Warehouse Details tab
The Warehouse Details tab is where your business adds the warehouses that need to be in sync with Amazon. Two behaviors follow from it. If several warehouses are selected on this screen, the exported item quantity is the sum of quantities across those selected warehouses, so Amazon sees pooled availability rather than a single site. And depending on the drop-down value selected, On hand, Available, or Available for Shipment, that is the quantity basis synced from Acumatica to Amazon. Choosing Available for Shipment rather than On hand is how your business avoids advertising stock that is already allocated.
The Inventory Details tab and SKU mapping
To upload a new SKU for an Amazon item, the mapping is created on the Inventory Details tab of the Amazon Store screen. If Import Item is checked on the import settings and an order is imported, the connector generates an Acumatica Inventory ID based on the SKU. To update the SKU afterwards, change the SKU for the existing item on the Inventory Details tab and import again, and no new item is created in Acumatica. That is the documented way to correct a mapping without leaving duplicate inventory IDs behind.
One pricing rule is worth committing to memory: during order import the Biz-Tech Services Acumatica Amazon connector takes the Amazon item price rather than the mapped Acumatica item price. The Amazon order is the commercial record of what the shopper paid, so Acumatica records that number rather than your list price.
Four buttons populate this tab. Get Product by ASIN displays the Amazon item in Inventory Details by its ASIN. Get Product by SELLERSKU does the same by SKU. Load FBA Products loads and displays all Amazon products in the store. Sync From Amazon takes a loaded FBA item and creates that item in Acumatica via the product SKU, which is the fastest way to seed Acumatica with an existing Amazon catalog rather than typing it.
Carriers Code, Cancel Reasons, and Adjustment Reasons
The Carriers Code tab matches Amazon carrier details to the Acumatica Ship Via carrier. The Cancel Reasons tab holds the order cancel reasons, and a cancellation reason must be selected while cancelling orders, so an empty tab blocks cancellations. The Adjustment Reasons tab is populated the same way and its values are required for refunding Amazon orders. Both reason lists can be imported or exported as an Excel file, which is the practical way to load them once and reuse them across tenants.
Inbound: How Amazon FBM Orders Become Acumatica Documents
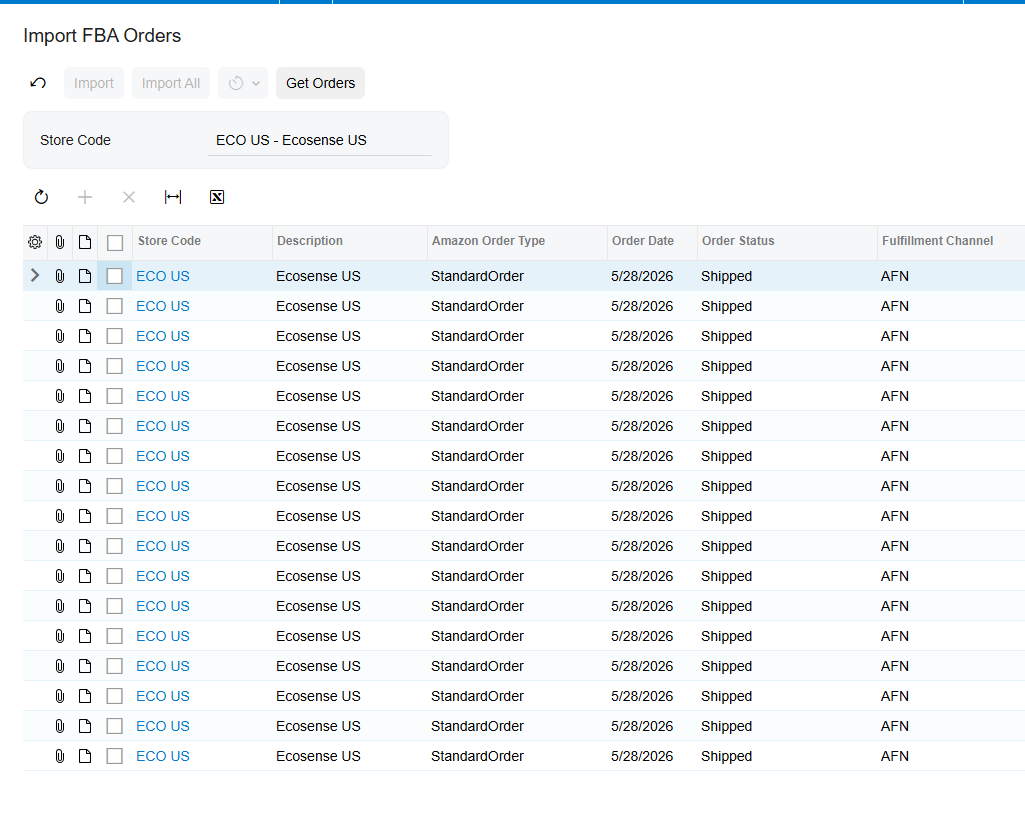
The Import Amazon Orders screen is the inbound gate for FBM. The user indicates the Store Code, and the screen retrieves data for that store: it pulls as many orders into Acumatica as exist in the selected period and displays all of them in the table, so nothing is committed on retrieval alone.
Retrieving Amazon orders with Get Orders
Step one is clicking the Get Orders button to retrieve orders from Amazon. After the button is clicked a timer indicates the elapsed time until the process is complete, and a user can cancel the retrieval by clicking the loading icon next to the timer. The Start Date and End Date fields filter the data retrieval, which is how your business avoids dragging months of history back on a routine run. Step two is reviewing the retrieved orders to decide which ones need to be imported.
Reviewing an order before importing it
Clicking the Order Number opens the corresponding order in a pop-up window, and the most important information is shown on the Amazon Orders screen. This is also the first place errors surface: if an error appears while importing a corresponding order, the error message is displayed on this screen and explains what should be fixed and in which system. That last part matters, because roughly half of import problems are Amazon-side data and half are missing Acumatica configuration.
Running the import
Step four is selecting the orders that require import. Step five is clicking the Import button to begin the import process, or the Import All button to import every order in the grid. After the Import button is pressed, unselected orders are filtered off the screen so the grid shows only what is being worked. A user can cancel the process of importing orders by clicking close.
If there is an error while processing an order, the error displays on the grid line corresponding to that order, and a user should hover the cursor over the red cross to see additional information about it. For deeper detail, a user can open Tools and then Trace.
Outbound: Sending Amazon PO Acknowledgements from Acumatica
Once an Amazon order exists in Acumatica as a sales order, the first thing that travels back to Amazon is the purchase order acknowledgement. There are two documented ways to export it: one at a time, or several at once.
Acknowledging a single Amazon order
Choose the required order on the Sales Orders screen, click the Actions button, and choose the Send Acknowledgement to Amazon option. After the action finishes, the Acknowledgement status changes to closed. That status change on the sales order is the confirmation that Amazon has the acknowledgement, and it is the field to check when someone asks whether an order was acknowledged.
Acknowledging many Amazon orders at once
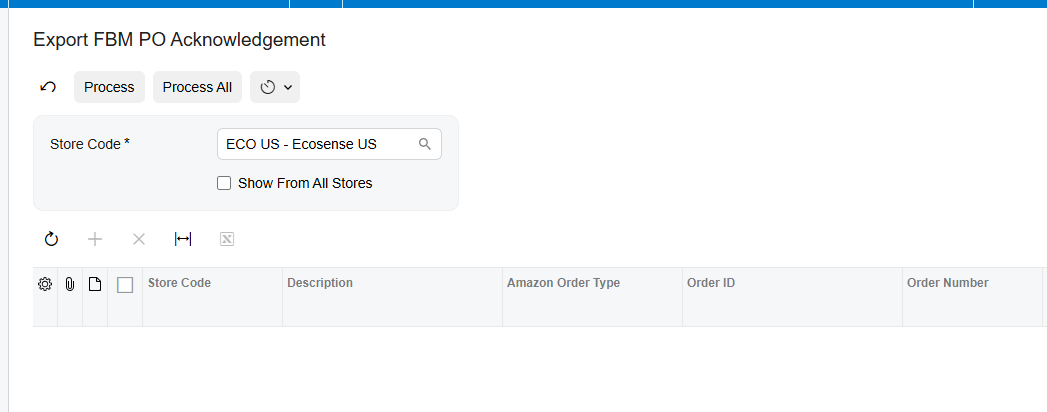
For volume, open Export Amazon PO Acknowledgement from Process Orders. This screen sends an API request to the Biz-Tech server, and the server in turn sends a request to the Amazon system to create the acknowledgement for the order. Choose the required orders by checking their checkboxes and press the Process button. The Biz-Tech Services Acumatica Amazon connector can also send acknowledgements automatically with a Success status.
Acknowledging with a Failure status to cancel
If an order must be cancelled, the Amazon acknowledgement is sent with a Failure status instead, and the Cancel reason field is required. The alternative route is Manually export Amazon PO Acknowledgement from Process Orders: choose the required order by checking its checkbox, click the Set Status Failure button, choose the Cancel Reason from the column below, press Save, and then Send Acknowledgement. This is why the Cancel Reasons tab has to be populated during setup; without it the cancellation cannot be completed.
Reflecting an Amazon-side cancellation back in Acumatica
The other direction is also documented. To cancel an order that already exists in Acumatica, cancel the order in Amazon, then open the Amazon Orders screen and press the Update Order button. That button updates the Amazon status in Acumatica so the two systems agree. Without it, Acumatica keeps working an order Amazon has already killed.
Outbound: Exporting Amazon Fulfillments from Shipments and Invoices
After the acknowledgement, fulfillment follows the ordinary Acumatica shipping chain, with the connector attached at two points.
From the Actions menu on the sales order, click Create Shipment. The user is then redirected to the Shipments screen. There, fill in Ship Via, add a Packages record, set a tracking number, and click Confirm Shipment.
Then click Prepare Invoice. Preparing the invoice is what fulfills the exact Amazon order: it sends an API request to the Biz-Tech server, and the server sends an API request to fulfill the order in the Amazon system. The same action can be performed in bulk from the Export Amazon Fulfillments screen by choosing the required shipments and pressing Process. The final step is navigating to the Invoice from Sales Orders and releasing the required invoice, which closes the accounting side of the transaction in Acumatica.
Refunds: Credit Memos and Imported Amazon Refunded Orders
Refunds move in both directions too, and the connector treats a refund initiated in Acumatica differently from a refund initiated in Amazon.
Refunding from Acumatica with a credit memo
To refund an order from the Acumatica side, open Invoices and Memos from Receivables, choose the required invoice, click Actions, and then Reverse. Fill in the Adjustment Reason, save the changes, and release. Releasing sends an API request to the Biz-Tech server, and the server sends an API request to refund the order in the Amazon system. The Adjustment Reason is mandatory, which is the reason the Adjustment Reasons tab is part of store setup.
Importing refunds that started in Amazon
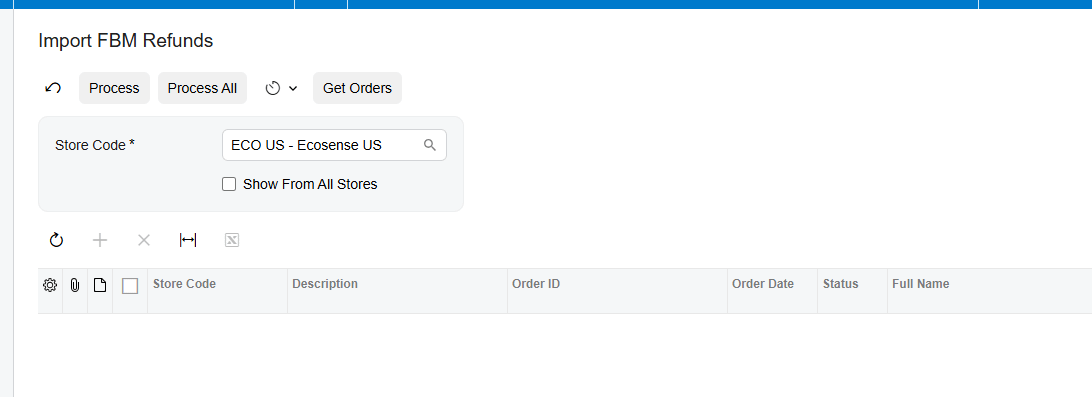
The Import Amazon Refunded Orders screen brings refunds that originated in Amazon back into Acumatica. Press the Get Orders button to load refunded orders, with a timer showing elapsed time until the process is complete. The refunded Amazon orders are displayed on the Amazon Refund screen. Choose the required orders by checking their checkboxes and press Process, or click Process All to import every refunded order shown.
How the connector handles each refund case
What the Biz-Tech Services Acumatica Amazon integrator connector does next depends entirely on how far the original order had progressed, and five cases are defined. In case one the refunded order is still only a sales order with no fulfillment. If it consists of one item, processing creates a Payment of the Customer Refund type, attaches it on the Payments tab, sets the refunded amount, and closes the order; following the Reference number shows that payment and the refunded amount on the Application History tab. The sales order status changes to Canceled and all lines are deleted.
Still within case one, if the order consists of several items, the refunded quantity is reduced from the order quantity and the system creates a Payment document attached on the Payments tab for the refunded items, while the order status remains Open. A partial refund therefore leaves a working order behind rather than cancelling the whole thing.
Case two covers a shipment that has been created but not confirmed: pressing Process finds it, deletes it, and then proceeds with the case one actions above. Case three covers a confirmed shipment, where the system creates a Credit Memo and attaches the Reference number with the Customer Refund type to Applications. Case four, an invoice prepared but not released, produces the same Credit Memo.
Case five is the fully posted scenario, where the invoice has already been released. Here the system reverses the invoice and generates a Credit Memo with a Customer Refund type Reference number attached to Applications. In every case, once the actions complete, the Processed checkbox on the Refunds tab is automatically checked on the Amazon Orders screen for the corresponding order, which means the process is over and the order is Closed. The credit memo itself is created in the Invoices screen of Sales Orders.
Item and Inventory Quantity Sync from Acumatica to Amazon
The Export Amazon Inventory Quantity screen syncs Acumatica and Amazon inventory quantities through the Biz-Tech server. Its behavior is governed by a checkbox on each line, and the distinction is easy to miss. If the checkbox is not selected, the Sync action updates the Amazon inventory quantity based on the number in the Quantity column, that is, the Acumatica quantity. If a user wants to send a different number to Amazon, change the value in the Amazon Quantity column, check the checkbox, and then press the Sync button, and the Amazon inventory quantity is updated to that value.
That override is useful when your business deliberately holds stock back from the marketplace, and it is also the reason listed availability can drift from Acumatica availability without anyone noticing. The quantity sent is still governed by the Warehouse Details tab: the sum across the selected warehouses, on the On hand, Available, or Available for Shipment basis chosen there.
FBA Settings: Configuring Fulfillment by Amazon in Acumatica
The Amazon Store screen carries a tab that provides access to all the settings for Amazon FBA orders. It is organized into order options, warehouse mapping, shipment options, customer information, and a payment option, and each group maps onto a distinct part of the FBA flow.
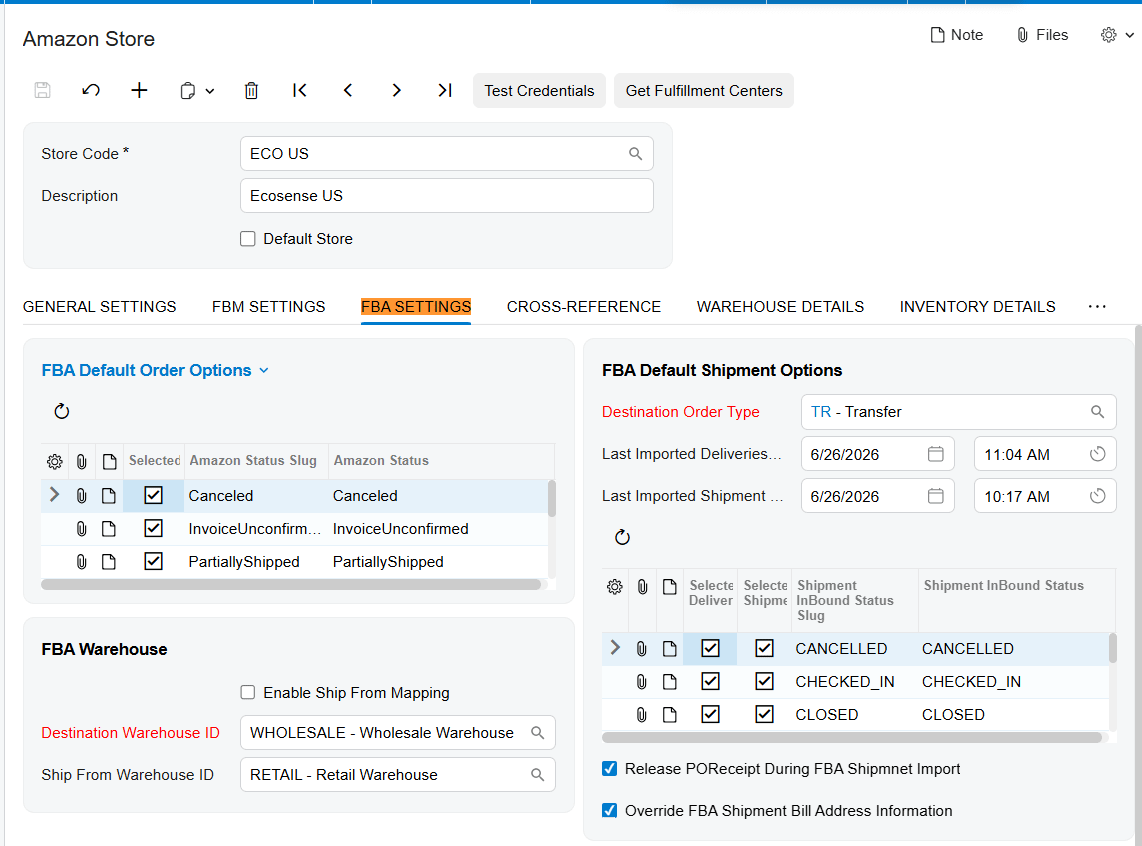
FBA Default Order Options
Invoice Type is the document created after an Amazon FBA order is received and imported, because an FBA order is imported as an invoice in Acumatica rather than as a sales order to be picked. Begin Order date filters the data retrieval, and Last Imported Order Date records when the last order was imported. Below the dates is a table for mapping Acumatica statuses to Amazon order statuses by selecting the corresponding status, so the connector knows which Amazon states are meaningful in your Acumatica workflow. To retrieve and import an order, the corresponding Order Status checkbox must be selected.
FBA Warehouse and fulfillment center mapping
Destination warehouse sets up the warehouse in Acumatica where Amazon goods or products are intended to be sent or delivered. When the Enable Ship from Mapping checkbox is selected, a mapping section opens between the Amazon Fulfillment Center and the Ship-from Warehouse ID, letting your business map an Amazon fulfillment center to an Acumatica warehouse ID and determine which warehouse ships product to the destination warehouse. If the checkbox is not selected, the section disappears and the single value in the Ship from Warehouse ID field is used instead. Businesses shipping into several Amazon fulfillment centers from several of their own sites need the mapping; a single-warehouse seller does not.
FBA Default Shipment Options
Destination Order Type should be populated with the Transfer order type, because all FBA orders need to be created using that specific order type. A Destination Order Type checkbox is included for transfer order types, and when it is selected the Order Type field is disabled, indicating that it is an Amazon FBA order type. One configuration rule is stated explicitly and is easy to trip over: the same order type can only be configured in one store and cannot be repeated in other stores.
Two checkboxes decide what is retrieved. Select Shipments imports FBA shipments, and Select Deliveries imports FBA deliveries. Two date fields report progress: Last Imported Shipment Date is the date the last shipment was imported from Amazon into an Acumatica transfer order, and Last Imported Deliveries Date is the date the last delivery was imported into an Acumatica purchase receipt. Below the dates, a table displays the corresponding Amazon shipment status to be imported into Acumatica.
Two more checkboxes change the resulting documents. When Release PO Receipt During FBA Shipment Import is selected, the shipment is imported as already released into the purchase receipt, which removes a manual release step for businesses that trust the Amazon numbers. Override FBA Shipment bill address information controls whether the order import overrides the customer addresses and sets the Acumatica order address on the sales order, or sets the customer billing address instead.
FBA customer and payment options
The Customer field sets the default customer used during the order import process from Amazon to Acumatica, and it is required for the Amazon orders import process. Under FBA Payment Option, selecting Import Amazon FBA Payment opens a further field for the payment method name, so a payment method can be set up and imported for the FBA order.
The FBA Process Flow: Shipments, Transfers, Deliveries, and Orders
The FBA flow in Acumatica is best read as two tracks. One track moves your stock into Amazon fulfillment centers and keeps the inventory numbers honest. The other track brings the resulting Amazon sales in as invoices.
Importing FBA shipments as transfer orders
To transfer and update items in a single shipment, the FBA shipments must first be pulled from Amazon Seller Central into Acumatica. When a shipment is imported, it creates a sales order with the Transfer order type already selected and set up in the FBA store. The grid displays the destination warehouse where the item will be received, and the sales order line shows the warehouse the item should be transferred from. Selecting the pre-configured Transfer order type established in the store displays the store code on the Sales Orders screen, which is how a user tells an FBA transfer apart from an ordinary internal one.
Updating warehouses with Update In
Upon confirming the shipment of the transfer order and clicking the Update In button, the system updates the warehouse by transferring items from the source warehouse to the destination warehouse. This is the step where Acumatica inventory finally reflects that the goods are in Amazon custody rather than on your own shelves.
Importing FBA deliveries as purchase receipts
After the items have been updated in the warehouses and the shipments are closed in Seller Central, go to the Import FBA Deliveries screen to retrieve all shipments. They are then displayed on the Purchase Receipt screen and are already in the destination warehouse. Following the purchase order release process, the quantity in the destination warehouse is updated and displayed.
Quantity rules on the Import FBA Shipments screen
The Import FBA Shipments screen handles the retrieval and importation of all shipments from Amazon into Acumatica and creates a purchase receipt based on the received quantity of the shipment. Three quantity outcomes are documented. If the received and shipped quantities are equal, the order imports without any issues. If the received quantity is smaller than the shipped quantity, the order still imports. If the received quantity exceeds the shipped quantity, an error message appears stating that the received quantity is greater than the shipped quantity. To prevent that, item quantities need to be adjusted on the FBA Shipments screen before importing.
Importing the FBA orders themselves
The Import FBA Orders screen gets and imports all Amazon FBA orders into Acumatica according to the dates and statuses configured on the store, and after importing it creates a sales order invoice. Imported FBA orders are displayed on the Invoices screen of Sales Orders, which is where users should look for them rather than in an open sales order list.
Where to Monitor Amazon Results in Acumatica
Most support questions about an Biz-Tech Services Acumatica Amazon integration reduce to one question: did the record make it, and if not, where did it stop? These are the exact places in Acumatica to look:
- Import Amazon Orders grid, where a red cross on an order line signals a failure; hover over it for detail, or open Tools and then Trace for more.
- Amazon Orders screen, opened by clicking the Order Number, which shows the key order information and the error message explaining what should be fixed and in which system.
- Email notifications listing Order IDs with errors, if the Send Email Notifications for Errors checkbox is selected on FBM Settings.
- Last Imported Order Date on the FBM Settings tab, and its equivalent on FBA settings, to confirm the flow is still running.
- Acknowledgement status on the sales order, which changes to closed once Send Acknowledgement to Amazon has finished.
- The Delivery Settings area of the Shipping tab on Sales Orders, where the cross-referenced Ship Via value should appear after import.
- Payments tab and Application History tab, where a Customer Refund payment and the refunded amount are recorded against the Reference number.
- Refunds tab on the Amazon Orders screen, where the Processed checkbox is checked automatically once a refund is fully handled and the order is Closed.
- Invoices screen of Sales Orders, where credit memos from refunds and imported FBA order invoices both appear.
- FBA Shipments screen, a set of generic inquiries giving compact information about shipments in both Acumatica and Amazon.
- FBA Destination Warehouse Quantities screen, which tracks warehouse updates and shows item quantities in both the destination warehouse and the current warehouse.
- FBM and FBA Orders screen, where the Fulfillment channel field identifies which channel each order came through.
Amazon Acumatica Integration: Frequently Asked Questions
What is the difference between FBA and FBM in the Amazon Connector for Acumatica?
FBM, Fulfillment by Merchant, means your business ships the order, so the Biz-Tech Services Acumatica Amazon integrator imports it as a sales order and you run Create Shipment, Confirm Shipment, and Prepare Invoice, with the fulfillment event going back to Amazon. FBA, Fulfillment by Amazon, means your products sit in Amazon fulfillment centers and Amazon handles storage, packing, shipping, and customer service, so the Biz-Tech Services Acumatica Amazon connector imports FBA shipments as transfer orders, FBA deliveries as purchase receipts, and the FBA orders themselves as invoices. The two channels have separate settings tabs and separate processing screens, and the FBM and FBA Orders screen shows both, distinguished by the Fulfillment channel field.
Are Amazon orders imported into Acumatica as sales orders or as invoices?
Both are supported. The Biz-Tech Services Acumatica Amazon integration can import Amazon orders as either the sales order or the invoice document type, and the Order Type field on the FBM Settings tab sets the default for FBM. For FBA the answer is fixed: an imported Amazon FBA order becomes an invoice, controlled by the Invoice Type field on the FBA settings tab, and those invoices appear on the Invoices screen of Sales Orders.
Why does my Amazon order import fail with an item error?
The most likely cause is the Import Item checkbox on the Amazon Store screen. When it is selected, the Biz-Tech Services Acumatica Amazon integrator imports product information for items that do not yet exist in Acumatica; when it is not selected and an unknown Amazon item arrives, an error occurs during integration. Check that checkbox first, then check whether the SKU is mapped on the Inventory Details tab of the Amazon Store screen. The full error text is shown on the Amazon Orders screen and explains what should be fixed and in which system.
How do I see the exact error behind a failed Amazon order import?
There are three places, in increasing order of detail. On the Import Amazon Orders grid, hover the cursor over the red cross on the failing order line to see additional information. Click the Order Number to open the Amazon Orders screen, where the error message states what should be fixed and in which system. For anything still unclear, open Tools and then Trace for the underlying detail.
What does the error “Received quantity is greater than the shipped quantity” mean?
It appears on the Import FBA Shipments screen when the received quantity on an Amazon FBA shipment exceeds the quantity shipped, and it blocks the import. Equal received and shipped quantities import cleanly, and a received quantity lower than the shipped quantity still imports. To clear the error, adjust the item quantities on the FBA Shipments screen before importing again.
How do I cancel an Amazon order from Acumatica?
Send the Amazon acknowledgement with a Failure status and fill the required Cancel reason field. From Process Orders, open Manually export Amazon PO Acknowledgement, check the order, click Set Status Failure, choose the Cancel Reason, press Save, and then Send Acknowledgement. Cancel reasons must already exist on the Cancel Reasons tab of the Amazon Store screen, otherwise the cancellation cannot be completed. If the cancellation happened in Amazon instead, open the Amazon Orders screen and press Update Order to bring the Amazon status into Acumatica.
What happens when an Amazon order is refunded after the invoice was released?
That is case five of the refund logic. When you process the refunded order on the Import Amazon Refunded Orders screen, the system reverses the invoice and generates a Credit Memo carrying a Reference number of the Customer Refund type attached to Applications. Once the actions finish, the Processed checkbox on the Refunds tab of the Amazon Orders screen is checked automatically and the order is Closed. The credit memo itself is created on the Invoices screen of Sales Orders.
Work With the Biz-Tech Services Amazon Connector
Traced end to end, the flow is coherent: credentials on the Connection Settings tab open the channel to the Biz-Tech intermediate server, the FBM Settings and FBA settings tabs decide what imported records look like, the cross-reference, warehouse, carrier, and reason tabs translate Amazon values into Acumatica ones, and the processing screens move orders, acknowledgements, fulfillments, refunds, and quantities in the appropriate direction. FBM runs through sales orders, shipments, and invoices; FBA runs through transfer orders, purchase receipts, and invoices. When something goes wrong, the Amazon Orders screen, the red cross tooltip, the trace, and the Processed checkbox on the Refunds tab tell your business exactly where the record stopped.
If your business sells on Amazon and wants that activity landing in Acumatica ERP as accurate orders, shipments, invoices, refunds, and inventory quantities, the Biz-Tech Services Amazon Connector is built for exactly that. Visit https://biz-techservices.com to learn more about our Acumatica expertise or to schedule a personalized demonstration.

