How do you customize kit components directly inside a sales order? Say a customer calls and wants a specific desktop computer build. You know, swapping out the hard drive, maybe choosing a different monitor size. Your sales team really needs a frictionless way to enter that order. Well, by the end of our time together today, you’re going to understand exactly how your backend specifications directly control and streamline that front-end sales order experience.
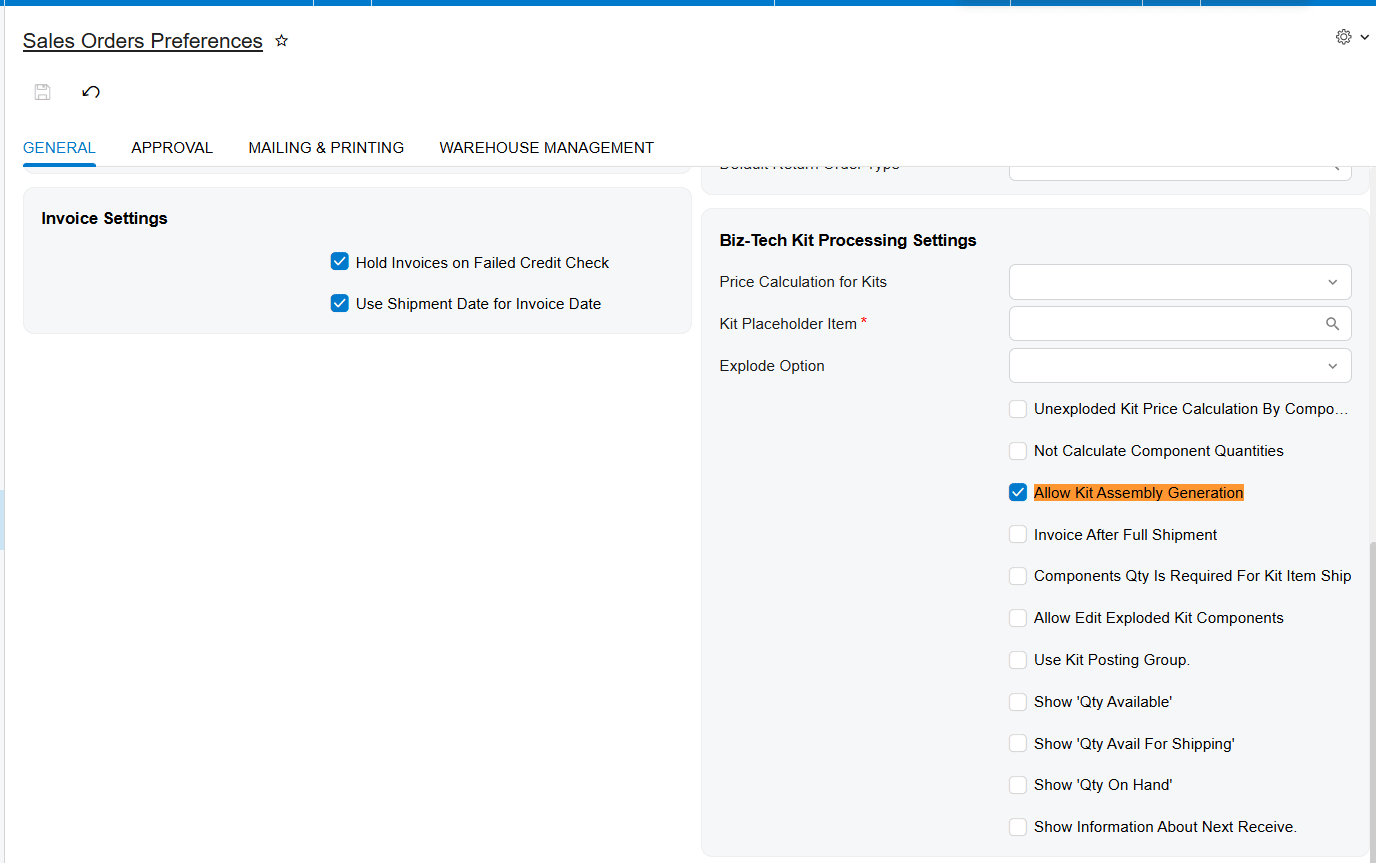
Let’s look at our road map for today. Defining kit specifications. This is where we shift from global preferences down to the item specific rules. So before a kit can actually do anything useful on a sales order, you have to hit a few prerequisites. Obviously, you’ve got to mark the specification as active. Then you need to select explode kit, which basically tells the system, hey, this item is allowed to be broken down into its component parts.
But here is a really critical concept. You absolutely must assign a kit placeholder item. See, because a kit consists of multiple components, when it explodes on the sales order, all those individual parts get added. To stop your system from double counting the cost of the components and the master kit itself. The kit item is actually replaced by this non-stop placeholder item.
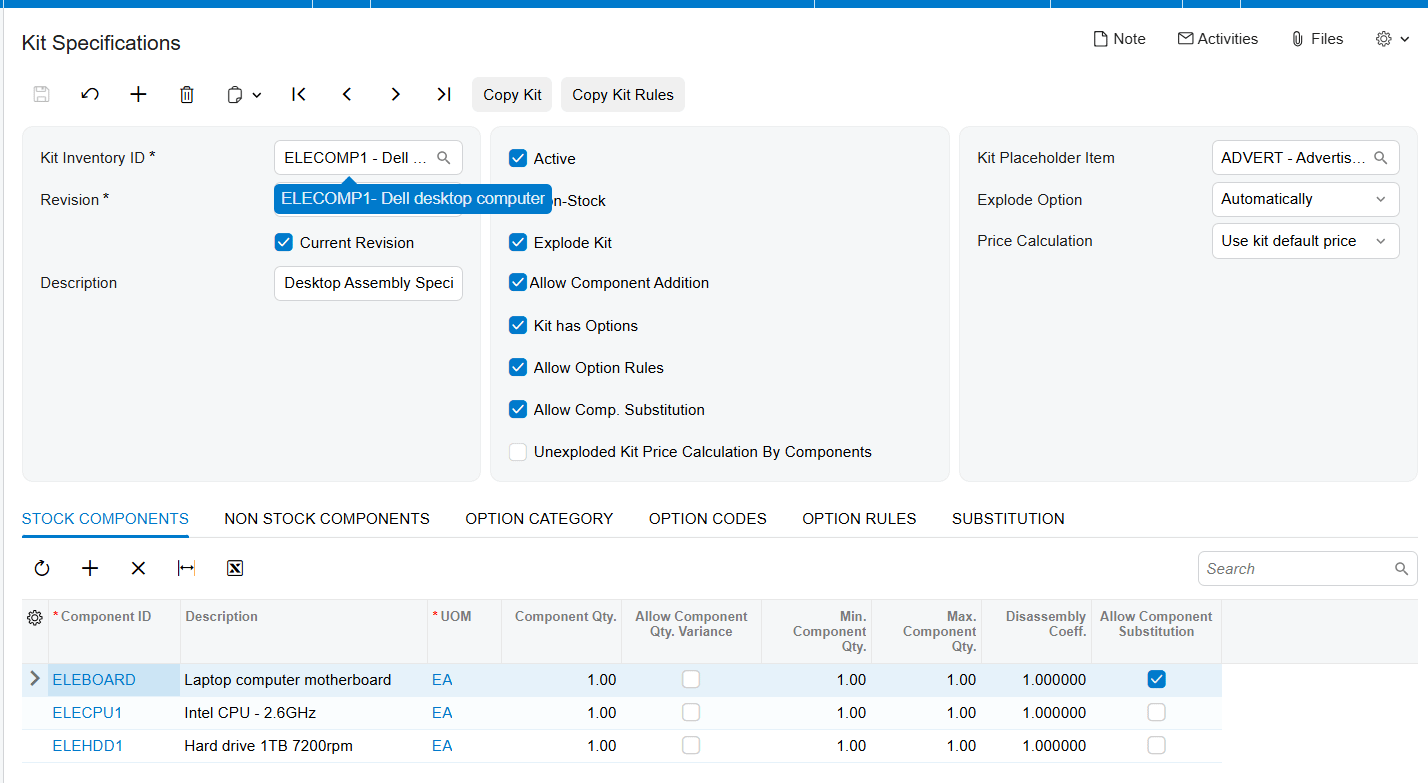
But let’s look a little further down to that kit has options checkbox. It dynamically reveals the option category and option codes tabs down at the bottom of your screen. That’s what allows you to build those highly customizable bundles where customers can literally pick and choose their specific components. So, it’s pretty vital to understand the distinction here. Option categories are your broad classifications. Think size, color, or maybe processor type. Option codes, on the other hand, are the actual specific selections within those categories like 8×10 black or 2.6 GHz CPU.
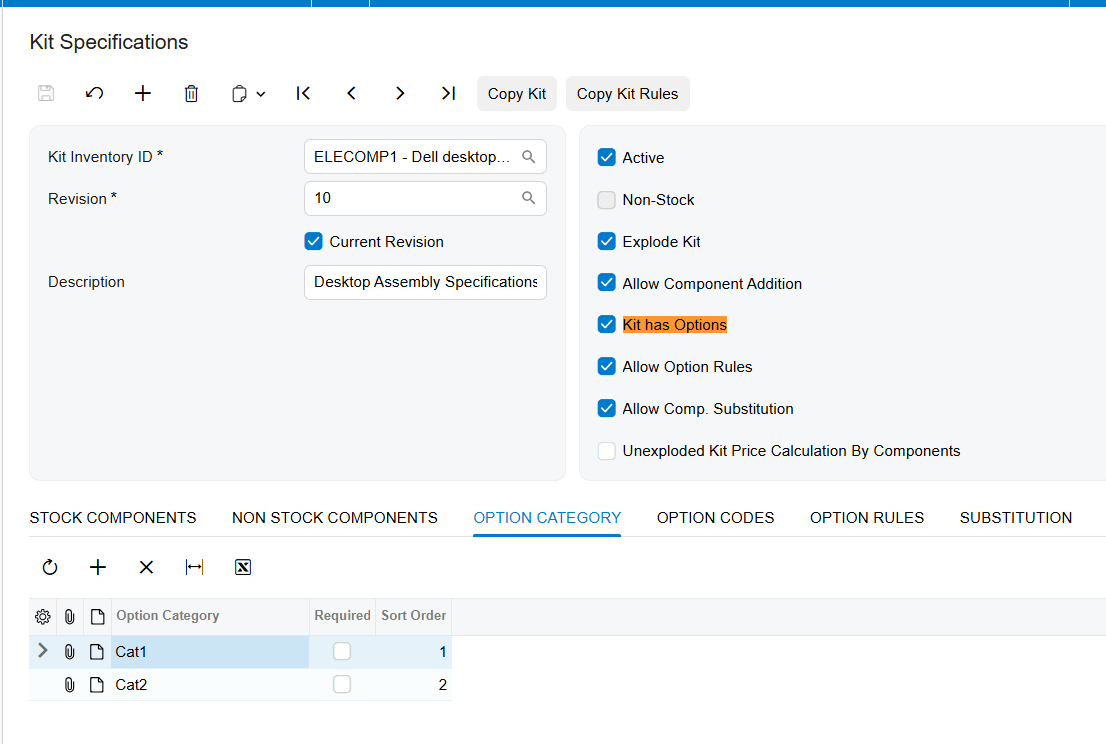
Notice that required checkbox from the setup. If you marked an option category as required during your backend configuration, this popup will literally force the sales rep to pick an option code before they can even proceed with the kit order.
So, let’s move on and see how this actually builds into the explosion phase. In your backend settings, you had a choice for the explode option, automatic or prompt. If you chose automatic. Well, the system just does the work for you. The moment the item is entered, it instantly explodes into its component parts right on the sales order screen.
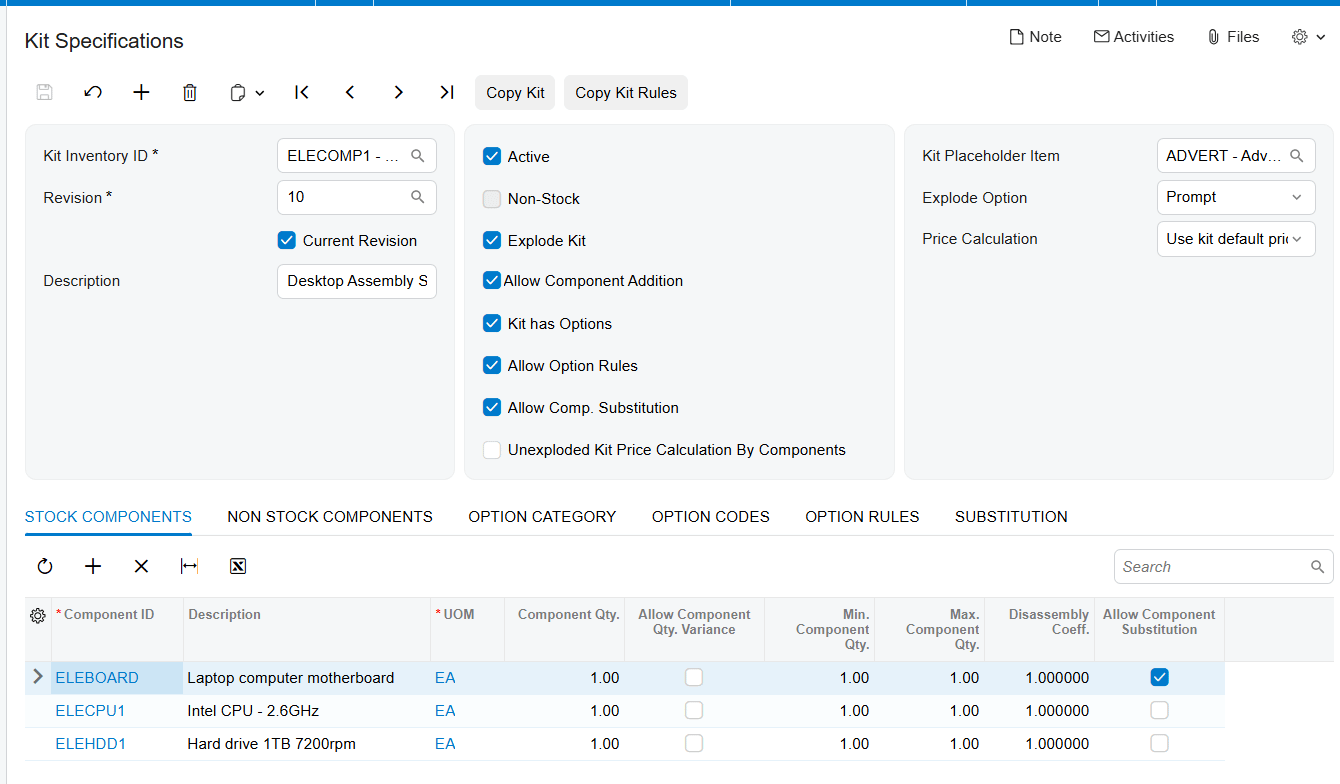
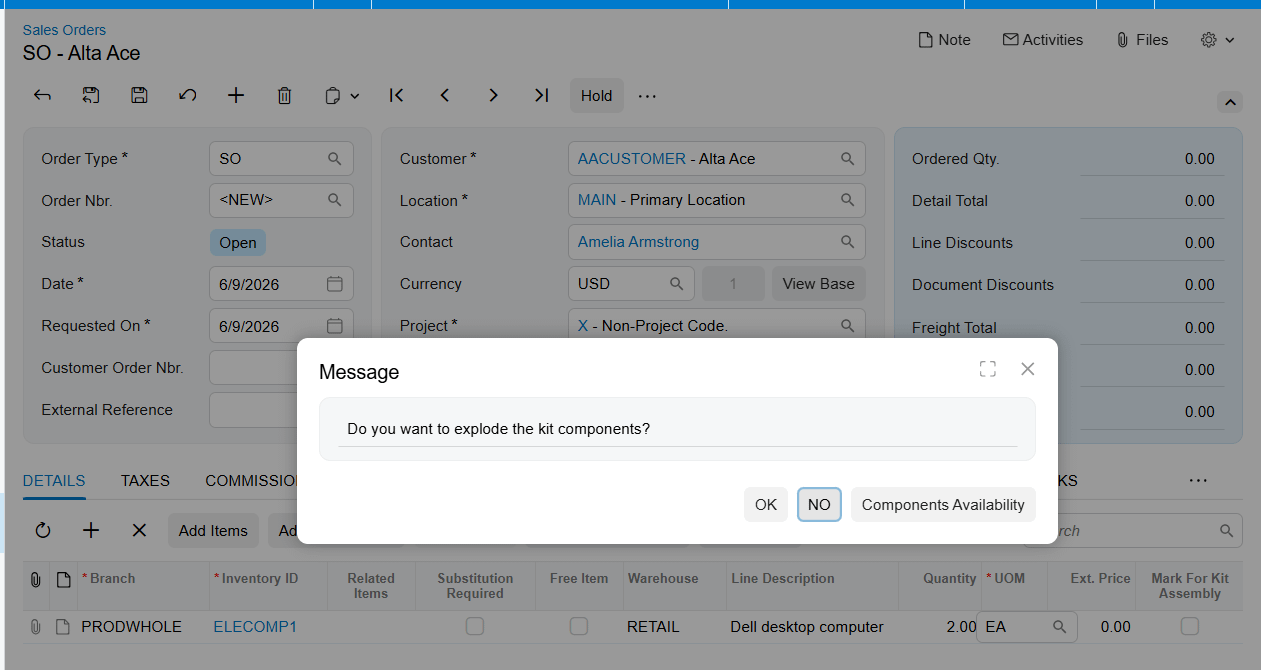
But if you chose prompt, the system actually pauses and empowers the sales team. It gives them a choice, prompting them to decide if they actually want to explode those components right then and there. If you selected prompt back in the configuration, this exact message box gets triggered during a live sales order. It simply asks, do you want to explode the kit components?
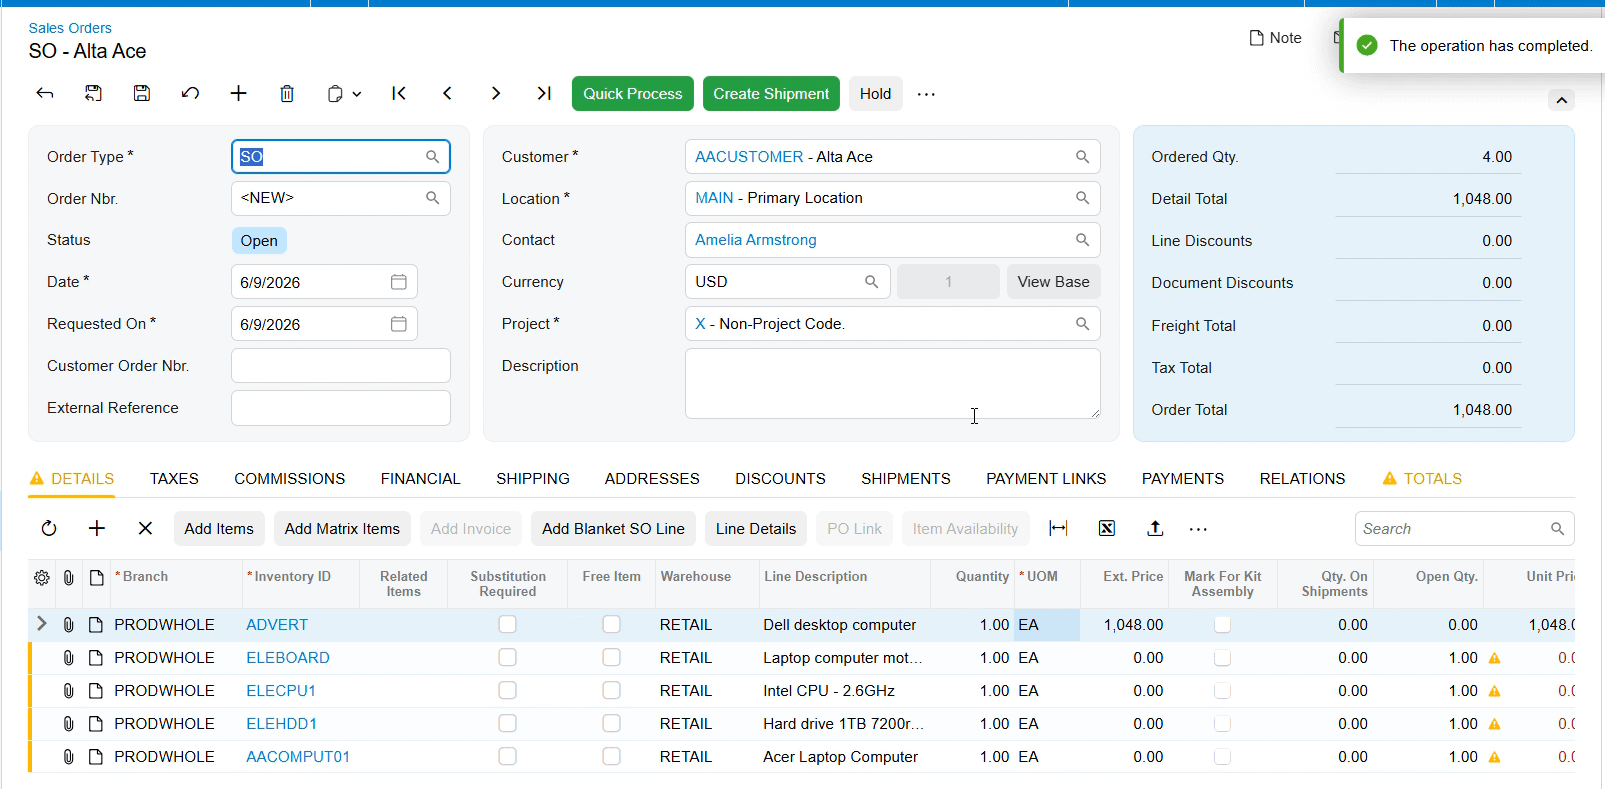
Let’s talk about generating those final documents. Direct your eyes to the detail grid on this sales order screen. There’s a specific checkbox highlighted right there. Mark for kit assembly on Sales Order line and Allow Kit Assembly Generation on SO Preferences.
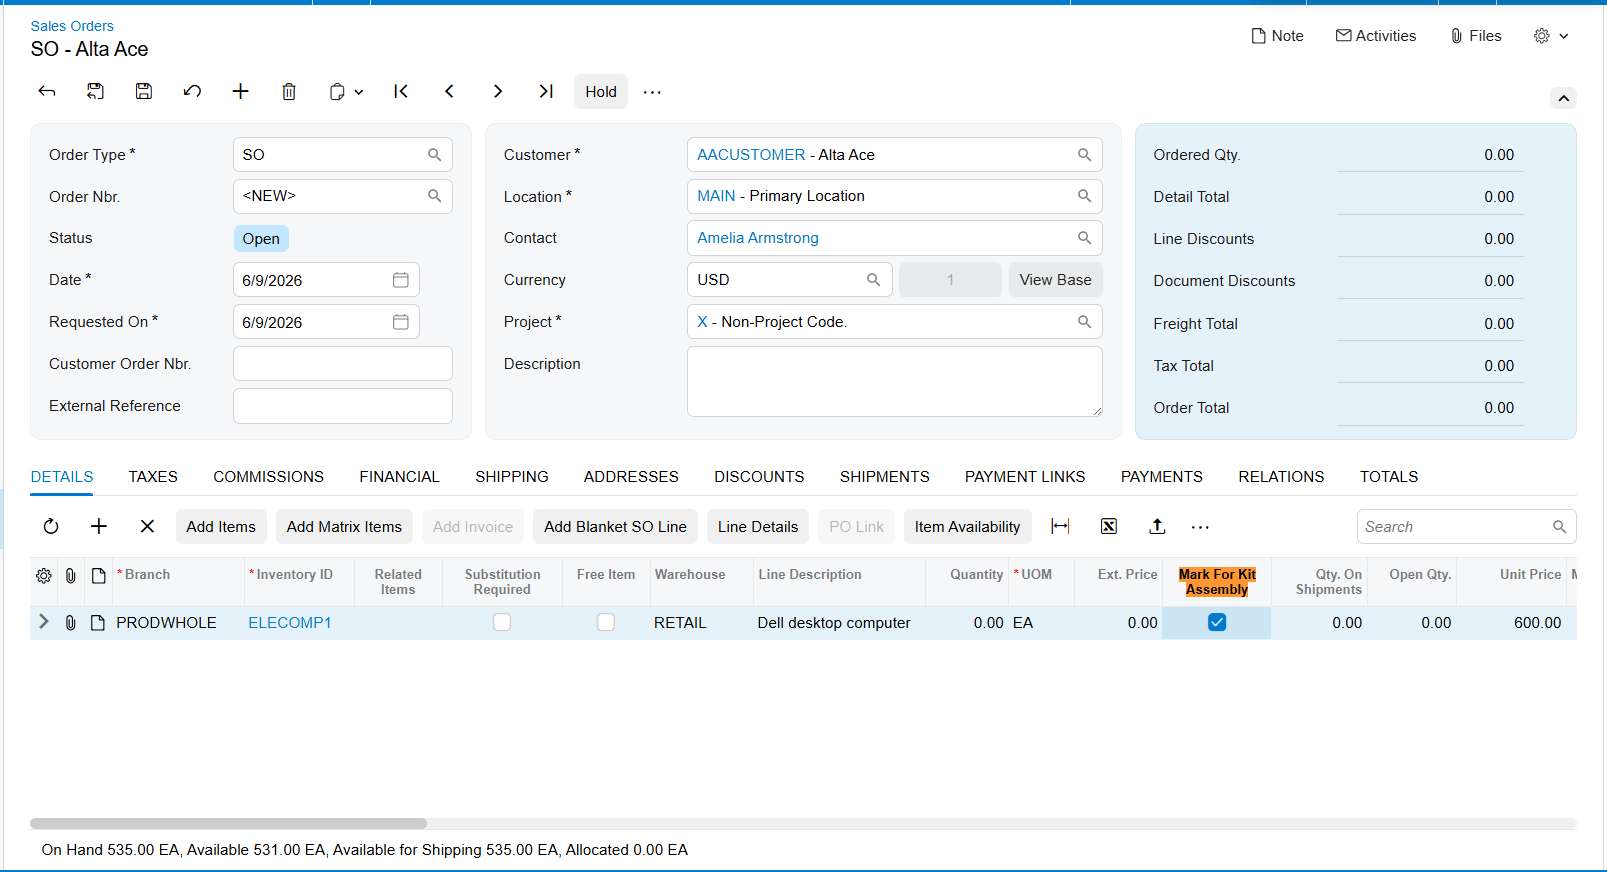
Once your kit is on the order, taking this box tells the system that this specific line item requires a formal assembly process before it can be shipped out. This checkbox will be totally disabled if you’re working with a non-stock item. It’s specifically designed for goods that require physical warehouse assembly.
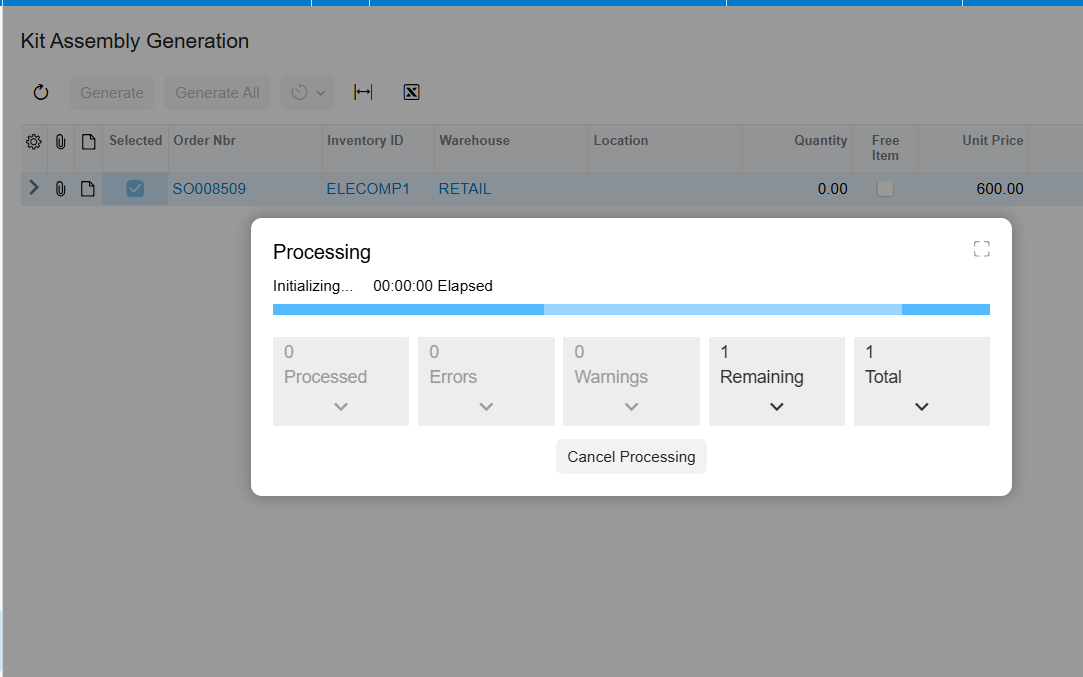
Generating kit assemblies. Once generated, a link assembly document number will dynamically appear right there in the details tab of your sales order. Your sales rep instantly knows the whole assembly document has been created for the warehouse now that your front-end sales team and your backend settings are perfectly aligned. Because understanding this workflow isn’t just about clicking the right buttons. It’s about empowering your teams to work with frictionless precision. Thanks so much for joining me for this explainer and happy configuring