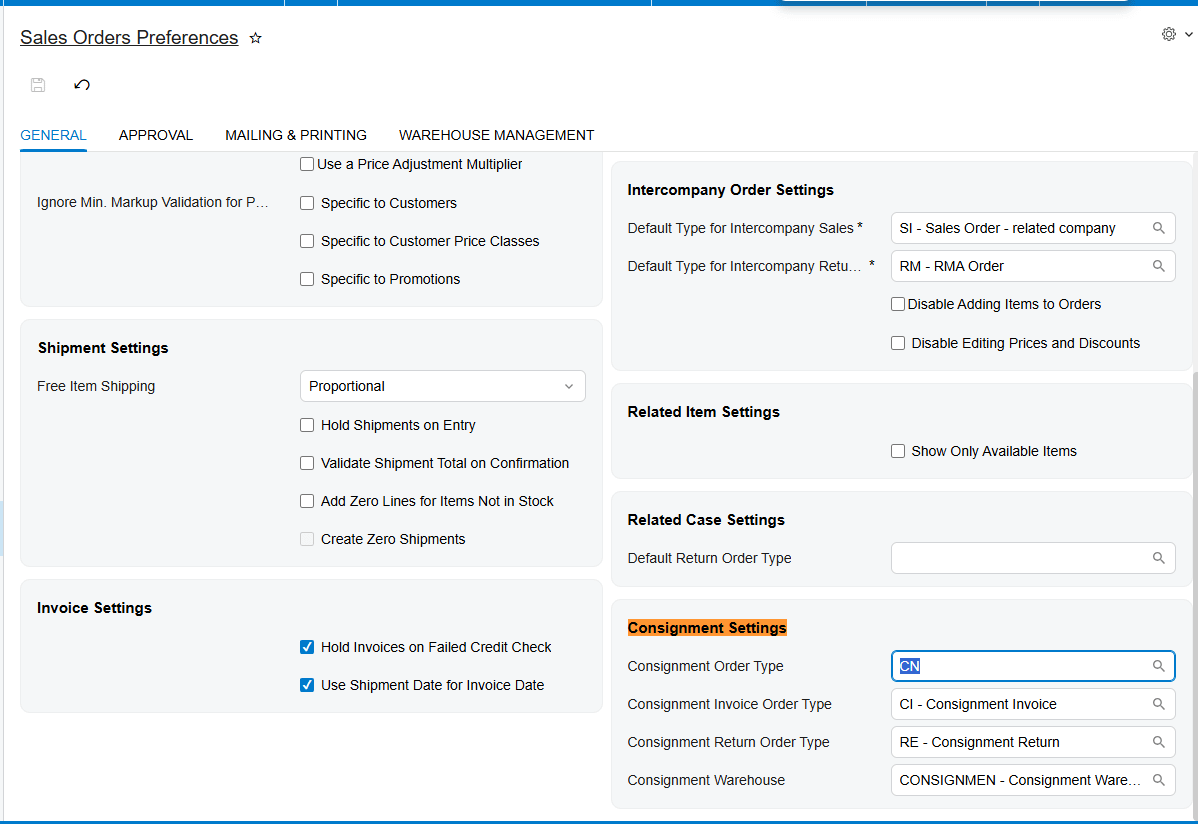
Initial Configuration: Order Types and Preferences “First, you need to have your order types ready. Specifically, ensure you have a Transfer Order type configured, which we’ll refer to as the CN type. Next, head over to the Sales Order Preferences screen (SO101000). You’ll find a dedicated Consignment Settings section where you need to map your order types: set the Consignment Order Type to ‘CN’, define your Invoice Order Type, and set your Return Order Type. These mappings are critical because they dictate how the system generates documents later in the process.”
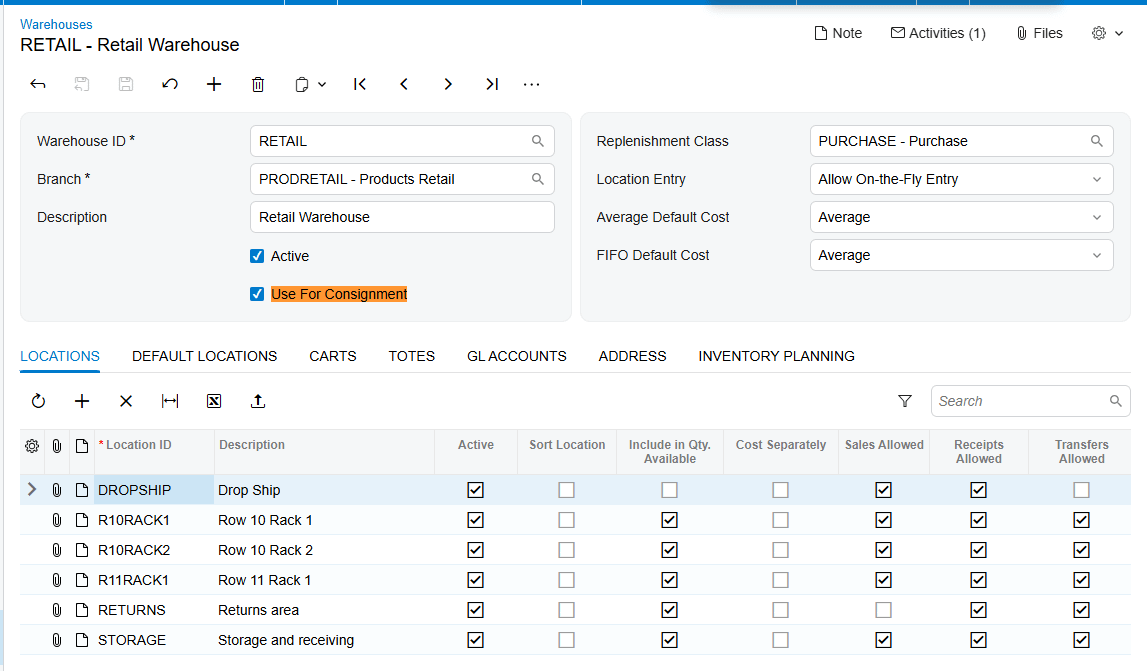
Warehouse and Customer Setup “Now for the infrastructure. On the Warehouses screen (IN204000), identify your consignment warehouse and ensure the ‘Use For Consignment’ checkbox is selected. Without this, you won’t be able to link it to the Consignment Settings. Once that’s active, go to the Customers screen and navigate to the Shipping tab. Here, you must add that specific warehouse to the Consignment Warehouse field. This customer-level setting will override any default selections when you create an order for them.”
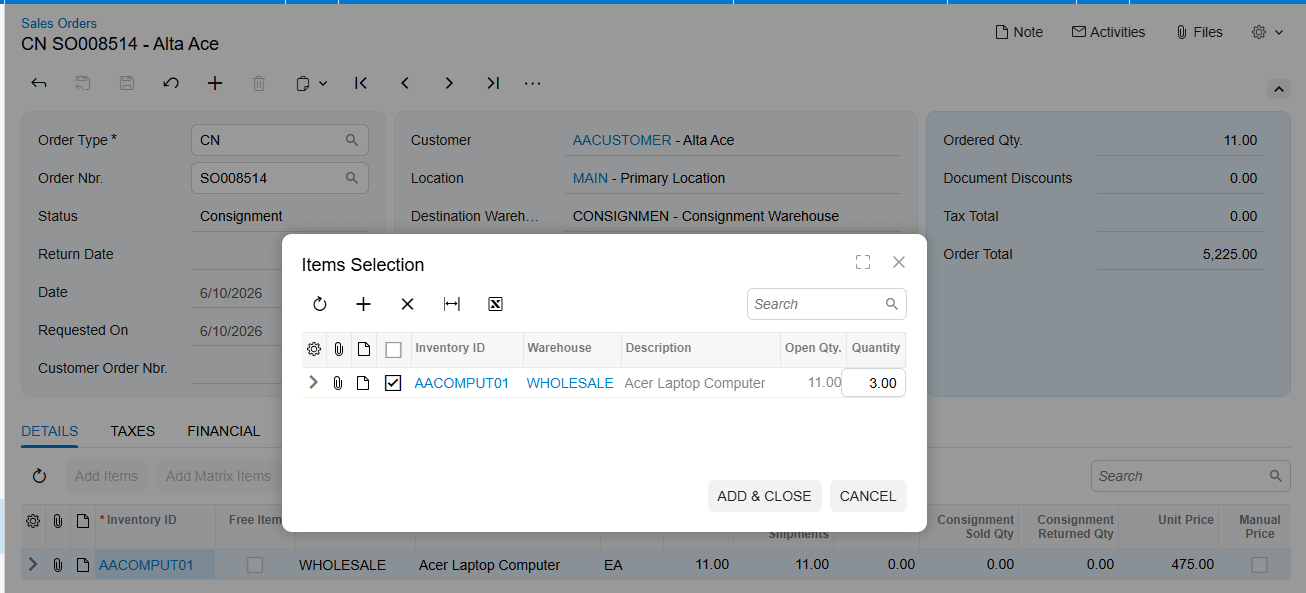
The Sales Order Workflow “With the setup complete, let’s create a Sales Order. Select Order Type CN and choose your customer. After adding your items, proceed through the standard shipment creation and confirmation. The most important step here is to press the ‘Update IN’ button. This action issues items from your main warehouse and receives them into the consignment warehouse, automatically generating a Transfer-type Purchase Receipt.”
Selling and Returning Items “Once the items are in the consignment warehouse and the order status is ‘Consignment’ or ‘Partial Consignment’, you’ll see two key actions in the menu: ‘Consignment Sell Items’ and ‘Consignment Return Items’.

When you select one, a popup appears for item and quantity selection. Every time you add a quantity in these popups, the system automatically creates a new Sales Order. The type of order created depends entirely on what you set earlier in the Sales Order Preferences for ‘Invoice Order Type’ and ‘Return Order Type’.”
Managing Consignment Physical Inventory “Finally, let’s talk about reconciliation. You can perform physical inventory specifically for stock at customer locations. To do this, create a PI Type with the ‘Consignment Inventory Count’ checkbox selected, which enables fields for the specific Customer and Location. When you complete this PI process, the system automatically generates a Consignment Invoice for any consumed items, following the same logic as the manual ‘Sell Items’ process. When all items are sold or returned, the original Consignment Order will automatically close
It’s important to understand that these statuses are entirely distinct from regular sales order statuses; they function independently to specifically track the consignment flow.
- Open: This is the starting point. When you first create a consignment order, it sits in “Open” status, meaning none of the items have been shipped to the customer yet.
- Partial Consignment: As soon as you ship some, but not all, of the ordered items, the status shifts here. This indicates that part of your stock is at the customer’s location while the rest is still pending shipment.
- Consignment: Once every item on the order has been shipped, the status becomes “Consignment”. At this stage, all items are officially part of the consignment inventory held by the customer.
- Closed: This is the final stage. The order moves to “Closed” automatically only when all ordered items have been shipped and every one of those items has been either successfully sold or returned to your warehouse.
Once an order is Closed, the “Consignment Sell” and “Consignment Return” buttons are disabled, and while you can still see the order-level data in generic inquiries, the item-level details will no longer appear in the “Consignment Item Details” inquiry