How to Connect WooCommerce to Acumatica
Link your online store to your ERP so orders, products, inventory, and payments stay in sync — automatically.
The double-entry problem
If you sell on a WooCommerce store and run your business on Acumatica, you’ve probably felt the gap between them. Orders come in on your website, and then someone has to re-key them into your ERP. Stock levels drift apart. A product sells online that you no longer carry. It’s a lot of manual work, and every handoff is a chance for something to go wrong.
The Biz-Tech WooCommerce Connector closes that gap. It links your WooCommerce store and your Acumatica system so that orders, products, inventory, customers, and payments flow between them without anyone copying data by hand. Let’s walk through how you connect the two.
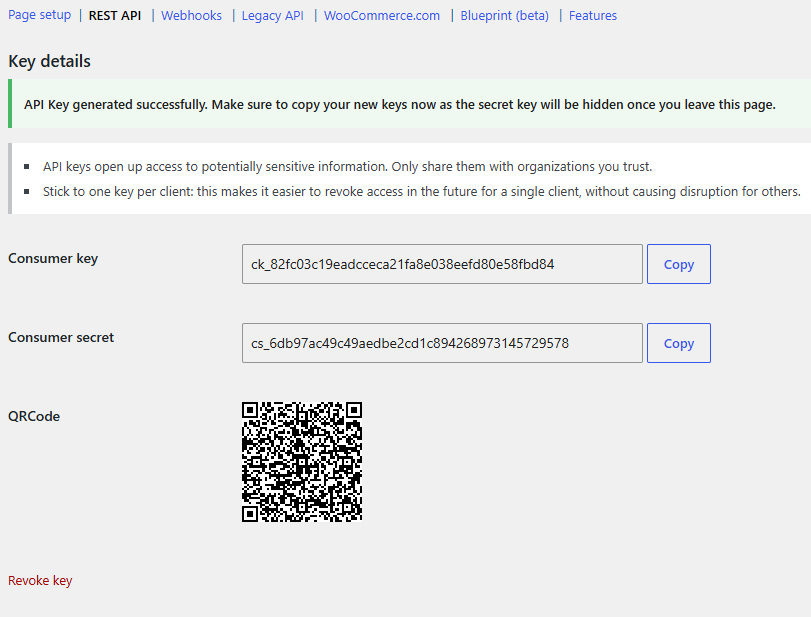
Step one: create your API keys in WooCommerce
The connection runs on WooCommerce’s REST API, which uses a key to control access. So the first thing you do is generate that key on your website. In WooCommerce, you go to Settings, then Advanced, then REST API, and add a new key. You give it a description, choose the user it belongs to, and set the permission level to Read and Write so data can move in both directions. WooCommerce then gives you two values, a Consumer Key and a Consumer Secret. Keep those handy, because Acumatica needs them next.
Step two: enter your credentials in Acumatica
Once the connector package is installed, a WooCommerce workspace appears right inside your Acumatica menu. You start on the WooCommerce Store Preferences screen and enter the credentials you just generated, your Consumer Key, your Consumer Secret, your store’s web address, and your WordPress login. Then you press Test Credentials. When you see the message that your credentials are valid, the two systems are talking, and you’re ready to configure how they work together.

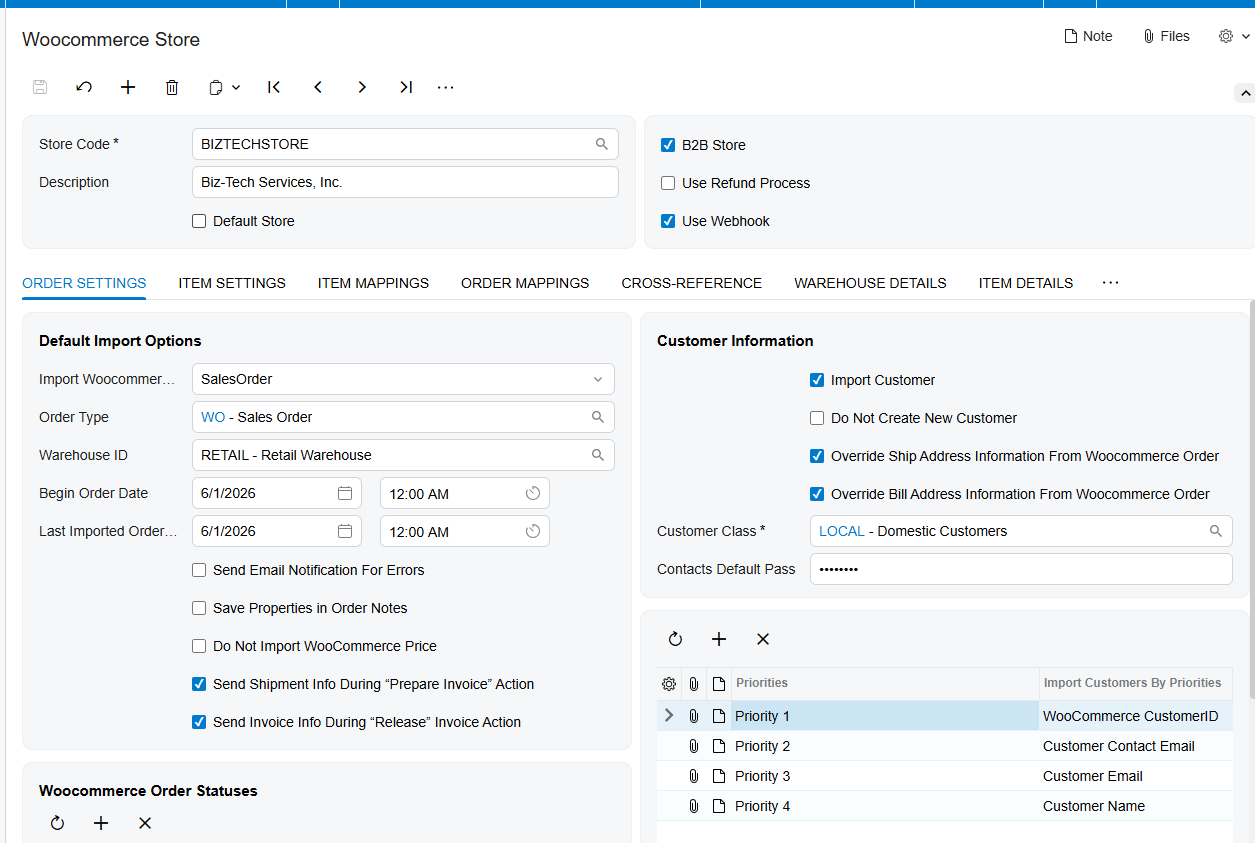
Step three: set up the WooCommerce Store
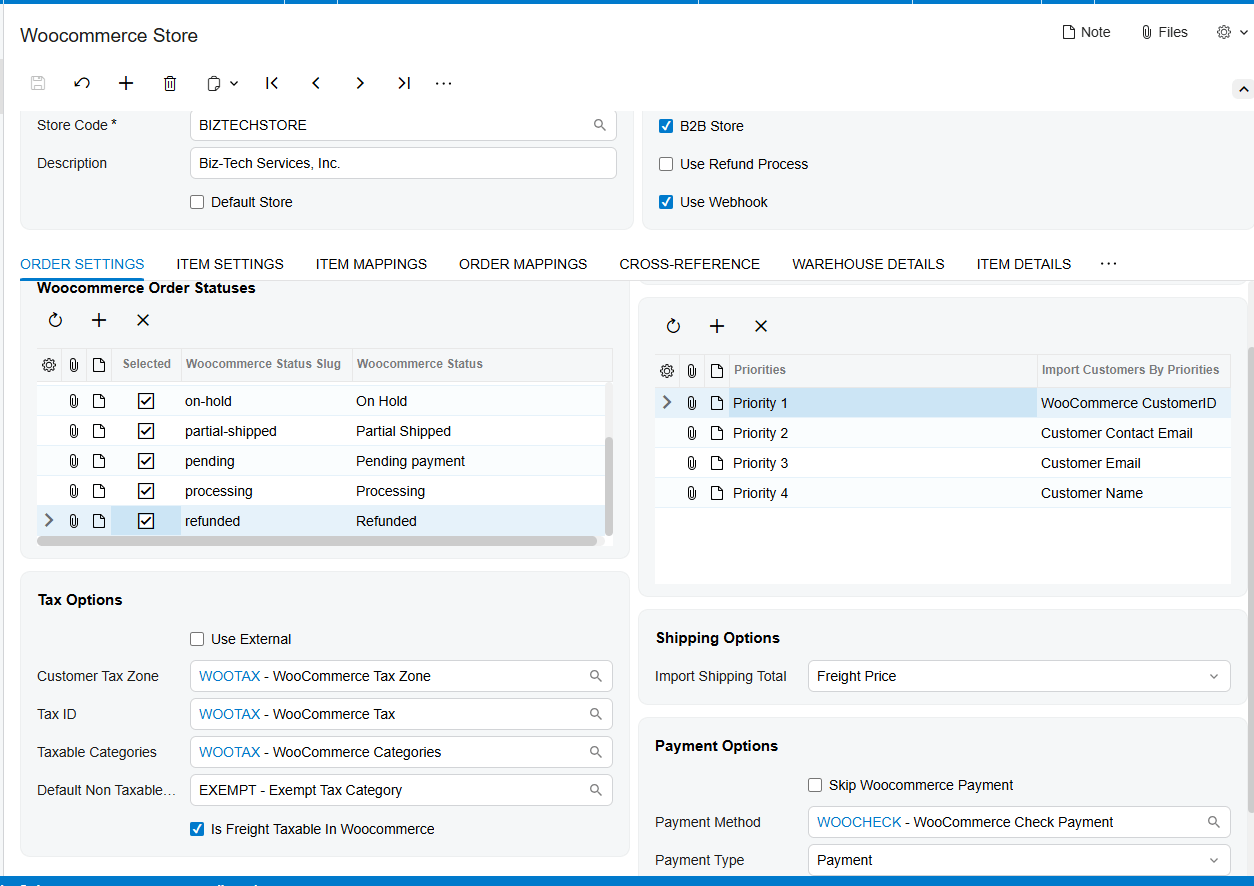
The WooCommerce Store screen is the control center of the whole integration. This is where you decide how orders behave when they arrive. You choose that incoming orders become sales orders in Acumatica or invoiced directly, you set a default order type and a default warehouse, and you tell the system which order statuses to pull in, like processing or completed. You can also set a start date so it only imports orders from a point you choose, and you decide whether you’re running in standard retail mode or business-to-business mode.
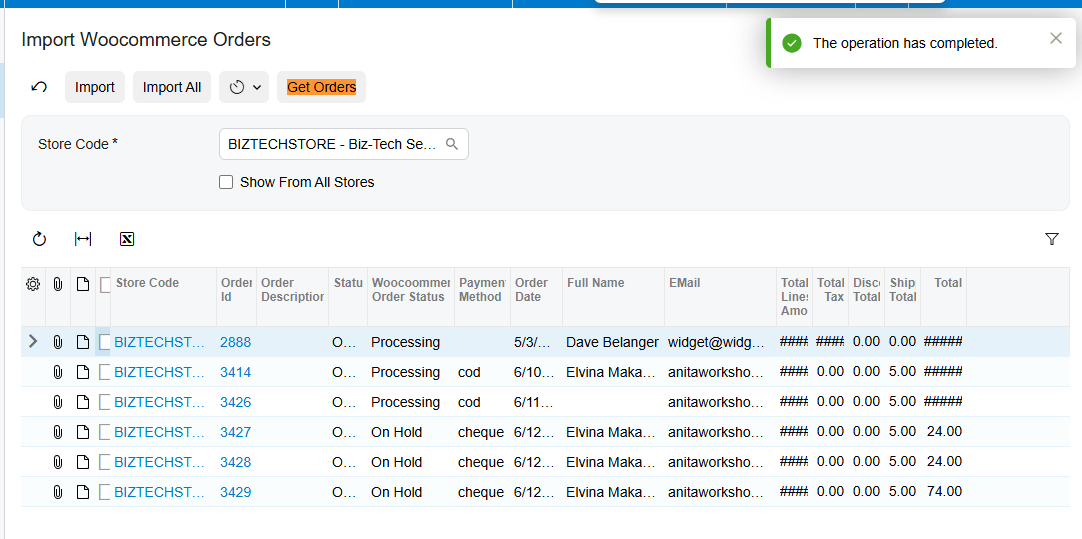
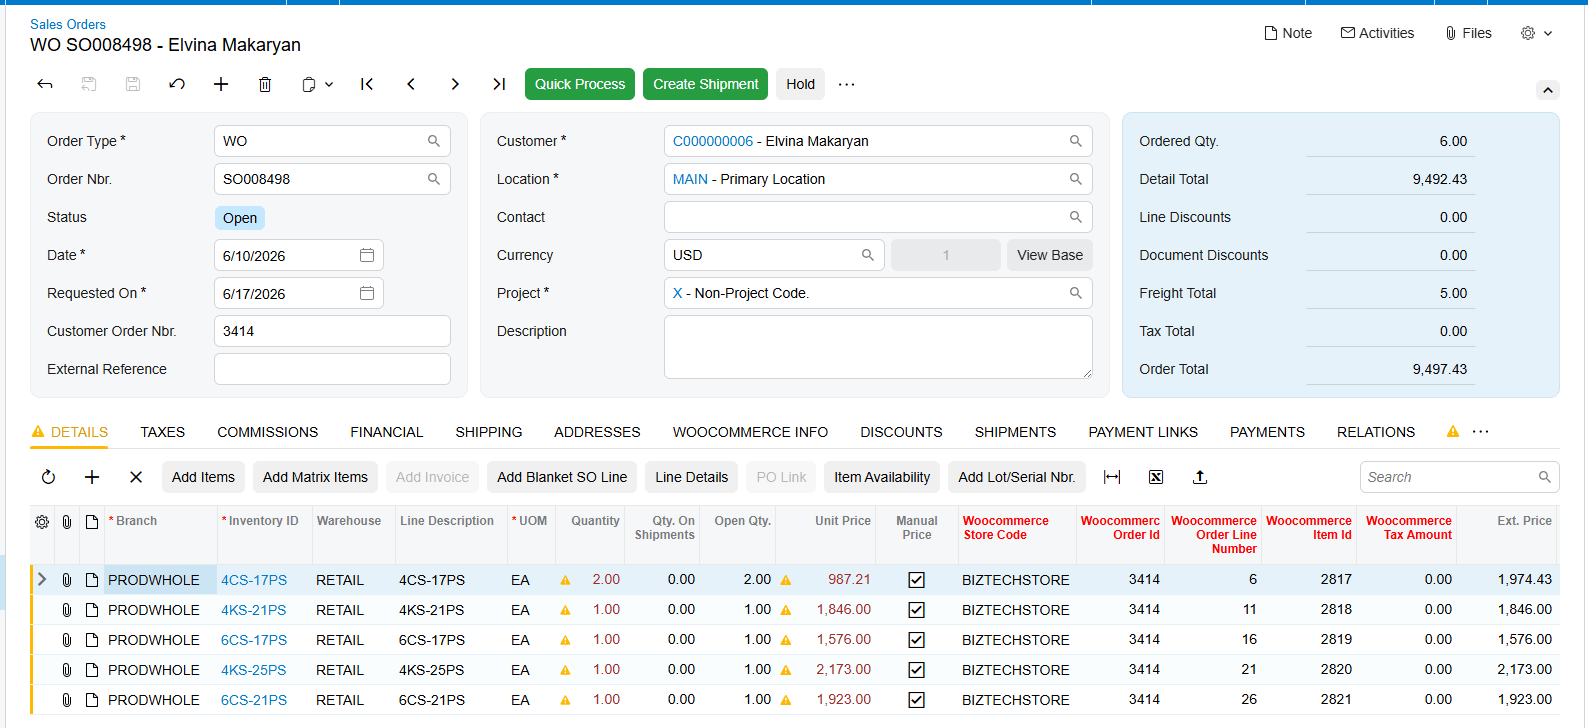
Bringing orders in
With that in place, bringing orders into Acumatica is simple. On the Import WooCommerce Orders screen, you press Get Orders, and the connector retrieves every order for your selected period. From there you can import them one at a time or import them all at once. And you don’t have to do it manually forever. You can set a schedule so the system retrieves and imports new orders on its own, around the clock.
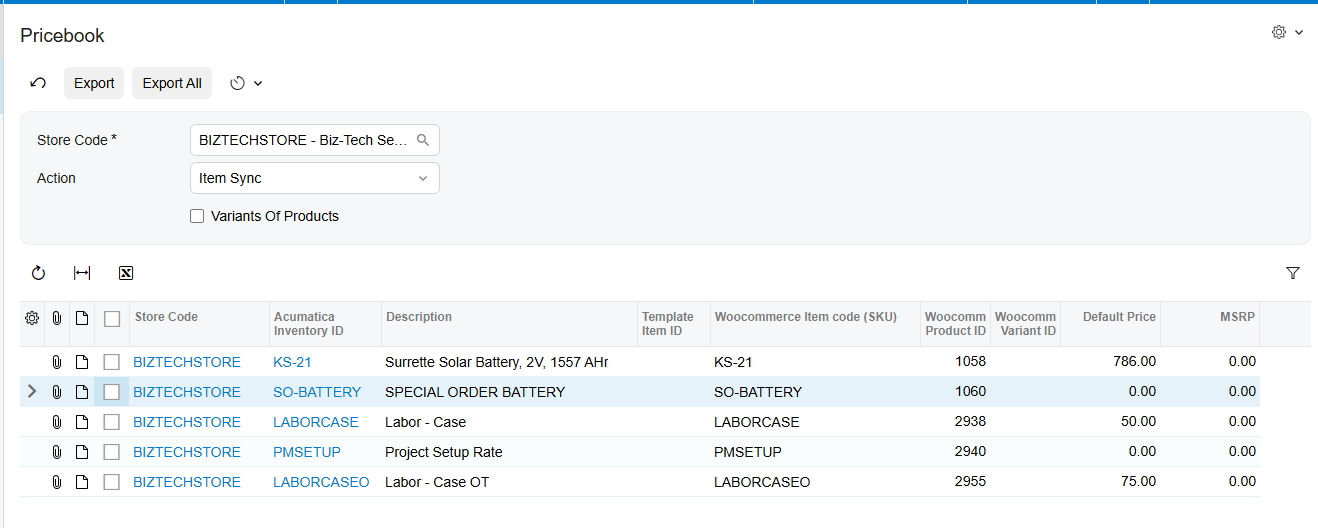
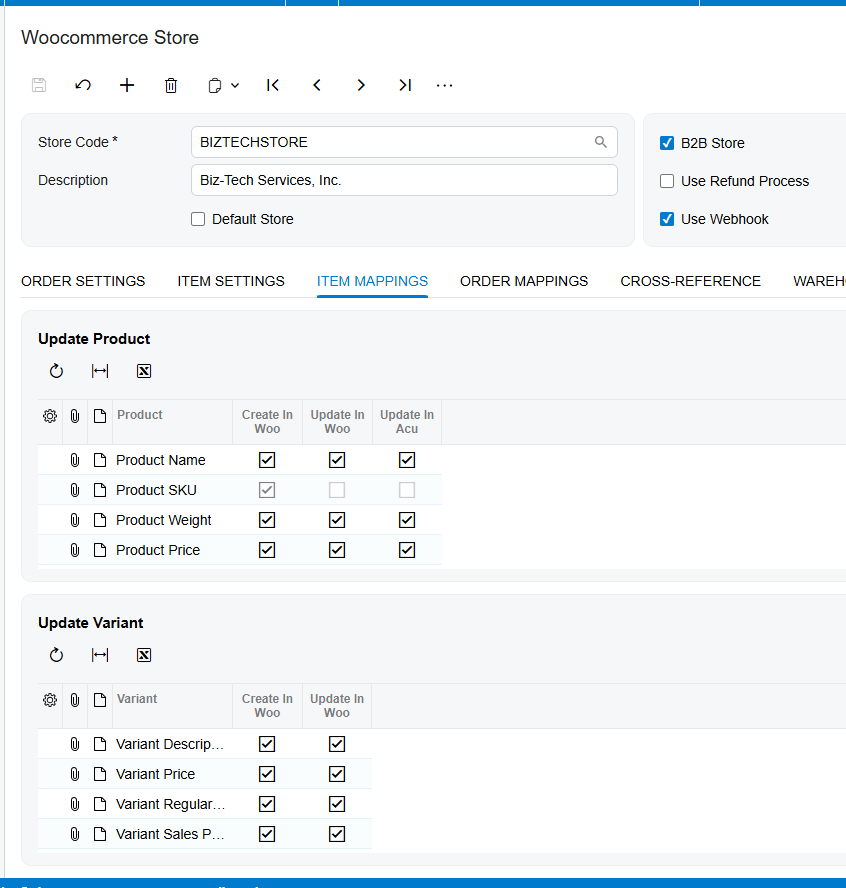
Keeping products and inventory in sync
The connector also keeps your catalog aligned. From the export screens, you can push your Acumatica items out to WooCommerce, update their prices and images, and publish or unpublish them based on whether they’re in stock.
Just as important, keeps your inventory configred. You choose whether Product Name, SKU, Weight, Image, Dimensions and etc. are sent to WooCommerce. You can also configure the 1st time creadion or later edits.
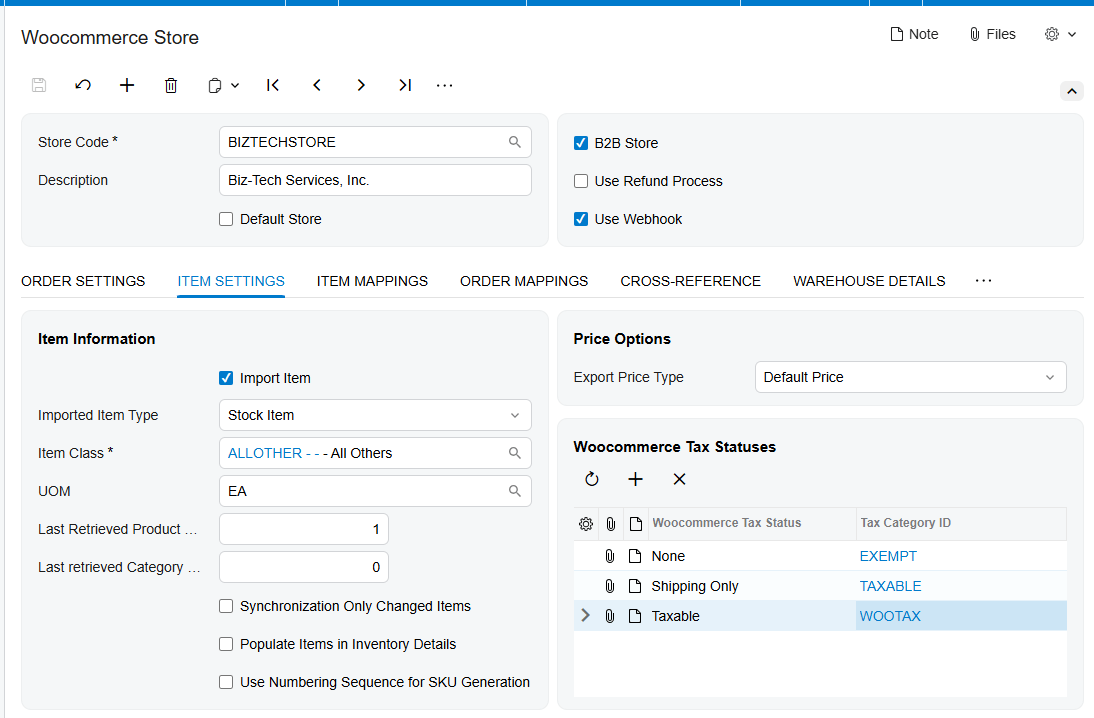
The Item Settings tab is where you decide how products are handled as they move between the two systems. You choose whether the connector should create brand-new items in Acumatica automatically, or only match incoming products to items you already have by lining them up on their SKU. And you set the defaults every new item inherits — things like its item type, its unit of measure, and which price gets sent back to your store.
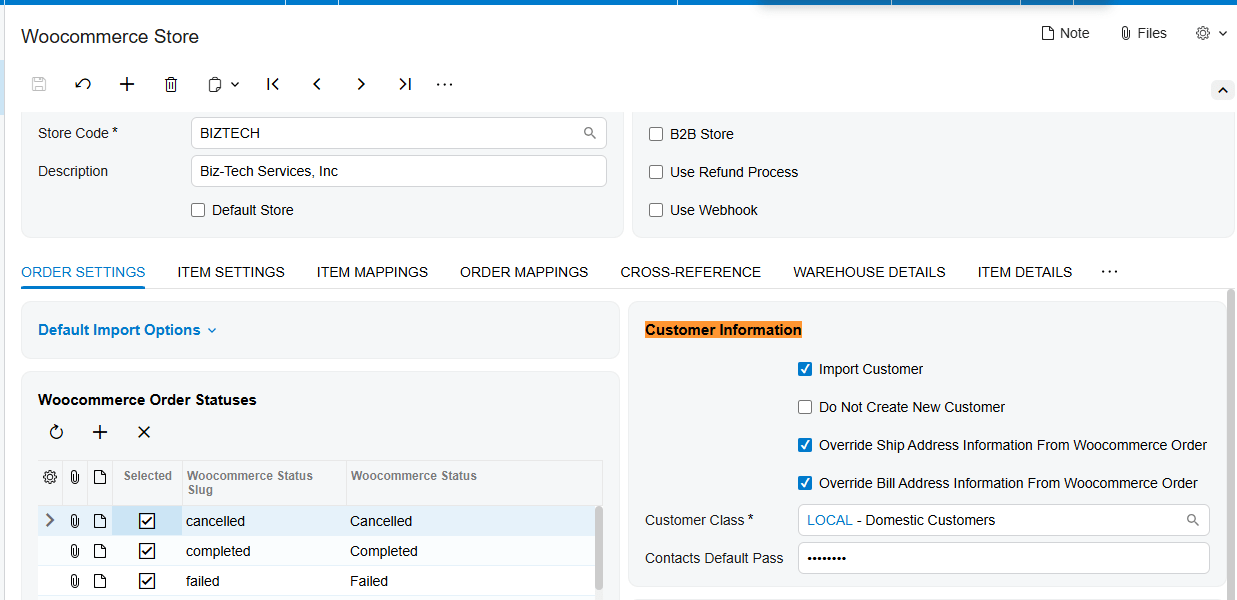
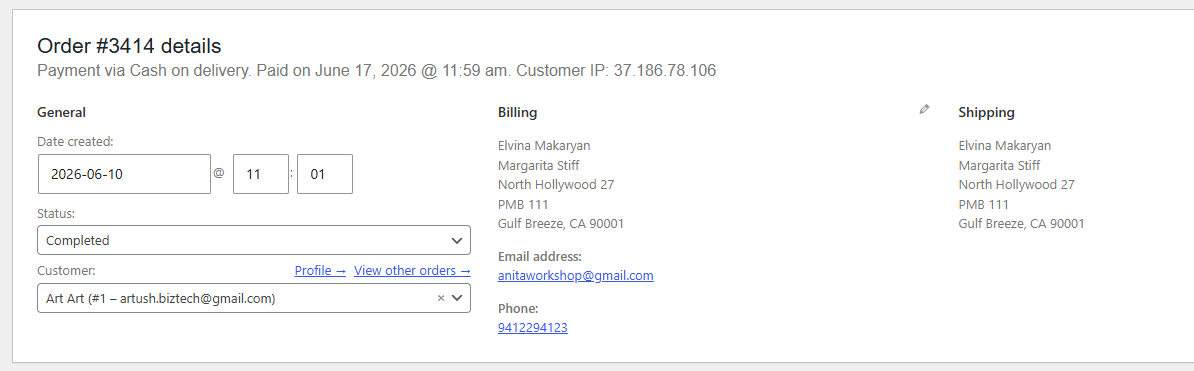
Matching up customers
Customers stay connected too. When an order comes in, the connector can create or match the customer record in Acumatica automatically, using the email and name to avoid duplicates. And if you run a business-to-business store, it can sync your contacts the other way and create matching user accounts on your WooCommerce site, so your buyers can log in and order directly.
Handling payments, taxes, and shipping
Payments are handled with real flexibility. When a customer pays on your website, WooCommerce authorizes the card and reserves the funds. Acumatica then records that authorization and lets you capture the money later, when the order is actually ready to ship. You decide the payment method and type during import, and the connector works with gateways like Ebizcharge and Fortis.
Taxes and shipping come across as well. You can map your tax setup, including external services like Avalara if you use them, so taxes calculate correctly in Acumatica. And you match each WooCommerce shipping method to the right ship-via in Acumatica, so the delivery method on the order is always accurate.
Completing the order: fulfillment
The last piece is fulfillment, and this is where the connection really pays off. You create the shipment in Acumatica, confirm it with the box and tracking number, prepare the invoice, and release it. As you move through those steps, the connector pushes the tracking number and the completion back to WooCommerce, so the order is marked complete on both sides and your customer gets updated automatically. No second system to touch.
Tracking number of Shipment document is moved to WooCommerce and the Order status is updated. Do not forget to have
The bottom line
Once it’s connected, your WooCommerce store and your Acumatica system work as one. Orders flow in, inventory stays accurate, payments line up, and fulfillment closes the loop on its own. Your team stops re-typing and starts focusing on growth.
If you’d like help connecting your own store, the team at Biz-Tech Services does this every day. Visit biz-techservices.com to book a walkthrough and see your WooCommerce orders flow straight into Acumatica.