
How WooCommerce Data Flows into Acumatica ERP
The WooCommerce Acumatica integration moves data in both directions, and that is the first thing to understand about it. Orders travel inbound from your store to become Acumatica sales orders, while items, quantities, prices, images, customers, and fulfillment events travel outbound from Acumatica back to WooCommerce. A single configuration screen governs almost all of it. Knowing which setting controls each handoff, and which screen shows the result, is what turns a large connector into a predictable one.
The Biz-Tech Services WooCommerce Connector links WooCommerce, the e-commerce platform, with Acumatica ERP. The integration retrieves orders from WooCommerce and imports the selected orders into Acumatica, and when a user confirms the shipments created from those imported orders, fulfillment events are generated in WooCommerce for each corresponding order. This article follows records through the full data flow in both directions and identifies the fields worth monitoring at every stage.
What the WooCommerce Connector for Acumatica Does
The WooCommerce Connector is an Acumatica ERP customization that synchronizes an online store with the back office. Inbound, it retrieves WooCommerce orders and creates Acumatica sales orders from them, optionally importing customers, addresses, payments, discounts, taxes, and shipping details along the way. Outbound, it exports items, inventory quantities, prices, sales prices, images, and product categories to WooCommerce, publishes and unpublishes products, exports customers, and reports shipment and invoice progress back to the store so order status stays current on both sides.
After the customization package is published, the WooCommerce workspace appears in the Acumatica menu along with its screens. Two of those screens matter more than the rest: WooCommerce Store Preferences manages the connection and the API setup, and WooCommerce Store manages the overall workflow and its configuration. Almost every behavior described in this article traces back to a setting on the second of those two screens.
The WooCommerce Data Flow at a Glance
Before looking at individual screens, here is the path records travel through the Biz-Tech Services Acumatica WooCommerce integration:
- Credentials are entered and validated on WooCommerce Store Preferences, which also auto-populates the Order Mappings tab.
- The WooCommerce Store screen defines operating mode, order settings, item settings, mappings, cross-references, warehouses, categories, and webhooks.
- Get Orders retrieves WooCommerce orders, which are routed to either the Import WooCommerce Orders screen or the WooCommerce Orders screen depending on their status.
- Import creates the Acumatica sales order, applying customer, payment, discount, tax, and shipping rules from the store configuration.
- Fulfillment runs Create Shipment, Confirm Shipment, Prepare Invoice, and Release, pushing shipment and invoice information back to WooCommerce.
- Export Item Processes push items, quantities, images, prices, and publication status outward, in batches of one hundred items per API request.
- Customer export, refund import, webhooks, and automation schedules run alongside the main order flow.
Each field discussed below sits at one of those handoffs.
Stage One: Credentials and the Two Setup Screens
Setup begins on the WooCommerce Store Preferences screen, where you enter the credentials generated on your WooCommerce website. Store Code is a lookup field indicating the corresponding WooCommerce store name, and Description holds a description of that store. The connection itself relies on the Consumer Key, Consumer Secret, and Base URL, which are the WooCommerce system credentials used during integration, together with the WordPress Login and WordPress Password fields, which hold the WordPress credentials required for authentication.
After entering the credentials, click Test Credentials. If the message confirming that credentials are valid appears, you can proceed to the WooCommerce Store screen. Do not skip this step, because it is the cheapest way to separate a connection problem from a configuration problem later.
Saving this screen does more than store credentials. During the save process, the Order Mappings setup is configured under the Order Mappings tab of the WooCommerce Store screen, and all required default fields are added automatically. That mapping determines how order synchronization is carried out, so a successful save is what makes order import possible at all.
Generating the WooCommerce API keys
The WooCommerce REST API works on a key system that controls access, and those keys are linked to WordPress users on your site. To generate them, go to WooCommerce, then Settings, then Advanced, then REST API, and choose Add Key. Add a description, select the user the key is being generated for, and select the level of access, which can be read access, write access, or read and write access. Selecting Generate API Key produces the Consumer Key and Consumer Secret used on the preferences screen. Choose the access level deliberately, since a read-only key will block every outbound process described later in this article.
Stage Two: The WooCommerce Store Screen Governs Everything
The WooCommerce Store screen is the main screen of the connector, and the configuration defined here determines how the Biz-Tech Services Acumatica WooCommerce connector functions. It controls order import, item import and creation, payment processing, customer management, shipping methods, warehouse mapping, and related settings. Proper configuration of this screen is what ensures accurate synchronization between the two systems.
The three switches that set operating mode
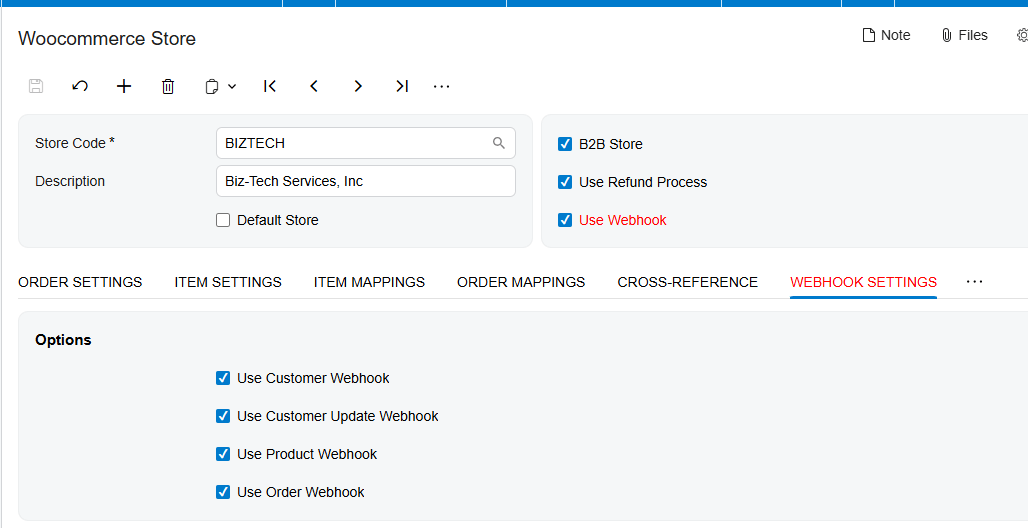
Near the Store Code at the top of the screen, three fields define the system’s operating process in advance. When the Use B2B Store checkbox is selected, the system operates in business-to-business mode, synchronizing the customer’s contact information and creating a corresponding user account in WooCommerce; when it is cleared, the Biz-Tech Services Acumatica WooCommerce integration handles standard retail workflows instead. The Use Refund Process option enables processing of WooCommerce refunded orders and reveals the Last Refunded Order Date field on the Order Settings tab. Use Webhook adds a Webhook Settings tab to the screen.
A Default Store checkbox in the header sets that store automatically in the Store Code field on the processing screens, which removes a repetitive selection step from daily work.
Two actions worth knowing
Edit Credentials redirects to the WooCommerce Store Preferences screen for editing. Update Synchronized Customers transfers WooCommerce customer information from the WooCommerce Info tab of the Customers screen to the Woo Customer Info tab. This second action is not optional housekeeping: customer synchronization is currently based on the Woo Customer Info tab, so after publishing a new package the existing data must be transferred using this action or customer matching will not work correctly.
The details section of the screen carries several tabs, including Order Settings, Item Settings, Item Mappings, Cross-Reference, Warehouse Details, Item Details, Product Categories, and Inventory Mapping, each configuring its corresponding process.
Inbound: How WooCommerce Orders Become Acumatica Sales Orders
The Order Settings tab configures order synchronization from WooCommerce to Acumatica. Import WooCommerce Orders To specifies the type of Acumatica document the orders become, with Sales Orders creating standard Acumatica sales orders. Order Type defines the default order type for all orders created by the Biz-Tech Services Acumatica WooCommerce integrator, and Warehouse ID specifies the default warehouse assigned to imported orders, which keeps inventory availability and stock management aligned with the right warehouse.
The date fields that control how much is imported
Begin Order Date sets a starting point to filter which WooCommerce orders are retrieved, so only orders created on or after that date are imported, enabling partial or incremental loading. Last Imported Order Date displays the date of the most recent order successfully imported, and the next import begins from that date so orders are neither skipped nor duplicated.
One detail deserves emphasis because it explains behavior that otherwise looks wrong. Orders are imported into Acumatica based on their updated date rather than their created date. An older order that was recently modified will therefore be picked up, which is intentional and keeps changes in sync.
Status filtering and which screen an order lands on
WooCommerce Status determines which orders are imported based on their status, such as Completed, Processing, or On Hold, and only orders matching a selected status are included. The corresponding order status checkbox must be selected for an order to be retrieved and imported at all, which is the first thing to check when expected orders never appear.
Retrieved orders are then routed to one of two screens according to status. Orders with working statuses, documented as on hold, partial shipped, processing, and pending, appear on the Import WooCommerce Orders screen, where the processing page shows partially shipped, on hold, pending, pending payment, and processing orders. Orders with canceled, failed, empty, and completed statuses appear on the WooCommerce Orders screen instead. Understanding this split prevents a great deal of confusion, because an order that is not on the import screen has usually not gone missing; it is simply in a status that routes it elsewhere.
Retrieving and importing
On the Import WooCommerce Orders screen, the Get Orders button retrieves orders from WooCommerce, with a timer showing elapsed time until the process completes. All orders for the selected period are retrieved and displayed at once. The Import button then imports the selected orders, while Import All imports everything displayed on the grid. A scheduler can also be configured on this screen to retrieve orders automatically.
Reading the WooCommerce Orders screen
Each retrieved order carries a hyperlink on its order number that navigates to the corresponding WooCommerce order screen. That screen presents the initial status of the order and organizes detail across several tabs: Document Details for the order’s items, Addresses for the customer’s address details, Import Fields for information relating to the order mappings configured in the store, and Refund Info, which becomes visible only if the order has been refunded.
The header fields are where users check results. Order ID displays the WooCommerce order ID and order number, Status shows the WooCommerce order status inside Acumatica, and Payment Method and Ship Via show how the order was paid and how it ships. Sales Order Number displays the resulting sales order once the order has been imported, and Invoice Number appears once it has been invoiced. Financial totals are carried in Total Lines Amount, Discount Total, Shipping Total, Total Tax, and Total, the last representing the final amount paid.
Two actions sit on this screen. Import Order retrieves an individual order from WooCommerce by selecting the store code and setting the order ID, which is useful for one-off recovery. Refresh Order updates the WooCommerce order status in Acumatica, which matters when an order is fulfilled in WooCommerce after it was imported.
One caveat about mappings belongs here. The Import Fields tab is populated based on the order mapping during the Get Order process and is then imported into Acumatica during the order import. Changes to the Order Mapping configuration do not affect orders that have already been retrieved. To adjust an already-retrieved order, users must edit it manually from the Import Fields tab before importing it.
Customer, Payment, Discount, and Tax Handling on Import
Customer information options
These options determine whether customer data from WooCommerce is imported and created in Acumatica. Import Customer brings customer information into a new Acumatica customer record. Override Ship Address Information from WooCommerce Order imports the address the order ships to, and Override Bill Address Information from WooCommerce Order imports the address of whoever pays the bill. Customer Class sets the default class applied to new customers created by the Biz-Tech Services Acumatica WooCommerce integration.
If Import Customer and both address options are left unselected, customer data is not imported and the order is created using the default customer information in Acumatica. A table under Customer Information also lets you determine the priority of WooCommerce fields when importing and exporting customers between the two systems.
Shipping and payment options
Shipping Options determine which shipping information is imported, and based on the configured setup the shipping total can be imported as either the Freight Price or the Premium Freight Price.
Payment Options determine whether payment information is imported. Selecting Skip WooCommerce Payment means imported orders carry no payment information and the order is created without recording one. Leaving it cleared reveals further configuration: Payment Method specifies the method assigned during import, such as credit card, PayPal, or bank transfer; Payment Type determines the payment type in Acumatica, such as prepayment, cash, or credit; and Release Payment during Order Import automatically releases the payment at import time so the financial transaction is processed immediately.
Payment authorization and capture
The division of labor between the two systems is worth explaining to finance teams before go-live. In WooCommerce, payments can be authorized at checkout, meaning the customer’s card details are verified and funds are reserved by the gateway without being collected. Once the order synchronizes into Acumatica, the system does not attempt to authorize again. Instead it performs a post-authorization, recording the authorization already completed in WooCommerce and bringing it into Acumatica’s accounts receivable so financial records stay consistent.
From there the payment can be captured directly in Acumatica when the order is ready to be fulfilled. The practical effect is that WooCommerce secures the funds at order creation while Acumatica collects them at the most appropriate point in your process. The Biz-Tech Services Acumatica WooCommerce connector supports Ebizcharge and Fortis as well as other credit card payment methods, and the corresponding payment method must also be set up in Acumatica for the card payment to process correctly.
Discounts and taxes
Discounts are handled two ways. Line-level discounts are calculated for each individual item, populating the Discount Amount and Discount Code fields in the Sales Orders document details table. Order-level discounts apply to the entire order and appear in the Discount section of the order instead.
Tax options ensure WooCommerce taxes are calculated and applied correctly in Acumatica and provide flexibility for external tax services. Customer Tax Zone is the combined tax of effective taxes for a zone, defined by vendor or customer location. Tax ID holds the customer’s tax identifier, and Taxable Category creates or edits the tax categories applied to products. Is Freight Taxable in WooCommerce controls whether freight is taxed on the WooCommerce side, and Use External allows another tax engine such as Avalara to be used where the plugin is in place.
Other order settings worth knowing
Do Not Import WooCommerce Price makes the system ignore WooCommerce prices during import and use the corresponding Acumatica item prices instead; selecting it disables the Send Invoice Info during Release option. Save Properties in Order Notes causes the connector to retrieve notes along with the orders. Send Email Notification for Errors alerts users to failures during import, with notifications going to the email address entered on the Order Settings tab and sent during batch imports and process updates.
Cross-References and Warehouse Configuration
Cross-Reference options specify which entities should be matched between the two systems during synchronization, so that payments, countries, or ship via values in WooCommerce correspond correctly to their Acumatica equivalents and duplicate or mismatched records are avoided. Only entities checked in Cross-Reference Options appear in the dropdown on the Cross-Reference tab, where the actual mappings are created. Get Shipping Methods loads WooCommerce shipping methods so they can be mapped against Acumatica Ship Via values. After order import, the mapped Ship Via value should be visible in the Delivery Settings field on the Shipping tab of the sales order.
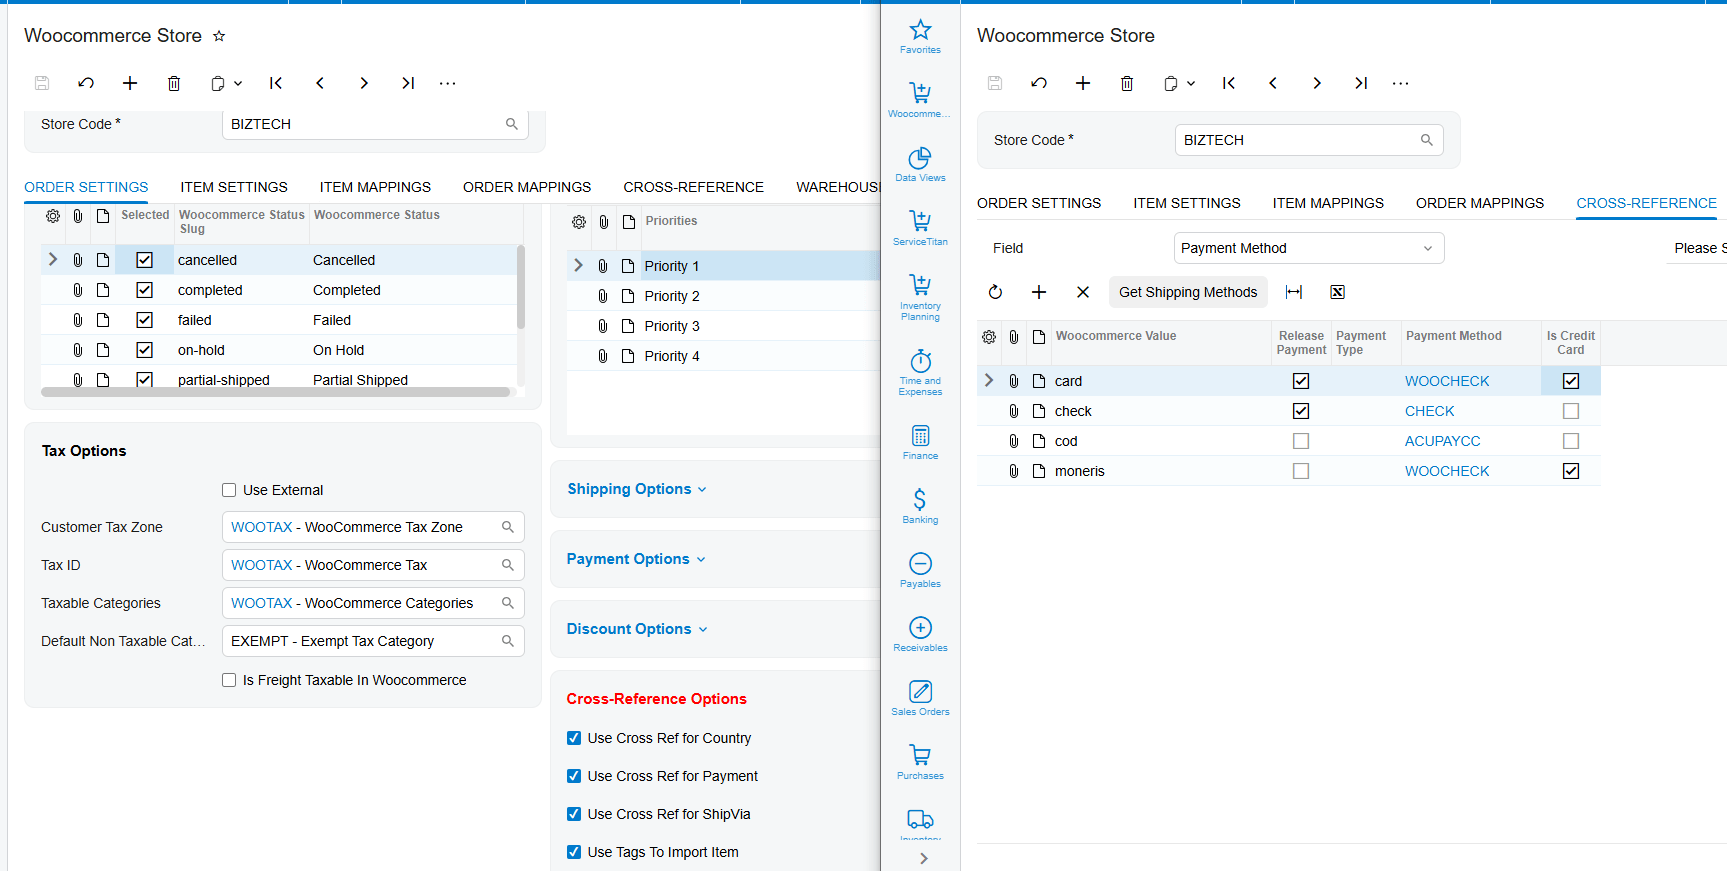
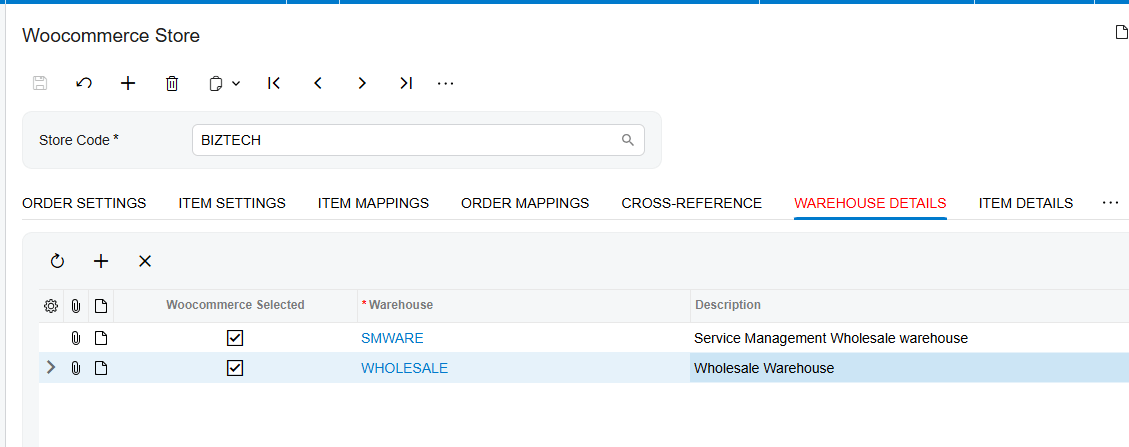
The Warehouse Details tab is where you add the warehouses whose inventory quantities need to synchronize with WooCommerce. The system calculates the total quantity across all selected warehouses for each item and displays that combined figure on the processing screen for export, so the store reflects stock across every relevant warehouse. A dropdown determines which quantity is used, with On Hand, Available, and Available for Shipment as the options. This choice directly controls what your store believes it can sell, so it should be made deliberately.
Outbound: Fulfillment Events Back to WooCommerce
When a WooCommerce order is associated with an Acumatica sales order, fulfillment runs in four steps. Click Create Shipment and confirm the pop-up with OK. On the Shipments screen, press Confirm Shipment once Box ID and Tracking Number are set. Click Prepare Invoice. Finally, press Release on the Invoices screen. After the process completes, the order status in both Acumatica and WooCommerce changes to Completed.
Two settings decide what is communicated during those steps. Send Shipment Info during Prepare Invoice sends shipment information to WooCommerce and marks the item as shipped during the prepare invoice process. Send Invoice Info during Release sends invoice information and moves the WooCommerce order to Completed status. The tracking number is updated on the WooCommerce order after Prepare Invoice.
Inventory reacts at defined points as well. After Prepare Invoice, the WooCommerce ordered quantity is reduced from the Available and Available for Shipping quantity fields in Acumatica. After an order refund, the item’s quantity is added back to the On Hold, Available, and Available for Shipping fields.
Exporting an order from Acumatica to WooCommerce
The Sales Order screen includes an action for exporting an order to WooCommerce and updating it. Export is supported only for orders with Open, On Hold, and Awaiting Payment statuses, and it works from the mapping configured on the Order Mapping tab. Customer resolution follows a simple rule: if the customer was exported beforehand and carries a Customer ID in the Woo Customer Info tab, the order is created under that ID; otherwise it is created against the Guest customer. Shipping method is exported using the Ship Via mapping from the Cross-References tab. Order status is set to Processing if the sales order has a payment and to On Hold if it does not.
One limitation should be communicated up front: tax export is not currently supported during order export, owing to differences in customer tax zones in WooCommerce. Exporting tax requires Acumatica-to-WooCommerce tax mapping to be configured.
Cancelling a WooCommerce order
The Sales Orders actions menu offers two cancel options that behave very differently. Cancel Order is the standard Acumatica action and cancels only within Acumatica. WooCommerce Cancel Order is the connector’s own feature and cancels the WooCommerce order through API requests. Once an order is cancelled on both sides, reopening it in Acumatica does not send a further request to update WooCommerce. If the status is changed manually in WooCommerce and the order retrieved again, it will not appear on the Import WooCommerce Orders screen; it appears on the WooCommerce Orders screen instead, because it already has an associated sales order.
Item Synchronization: The Export Item Processes
Item export is batched for efficiency. During the export process from the Export Item Processes screen, a single API request covers one hundred items, with requests sent before the batch begins.
Item settings that govern creation
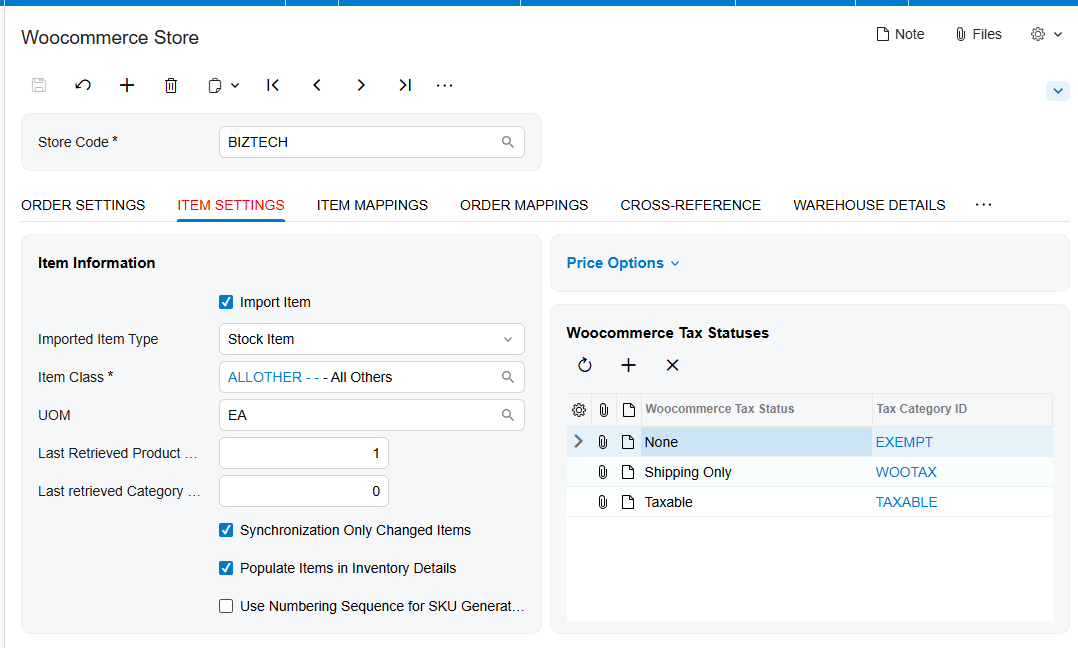
On the Item Settings tab, Import Item controls whether new items are created in Acumatica during item synchronization. When it is cleared, the program prohibits import and creation unless the items already exist in Acumatica. The matching logic is worth knowing: the system searches for the Inventory CD using the WooCommerce product SKU, retrieves the item if found, and otherwise displays an error stating that the item does not exist in the system.
Import Item Type specifies the item type to create and UOM is the unit of measure used to quantify inventory items. Last Page Number for Getting Products indicates the last page used when retrieving products. Synchronize Only Changed Items limits the Export WooCommerce Inventory Items screen to items whose details have changed since the last sync. Populate Items in Inventory Details adds items to Inventory Details during import. Use Numbering Sequence for SKU Generation generates a SKU when none is found, provided the numbering sequence exists; without it, and with no SKU on the item, an error appears. The WooCommerce Tax Status and Tax Category ID fields update the WooCommerce item’s tax status to match the Acumatica stock item tax category during synchronization.
The five export item processes
Item Sync creates and updates item data in WooCommerce. The process is to select the store code, which is set automatically when Default Store is selected, choose the fields from Item Mapping that should be updated, specify which price fields to export, and then sync items individually, all at once, or on a schedule. Synchronization is bidirectional, so updates can flow either way. Selecting variants of products displays all product variants, and if the system does not find an item in the store during synchronization it creates it automatically. The Is WooCommerce Item checkbox is selected only for items obtained from WooCommerce and generated by the Biz-Tech Services Acumatica WooCommerce connector.
Quantity Sync updates inventory in WooCommerce from Acumatica data. Three requirements must be met for an item to appear: it must already exist as a WooCommerce item in Acumatica, it must be loaded, checked, and saved in the Inventory Details tab of the store, and warehouses and a quantity type must be selected in Warehouse Details. On the processing screen, Quantity is a read-only field showing the item’s total across all selected warehouses, while WooCommerce Quantity is editable and specifies what is actually synchronized. That distinction gives you control over what the store sees.
Images Sync exports an item’s image when the corresponding checkbox is selected for the product in the Item Mapping tab, exporting the default image configured in the stock item’s Description tab, and it handles both products and variants. Item Price updates prices in WooCommerce using either MSRP or Default Price, with the corresponding field value selected in Item Mapping; in both cases it is the Regular Price field on the WooCommerce website that is updated. Publish and Unpublish Item manages product visibility: an item whose status is In Stock is published, and an item with any other status is unpublished. The Selected for Publish/Unpublish field on the Item Details tab controls which items appear on that processing screen. All of these processes can run manually or on a scheduler.
Item Details, categories, and mappings
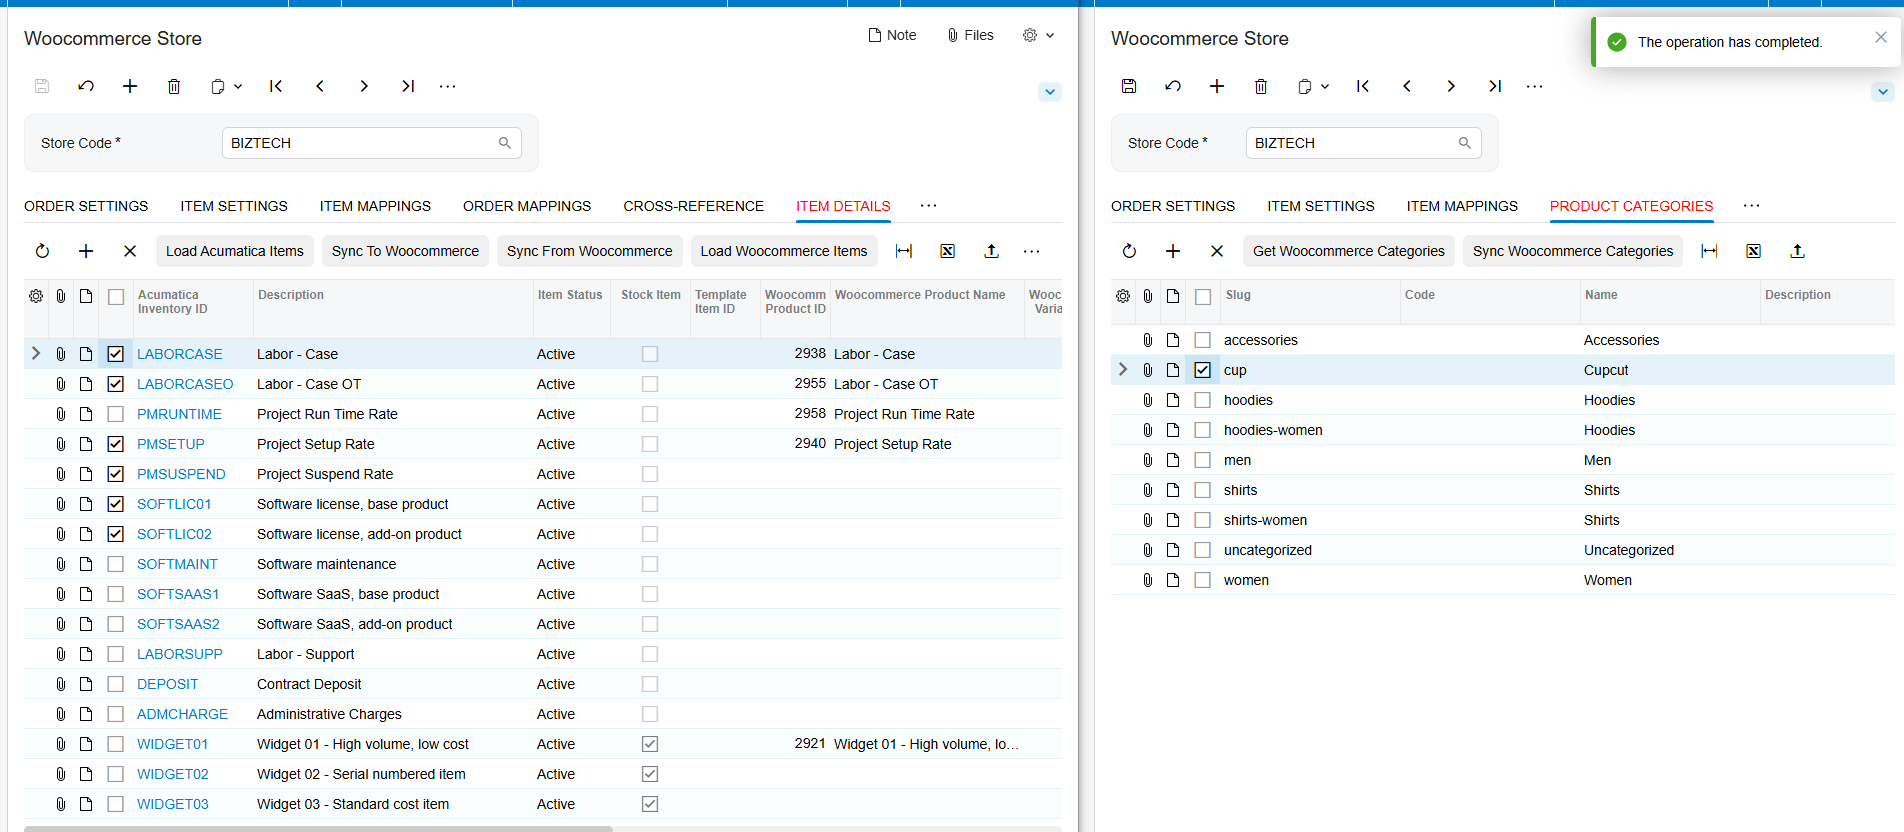
The Item Details tab loads and manages items directly. Load Acumatica Items retrieves all stock and non-stock items, and Load WooCommerce Items does the same from the store. Sync to WooCommerce exports Acumatica items outward and Sync from WooCommerce imports them inward. Publish Items in WooCommerce gives selected items Published status, while Unpublish changes the status to Last Modified. Check All toggles selection of everything displayed, Purge deletes all items shown in the table, and Get Item By ID retrieves a single WooCommerce item into Acumatica. When an item is synced from Acumatica to WooCommerce, a new item is created there and a unique ID is generated, displayed both in the store screen and on the WooCommerce Inventory tab of Stock Items. The item details list can be exported to and imported from Excel, and synchronization, publishing, and unpublishing can also be performed from the Stock and Non-Stock Items screens.
On the Product Categories tab, Get WooCommerce Categories retrieves categories from the store. To create a category in Acumatica and push it outward, select it, save, then press Sync WooCommerce Categories. Retrieved categories appear on the WooCommerce Categories tab of the stock item screen, where a preferred category can be set and exported with the item, after which WooCommerce selects it automatically. This list can also be exported to and imported from Excel.
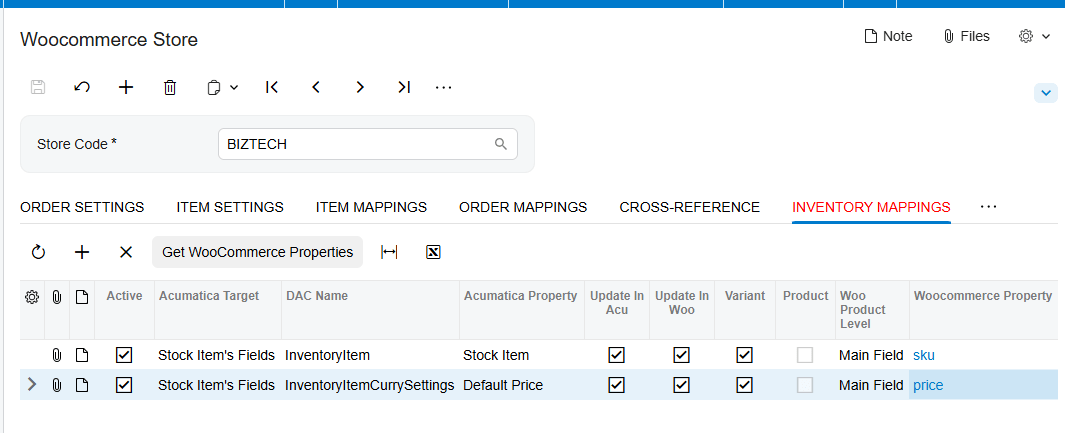
The Inventory Mappings tab configures mappings that synchronize Acumatica stock item fields and attribute values with WooCommerce fields. Get WooCommerce Properties loads the product’s main fields, meta fields, or attributes. Acumatica Target defines whether a Stock Item or an Attribute is mapped, DAC Name specifies the data access class, and Acumatica Property names the field or attribute. Update in Acumatica and Update in WooCommerce control the direction in which changes apply, Woo Product Level defines whether the WooCommerce field is a main field, attribute, or metadata, and WooCommerce Property names the field loaded by the properties action. One constraint matters here: the connector does not support the mapping function during the Acumatica item export process, only during import from WooCommerce to Acumatica. When exporting an inventory item outward, the item’s Inventory CD is set as the SKU.
Item and order mapping tabs
The Item Mappings tab chooses which fields are exported and imported during item sync. The first column holds field names, the Create in Woo column allows those values to be created in WooCommerce, the next column allows updates to values already created there, and Update in Acu applies selected values during import. Some fields, such as SKU, are selected by default because they are required for item creation.
The Order Mappings tab holds the order mapping configuration, loaded and mapped automatically when the preferences screen is saved, and configurable manually thereafter. Load WooCommerce Fields loads or updates all related WooCommerce order fields. Update in WooCommerce and Update in Acumatica control the direction of updates during order synchronization. Original Field indicates an original field, and original fields must be mapped for order synchronization to work. Meta Data should be checked when the WooCommerce target is metadata. Acumatica Target selects between Document for sales order header fields and Details for sales order line fields, Acumatica Property names the field, WooCommerce Field Target specifies Order, Line, or Metadata, and WooCommerce Property names the loaded field.
Template and matrix items
Template items follow their own two-step path. From the Template Items screen, the Sync Template Items to WooCommerce action exports the template, and a successful export generates a WooCommerce Product ID shown under the WooCommerce Product tab. Running Sync Matrix Items to WooCommerce afterward creates the matrix items, which appear as variations under the corresponding template item product in the store.
Customer Synchronization and B2B Mode
One rule frames everything else in this area: individual customers are not imported directly from WooCommerce into Acumatica. Customer information reaches Acumatica through WooCommerce orders instead. When creating a customer during that process, the system searches first by the contact’s WooCommerce customer ID, then by billing email, then by account name, and creates a new customer and contact only if no match is found.
In B2B mode, enabled by the B2B Store checkbox, the connector syncs the customer’s contact and creates a user in WooCommerce. Before exporting a contact, the system searches for an existing user by the contact’s ID, then by email, and finally by a username composed of first and last name. A password must be set on the contact in Acumatica for the export to succeed, and after export the generated WooCommerce ID is written back to the Acumatica contact. If the Woo Customer Info tab is empty and B2B Store is enabled, all contacts are exported as separate users; if B2B Store is not enabled, only the primary contact is exported, falling back to the first available contact when no primary exists.
With B2B Store cleared, standard customer export logic applies, initiated from the Customers screen using the Sync WooCommerce Customer action. The program checks WooCommerce using the customer’s email, WooCommerce customer ID, and first and last name combination. If the customer is found, a record is created in the Woo Customer Info tab holding the WooCommerce Customer ID; if not, a new customer is created in the store and its ID written back to the same tab. This process depends on the customer having a corresponding contact, and an error is displayed when one is missing.
Customers can also be linked manually by adding a record on the Customer page, opening the Woo Customer Info tab, and setting the Contact ID, Store Code, WooCommerce Customer ID, and B2B fields. For automatic linking, each customer needs first name, last name, and email, and the record is created automatically during synchronization when the contact’s email or first and last name combination matches the WooCommerce username. A dedicated Export WooCommerce Customers processing screen creates and updates customers in the store, individually or all at once, and supports a scheduler.
Refund Processing
Refund handling requires the Use Refund Process checkbox in the store setup. Specify the date from which refunded orders should be retrieved, then click Get Orders, and the system retrieves and displays all matching refunded orders. Refund information is recorded on the Refunds tab of the related WooCommerce order in Acumatica, so the original order and its refund stay linked.
The system then handles refunds according to how far the original order had progressed:
- If the sales order has had no fulfillment activity and consists of a single item, processing generates a payment of Customer Refund type, attaches it to the Payments tab, sets the refunded amount, and closes the order; the sales order status changes to Canceled and its lines are deleted.
- If a shipment was created but not confirmed, the system finds and deletes that shipment, then follows the same path as the first case.
- If a shipment was confirmed, the system creates a credit memo and attaches a reference number of Customer Refund type to the Applications.
- If an invoice was prepared but not released, the system likewise creates a credit memo and attaches a Customer Refund reference number to Applications.
- If the invoice was already released, the system reverses the invoice.
In each case, the Processed checkbox on the Refunds tab of the WooCommerce Orders screen is automatically selected once the work is complete, which means the process is finished and the order is closed. Following the reference number shows the Customer Refund payment and refunded amount on the Application History tab.
Webhooks and Automation Schedules
Selecting Use Webhook adds the Webhook Settings tab. With Use Customer Webhook, Use Product Webhook, and Use Order Webhook selected, the Biz-Tech Services Acumatica WooCommerce integrator generates newly created customers, products, and orders in WooCommerce. Creating a webhook means filling out the webhook name and implementation class on the Acumatica Webhooks screen, saving to generate the webhook URL, and adding that URL in WooCommerce.
For scheduled operation, both the order get and order import processes can be automated. For the get process, configure the Get Orders screen and select Import Orders from WooCommerce in the Screen ID field. For the import process, set up the Import All screen and select Import WooCommerce Orders in the Screen ID field. Most of the export item processes and the customer export screen support schedulers as well.
Where to Monitor WooCommerce Results in Acumatica
When configuring the Biz-Tech Services Acumatica WooCommerce integrator, training users, or investigating a record that did not arrive, these are the fields and screens that reveal what actually happened:
- Test Credentials on WooCommerce Store Preferences, which confirms the connection before anything else is investigated.
- The WooCommerce Status selections on Order Settings, since an order whose status checkbox is not selected is never retrieved.
- Begin Order Date and Last Imported Order Date, which bound what the next import will collect, remembering that orders are selected by updated date rather than created date.
- Which of the two order screens a record appears on, since status routing sends working orders to Import WooCommerce Orders and completed or cancelled ones to WooCommerce Orders.
- Sales Order Number and Invoice Number on the WooCommerce Orders screen, which confirm that import and invoicing actually produced documents.
- The Import Fields tab, which holds the mapped values as captured at Get Order time and is the only place to correct them before import.
- The Delivery Settings field on the Shipping tab of the sales order, which should show the mapped Ship Via value after import.
- Quantity versus WooCommerce Quantity on the quantity sync screen, where the first is the calculated total and the second is what is actually sent.
- The quantity type selected in Warehouse Details, which decides whether On Hand, Available, or Available for Shipment is published to the store.
- The Woo Customer Info tab on the Customers screen, which holds the WooCommerce Customer ID that determines whether an exported order is linked to a real customer or to Guest.
- The Processed checkbox on the Refunds tab, which confirms a refund has been fully handled.
- The Get Order Process Error Messages screen, which collects all errors generated during order retrieval.
- Email error notifications, which alert users to failed imports at the address configured on Order Settings.
WooCommerce Acumatica Integration: Frequently Asked Questions
What does the WooCommerce connector for Acumatica do?
It synchronizes a WooCommerce store with Acumatica ERP in both directions. Inbound, it retrieves orders and creates Acumatica sales orders with their customers, payments, discounts, taxes, and shipping details. Outbound, it exports items, quantities, prices, sales prices, images, categories, and customers, publishes and unpublishes products, and reports shipment and invoice progress back so order status stays current in the store.
Why are some WooCommerce orders not appearing on the import screen?
Check three things. First, the order’s status checkbox must be selected in WooCommerce Status on the Order Settings tab, or the order is never retrieved. Second, orders route by status: working statuses appear on the Import WooCommerce Orders screen while canceled, failed, empty, and completed orders appear on the WooCommerce Orders screen. Third, confirm Begin Order Date and Last Imported Order Date cover the period you expect, remembering that selection is by updated date, not created date.
How does payment authorization work between WooCommerce and Acumatica?
WooCommerce authorizes the payment at checkout, verifying the card and reserving funds without collecting them. When the order synchronizes, Acumatica does not authorize again; it performs a post-authorization that records the existing authorization in accounts receivable. The payment is then captured in Acumatica when the order is ready to fulfill. Ebizcharge, Fortis, and other credit card methods are supported, and the matching payment method must exist in Acumatica.
Why was a customer not created in Acumatica from a WooCommerce order?
Most likely because Import Customer and both address override options are unselected, in which case customer data is not imported and the order uses the default Acumatica customer. Note also that individual customers are never imported directly from WooCommerce; customer information only reaches Acumatica through orders.
Which inventory quantity is published to WooCommerce?
Whichever type is selected in the Warehouse Details tab, from On Hand, Available, or Available for Shipment. The system totals that quantity across every warehouse added on that tab. On the quantity sync screen, Quantity is the read-only calculated total while WooCommerce Quantity is editable and determines what is actually sent to the store.
Why did my order mapping change not affect an order?
Because changes to the Order Mapping configuration do not apply to orders that have already been retrieved. The Import Fields tab is populated during the Get Order process using the mapping in force at that moment. To alter an already-retrieved order, edit it manually from the Import Fields tab before importing it into Acumatica.
Can taxes be exported from Acumatica to WooCommerce?
Not currently during the order export process, because of differences in customer tax zones in WooCommerce. Exporting tax on order export requires Acumatica-to-WooCommerce tax mapping to be configured. Taxes on imported orders are handled separately through the tax options on the Order Settings tab, including the option to use an external service such as Avalara.
What is the difference between Cancel Order and WooCommerce Cancel Order?
Cancel Order is the standard Acumatica action and cancels the order only inside Acumatica. WooCommerce Cancel Order is the connector’s own action and cancels the order in WooCommerce through API requests. After a WooCommerce cancellation, reopening the order in Acumatica does not send another update to the store.
Work With the Biz-Tech Services WooCommerce Connector
The Biz-Tech Services Acumatica WooCommerce integrator is large, but its shape is simple. Credentials and validated API keys open the connection, the WooCommerce Store screen defines how everything behaves, order settings and status selections determine what comes in and where it lands, customer, payment, discount, and tax options shape the resulting sales order, fulfillment steps push shipment and invoice information back to the store, and the export item processes keep products, quantities, prices, and images current in the other direction. When something does not arrive, the routing rules, the Import Fields tab, and the error message screen tell you where it stopped.
If your business sells through WooCommerce and wants orders, customers, inventory, pricing, and fulfillment synchronized with Acumatica without manual re-keying, we are glad to help you scope, configure, and roll out the connector. Visit https://biz-techservices.com to learn more about our Acumatica integration expertise or to schedule a personalized demonstration of the Biz-Tech Services WooCommerce Connector.

