
How to Import EZCom Purchase Orders into Acumatica
Importing EZCom purchase orders into Acumatica starts on the Import Purchase Orders screen: retrieve orders for the required partner and period, review the returned grid, and import selected records or the full displayed set. The result is an Acumatica sales order created according to the trading partner settings, customer rules, warehouse defaults, and cross-references configured for the integration.
This guide explains the task from prerequisites through retrieval, validation, import, and follow-up. The Biz-Tech Services EZCom Acumatica Connector supports this controlled process through an intermediate server managed by Biz-Tech Services, so users can bring selected EZCom orders into Acumatica and then monitor the related inbound and outbound documents.
Before You Start: What Must Be Configured
Before retrieving an order, confirm the connection, defaults, and partner-level rules. The Biz-Tech Services Acumatica EZCom Connector uses the General Settings and Trading Partners screens to determine which data can be retrieved and how an imported order is created.
1. Install and publish the customization package through Customization Projects (SM204505).
2. On General Settings, supply the Account, API Key, and EZCom admin Login and Password when Modify API Connectivity is selected.
3. Use Test Credentials under Actions to verify the connection to the Acumatica-Biz-Tech server.
4. Retrieve partner records with Get Trading Partners, then select the relevant Partner Code.
5. Set the partner Order Type, eligible EZCom Status, Begin Order Date, Customer ID, and Warehouse ID as required.
6. Select the applicable order-status checkbox. The documentation states that the corresponding status must be selected for an order to be retrieved and imported.
7. Configure enabled cross-reference options and map each required EZCom item under Inventory Items.
If Get Order From All Partners is used on General Settings, its date-based default does not take effect until the checkbox is selected and Apply Order Date Update for Partners is run from Actions. For broader setup context, see the sibling articles EZCom EDI Acumatica Connector Configuration Checklist and How EZCom EDI Data Flows Through Acumatica ERP.
How to Import EZCom Purchase Orders into Acumatica, Step by Step
The Biz-Tech Services EZCom Acumatica Integration separates retrieval from import. This gives the user a chance to see the orders returned for the selected period before creating records in Acumatica.
Step 1: Open Import Purchase Orders
Open the Import Purchase Orders screen. The screen is designed to retrieve and import orders for the corresponding EZCom trading partner.
Step 2: Retrieve the available orders
Click Get Orders. A timer shows elapsed time while the connector retrieves orders from the EZCom partner. All orders for the selected period are returned and displayed together in the grid. If retrieval must be stopped, click the loading icon next to the timer to cancel the process.
Step 3: Review the returned order set
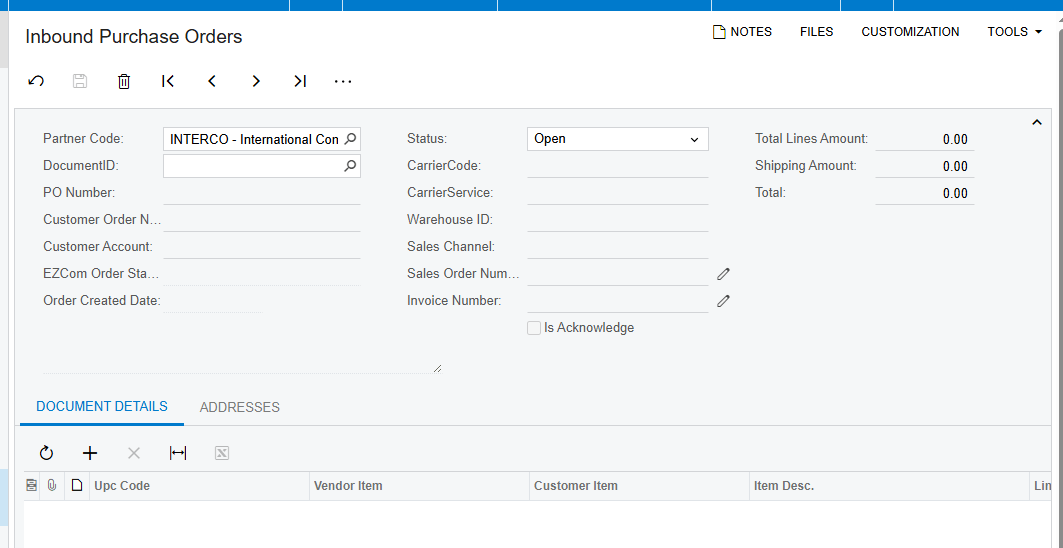
Confirm that the intended partner and period produced the expected records. An order must have a status enabled in the partner settings, and item mapping must be complete before import. The Inbound Purchase Orders screen is also available to display information related to an EZCom order for the corresponding partner.
Step 4: Import selected orders or the entire grid
Select the required rows and click Import, or click Import All to process every order currently displayed. The integration creates the sales order using the configured order type, customer selection logic, shipping address option, warehouse rule, and enabled cross-references.
Step 5: Check the created order and related records
Verify the customer, location, inventory items, warehouse, shipping method, and quantities against the source order and partner configuration. Later workflow actions can generate acknowledgements, routing requests, warehouse orders, shipment updates, and invoices; those actions are separate from the initial import.
Document Triggers: What Each Action Creates
The source describes a sequence of screens and process triggers rather than a single automatic chain. Use each action only when the related order is at the required stage.
1. Get Orders retrieves orders for the selected partner and period and places them in the Import Purchase Orders grid.
2. Import or Import All creates Acumatica sales orders from selected or all displayed EZCom orders.
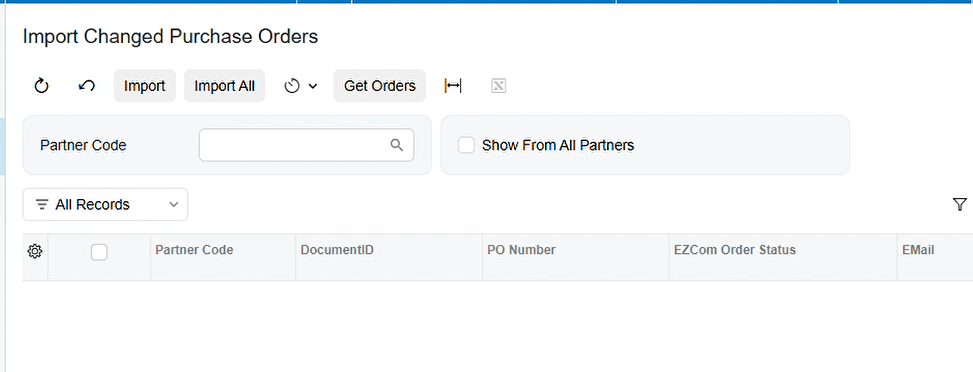
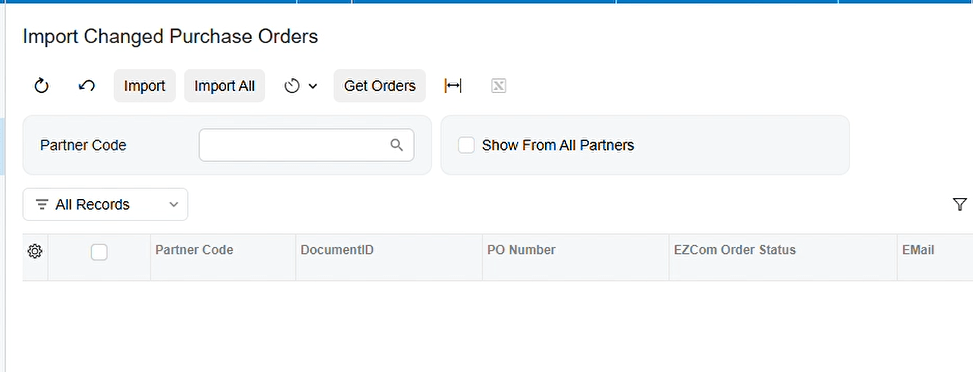
3. Import Changed Purchase Orders retrieves and imports changed orders for the corresponding partner.
4. Send or Send All on Send Outbound PO Acks sends acknowledgement requests; the EZCom order becomes acknowledged and the Acumatica sales order status changes to Closed.
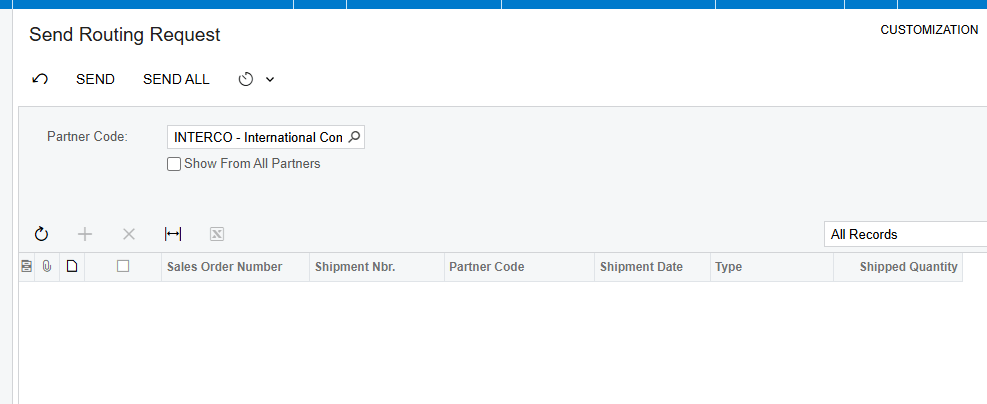
5. Send Routing Request submits the EZCom Order ID when the order is at shipment level and indicates that the product is ready for shipment.
6. Import Routing Response uses Carrier Code and Carrier Service to find a Ship Via cross-reference and update the shipment.
7. Import Warehouse Shipment brings item quantity and tracking number from EZCom into the shipment and updates shipped quantity and tracking number.
8. Prepare Invoice can export a shipment when Export Shipment During Prepare Invoice is enabled; otherwise the order appears on Send Outbound Shipments.
9. Release Invoice can export an invoice when the partner export option is enabled; otherwise the order appears on Send Outbound Invoices.
Mapping Rules That Decide What Appears on the Order
Partner settings control the resulting sales order. Order Type determines the default order type. Customer ID supplies the fallback Acumatica customer, while Override Ship Address Info from EZCom Order brings in the destination address from EZCom.
Country, ShipVia, and warehouse values can come from the Cross-Reference tab when their corresponding Use Cross Ref options are enabled and mappings exist. For warehouse mapping, the documentation says the Default Warehouse field must be empty for the cross-reference value to be used.
Every corresponding EZCom item must be mapped on the Inventory Items tab. The available search field choices depend on the cross-reference options selected. The manual illustrates UPC Code: the system searches by that code and associates the result with an Acumatica Inventory ID.
Customer Ship To setup changes customer selection. The integration searches for Trading Partner Ship To ID using the order Location Number, then looks for matching parent and child customer values and a Customer ID and Location CD mapping. If no Customer Ship To setup exists, it uses the customer configured in Partner Settings.
Validation and Common Exceptions
The strongest pre-import validation is configuration-based. Test credentials, confirm the partner and date settings, enable the intended order status, and verify item, customer, warehouse, country, and shipping mappings before clicking Import.
1. No expected orders in the grid: check the Partner Code, Begin Order Date or applied all-partner date, and the eligible EZCom Status checkbox.
2. Item mapping error during import: map the EZCom item on the Inventory Items tab to an Acumatica Inventory ID.
3. Unexpected warehouse: determine whether Warehouse ID is populated. The source says it must be blank when the cross-reference warehouse should win.
4. Unexpected customer or location: review Customer Ship To mappings, including Location Number, parent and child customer values, Customer ID, and Location CD.
5. Unexpected Ship Via on a shipment: review the Carrier Code and Carrier Service mappings used during Import Routing Response.
6. Long-running retrieval: monitor the timer; use the loading icon next to it if the retrieval should be cancelled.
The manual warns that an unmapped item produces an error, but it does not provide the exact error message, a complete validation catalog, or recovery instructions for every exception. Avoid relying on undocumented message text when training users or writing operating procedures.
Where to Check Your Work
The Biz-Tech Services Acumatica EZCom Integration provides several screens and fields for confirming the result after retrieval and import:
1. Import Purchase Orders grid – orders retrieved for the selected period.
2. Inbound Purchase Orders – information for EZCom orders by partner.
3. Trading Partners: Partner Code, Order Type, EZCom Status, and Begin Order Date.
4. Trading Partners: Customer ID and Override Ship Address Info from EZCom Order.
5. Trading Partners: Warehouse ID and enabled Cross-Reference Options.
6. Inventory Items tab – EZCom item lookup values and Acumatica Inventory ID mappings.
7. Customer Ship To tab – Location Number, parent and child customer, Customer ID, and Location CD mappings.
8. Import Changed Purchase Orders – changed orders retrieved for the partner.
9. Import Routing Response – shipment routing updates based on carrier mappings.
10. Import Warehouse Shipment – imported item quantities and tracking numbers.
11. Send Outbound PO Acks, Send Outbound Shipments, and Send Outbound Invoices – documents awaiting manual transmission when automatic triggers are not used.
How to Import EZCom Purchase Orders into Acumatica: Frequently Asked Questions
Why does an EZCom order not appear on Import Purchase Orders?
Check the selected partner, retrieval period, Begin Order Date, and EZCom Status. The corresponding order-status checkbox must be selected before the order can be retrieved and imported.
Should I use Import or Import All?
Use Import for selected rows. Use Import All when every order displayed in the current grid should be imported into Acumatica.
Why does an item fail during EZCom order import?
The source explicitly warns that unmapped items cause an error. Map the corresponding EZCom item under the Inventory Items tab and associate it with the correct Acumatica Inventory ID.
Which customer is used for the imported sales order?
The Biz-Tech Services EZCom Acumatica Integrator follows Customer Ship To setup when it exists. Without that setup, the integration uses the Customer ID configured in Partner Settings.
Why did the imported order use the default warehouse instead of a cross-reference?
The source says the Default Warehouse field must have no value for the system to take the cross-reference warehouse value. Also confirm that Use Cross Ref for warehouse is enabled and mapped.
Can I stop Get Orders after retrieval starts?
Yes. The documentation says to click the loading icon next to the elapsed-time timer to cancel the process.
Does importing an order automatically send every later EZCom document?
No. The documentation identifies separate screens and triggers for acknowledgements, routing, warehouse orders, shipments, invoices, and inventory availability. Some shipment and invoice exports can run during Acumatica processing when their partner options are enabled.
Work With the Biz-Tech Services EZCom Connector
A reliable EZCom purchase order import depends on three things: a tested connection, partner rules that match the intended workflow, and complete item, customer, shipping, and warehouse mappings. Retrieve first, review the grid, import deliberately, and then verify the created sales order and downstream document queues.
If your team needs help configuring, validating, or operating the Biz-Tech Services Acumatica EZCom Integrator, visit https://biz-techservices.com to work with Biz-Tech Services on an Acumatica integration grounded in your documented trading partner workflow.

